Wicked Webby
Right is Harder than Wrong.
Hello All,
Well, I decided to post this guide to get rid of some misinformation regarding the handle bar adjustment on the Generation II FJR's(06-07). This will show my adjustment from the middle position(stock) to the forward position(more aggressive riding position). I know some people have successfully adjusted their bars without lifting them off of the triple tree(I call it blindly). This guide is the way I chose to do it. Either way you choose to, I hope this guide gives you the information your looking for.
Start off by placing a towel over the gas tank, fairing area, and gages to protect it during the adjustment.
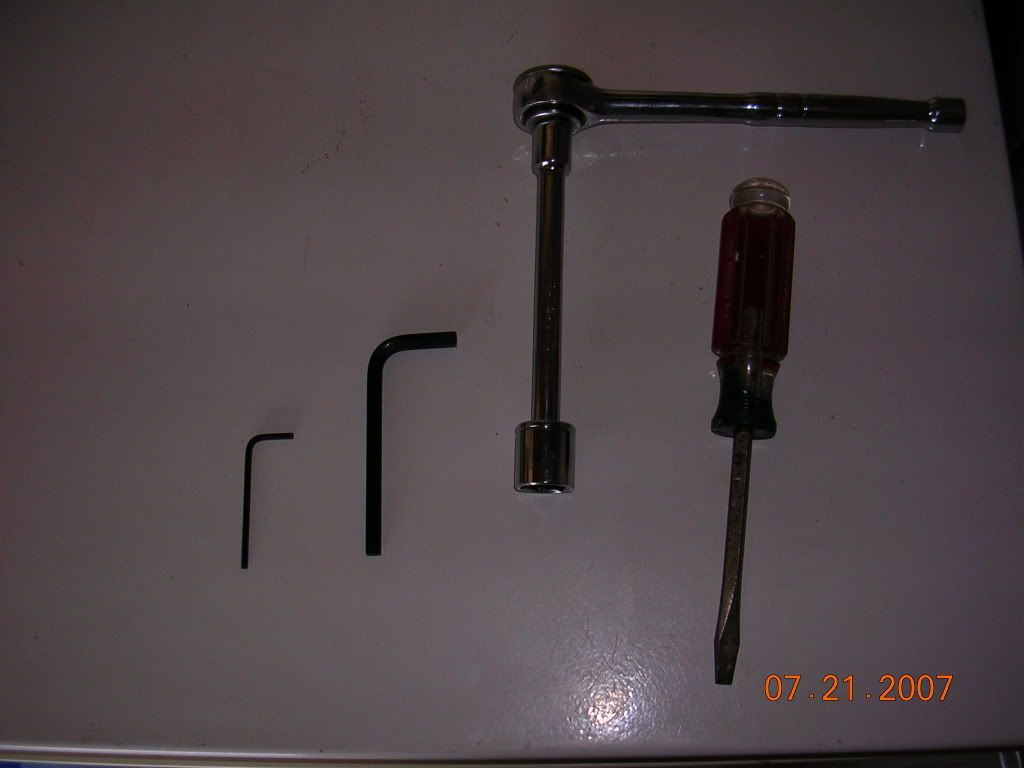
TOOLS REQUIRED: 2.5 MM allen wrench, 6mm allen wrench, 17mm socket with extension, med flat head screw driver
FIRST REMOVE THE HANDLE BAR CAPS (2.5mm Allen wrench):
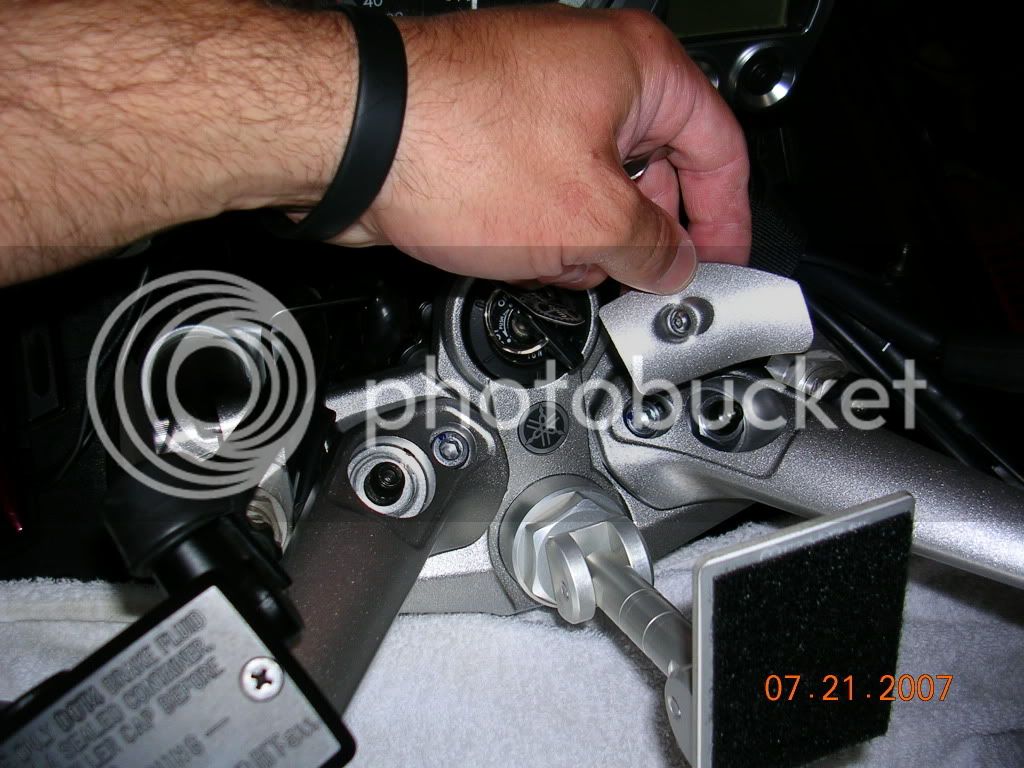
SECOND REMOVE THE 6MM ALLEN BOLT AND 17MM NUT (If you are using a standard size socket you may need to have it only partially set in the extension at first to start removing it because of the threaded head that supports the handle bar cover.)
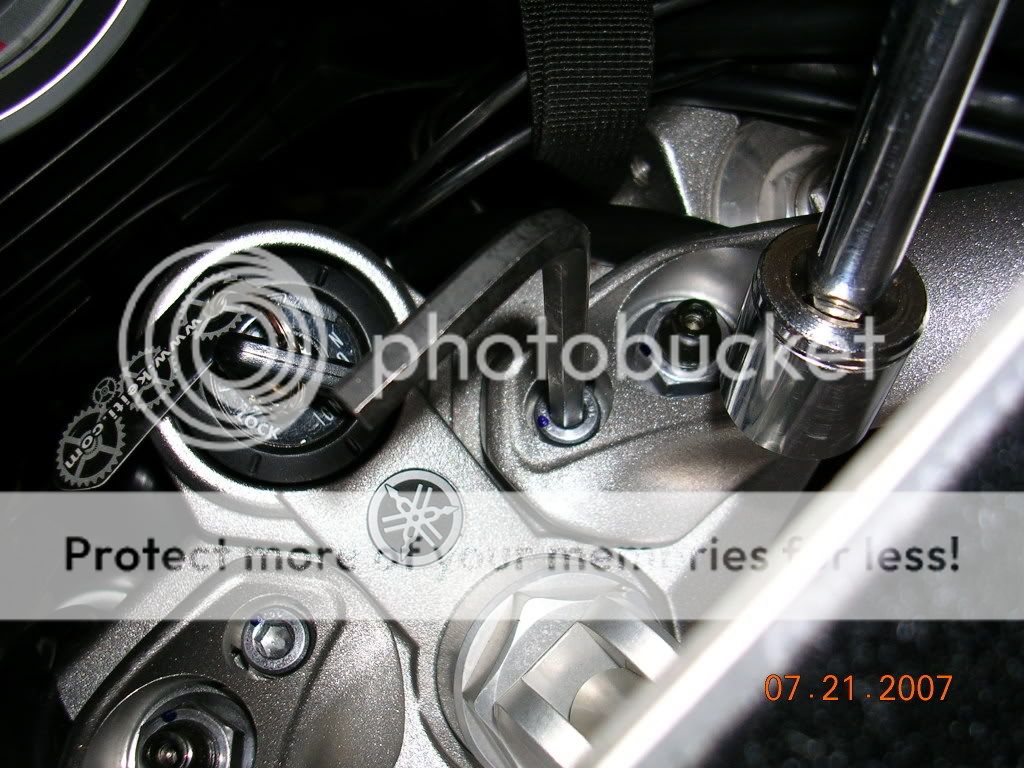
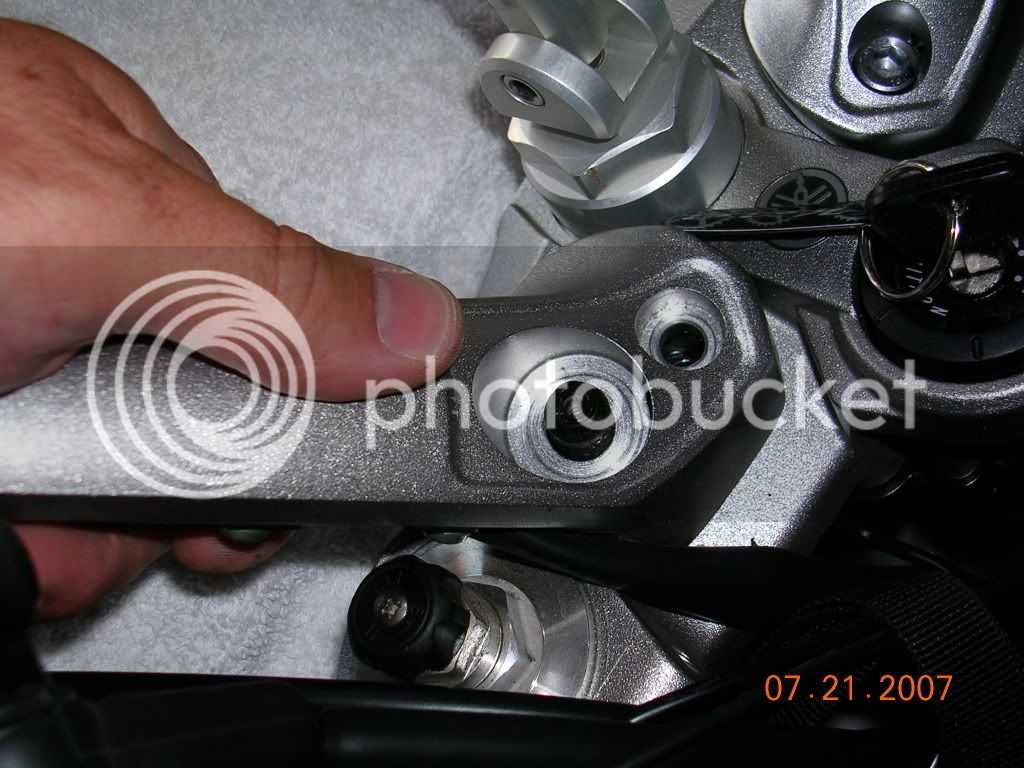
Notice the pins underneath the handle bar plate. LEAVE THEM ALONE THEY DO NOT GET REMOVED!!!!
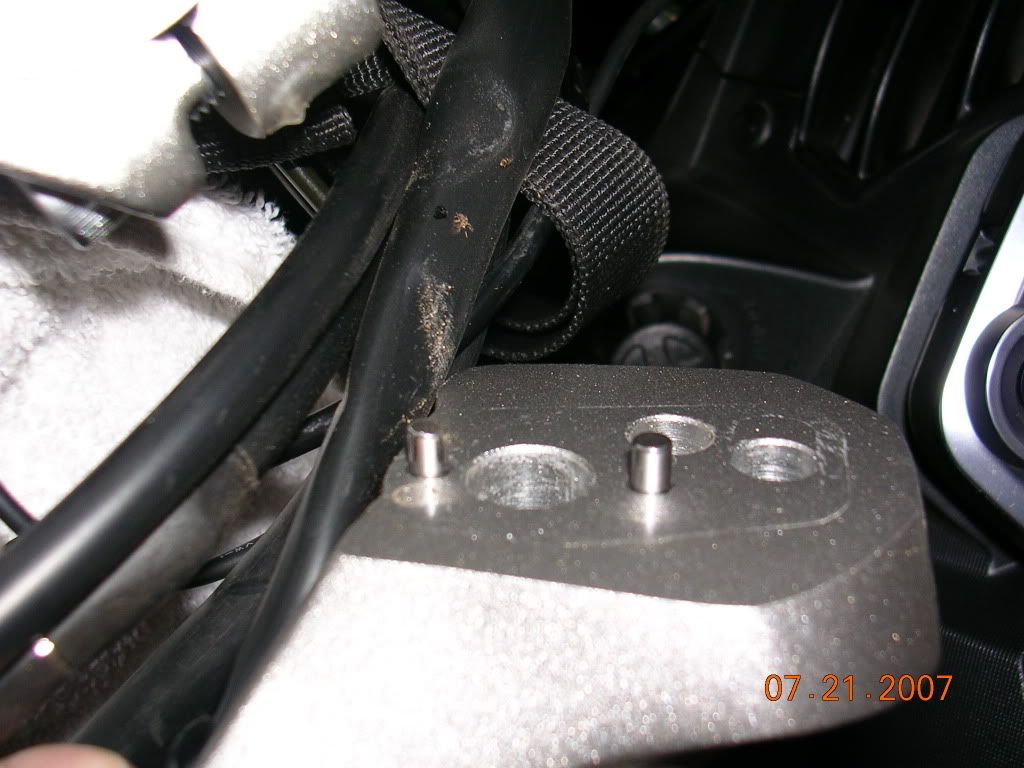
Place the handle bar off on its side(on the towel)and secure it so it will not fall off the towel/bike.
Now take a look at what your dealing with:
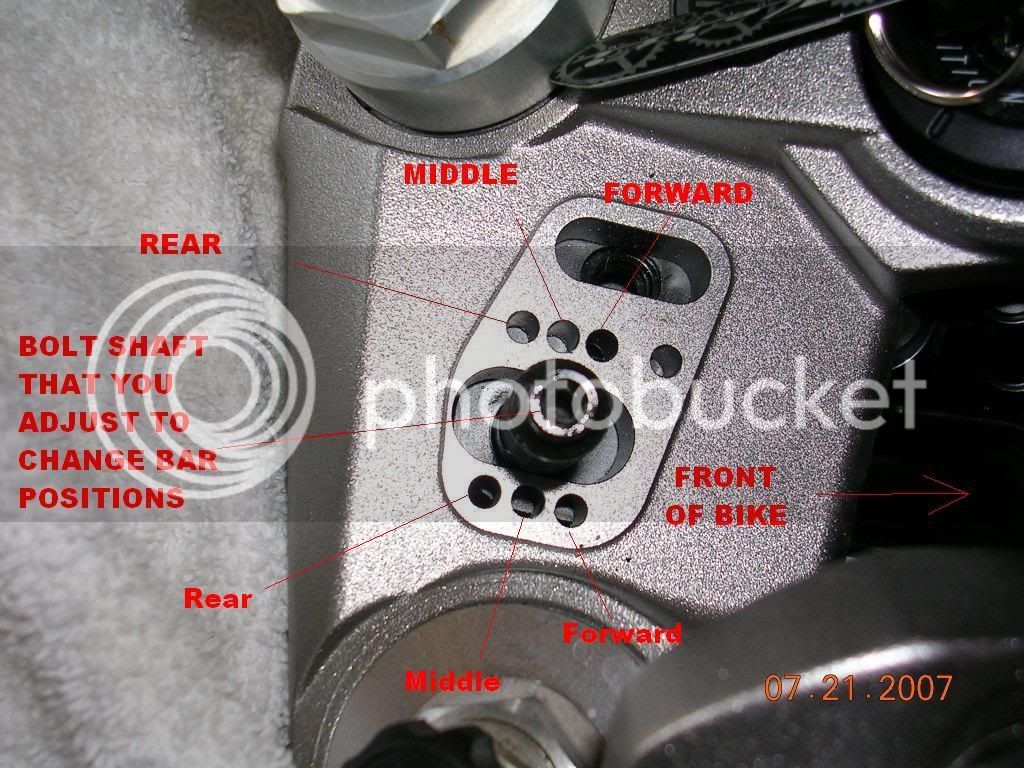
THIRD, START PUSHING/PRYING THE SHAFT INTO THE POSITION YOU PREFER
(Forward, Middle , Rear; it should come stock in the middle position) UPDATE: When adjusting another fellow members bike, I
found that using the 6mm allen was much easier to pry with(and easier on the soft metal).
Note: I first used my hand to start moving the shaft forward and then assisted this by gently prying
the shaft into the forward position. Be careful not to mark up the soft aluminum when doing this.
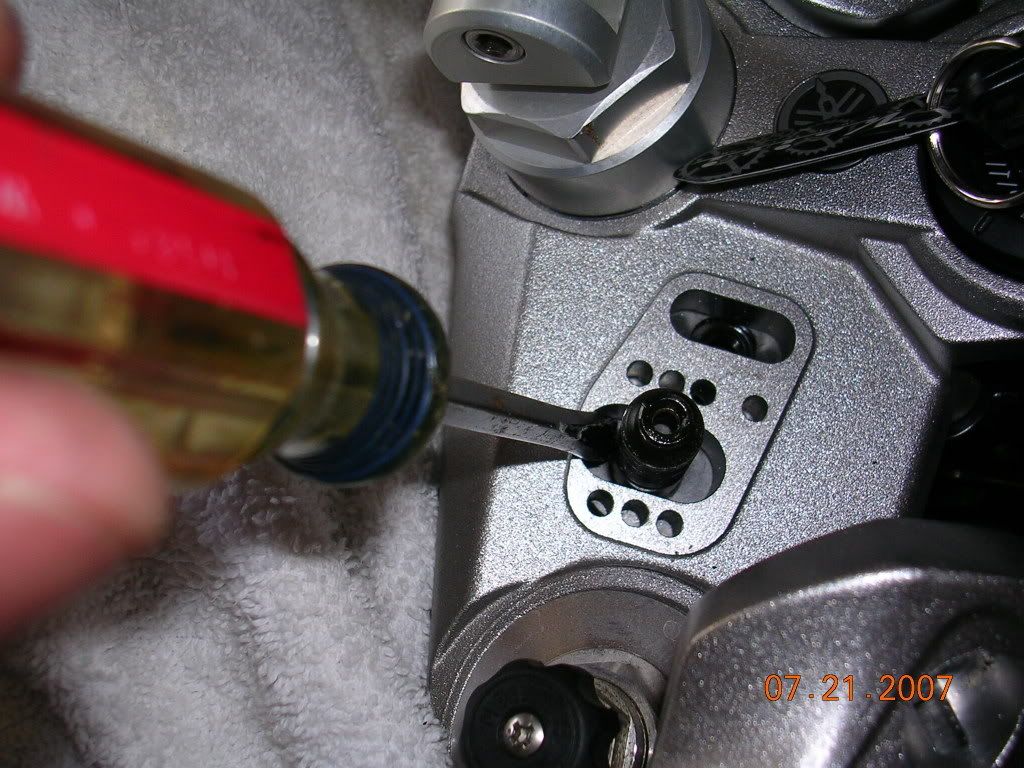
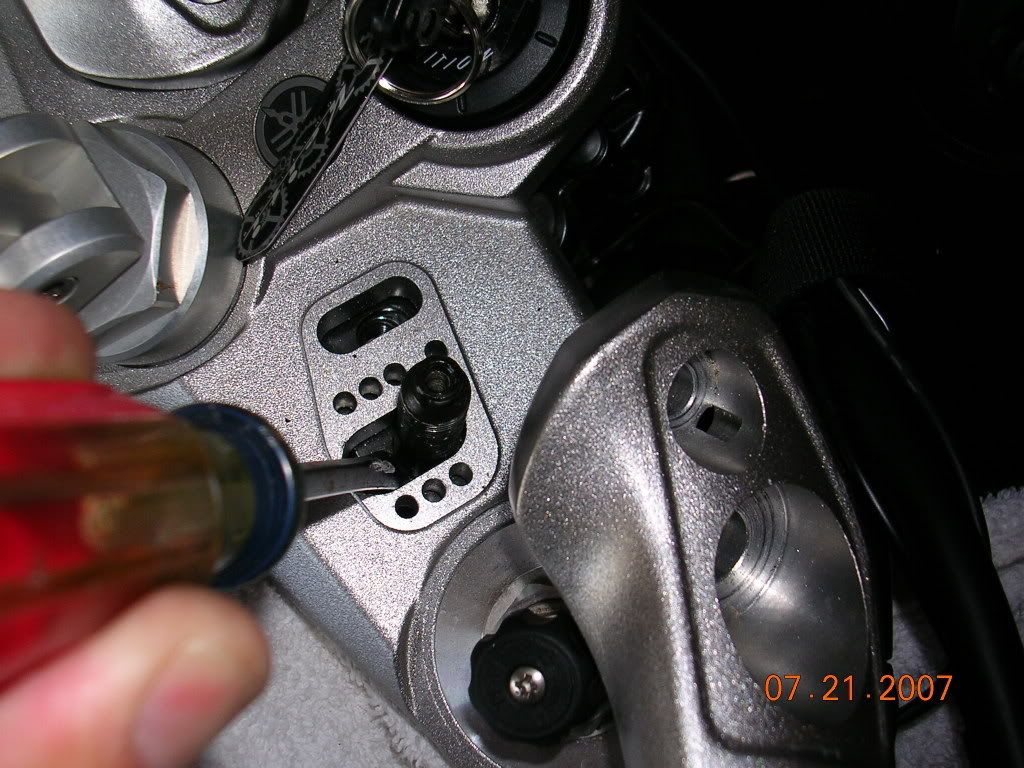
NOW POSITION THE HANDLE BAR BACK INTO PLACE AND DOUBLE CHECK THAT BOTH PINS
ARE IN THE CORRECT POSITION(Forward, middle, rear)
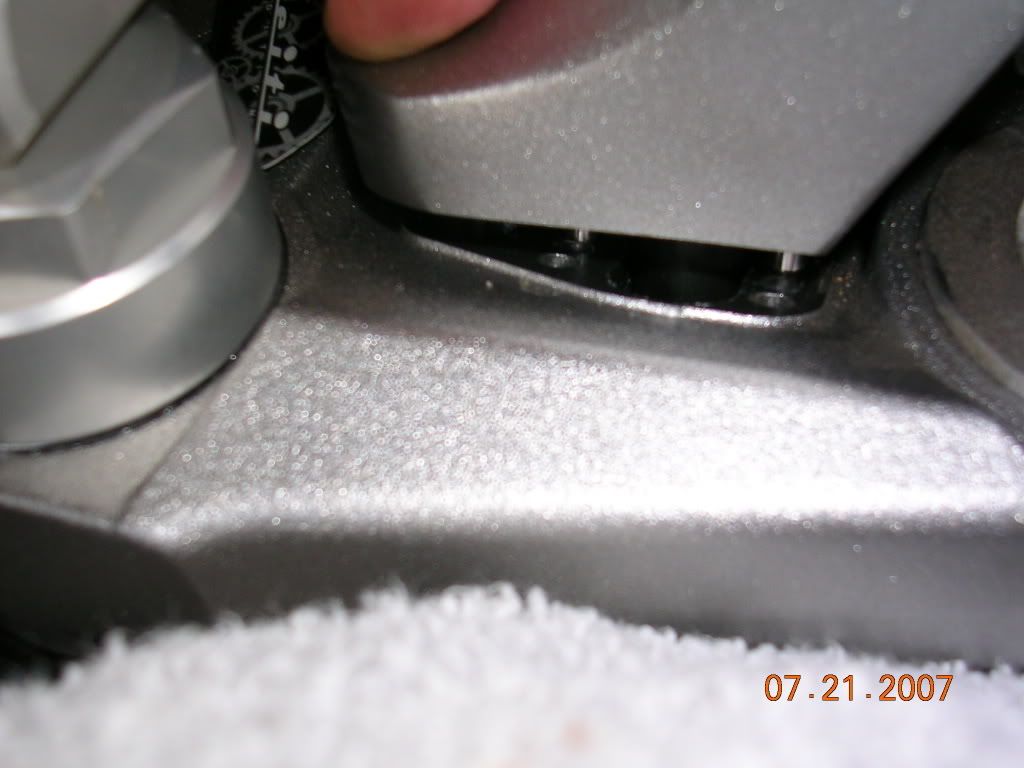
Now tighten down the 6mm allen bolt and the 17mm nut.. Remember that you may have to slightly separate the
socket from the extension to get the 17mm secured tightly if you are using a short socket. Then re-secure the
handle bar caps with the 2.5mm allen bolt. I tightened the 17mm nut and 6mm allen bolt good and tight..The way it
felt when I loosened it up. They were pretty darn tight. The covers I snugged tight but did not go crazy on.

Now do the other side. After completed check them both to see that they have both been properly adjusted(even).
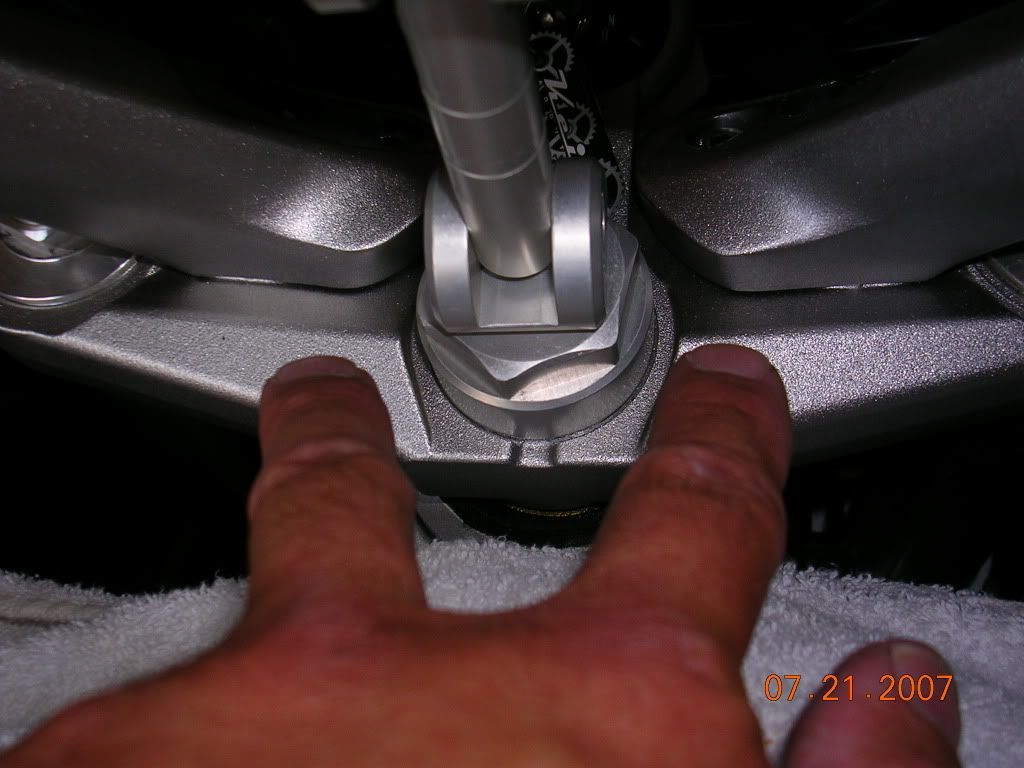
DONE!!!
IMPORTANT DISCLAIMER: REMEMBER TO PUMP UP YOUR CLUTCH AND FRONT BRAKES GOOD AFTER THIS ADJUSTMENT.
WHEN THEY ARE TIPPED OVER THEY CAN LOSE SOME PRESSURE AND NEED TO BE PUMPED BACK UP. DO NOT JUST DRIVE OFF AND GO FOR A RIDE. YOU MAY NOT HAVE ENOUGH BRAKE PRESSURE OR CLUTCH PRESSURE TO OPERATE SAFELY!!!!
Hope this helps clear up and confusion about this adjustment. REMEMBER: THE PINS DO NOT GET REMOVED!!
WICKED WEBBY

Well, I decided to post this guide to get rid of some misinformation regarding the handle bar adjustment on the Generation II FJR's(06-07). This will show my adjustment from the middle position(stock) to the forward position(more aggressive riding position). I know some people have successfully adjusted their bars without lifting them off of the triple tree(I call it blindly). This guide is the way I chose to do it. Either way you choose to, I hope this guide gives you the information your looking for.
Start off by placing a towel over the gas tank, fairing area, and gages to protect it during the adjustment.
TOOLS REQUIRED: 2.5 MM allen wrench, 6mm allen wrench, 17mm socket with extension, med flat head screw driver

FIRST REMOVE THE HANDLE BAR CAPS (2.5mm Allen wrench):

SECOND REMOVE THE 6MM ALLEN BOLT AND 17MM NUT (If you are using a standard size socket you may need to have it only partially set in the extension at first to start removing it because of the threaded head that supports the handle bar cover.)


Notice the pins underneath the handle bar plate. LEAVE THEM ALONE THEY DO NOT GET REMOVED!!!!

Place the handle bar off on its side(on the towel)and secure it so it will not fall off the towel/bike.
Now take a look at what your dealing with:

THIRD, START PUSHING/PRYING THE SHAFT INTO THE POSITION YOU PREFER
(Forward, Middle , Rear; it should come stock in the middle position) UPDATE: When adjusting another fellow members bike, I
found that using the 6mm allen was much easier to pry with(and easier on the soft metal).
Note: I first used my hand to start moving the shaft forward and then assisted this by gently prying
the shaft into the forward position. Be careful not to mark up the soft aluminum when doing this.


NOW POSITION THE HANDLE BAR BACK INTO PLACE AND DOUBLE CHECK THAT BOTH PINS
ARE IN THE CORRECT POSITION(Forward, middle, rear)

Now tighten down the 6mm allen bolt and the 17mm nut.. Remember that you may have to slightly separate the
socket from the extension to get the 17mm secured tightly if you are using a short socket. Then re-secure the
handle bar caps with the 2.5mm allen bolt. I tightened the 17mm nut and 6mm allen bolt good and tight..The way it
felt when I loosened it up. They were pretty darn tight. The covers I snugged tight but did not go crazy on.

Now do the other side. After completed check them both to see that they have both been properly adjusted(even).

DONE!!!
IMPORTANT DISCLAIMER: REMEMBER TO PUMP UP YOUR CLUTCH AND FRONT BRAKES GOOD AFTER THIS ADJUSTMENT.
WHEN THEY ARE TIPPED OVER THEY CAN LOSE SOME PRESSURE AND NEED TO BE PUMPED BACK UP. DO NOT JUST DRIVE OFF AND GO FOR A RIDE. YOU MAY NOT HAVE ENOUGH BRAKE PRESSURE OR CLUTCH PRESSURE TO OPERATE SAFELY!!!!
Hope this helps clear up and confusion about this adjustment. REMEMBER: THE PINS DO NOT GET REMOVED!!
WICKED WEBBY
Last edited by a moderator:


