flagstaff
Well-known member
At 44,490 miles my 2006 stock shock was well beyond its useful life. After a recent spirited ride with some friends I knew I had to do something soon. I started looking into Penske and Ohlins replacements when MCRIDER007 suggested using a Gen III as a replacement. Since the Gen III shocks are said to have a heavier spring and better damping...and could be had for only $432 shipped, I started looking closer at this option. I immediately check with a good friend who bought a 2013. He is the type to replace factory shocks with aftermarket almost immediately, but had not done so on his 2013. I spent several days last summer chasing him over a bunch of passes in Colorado and can attest that his 2013 handled very well. Since he was completely satisfied with the 2013 shock I order one. Removal and installation were straight forward using the available how-to posts here and on fjrtech.com. More on that in a bit.
Right to the bottom line...the new shock is a winner. No special mounting problems since it is the same physically as the old shock. The spring is definitely heavier. I can actually ride in the 'Soft' setting! Damping seems very good though I haven't played around with different settings as of yet. I took it out for a spin on a local road with some nice sweepers and undulating pavement. It handled everything with ease. I recognize that any new shock will be significantly better than that worn out one, but the seat of the pants feel is that this is a very good shock at a very reasonable price.
Back to the removal and install. Two areas were a bit of a problem, the top mounting bolt and the control cable routed above the electronic control. Instructions say to remove the connectors from the electronic control box since the preload control cables run over the top of them. I struggled to get those connectors loose and finally decided it wasn't worth the effort since the shock was headed for the trash. I just cut the preload cable with a pair of side cutters and moved along.
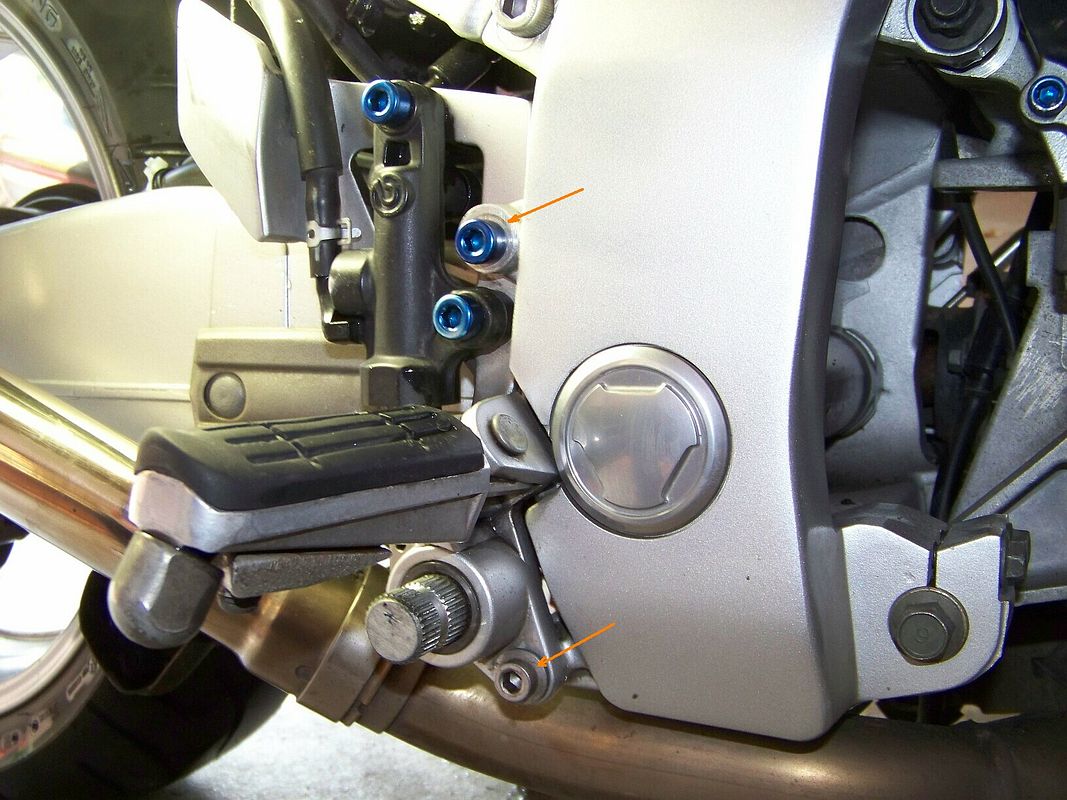
The other troublesome area is access to the bolt head on the right side of the upper shock mount. The ABS module and associated hoses are in this area, but you can get in there with a little work. If you remove the machine screws holding the rear master brake you will likely have enough wiggle room to get in there. The orange arrows indicate what needs to be removed.

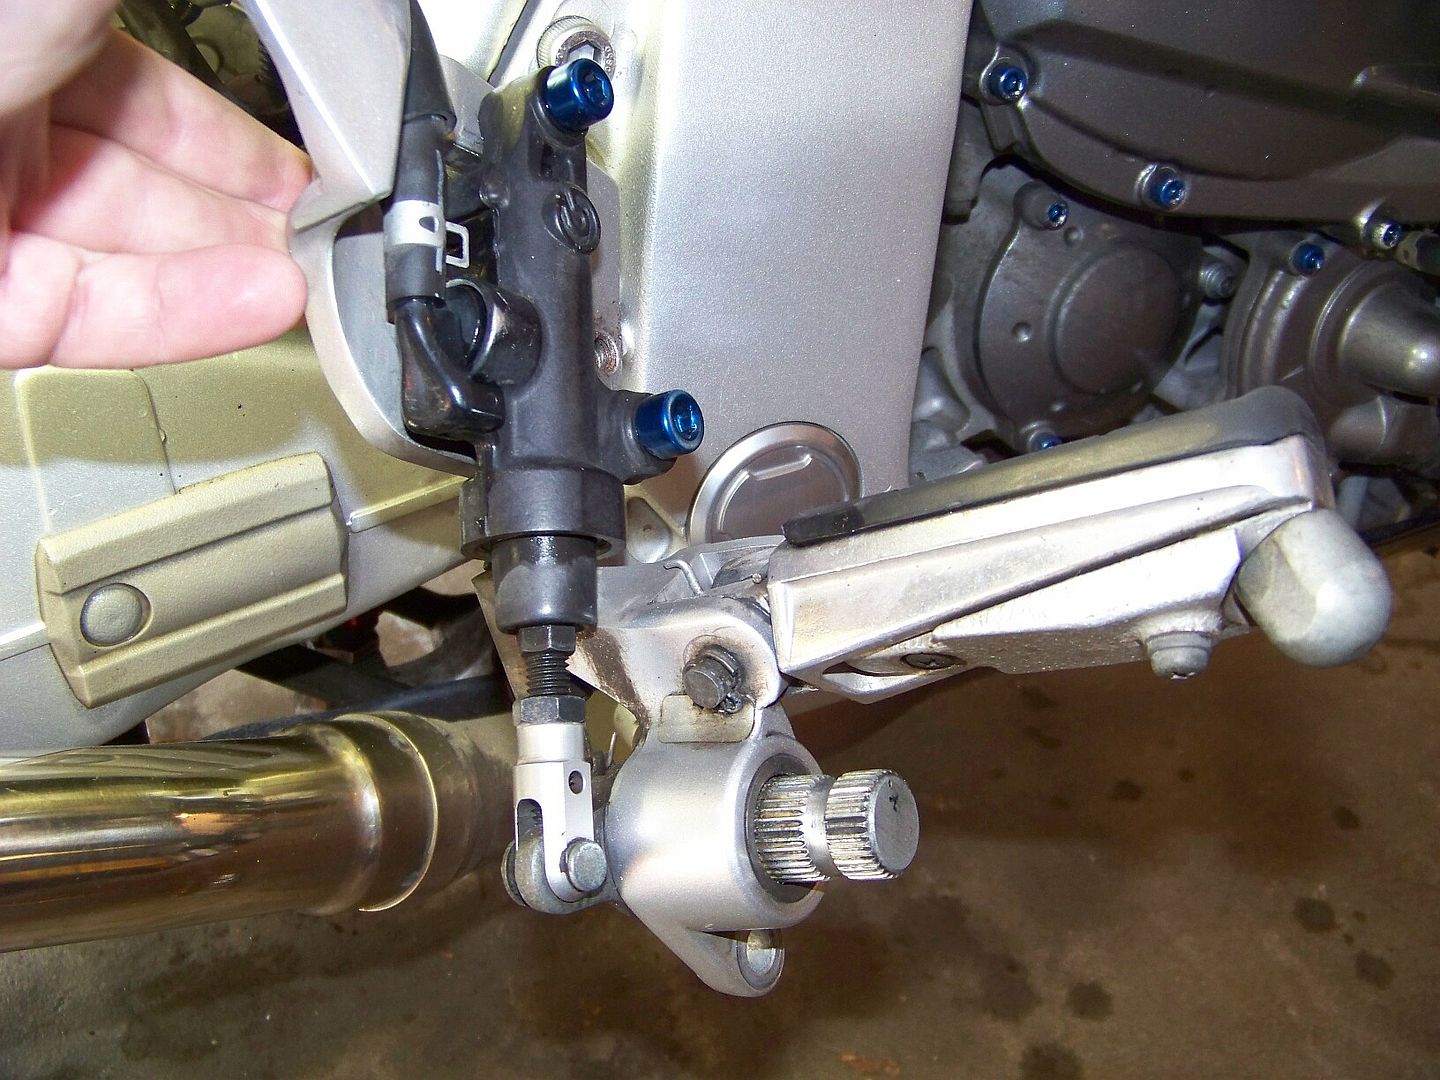
The hose running from that master cylinder is what is in the way more than anything else. I also removed the machine screws that secure the plate that holds the electronic control box and the mounting studs for the preload adjuster. There are two allen screws on each side. This provides a little extra wiggle room.
Here are the mounting bolts for the plate on the right side. Remove these for some extra wiggle room.

A wider shot of the right side.

Here are the mounting bolts for the left side of the plate.

When replacing the bolt slide it in from the left instead of the right. It makes the job MUCH easier. You will knock out, if you haven't already, the green metal spacer sleeve that goes in the right side of the bike's shock mount. Put the bolt in from the right and then slip the green sleeve onto it from the right. Once it is sitting on the bolt you'll need to maneuver the shock until the sleeve is in a position to slide in place. Spray some WD40 or similar product in there before you start so you have a better chance of things sliding together. A long screw driver is NOT the to use to shove the green sleeve into place since many are somewhat magnetic. Mine had just enough magnetic attraction to pull the sleeve off the bolt a couple of time. I switched to a chopstick and that issue was solved.
The green arrow points to the reinforced hose coming from the rear master brake cylinder. The red arrow points to the upper shock mounting bolt on the right side. In stock position this would be the head of the bolt. I reversed the bolt so you are now looking at the nut end.

I'd be glad to clarify any of this. Just ask.
Right to the bottom line...the new shock is a winner. No special mounting problems since it is the same physically as the old shock. The spring is definitely heavier. I can actually ride in the 'Soft' setting! Damping seems very good though I haven't played around with different settings as of yet. I took it out for a spin on a local road with some nice sweepers and undulating pavement. It handled everything with ease. I recognize that any new shock will be significantly better than that worn out one, but the seat of the pants feel is that this is a very good shock at a very reasonable price.
Back to the removal and install. Two areas were a bit of a problem, the top mounting bolt and the control cable routed above the electronic control. Instructions say to remove the connectors from the electronic control box since the preload control cables run over the top of them. I struggled to get those connectors loose and finally decided it wasn't worth the effort since the shock was headed for the trash. I just cut the preload cable with a pair of side cutters and moved along.
The other troublesome area is access to the bolt head on the right side of the upper shock mount. The ABS module and associated hoses are in this area, but you can get in there with a little work. If you remove the machine screws holding the rear master brake you will likely have enough wiggle room to get in there. The orange arrows indicate what needs to be removed.

The hose running from that master cylinder is what is in the way more than anything else. I also removed the machine screws that secure the plate that holds the electronic control box and the mounting studs for the preload adjuster. There are two allen screws on each side. This provides a little extra wiggle room.
Here are the mounting bolts for the plate on the right side. Remove these for some extra wiggle room.

A wider shot of the right side.

Here are the mounting bolts for the left side of the plate.

When replacing the bolt slide it in from the left instead of the right. It makes the job MUCH easier. You will knock out, if you haven't already, the green metal spacer sleeve that goes in the right side of the bike's shock mount. Put the bolt in from the right and then slip the green sleeve onto it from the right. Once it is sitting on the bolt you'll need to maneuver the shock until the sleeve is in a position to slide in place. Spray some WD40 or similar product in there before you start so you have a better chance of things sliding together. A long screw driver is NOT the to use to shove the green sleeve into place since many are somewhat magnetic. Mine had just enough magnetic attraction to pull the sleeve off the bolt a couple of time. I switched to a chopstick and that issue was solved.
The green arrow points to the reinforced hose coming from the rear master brake cylinder. The red arrow points to the upper shock mounting bolt on the right side. In stock position this would be the head of the bolt. I reversed the bolt so you are now looking at the nut end.

I'd be glad to clarify any of this. Just ask.
Last edited by a moderator:


