anyone put a cruise control here?

Yamaha FJR Motorcycle Forum

Help Support Yamaha FJR Motorcycle Forum:

This site may earn a commission from merchant affiliate links, including eBay, Amazon, and others.

v65

ouch
Joined
Feb 14, 2006
Messages
2,108
Reaction score
3
Location
Alfred, NY
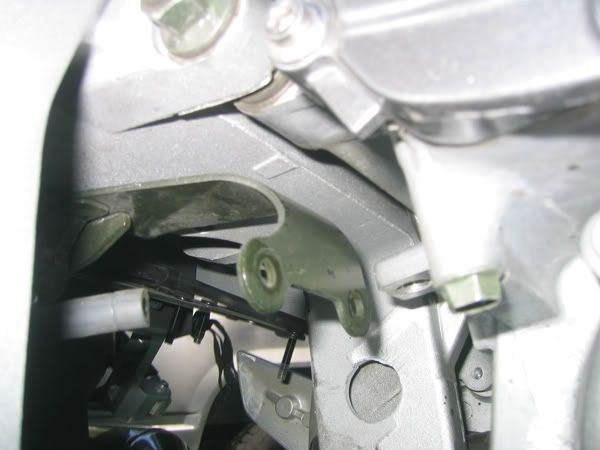
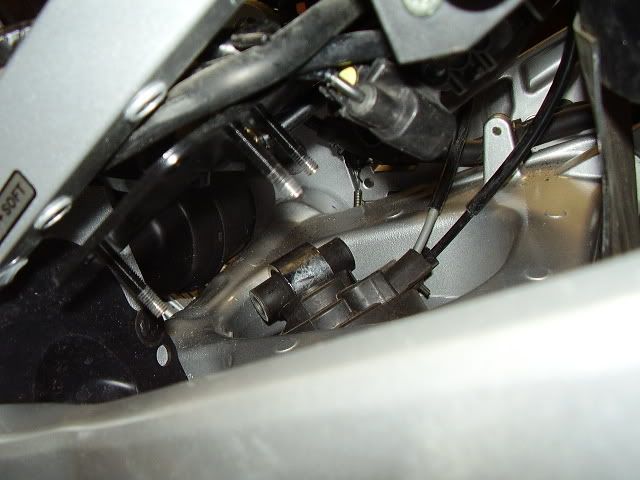
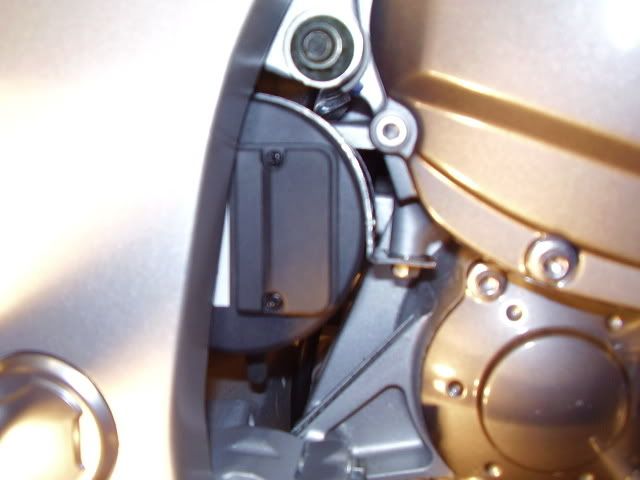
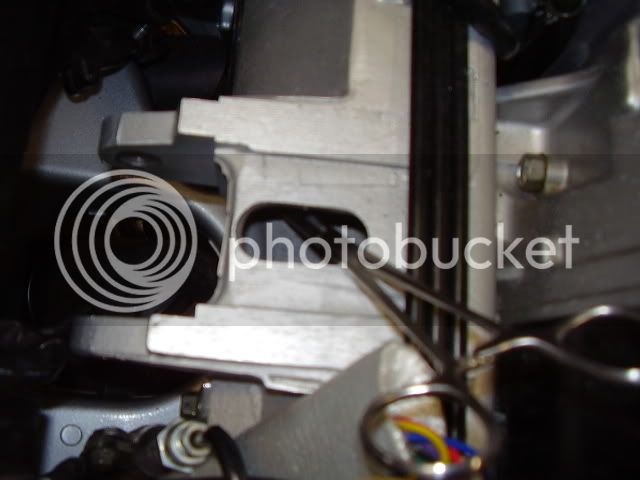
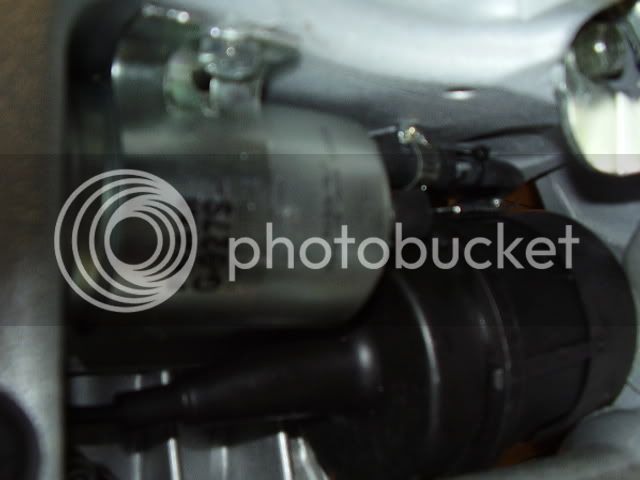
The problem with having an entire winter to farkle is you spend too much time thinking about stuff. Looking at where the swingarm attaches to the frame it looks like there is almost room for a cruise control, I am wondering if anyone has put one here:

bigenough.jpg


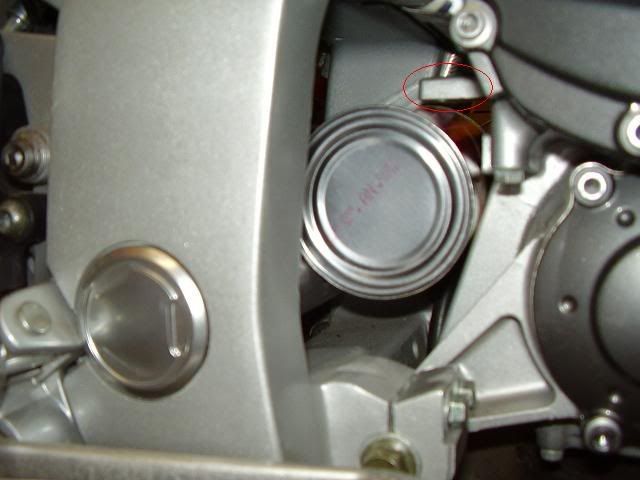
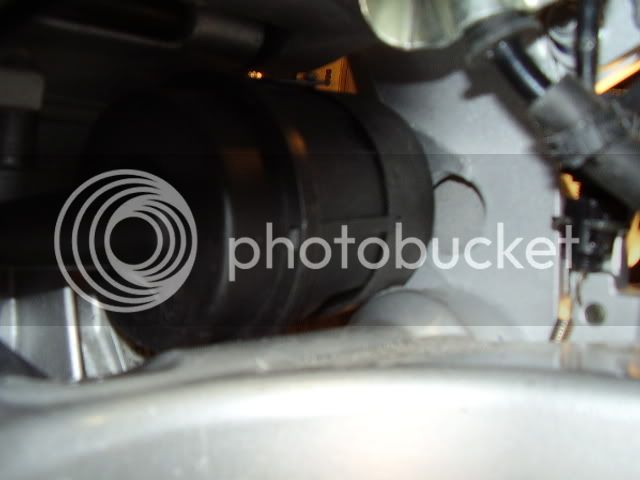
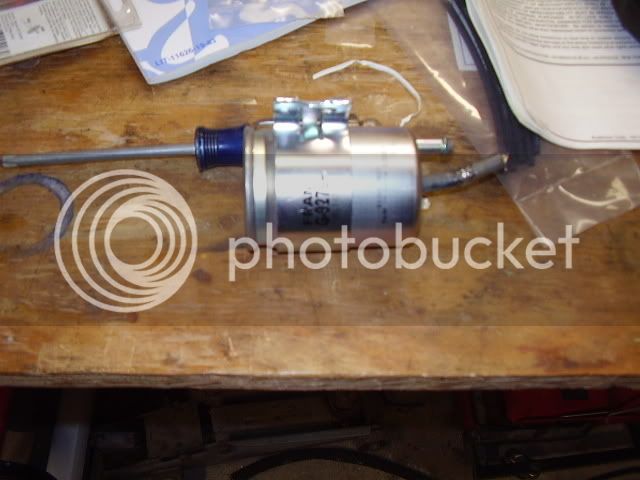
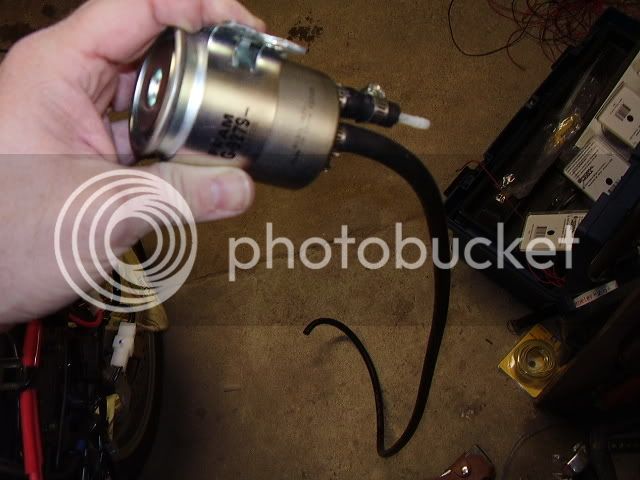
The bottom of the soup can you see in the above pic is modestly smaller than the cruise control unit:

soupcan.jpg


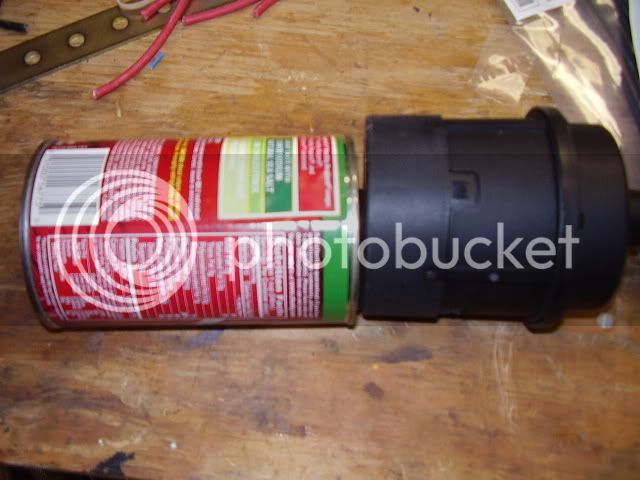
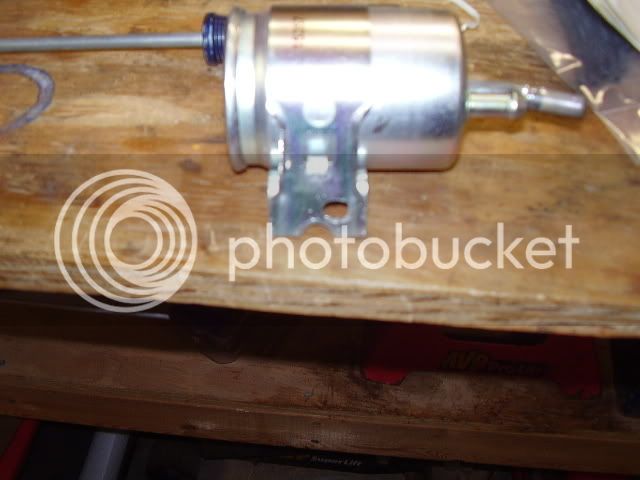
In playing around with this setup I am pretty sure that the large diameter ring that runs around the cc is just big enough so that it won't fit, otherwise it would fit wonderfully. The tab circled in red, which doesn't seem to perform any function BTW, sticks out far enough to just be a problem. Haven't got the guts to cut it off though.

In anticipation of some questions:

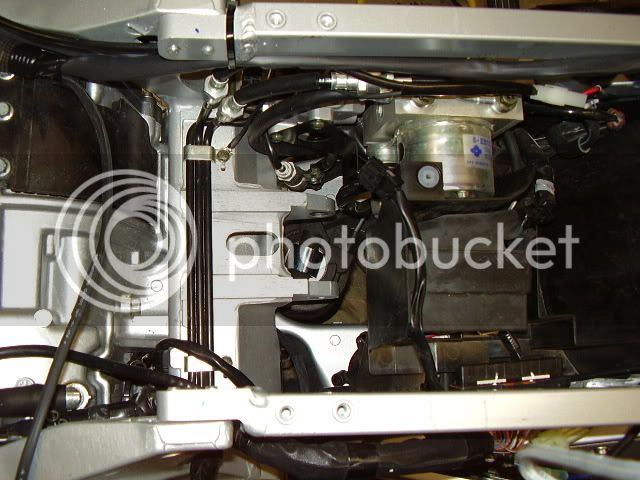
1) I am trying to avoid mounting in the tool tray to save that space, although I am pretty much resolved thats where it is going. Like I said earlier, too much time on my hands.

2) I am familiar with Ionbeam's mounting point for the cc. The rearsets on the '06's are different from the earlier models, I haven't seen anyone mount a cc on an '06 this way. Didn't look like there was enough clearance for the swingarm to me.

3) I have other reasons for not wanting to mount it on top of the engine as has been done on the AE's.

4) That low sodium soup tastes like crap, get the real deal :lol:

 
Last edited by a moderator:
I've been eyeing that space too. That's where the CA smog can goes. The tab that is in the way may have a couple of holes in it intended for the smog can hardware. Dunno if you can use the charcoal can bracket to mount the AVCC servo. Blaze the trail V65!

 
Cut the tab off, and let us know

how it works. I looked at the same

spot for mine, I think it'll work. But,

you first.

 
I've been eyeing that space too. That's where the CA smog can goes. The tab that is in the way may have a couple of holes in it intended for the smog can hardware. Dunno if you can use the charcoal can bracket to mount the AVCC servo. Blaze the trail V65!

The smog can attaches to this bracket pictured below.

We have the same useless mounting tab on the Cali engine block too !

SMOGCANBRACKET.jpg


V65,

I have a 2004 with a cruise control mounted in this location. I wanted to maintain my storage space under the seat.

Not up to speed for sending photos on this site but lets try this. I have more photos I can email them to you if you would like.

John

Click on photo.


Last edited by a moderator:
Well, once I knew it would go in, there was only way to get it in there. I already have my air intake out, so it was (relatively) quick work to remove the shock. There is a large hole there that the cc can slide through. I also ended up loosening the metal mounting plate that the shock adjusting lever mounts to, although I am not completely sure that was necessary.

EDIT: Added pics

Here is a top view of the shock removed and where the cc will go though

P2050149.jpg


I routed the cc in between the left rearset and the tire, underneath the mount for the shock lever, and through the hole left by the missing shock.

gothroughhere.jpg


Its tight, but if the cc is twisted in the right direction at the right time you don't have to force it. Here is a rear view of the cc in the void.

fromtheback.jpg


Since the shock is off I was able to move the swingarm through its full range of motion, there is plenty of room here. A side view of the farkled mounting bracket the cc comes with

sideview.jpg


Still some work left to do, but this looks like a very tidy place to mount the cc. The cable routes nicely out the other side. The bolt used to mount the bracket to the tranny appears to be the last one of the crankcase bolts - fortunately the last one in the torque sequence.

I am wondering about insulation. Obviously its close to the tranny, but it also is sitting out in the air on the one end. Insulating could prevent cool air from getting to the unit. A heat shield would be best, not sure how to mount it or if its necessary.

 
Last edited by a moderator:
Well I thought I would provide an update as I attempt to set the record for the longest time it takes to install the cc (no chance at shortest). After installing the cc unit I was now scouting for a place to install the vacuum reservoir. After running through various possibilities a trip to walmart turned up the perfect fuel filter - a FRAM G9279. Both the in and out tubes are on the same end of the filter, and it comes with a usefule mounting clamp. Don't ask me what it fits, but it will fit in right next to the cc unit with some modification. I had to bend the middle tube to get proper clearance around the cc unit. I also trimmed the mounting tab and drilled a new hole for it. The modified filter looks like this:

bent tube:

filterwithtubebent.jpg


After these photos were taken I decided to trim the middle tube down to the length of the upper tube. Sorry, no photo, but a dremel makes quick work of it.

Here is a photo of the trimmed mounting tab with hole drilled. The photo is blurry, but at the bottom of the tab you can see where the original mounting hole was before it met the dremel:

filterwithnewhole.jpg


I managed to squeeze quarter inch fuel line on the filter, which means I only needed one reducer to get down to the 3/16 vacuum line size. The middle line from the filter will run to the engine, the upper tube with the reducer connects to cc unit:

filterwithhoses.jpg


You will be mounting the filter on the top rear shock mount. There are two holes in this mount, presumably legacy holes from the '03-'05 charcoal cannister mount. It is a bit tight getting in there, I put the bolt through the filter and through this hole, then put the nut down in the recess using some forceps. It was actually easier than I thought it was going to be:

puttingthenuton.jpg


Before mounting the filter, I unhooked the cc unit. Then I cut the vacuum line from the unit to the proper length and attached to the reducer from the filter. The cc unit was re-installed, then the filter was installed as described above. I would like to give you a picture, but you can't see the filter when it is installed. The best I have is a pic taken from where the rear shock goes:

canisterandcruise.jpg


If you study the photo closely you can see the mounting bolt and the upper vacuum line with the (blurry) white reducer.

When the shock is installed it becomes all but invisible, so the above photo is the only proof I have that it is installed correctly. The trickiest part of the install is getting the hole in the mounting tab correct so that there is plenty of clearance for the shock. The filter wants to hit the tab on the back of the engine mentioned above.

 
Last edited by a moderator:
I stumbled on this thread sometime this past winter. It seemed like a great idea.

I'm about halfway into this and I can't believe how many parts I've removed from the bike.

I should have gone with kaitsdad's mounting location or the MC Cruise mounting location (similar to kaitsdad's but on the other side)

If tomorrow I don't turn a corner on this project, someone's going to get a great deal on a dumpster full of enough FJR parts to build a complete bike.

 
I think I saw somewhere back somebody else mounted their CC servo there as well. I considered it as well but I was afraid that more frequent exposure to possible water might have an effect. Hopefully that wont be a problem.

I don't think you need to worry too much about heat as they are intended to be installed on cars under the hood.

 
Success!

v65, Thanks for the idea and the details. [SIZE=8pt](although I was cursing you earlier today and most of yesterday)[/SIZE]

[SIZE=8pt](my declaration of "Success" is similar to George Bush's banner "MISSION ACCOMPLISHED". I still have some reassembly before I can actually ride the bike)[/SIZE]

 
Last edited by a moderator:
Success!
v65, Thanks for the idea and the details. [SIZE=8pt](although I was cursing you earlier today and most of yesterday)[/SIZE]

[SIZE=8pt](my declaration of "Success" is similar to George Bush's banner "MISSION ACCOMPLISHED". I still have some reassembly before I can actually ride the bike)[/SIZE]
But think about how well you know your bike now!
While Joe is getting to know his bike well I plan on getting to know Joe well. :D

Study hard Joe.

 
Finally! The weather got nice enough to get out for a run and try out the Audiovox CC on my 06FJR. IT WORKS GREAT (so far). If heat is an issue, testing it when it's 35 degrees won't be a final test, but I'm glad it works and holds the cruise at this point.
I installed my servo unit in the little space between the tranny and the rear shock and the Vac Res under the front of the gas tank. Only one Vac pickup off #1 intake going to one check valve, then the Vac Res (a pickup truck fuel filter), and off to the servo unit.

The only change I made from the norm would be the DIP swich setup. Switch #4 is OFF, Switch #5 is OFF which is for MEDIUM SENSITIVITY. I had read on another site that they had tried LOW, but MEDIUM worked better (this was an install for a Honda Valkrie). The cruise engages with authority and it seems to be holding hills very well, although finding what most would call hills is a stretch where I live!

After hearing all the horror stories about the Gen II problems, I was expecting it NOT to work. :yahoo:
Just an update V65. It was 78 degrees today and all was working perfectly!! Great idea to put the servo in this location! :yahoo:

 
:blink:

Took it for a test ride tonight. It didn't work.

Don't offer any suggestions yet. I'll have to wait to diagnose the problem. I'm leaving for the Smokey Mountains in 9 hours.

Using the brake light relay to to power my relay for the fuse block and the brake light signal to the AVCC worked. Check it out: link

 
Top