audiovox shuts off

Yamaha FJR Motorcycle Forum

Help Support Yamaha FJR Motorcycle Forum:

This site may earn a commission from merchant affiliate links, including eBay, Amazon, and others.

Brian T

Member
Joined
Oct 30, 2006
Messages
8
Reaction score
0
Location
Denver, CO
Before I start tearing things apart thought I would ask a question here first. Installed the Audiovox CC and went for my first ride. WOW I love this thing. Unfortunately I was cruising along about 75mph on flat freeway and the thing triped off (I didn't touch the brake). Pressed the set button and ran for another 5 miles and it tripped off again. Used it for another 50 miles and no problem. I'm trying to get everything functioning for a long trip this summer and this unpredictable occurance has me concerned. The only thing I did unusual during the install was that I screwed up the filter from the coil; however, I read on this forum that this is just a 20k resistor so I found 2, 10k resistors at Radio Shack and soldered them in series.

Any thoughts out there?

Thanks

Brian in Denver

 
Have you double checked the brake light switches on the brake lever and brake pedal? Sometimes those can be very hair trigger and an unusual bump or something can jog the pedal enough to momentarily activate the brake light switch which turns off the cruise.
+1

If it's operating for minutes at a time with no problems, something is tripping the fun. At this point, I can't think of any other culprits, assuming all of the connections are tight, unless the unit is faulty?

Should be easy enough to eliminate the brake question though....

Shane

 
Last edited by a moderator:
The brake input is particularly sensitive. If you have any accessory equipment (or if one of your brake bulbs is burned out) the unit can be 'difficult'.

If nothing else helps, you should consider installing a brake-circuit-driven relay to control the input to the unit. I'll wager THAT solves your problem.

 
Before I start tearing things apart thought I would ask a question here first. Installed the Audiovox CC and went for my first ride. WOW I love this thing. Unfortunately I was cruising along about 75mph on flat freeway and the thing triped off (I didn't touch the brake). Pressed the set button and ran for another 5 miles and it tripped off again. Used it for another 50 miles and no problem. I'm trying to get everything functioning for a long trip this summer and this unpredictable occurance has me concerned. The only thing I did unusual during the install was that I screwed up the filter from the coil; however, I read on this forum that this is just a 20k resistor so I found 2, 10k resistors at Radio Shack and soldered them in series.
Any thoughts out there?

Thanks

Brian in Denver
If you have flashing brake lights they could be a problem. I know Smitty had some issues with them during his mega california install.

Other wise send Smitty a PM i am sure he can help you out.

Richard

 
I've had a similar problem arise on mine. At 75 it will work great for very long periods, sometimes cutting out, most times working for as long as you like. But I had it set at 90-95 the other day and it wouldn't hold that for more than a minute and then cut out. Hit the resume and it would try to get back to speed, but then cut back out.

No flashing brake lights. All brake switches checked for operation, etc.

 
Last edited by a moderator:
I'm pretty much positive my problem isn't in the switches. Checked those out first thing.

Not that it makes much sense, but I'm wondering if it wasn't a weak vacuum signal. When I first hooked the unit up I was pulling off the MAP sensor and the bike was having a hard time maintaining speed in wind or even up a hill.

I then took it off the MAP and tapped into all four cylinders using the extra ports used for TBS. That worked a lot better, but the cylinders weren't isolated and as stated already, a couple weeks ago while running against a heavy headwind, trying to set the cruise anywhere above 85 or 90 caused it to cut off sooner or later. It usually on ran for about a minute before it would cut out. The faster you tried to set it, the quicker it would cut out. If you helped the throttle along a bit, like climbing a hill, it would hold longer than if you just let it run by itself.

This weekend I isolated all four cylinders by putting check valves in the vacuum lines, and a check valve on the reservoir. The bike held 95 mph two up into a mild headwind (not like the day it was cutting out though). I don't know if it's fixed or not, until I get to test it a little more, and don't know why weak vacuum would cause such a problem, or if it is even part of the problem.

 
Sounds like the cut out happens sooner the faster you go, and/or against the wind/up hills, right?

Unlikely that there isn't sufficient vacuum if you're tapped into a reliable source, and if you're running a cannister of some sort, there is usually more than enough vacuum. Unless there's a leak?

Possibly, you could be running out of throttle take-up.

How much slack is in the cable when the unit is shut off and the throttle closed? There should be just enough to ensure that the throttle is well and truly closed, since the available take-up is finite, and I've read that it can be used up in certain situations, but I don't know if it shuts down at that point or not.

Keep at it, you'll get it.

Shane

 
Sounds like the rear brake switch has a bit too much tension in it, and it's tripping the brake light. My FJR did that when I first got the bike. I had the dealer adjust the switch before I took delivery officially.

If the take-up on the CC is running out, the CC wouldn't stay engaged for more than a few seconds from my experience. The Audiovox CC could act a bit different though.

 
A revisit here: I went and installed check valves to isolate each cylinder and for the vacuum reservoir itself. That did help the engine run smoother, but didn't really make the cruise operate any different.

So this past weekend I was out riding two up and the cruise worked great, no problems. Until I stopped for a break, got back on and headed out. When I went to set it, it would cut off 3-10 seconds after setting. I tried the Resume button with the same results. So I held the Resume button down for Accelerate and it accelerated for a bit then cut out. I held it again and it accelerated to where I wanted it and held.... the rest of the day. And it's worked from then on.

I'm a bit baffled here. I've checked the brake switches and am now wondering if I don't have a bad cruise switch, the pad itself.

 
The switch pad will act oddly if water has gotten into it. Ridden in rain, or washed the bike lately? Does the problem coincide with either of the two?

 
How did you make your electrical connections? Did you use wire taps, or splice and solder? Some pics would help.

 
After washing the pad has acted weird, with the power on light staying on. But not always, depends on if the pad gets sprayed down good. I have the Skyway mount and I sealed it with RTV on the back of the pad.

To answer the question though, no, I had not recently washed the bike nor ran through any rain. Clear dry day.

All connections are soldered except for the power connection to the power distribution block.

 
After washing the pad has acted weird, with the power on light staying on. But not always, depends on if the pad gets sprayed down good. I have the Skyway mount and I sealed it with RTV on the back of the pad.
To answer the question though, no, I had not recently washed the bike nor ran through any rain. Clear dry day.

All connections are soldered except for the power connection to the power distribution block.
Inlaw1,

The RTV on the back of the pad is a good idea - IF the RTV used is NOT AGRESSIVE TOWARDS COPPER!!. Read the fine print on the tube, or go the manufacturers website and find the MSDS on the product. Most RTV sealants are muy no bueno against copper. I would suggest that you open the switch up (if it's not sealed by the RTV) and examine the copper traces on the PCB.

The switch side (the side under the rubber buttons) also needs to be sealed - you may have water entering between the face cover and the flexible rubber 'on off set res' and causing shorts on the pad. I would imagine this would evaporate rather slowly, and might add to corrosion. The problem you describe leads me to suggest that you may have corroded contacts on the control pad.

As the saying goes - 'This posting is worthless without pics" so - I just ran out to the garage, grabbed a brandy new control pad that I just happened to have sitting on my work bench, and sealed it - took about 5 minutes or so.

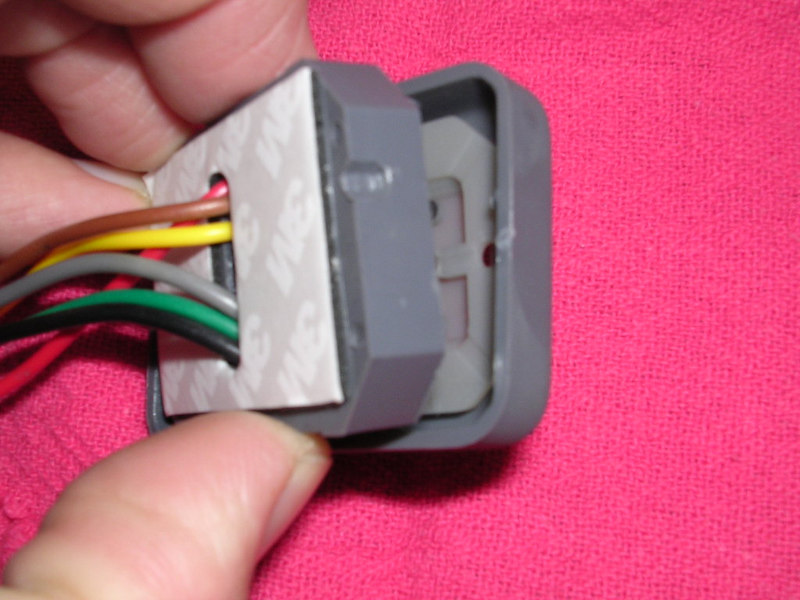
We all know this item, don't we?

140705532-L.jpg


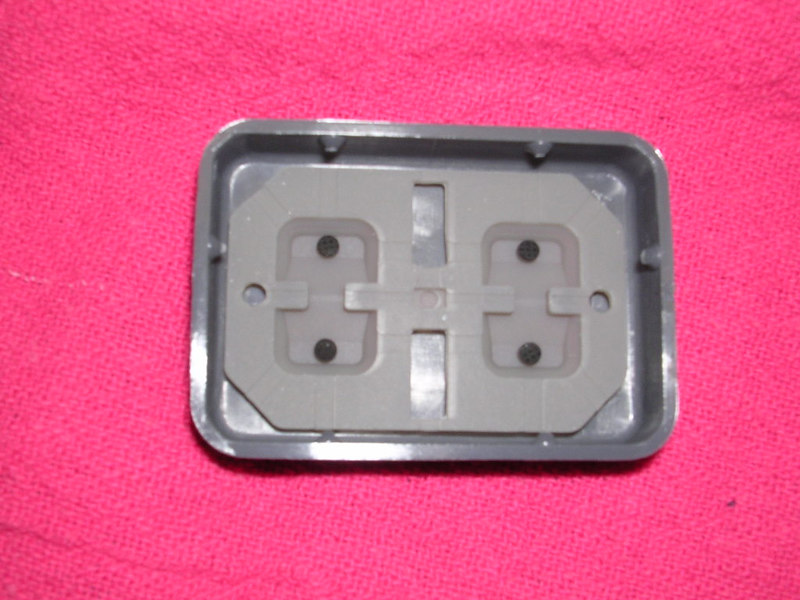
Inside of the rubber pad - those little black 'pucks' are metal - and act as the contact between the copper traces on the PCB.

140705549-L.jpg


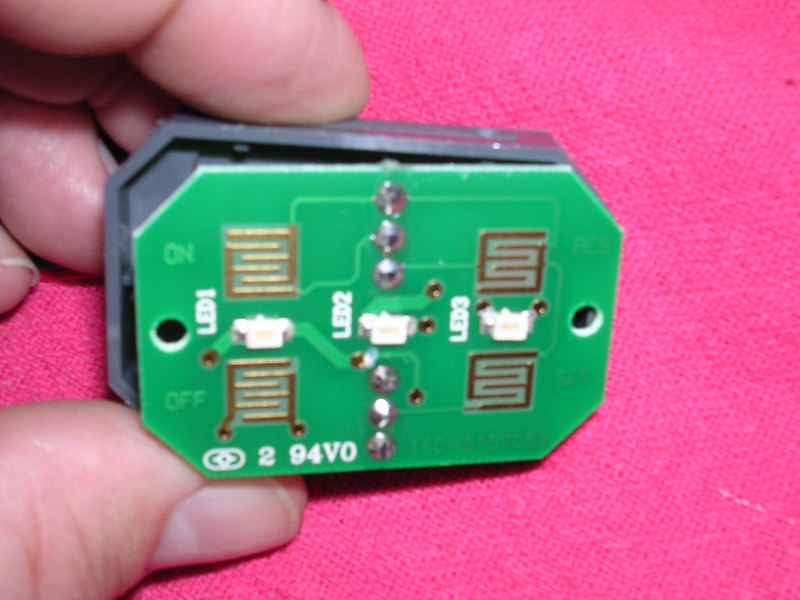
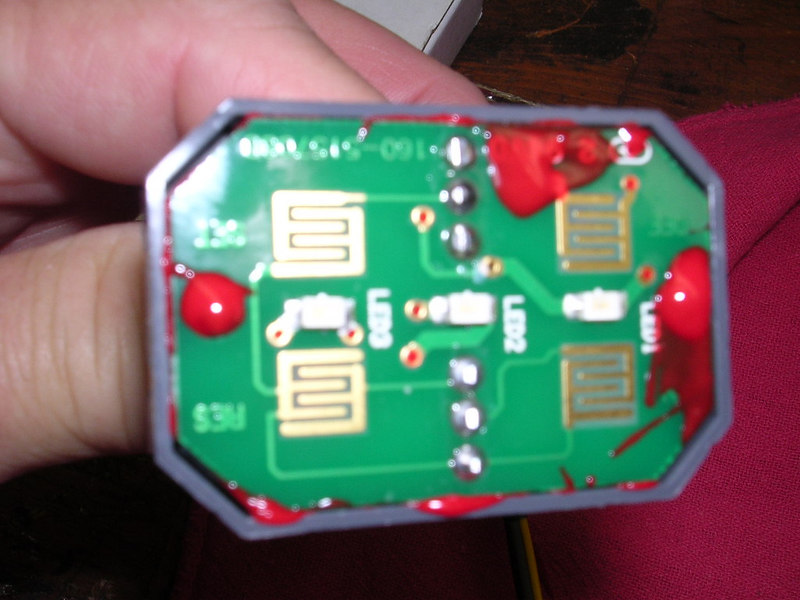
PCB board - front. (excuse the poor focus)
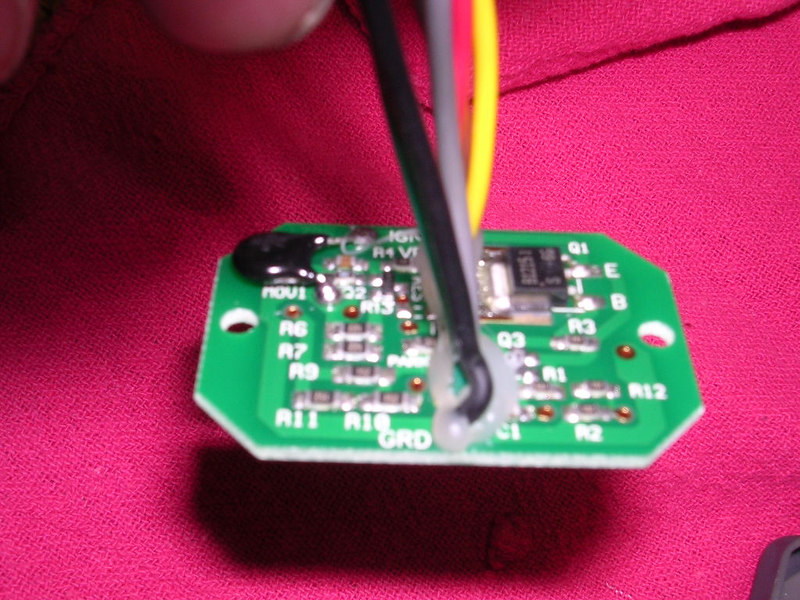
140705588-L.jpg


PCB board - back.

140705616-L.jpg


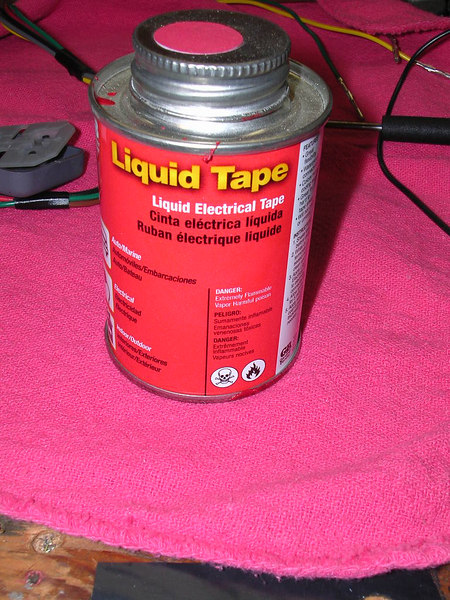
I use liquid tape to do this - it's available at just about any Home Depot in the electrical department - it's dielectric, waterproof, and NOT AGRESSIVE towards copper. I use the pretty red color - as it is easier to wipe off of some place it doesn't belong without leaving an extremely obvious smear, like the black stuff does. DAMHIK. :blink:

140705676-L.jpg


Others may prefer the manly black, however I believe it's available in the color of your choice which enables you to eliminate the chance of that unsightly smear clashing with your other farkles.

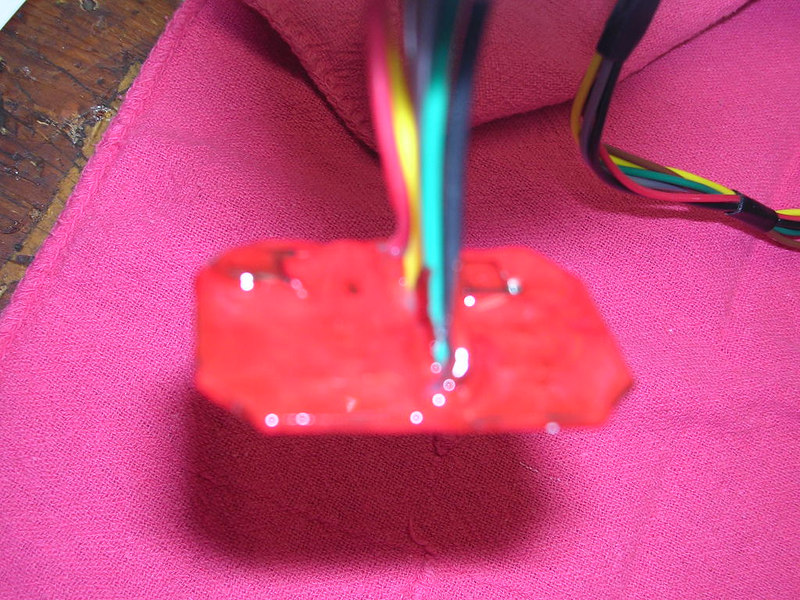
The proper treatment (IMHO, and experience) for the switch pad is to remove the PCB from the gray plastic case, so all you have is the board with the wires hanging out the back.

140705616-L.jpg


Then - you seal the board - edges and everything - with the exception of the copper traces directly underneath the little metal 'contact' pads that are part of the rubber cover - and of course, the light emitting diodes. Unless you don't like to see the pretty green pad at night.

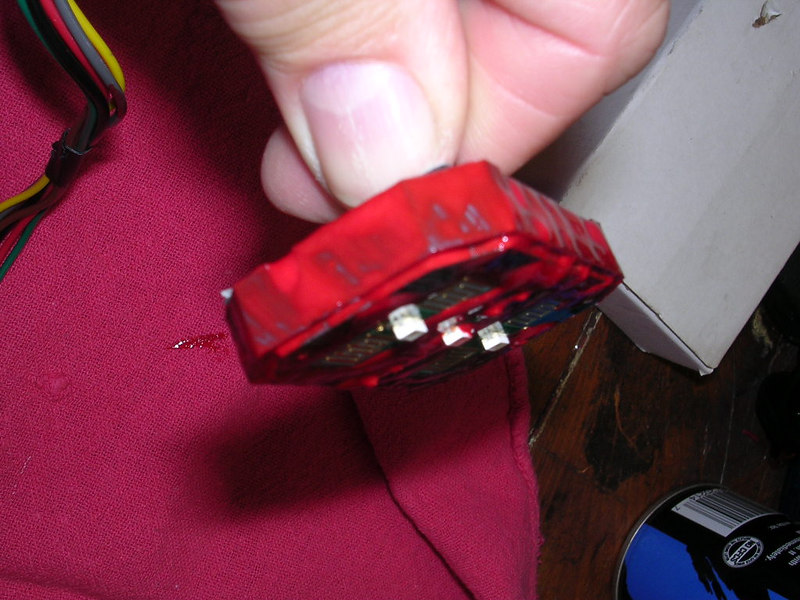
Back - note the thick layer of liquid tape.

140705702-L.jpg


Then - once the back and edges of the board sealed, install it back in the housing.

140705720-L.jpg


140705735-L.jpg


Note how I left the word 'OFF' visible - so that I can ensure that I don't install the PCB back into the pad upside down.

And again, DAMHIK.

and then paint the outside edges of the inside switch housing - then seat them together.

140705756-L.jpg


This process seals the inside of the rubber switch cover onto the PCB, giving you a water tight membrane with the PCB inside.

Let it sit overnight or so - the liquid tape sets up very quickly - and you'll have a very waterproof switch housing. Install as usual in your control pad mount of choice.

 
WOW! That's why I find this board to be the best board I've ever been on. What a detailed, useful response! Thank you very much Kaitsdad! I will buy you a beverage of your choice if / when we ever meet.

My pad isn't sealed that well but I'm going to look at getting it done. How hard is it to open up the switch to get to the board? I think I was worried about breaking the thing.

Anyone know where I can get a spare pad? I think I saw a sight that had extra for sale, can't locate it at the moment though.

 
I'm getting into this one a bit late as usual but here's my 3 or 4 cents:

There are a number of things that could be causing your CC to cut out. The button pad is one of them. Rather than going through all of the histrionics suggested, just pop the thing apart and see if there is any water in there. Probably not but it is the easiest thing to check.

You might want to check how much vacuum you're getting at the servo. A backwards check valve, bad check, collapsed vac hose, etc could be the cause. Again easy to check. Motorcycles don't generate much vacuum; short intake path, big throttle bodies, not much flywheel and lightweight relative to power output all contribute to barely enough vacuum to run the CC. Just slap a vac gauge into the line and go for a ride. I think you should see around 25 inches of mercury with an FJR but don't quote me on that. I just can't quite remember what I got on mine when I was setting it up.

The final thing to look at is the vacuum servo itself. This is the most likely source of your failure and also the biggest pain to get at. The Audiovox unit was designed for use under the hood of a car and as such they didn't expect it to get wet. Ever. This is probably the worst part of the design but it is easy to remedy. Water can enter the unit around the vacuum hose connection and the input cable. Depending on how you have the unit oriented on your bike the water can just run out of it or collect in one of the chambers and foul up the electronics and/or the vacuum valves.

I've had a failure on my GS where the CC got soaked in some deep off road (I know I'm talking some kinda foreign language to you FJR types but you'll have to trust me on this one; 500 pound motorcycles can go off road) and on an ensuing technical downhill, engaged itself and scared this livin' shit outta me. The water shorted out something on the board and made it go crazy.

What you'll want to do is dismount the servo, take off the connector cover, pull the connector, pull the bottom cover and take out the printed circuit board (PCB). Look for condensation on the board and inside the housing. This will tell you if you've got a water problem. If it is wet, you'll want to take the vacuum valve out and dry it off. The vacuum valve is inside the middle housing and you get at it by popping off the three clips on the three sides adjacent to the vacuum hose connection. Don't loose the little o-rings that seal the vacuum valve to the actuation chamber. They're hard to buy without purchasing another entire unit (DAMHIK).

Check the pins and contact between the vacuum valve and the PCB and the input connector and the PCB. If these get corroded, they'll cause your unit to work intermittently or not at all. Clean them with an eraser and contact cleaner. I've since used silicone dielectric grease with good results on these connections.

I've drilled a 1/4 inch hole in the cover between the vacuum valve chamber and the PCB chamber, packed the perimeter of the vacuum valve chamber with RTV and called it good to go. This seems to to the trick except for deep long water crossings and since it is unlikely any of you all are going to be riding through 2 foot deep water we can skip the deep sea proofing procedure I've had to do on the GS.

I'll try and post up some photos if there is any interest.

Have fun out there and be safe. Well not tooooo safe...

 
Top