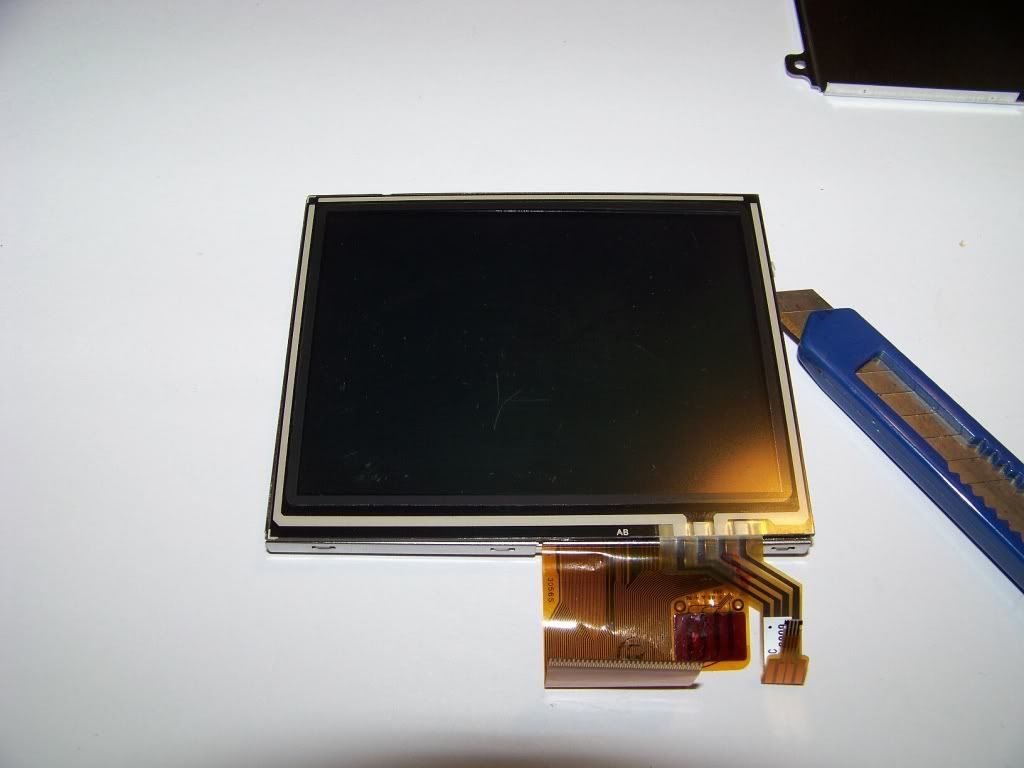
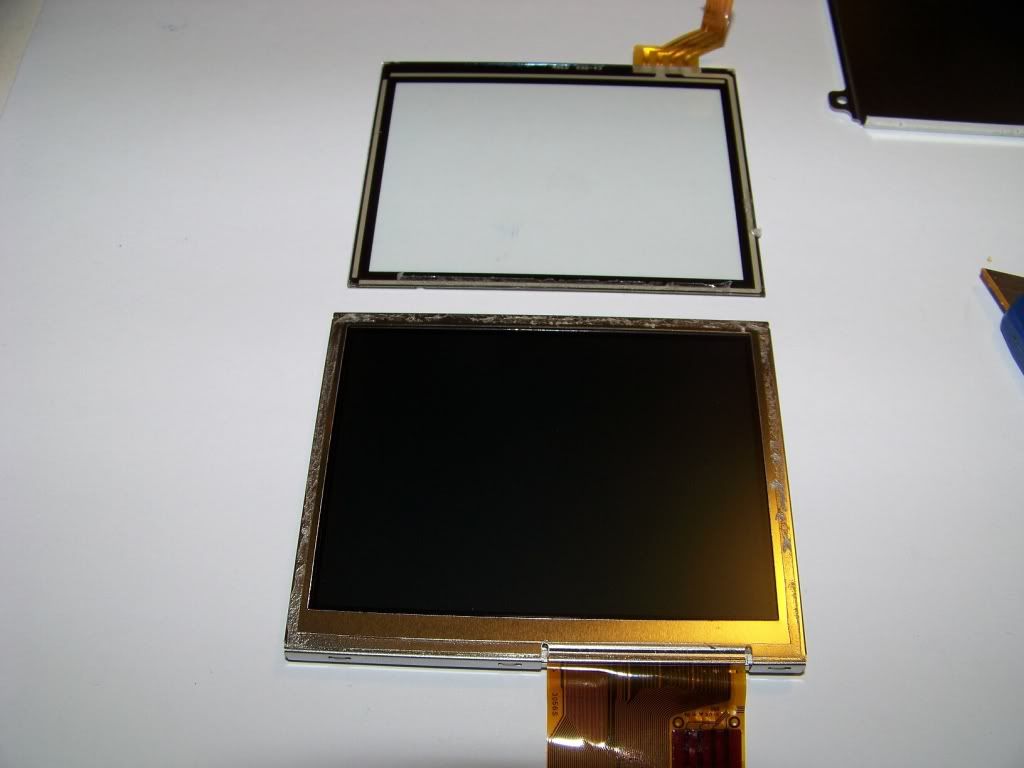
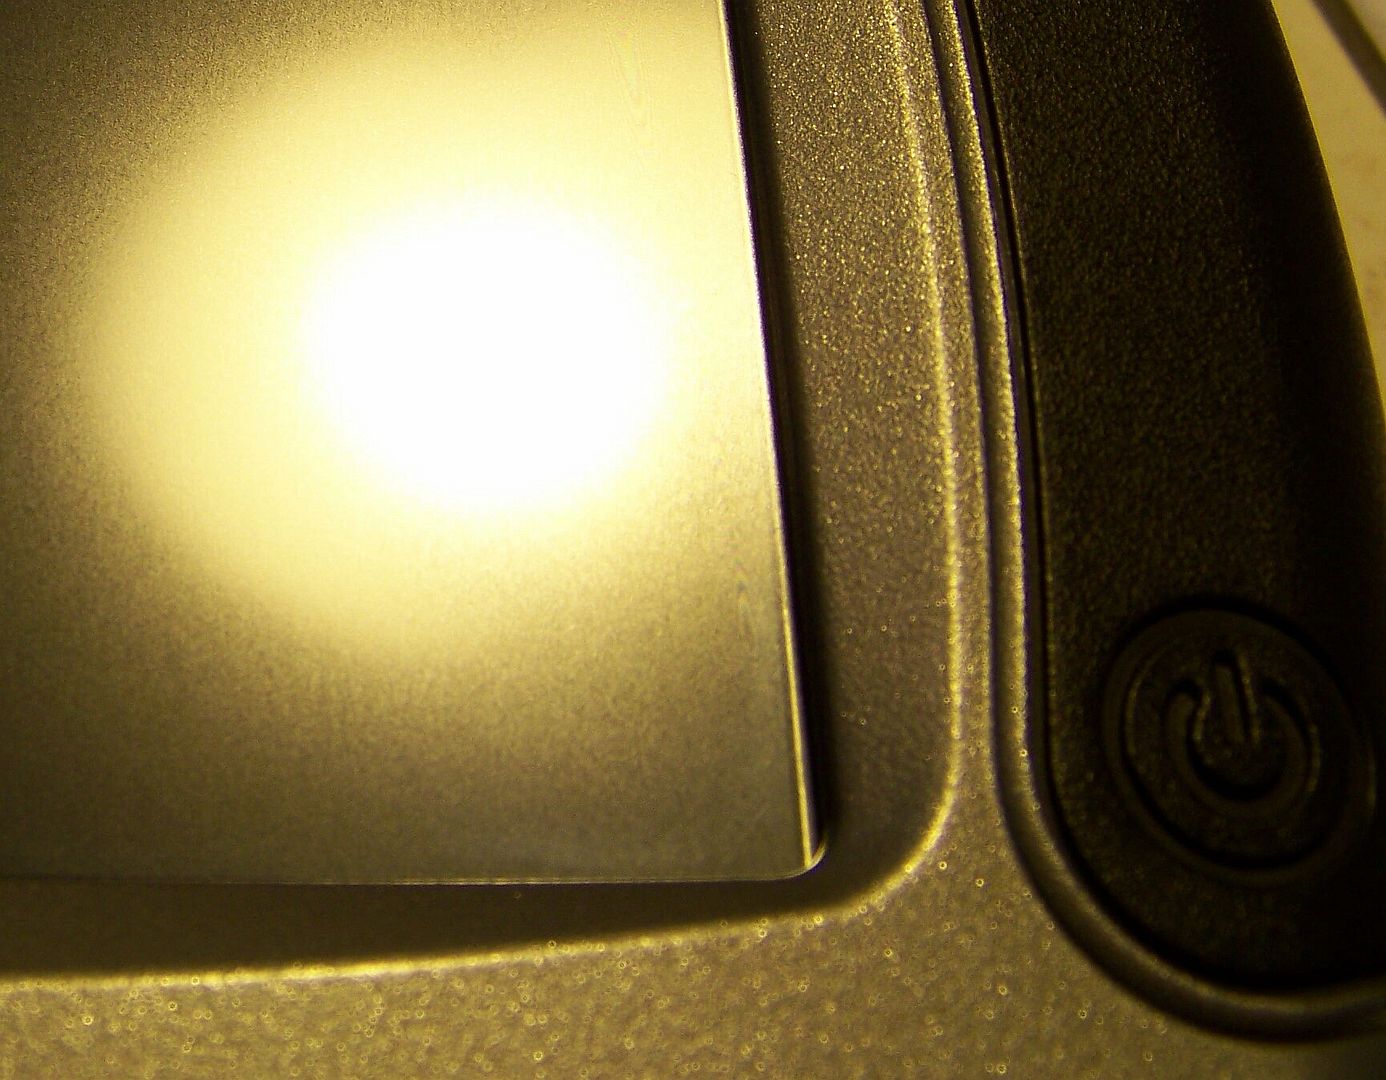
On our recent week long trip down south to EOM my Garmin Zumo 550 started acting up. I first noticed it because when going to the "overhead view" screen, (by that I mean the one you get if you just touch anywhere on the map background) if I tried to pan around by doing the old "touch and drag" the screen would get all jittery, and continue to jitter even when released, or if I tried to touch it again (to exit) it would ignore my touches.
At first I thought I had a bogus firmware update (as I had foolishly just updated the GPS's software version before the trip), but after downgrading to the prior version one night the problem returned (eventually). As the problem worsened it would sometimes look like there was a "ghost in the machine" and I would get some phantom button pushes showing up occasionally causing the GPS to switch screens, etc.
Having some familiarity with touch screen mechanisms (from work), I tried cleaning around the edges of the touch screen with a folded piece of paper. That reduced the phantom button pushes enough to allow me to use the GPS well enough to get home.
Once home, I researched the problem on the intarwebs. This is a fairly common complaint with these units and there are replacement touch screen digitizers available on eBay. I purchased one from eBay seller mingxing200808 for only $19.18 including shipping from Hong Kong. In the auction he instructs buyers to be sure to mention that you need the installation tools and he will include them free. If you fail to mention it, no free tools.
The free shipping took almost two weeks, but the digitizer and tools arrived yesterday.
Using this detailed screen replacement post on the ADV forum as a reference, I dug into the Zumo this morning to see what I could do to fix it. As stated in the linked post, the Torx driver needed to open the Zumo's cases is a T-7.
The "free tools" that were provided were pretty cheesy and both were the wrong size. The Phillips screwdriver is too small for the inside screws and pretty much useless, and the Torx driver is something even smaller than a "T-7".
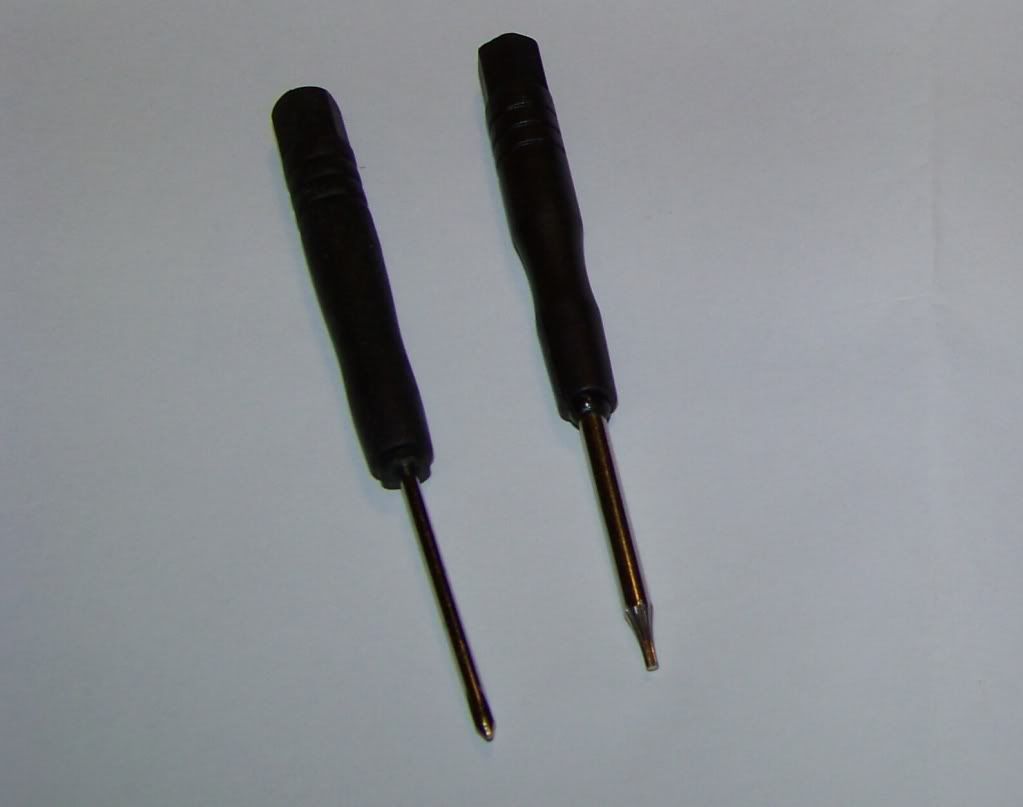
But, before I ran out and bought a new T-7 driver, I noticed that the Torx tip on the little free tool was tapered, so figured what the hell, and just filed down the tip a little bit until it fit the T-7 screws.
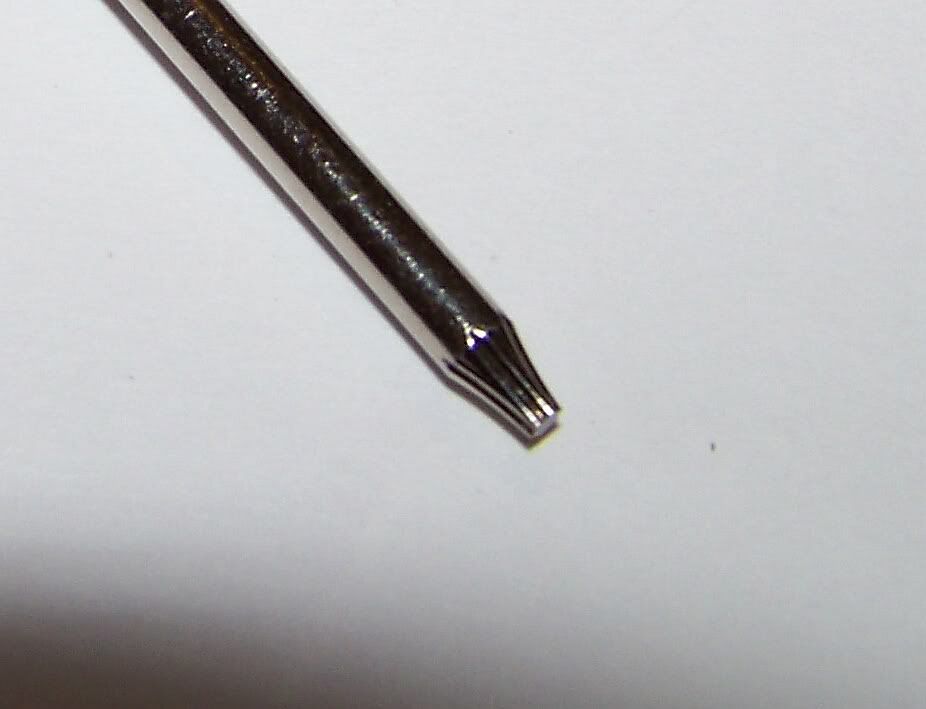
I then jammed a 1/4" inch drive 9/32" socket onto the hex shaped end to make it a little easier to break the screws loose with a 1/4" ratchet handle while firmly pressing the tip of the tool into the screws.
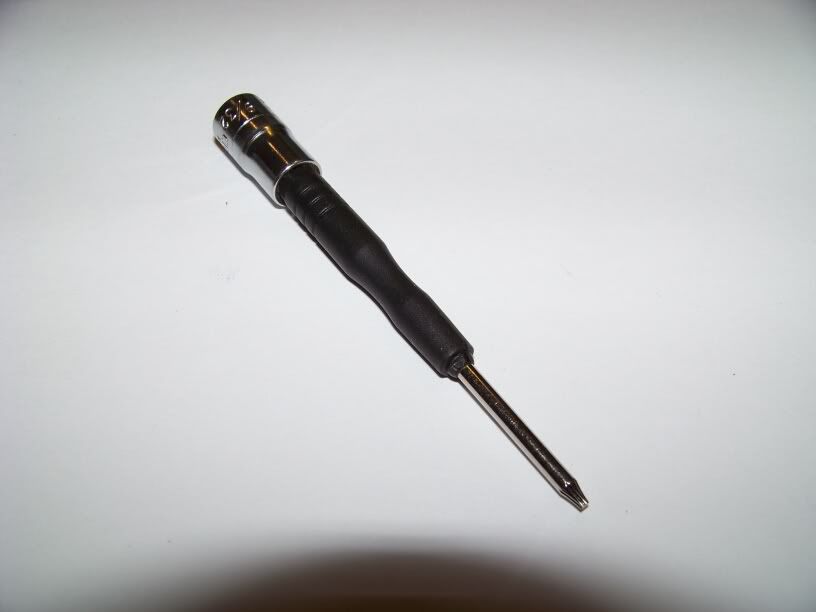
My modified tool worked perfectly. :yahoo:
I followed the first few steps in the linked ADV post, but have a few things to add to those instructions.
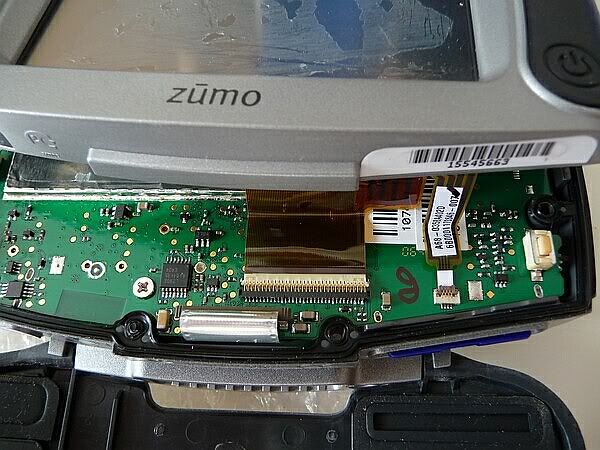
Once you get the cases of the Zumo split and it's time to disconnect the two ribbon cables from the PC board, the ADV procedure doesn't make it clear how the cables clip in. In the below picture (stolen from the ADV post) you can see the two ribbon cables clipped into place as you will find them. To release them you need to fold the small white and brown flaps over the top of the cables towards you on the wide and narrow ribbon cables respectively. They flip open towards the connector with the hinge side being closest to the connector.
Here's a view of the connectors with the flaps flipped open and two ribbons removed
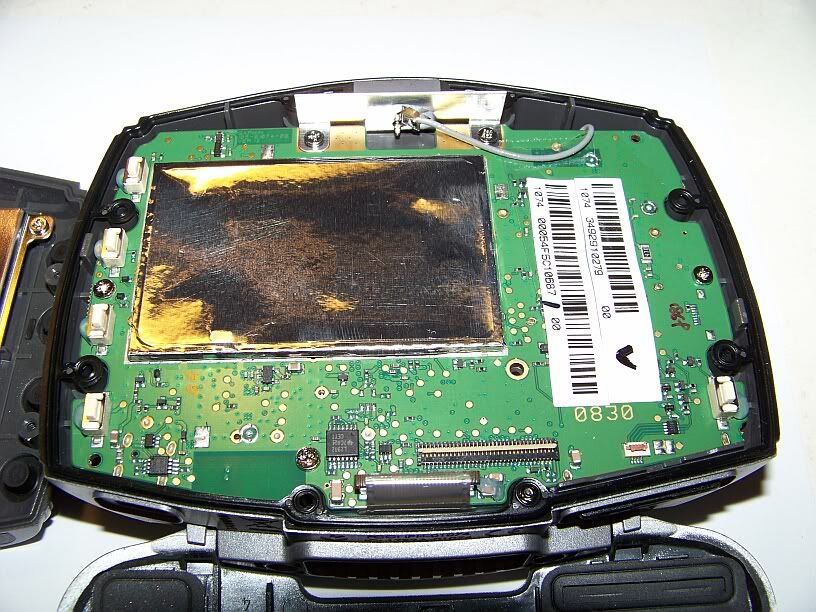
Once I had the cables off, I removed the four Phillips screws and removed the touchscreen assembly from the front half of the clam-shell cover, per the ADV procedure. But then rather than diving in and separating the touch digitizer from the LCD display screen (per the procedure) in preparation for installing the new one, I decided to just clean up the entire touch screen surface with some mild glass cleaner (Stoners Invisible Glass - good stuff BTW) and also clean up the rubber profile gasket that forms the watertight seal between the front of the touch screen and the front cover.
Sorry, I forgot to get a picture of that gasket, but it is like many profile gaskets in that it has a ridge that fits into a corresponding groove in the cover, and squishes against the flat touch screen on the other side.
I didn't really think that this was going to solve my problems, but after the cleaning and reassembling it appears my touch screen is behaving itself once again. For how long is to be seen. :huh: But if it does start acting up again I have the replacement screen at the ready and know where to find the procedure to do it.
A couple of notes about re-assembly:
You have to place the front cover upside down on the work bench and be careful to get the rubber profile gasket aligned and seated in the cover's grooves before then placing the flat screen down on top of it. You will not want to slide the screen around as you may dislodge the gasket, so try to drop the screen straight down correctly.
Also, when connecting the ribbon cables be sure that they are pushed as far down into the connectors (towards you)as possible before flipping the flaps that secures them. It's a little bit fiddly, especially if you have fat fingers like mine.
Just thought I would pass along this info in case anyone else comes across the apparently all too common problem of the ghost in the Zumo.
At first I thought I had a bogus firmware update (as I had foolishly just updated the GPS's software version before the trip), but after downgrading to the prior version one night the problem returned (eventually). As the problem worsened it would sometimes look like there was a "ghost in the machine" and I would get some phantom button pushes showing up occasionally causing the GPS to switch screens, etc.
Having some familiarity with touch screen mechanisms (from work), I tried cleaning around the edges of the touch screen with a folded piece of paper. That reduced the phantom button pushes enough to allow me to use the GPS well enough to get home.
Once home, I researched the problem on the intarwebs. This is a fairly common complaint with these units and there are replacement touch screen digitizers available on eBay. I purchased one from eBay seller mingxing200808 for only $19.18 including shipping from Hong Kong. In the auction he instructs buyers to be sure to mention that you need the installation tools and he will include them free. If you fail to mention it, no free tools.
The free shipping took almost two weeks, but the digitizer and tools arrived yesterday.
Using this detailed screen replacement post on the ADV forum as a reference, I dug into the Zumo this morning to see what I could do to fix it. As stated in the linked post, the Torx driver needed to open the Zumo's cases is a T-7.
The "free tools" that were provided were pretty cheesy and both were the wrong size. The Phillips screwdriver is too small for the inside screws and pretty much useless, and the Torx driver is something even smaller than a "T-7".

But, before I ran out and bought a new T-7 driver, I noticed that the Torx tip on the little free tool was tapered, so figured what the hell, and just filed down the tip a little bit until it fit the T-7 screws.

I then jammed a 1/4" inch drive 9/32" socket onto the hex shaped end to make it a little easier to break the screws loose with a 1/4" ratchet handle while firmly pressing the tip of the tool into the screws.

My modified tool worked perfectly. :yahoo:
I followed the first few steps in the linked ADV post, but have a few things to add to those instructions.
Once you get the cases of the Zumo split and it's time to disconnect the two ribbon cables from the PC board, the ADV procedure doesn't make it clear how the cables clip in. In the below picture (stolen from the ADV post) you can see the two ribbon cables clipped into place as you will find them. To release them you need to fold the small white and brown flaps over the top of the cables towards you on the wide and narrow ribbon cables respectively. They flip open towards the connector with the hinge side being closest to the connector.

Here's a view of the connectors with the flaps flipped open and two ribbons removed

Once I had the cables off, I removed the four Phillips screws and removed the touchscreen assembly from the front half of the clam-shell cover, per the ADV procedure. But then rather than diving in and separating the touch digitizer from the LCD display screen (per the procedure) in preparation for installing the new one, I decided to just clean up the entire touch screen surface with some mild glass cleaner (Stoners Invisible Glass - good stuff BTW) and also clean up the rubber profile gasket that forms the watertight seal between the front of the touch screen and the front cover.
Sorry, I forgot to get a picture of that gasket, but it is like many profile gaskets in that it has a ridge that fits into a corresponding groove in the cover, and squishes against the flat touch screen on the other side.
I didn't really think that this was going to solve my problems, but after the cleaning and reassembling it appears my touch screen is behaving itself once again. For how long is to be seen. :huh: But if it does start acting up again I have the replacement screen at the ready and know where to find the procedure to do it.
A couple of notes about re-assembly:
You have to place the front cover upside down on the work bench and be careful to get the rubber profile gasket aligned and seated in the cover's grooves before then placing the flat screen down on top of it. You will not want to slide the screen around as you may dislodge the gasket, so try to drop the screen straight down correctly.
Also, when connecting the ribbon cables be sure that they are pushed as far down into the connectors (towards you)as possible before flipping the flaps that secures them. It's a little bit fiddly, especially if you have fat fingers like mine.
Just thought I would pass along this info in case anyone else comes across the apparently all too common problem of the ghost in the Zumo.
Last edited by a moderator:


