Silver Penguin
Silver Penguin
A Crash Course For The Motorcyclist
The following is from notes taken during a lecture by Joy Medved, of The Joy Of Motorcycling, Inc, presented to the Epicurean Riders on 1-28-07. Joy is an 18yr motorcyclist, with extensive experience of riding and of participation in accidents! She has ridden 400,000 miles mostly on Goldwings. Her experience includes Motorcycle Drill Team, MC Escort Officer, Top Gun competitor, MSF instructor for both civilian and military, and teaching motorcycle traffic school. You can contact her at [email protected]
As more people become certified in basic Accident Scene Management, Joy hopes to bring an advanced level course to California. These courses originated in Wisconsin with Vicki Roberts-Sanfelipo RN/EMT in December 1996.
This course is not endorsed by MSF. Some of the teaching materials are filmed in Wisconsin and depict riders not wearing helmets. Since MSF requires the use of a helmet at all times, when riding, they refuse to sanction the course.
Further information may be found at www.accidentscene.org
The notes are shared here, for those who were unable to make the class. However, these notes cannot replace the experience of being in a live class. Should the opportunity present itself, I highly recommend that you enroll for an Accident Scene Management class.
Difference between a crash and an accident;
A crash is predictable and preventable. An accident involves something unforeseen e.g. a meteor landing on you.
Goals of this course;
1. To reduce victim injuries and fatalities.
2. To reduce injuries to rescuers.
3. To increase the effectiveness of Emergency Medical Services.
4. To address motorcycle specific concerns.
At the scene of an accident, civilians have no obligation to offer aid but professionally trained people such as police officers, doctors, nurses etc are expected to help. To protect all who help the injured, CA Health and Safety Code 1799.102 states that ‘No person who in good faith and not for compensation renders emergency care at the scene of an emergency shall be liable for any civil damages resulting from any kind of omission. This does not apply to gross negligence.
The above was qualified by re-stating IN GOOD FAITH, and within the scope of training received.
In the event of a fatality, First responders to an accident scene must offer aid unless the victim is obviously decapitated or decomposed. Otherwise, only a physician can pronounce a victim to be dead, so rescue efforts continue until that happens.
Other legal concerns.
1. Ask the victim if they need your help. If they say no, any assistance may be seen as assault and battery. However, if a law enforcement officer is present, he/she can take the victim into temporary custody, which allows aid to be rendered.
2. An unconscious victim has implied consent for you to assist.
3. Once you’ve started to help, you must continue until either relieved by someone else, or to the limits of your physical capability. Anything less is considered abandonment.
4. If the victim carries a Do-Not-Resuscitate order, consent to aid is denied.
5. Look for medic-alert bracelets, necklaces or an e-health key.
6. If you personally have a DNR, allergies or health issues, a medic-alert device is essential. Look at www.medicalert.org to see what’s new.
The whole course is based around the acronym P.A.C.T.
P Prevent further injury
A Assess the situation
C Contact the EMS
T Treat the injured
Preventing further injury is accomplished by the following;
1. Someone takes charge of the situation (cue slide of George S. Patton). This will be the person with the most experience, who will delegate responsibilities. Riding groups can set up who will do this before leaving, but it may change depending on circumstances. It is recommended that each and every rider carry a first aid kit on their bike.
2. Secure the scene. This minimizes the risk to both the victim and the rescuer. Solicit help from drivers, and use their vehicles to shield the injured. Turn on hazard lights but do not point headlights towards oncoming traffic. It’s OK to hold up and/or inconvenience other road users, in the name of safety. Be aware of fluid spills on the road. Don’t smoke. Don’t ride in Orlando, FL where they even have road signs advising drivers to pull damaged vehicles to the shoulder after fender benders. (There was a photo of one of the signs).
3. Ensure maximum visibility. If you carry, and use flares, the CHP will replace however many you used at the scene. Place flares 100 feet from the scene. Look carefully for a passenger who may have been thrown from the bike. Joy gave the example of one rider who was found on TOP of a three storey building after a collision. Reflective vests help. Reflective triangles are useful. There are various kinds of flashlights available, some with cranks, some shaken to operate, some with headstraps.
4. Control Traffic. At 55mph it takes 185 feet to come to a stop AFTER the driver has seen you. Alert drivers as soon as possible to the danger ahead. Wave a white t-shirt, or a motorcycle jacket. Even better if you have a really big guy wearing a Hi-Viz Yellow Aerostich suit.
5. Prevent transmission of disease. A leather-clad biker/rescuer is actually pretty well protected from the victim’s body fluids. The gear protects YOU from the victim. HIV, hepatitis C and TB are on the rise. Carry non-latex gloves and replace them frequently. After assisting a victim, remember to wash your hands or use hand-gel before touching anything important, including your own bike. Keeping your protective gloves in a zip-lock baggie gives you a place to put your contaminated gloves afterwards.
6. Preserve evidence. You can buy a 27 exposure disposable camera with flash, for around $3 at Wal-Mart. This uses 35mm film, which is admissible as evidence. Due to the popularity of PhotoShop, digital images cannot be used in court by the lay person. Don’t move anything at the scene. Make notes. Write down names, location, license plates, witness names and phone #s. Make a sketch of how things happened.
7. Move the injured, if necessary. If the victim isn’t breathing, you’ll have to get him to a position where his airway is open. This is more important than immobilizing his c-spine. If the bike is lying on the victim, hot pipes may be burning his leg. Two or more people can gentle separate rider and bike. If the victim is lying in a pool of gasoline, he needs to be moved. If you cannot control traffic, especially after dark, the victim will have to be moved. Turn the bike’s ignition off. Beware of sharp, broken motorcycle parts especially on choppers.
How to move a victim.
There are three ways to do this, all with respect to possible spinal injury. The victim can be log-rolled. Rescuer #1 supports the head, keeping it aligned with the body at all times. Rescuers #2 and #3 take the chest and hips, interlinking their arms, to get a smooth turn.
Secondly, the victim can be log rolled onto a blanket (or riding jacket) then dragged. Remember to keep the spine straight.
Third is the armpit drag, which one person can do. Put your arms under the victim’s armpits. Hold his spine. Don’t pull via a jacket. Use your knees rather than your back to take the weight.
Assessment of the situation.
If you know what type of crash, and where the impact was, you may be able to predict the likely injuries. Types of crashes are:
1. Failure to negotiate – high side or low side.
2. Right of way violation – t-bone, sideswipe, u-turn
3. Loss of traction – debris, liquid
4. Mechanical failure – locked chain, tire blow out.
Types of impact
1. Motorcycle hits something
2. Rider/ passenger hits obstacle/ground
3. Internal organs hit internal stuff.
Types of injury
1. Road rash
2. Bones – especially collar bones
3. Head trauma. Usually slight concussion at very least.
4. Head and neck injuries involve the brain and spine.
5. Chest injuries involve the ribs, lungs and heart.
6. Abdominal injuries involve the stomach, liver, spleen and kidney
7. Orthopedic injuries involved the bones and soft tissue
During a T-bone accident, the rider may experience femur fractures when the thighs hit the handlebars. The lungs will hyperinflate during the ‘Oh Sh*t’ moment. Broken ribs can pierce the lungs causing flail chest and a pneumothorax. Wrists, elbows and collarbone will shatter on impact and the spine can suffer compression fractures. Andy Hall can provide more details if required!
A sideswipe collision will cause road rash unless good gear is worn. Orthopedic injuries are likely. Someone mentioned REAL skid marks.
Low side events will take out an ankle and collar bone. There is a possibility of a head injury and friction burns INSIDE the leathers are likely.
A slide was shown of an unprotected rider flying over the top of a car. If he survived, he would have orthopedic injuries and severe bleeding. Good grade leather will disperse force, but not if you don’t wear it. The tennis shoes had already come off the feet. Later, a slide was shown to those who were willing to keep their eyes open, of a shoe with a foot inside it. No leg attached.
Remember to look for a passenger at the scene of an accident. If the bike has a basket, or side car, there may be a dog. When scared, animals can get nasty. Keep your leathers on, for protection against a frightened dog.
Contacting the Emergency Medical Services
1. Make a quick assessment before calling 911, especially if sending someone to a remote phone. They will need to provide basic information to assist the dispatcher.
2. Use a land line if possible. The call goes straight to the local EMS and can be tracked back to the phone. Even if you don’t know where you’re calling from, they do.
3. When sending someone to make a 911 call, ask them to report back to you and confirm that the call was made.
4. If sending someone to a private phone, send ‘Lovely Lisa’ rather than ‘Scary Hairy’. She will get access to the phone faster and more easily.
5. Statistically, aid rendered during that first hour after injury, aka the Golden Hour has the best chance of saving life.
6. When calling 911, have as much information as possible to hand. They will want to know: Your name and #. Location and identifiable landmarks. What happened? How many vehicles, and of what type? How many are injured? Possible types of injury? Traffic? Weather conditions at site? Anyone trapped? Don’t hang up until dismissed by the dispatcher. Report back to the scene, to confirm that help is on the way.
7. When the EMS arrive, flag them down and direct them to the injured.
Assessing the injured.
Use the acronym SAMPLE
S Symptoms. Where does it hurt?
A Allergies.
M Medications. What does the victim usually take?
P Physician. Who is the victim’s doctor?
L Last food or drink. Important information should the victim need surgery.
E Events. What happened?
Keep talking to the victim. Learn his name, and use it over and over again. Keep him conscious if possible.
Treat the injured
Use the mnemonic ABCSS
A Airway
B Breathing
C Circulation
S Shock
S Spinal immobilization
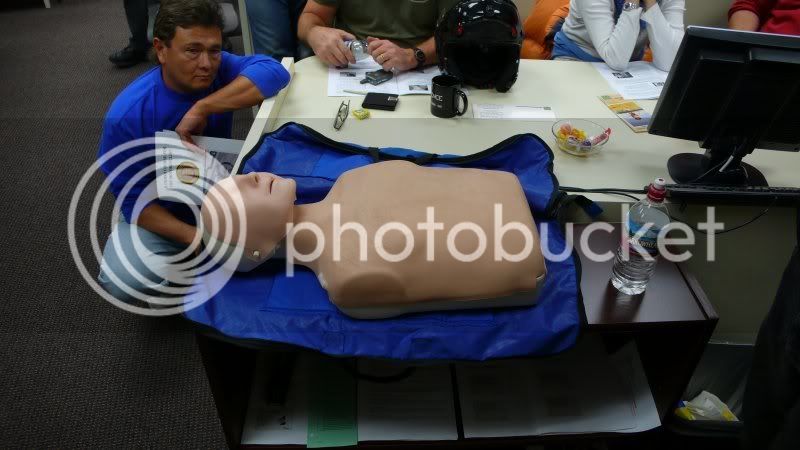
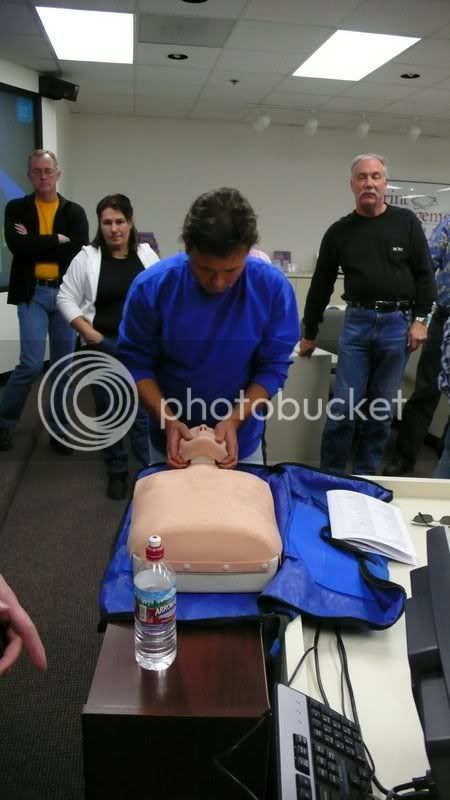
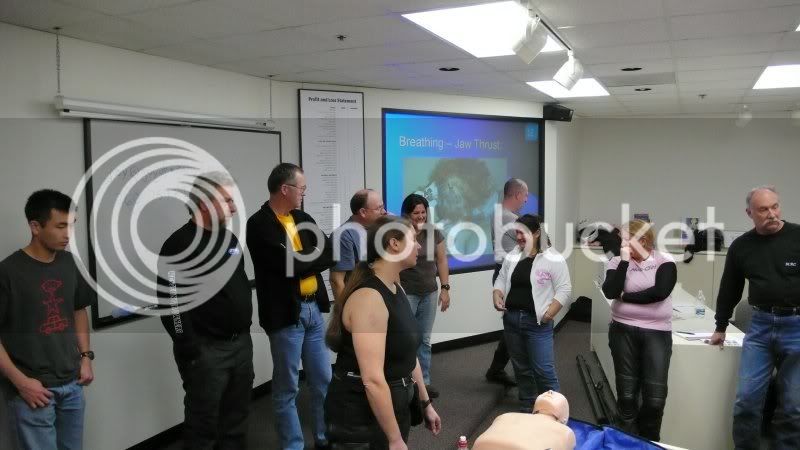
To open/maintain a patent airway, use the jaw thrust technique rather than the usual head tilt/chin lift. Jaw thrust is safer when the spine may be injured. Opening the airway may be all that is needed for the victim to breathe on his own. If not, rescue breathing may be delivered using one of many commercially available barrier devices. Mouth-to-mouth may also be given without a barrier. I choose to carry a $7 mask that folds into a small key chain. When giving rescue breaths, look for chest rise.
Circulation is concerned with loss of blood. Remove rings and watches, and give back to the victim before swelling makes them hard to remove. Bleeding is controlled with direct pressure, elevation (if no fracture present) and the use of pressure points. Tourniquets are no longer routinely used. If blood seeps through a dressing, add another. More bleeding? Add another dressing. Don’t remove sodden dressings.
There are three types of shock that might be seen at the scene of an accident.
Neurogenic shock involves injury to the brain or spinal column.
Hypovolemic shock is caused by bleeding. Note that you will not see internal bleeding from the outside, but it can be just as lethal as external bleeding.
Psychogenic shock is the psychological response to trauma. Hearing is the last thing to fade, so be careful how you talk about a victim. Remember that YOU may also be affected by psychogenic shock, especially if you witnessed the crash.
Shock will be manifested by most or all of the following:
Restlessness or irritability
Confusion, or drifting in and out of consciousness
Pale, cool, moist skin
Rapid breathing
Rapid heart rate
Thirst
What you do to help:
1. Keep yourself and the victim calm.
2. Control bleeding
3. Lie the victim down and raise his legs (if safe to do so)
4. Don’t give him anything to eat or drink.
5. Watch his breathing
6. Gather info while he remains conscious
7. Keep him warm and dry
8. Keep notes of changes in his condition. This will help the EMS when they arrive.
Spinal injury.
Symptoms of spinal injury include tenderness, tingling and numbness, incontinence and/or an inability to move the legs. Depending on the level of the injury, the victim may not be able to breathe.
Reassure him, remembering that the hearing is the last thing to go. Keep the spine as stable as possible.
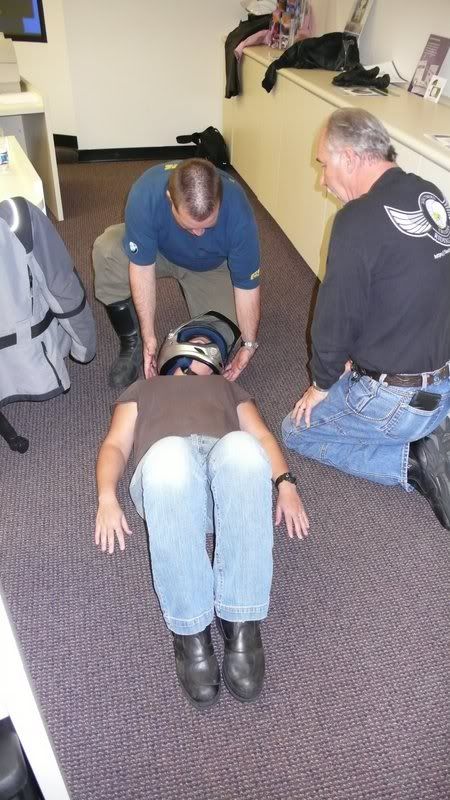
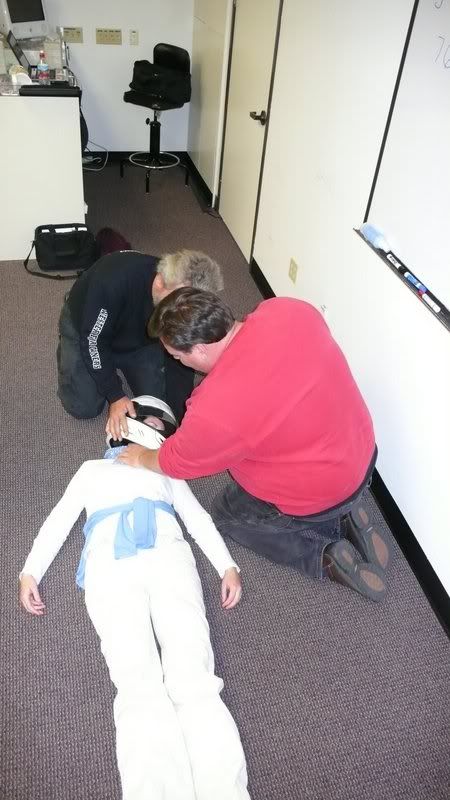
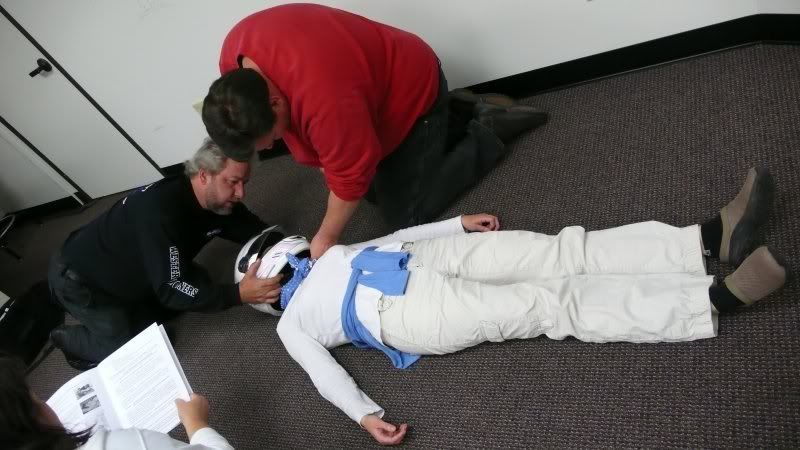
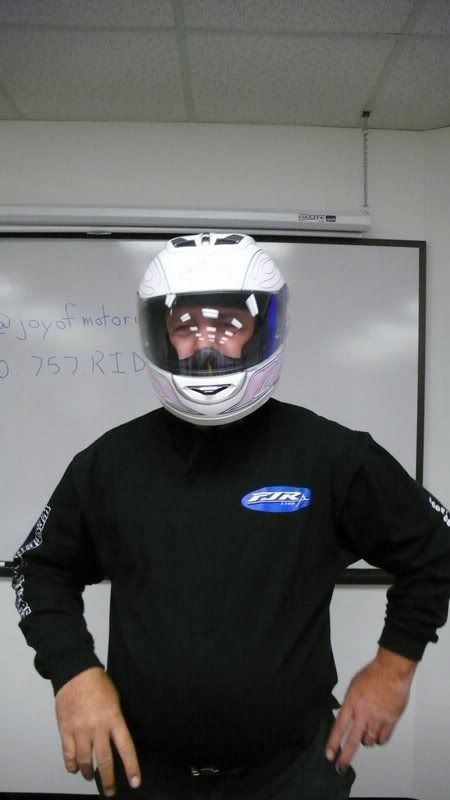
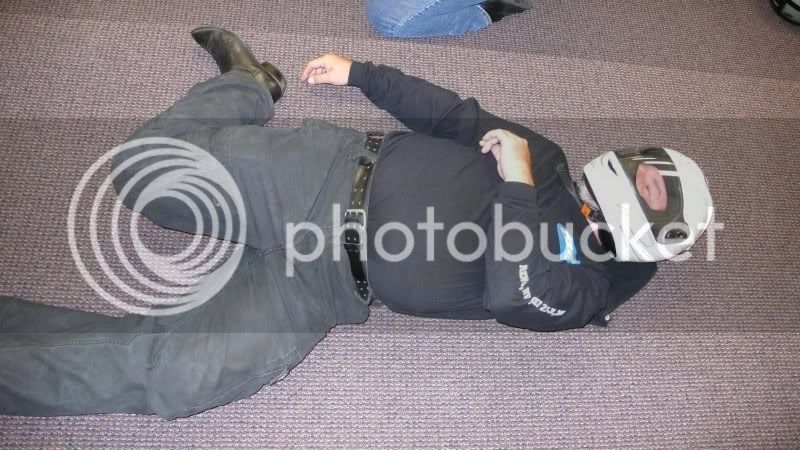
Removal of a full face helmet
Unless you have to, DON’T take the helmet off. If you have to remove it, to open the airway or give rescue breathing, here is the technique.
1. Rescuer 1 stabilizes the helmet with hands on each side of the helmet, fingers on the jaw. This prevents movement as Rescuer 2 loosens, or cuts the strap.
2. Rescuer 2 hand the ends of the strap to Rescuer 1.
3. Rescuer 2 places one hand under the neck near the helmet and the other hand on the jaw with the thumb on one side of the jaw and the index and middle finger on the other side. Note: Be sure that your grasp is on the jaw not the neck.
4. Rescuer 1 pulls the helmet off straight back, pulling out on the helmet at the straps, to clear the ears. Rescuer 2 moves the hand at the back of the neck along with the helmet as it is removed, in order to accept the weight of the head. Note: support your forearm on the ground to help support the weight of the head.
5. Rescuer 1 returns to place hands on either side of the head once the helmet has been removed. Rescuer 2 assists with head to lower to the round before removing hands.
Suggestions for a First Aid Kit
Joy does not provide a list for stocking your kit, since it’s an individual thing. You might start with a commercial kit then add your own stuff to it. Here are some basic items that you might add:
Non-Latex gloves (even if you’re not latex-sensitive, your patient might be).
Bandages and band aids
Anti-biotic cream
Tylenol – Motrin – Benadryl- Zantac
Scissors / trauma shears. Note: when cutting leathers, try to cut close to a seam
Tape
Own prescriptions
Hand sanitizer
Aloe
Ice pack (in a strong cover to prevent inadvertent activation)
Emergency blanket
Tweezers
Triangular bandage
Masks
Flushable wipes
Eye wash
Protein bars
As for carrying ‘little blue pills’, that is a personal decision. Only you can anticipate what kind of emergency you may encounter. When I stated that I administer them frequently at work, please understand that the Happy Pill can also be used for its original purpose which is the control of Pulmonary Hypertension in critically ill patients. I crush up half a pill and inject it into the feeding tube of a sick baby. (And no, it doesn’t do that to the baby boys).
The following is some general information, shared by retired police officer Fred Lebhardt. His extensive experience includes being a helicopter pilot, army flight instructor, air traffic controller, patrol officer and investigator, traffic school instructor.
Fred shared a lot of information and anecdotes, just a portion of which is included here.
When an officer ‘lights you up’, here are his suggestions for minimizing the trauma of a traffic stop.
1. Stop when you feel safe. If you’re in a bad neighborhood, indicate to the officer that you’re aware of him, then proceed to a safer area before stopping. (Leaving the county/state is not cool though).
2. Hands up, or on the bars in full view. Feet down (if they reach the floor)
3. Only remove your helmet if and when invited to do so.
4. Raise your visor when asked.
5. You must carry your license/registration/ insurance card. When asked to produce them, tell the officer where you are going to reach.
6. As you hand over the papers, remember that some nervousness is expected. If you’re completely confident, and not a fellow officer, that will raise a red flag.
7. If the stop is for DUI, the way you find your documents is part of the assessment.
8. If asked why you think you were stopped, don’t incriminate yourself. Ask politely why the officer stopped you.
9. As the officer returns to his vehicle to process your information, he is making the decision about the ticket. A citation is actually a PIA for him, requiring a lot of paperwork. He may feel that his job was done by educating you, then let you off with a warning. However, you can also talk yourself INTO a citation.
10. Attitude check. Remember – the audio/video is probably rolling.
11. If you DO get a ticket, the officer will set the court date for his day off work, to ensure that he will be available. You are entitled to one continuance, no questions asked. That second date may be on his scheduled work day. He will attempt to fit the court appearance into his day, but may not be able to. No show by the office = case dismissed.
12. If you DO get a ticket, it will represent approximately 2000 occasions upon which you could have been awarded one, and didn’t get one.
The above represents notes takes while a retired officer chatted to us. Please don’t even THINK that this constitutes legal advice. Use your common sense during any traffic stop.


