Auxiliary Cell Design

Yamaha FJR Motorcycle Forum

Help Support Yamaha FJR Motorcycle Forum:

This site may earn a commission from merchant affiliate links, including eBay, Amazon, and others.

Joe2Lmaker

Well-known member
Joined
Jul 1, 2006
Messages
2,162
Reaction score
50
Location
Fridley, MN
Edit Oct 16, 2009: I started this thread back in 2007 as sort of a winter project. My idea was that I would share the entire process of design and fabrication. I thought it might be interesting for others to be part of the process beginning with defining the design parameters, and finishing with a working auxiliary tank. Just as I'm not a carpenter, but I still like watching Norm Abram and his New Yankee Workshop.

I didn't expect that the finished tank would only be the first. It wasn't until after I had my Tanji style tank finished and spent some time using it, that I changed my mind about my original design parameters. I've added this note for those who haven't been following this thread and are taking a look at it beginning with the first post. I hope you find some useful information here.

Dean Tanji designed an excellent a fuel cell. "FlatBed Fuel Cell" & Luggage Rack

These are no longer available. I've researched all kinds of solutions, but I really want a low profile with a flat top. I've decided to fabricate my own version.

I'm going to share my design ideas here. Hopefully this will be a project that some of you will find interesting.

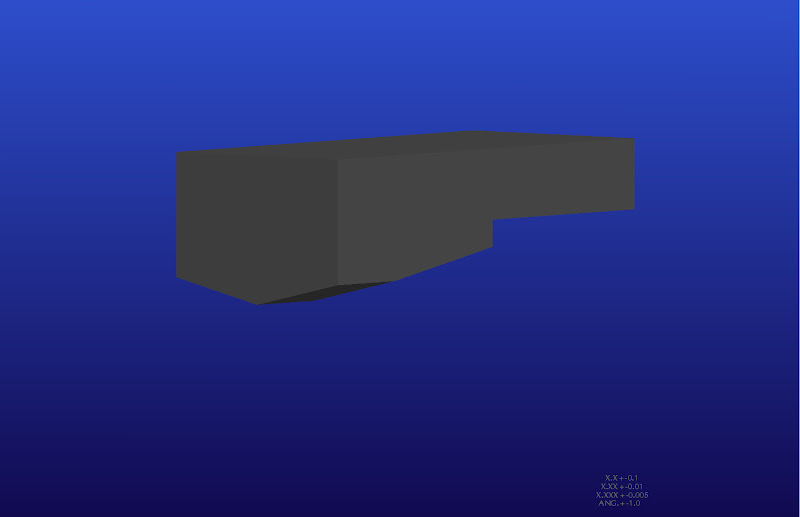
Here's the first CAD model:

(volume checks a little over the 4.8 gallon goal)
1st%20front%20side.jpg


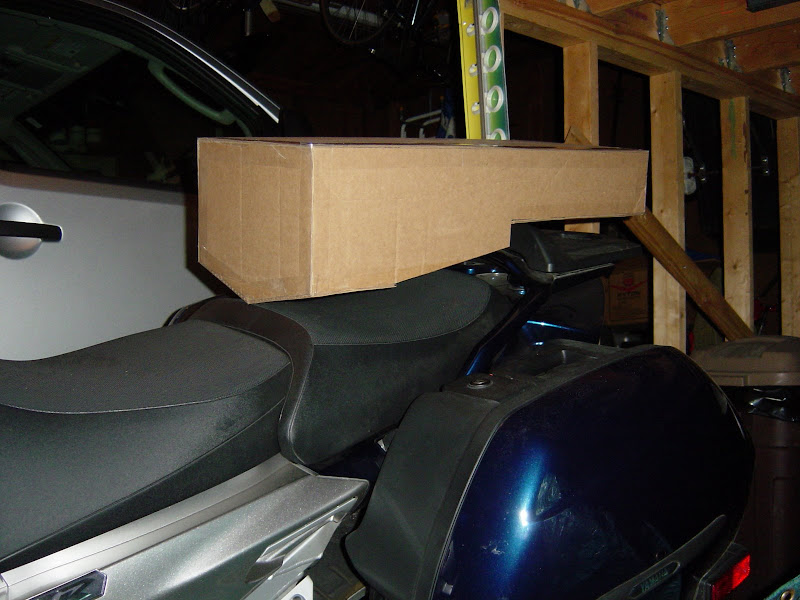
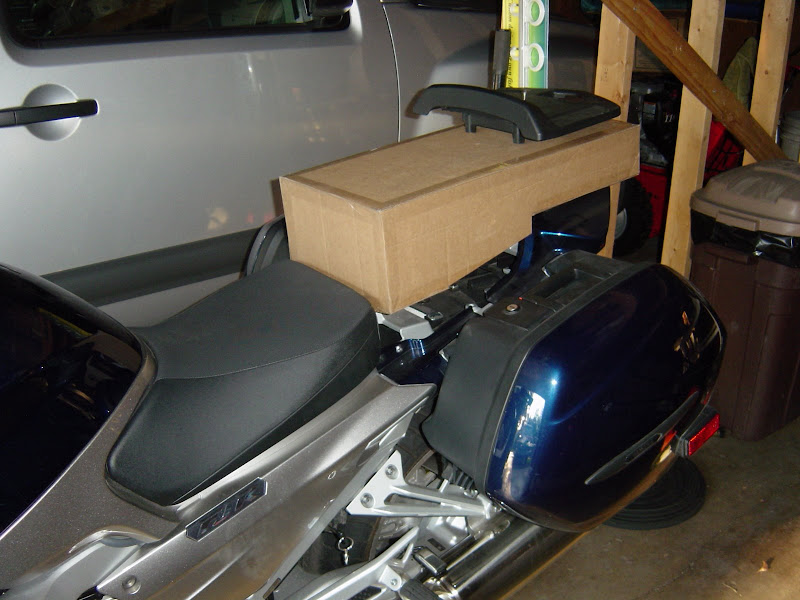
Here's the same view of the mock up:

DSC03313.JPG


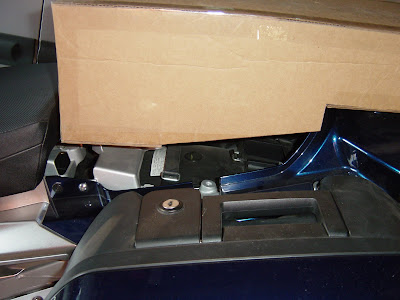
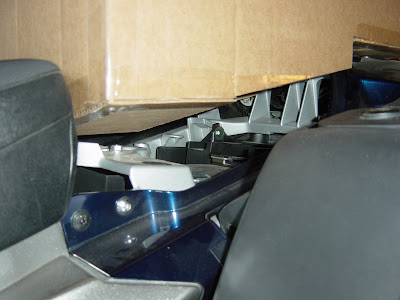
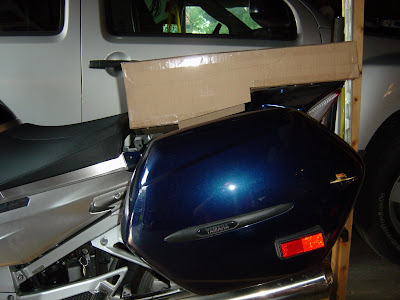
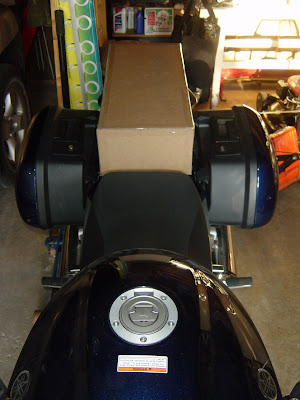
More views of the scale model with the rear seat removed:
DSC03319.JPG
DSC03323.JPG


DSC03325.JPG
DSC03327.JPG


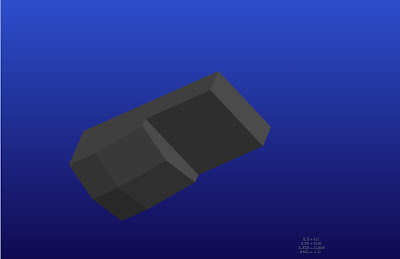
Here's sort of a bottom isometric view of the CAD model:
1st%20bottom.jpg


I wish I knew how to make a movie of the CAD model rotating. It would make it easier to visualize.

I already don't like how the flat top isn't level. I'll have to make some changes to correct that.

I'm open to suggestions. I'm trying to consider everything before I start cutting material.

 
Last edited by a moderator:
Joe2Lmaker,

My intent is not to hijack this thread - but had you considered this?
That's not a hijack. It's a design suggestion. That's right on topic.

To answer your question though, yes I did see your write up on that. Definitely has its advantages, but I'm liking gravity feed at this point.

(edited to clean up the quotes)

 
Last edited by a moderator:
Joe2Lmaker,
My intent is not to hijack this thread - but had you considered this?
That's not a hijack. It's a design suggestion. That's right on topic.

To answer your question though, yes I did see your write up on that. Definitely has its advantages, but I'm liking gravity feed at this point.
Gravity certainly has it's advantages - as it doesn't rely on DC power for the pump - and, (as far as I know) has never stopped.

There's lots of folks on this forum with fuel cells - I look forward to their chiming in on your design.

What I like about your design (as well as Dean's) is the large flat surface it provides. This has it's advantages.

Do you have the capacity to do your own fab work? TIG welding, etc.? Not having to farm this out is a huge savings in the cost of the tank.

How about integration of a rider's backrest? Your design would support it - That would be huge !

 
Do you have the capacity to do your own fab work? TIG welding, etc.? Not having to farm this out is a huge savings in the cost of the tank.
The only TIG welding experience I have is with micro-TIG welding. I used to think that being able to control the heat so I could lay down a .015" bead on the corner of an injection mold component meant that I could weld about anything. Now I'd be o.k. letting someone else do it. I'll do the design, build a weld fixture, cut the pieces, then hand it off. I do own a Thermal Arc Fabricator 131. I could use that. It depends on what kind of qotes I get.

How about integration of a rider's backrest? Your design would support it - That would be huge !
Rider back rest, integrated mounts for the Yamaha trunk and/or Givi Monokey, and room left over!

(edited to clean up the quotes)

 
Last edited by a moderator:
The only real 'problem' I see with your design is there is no flat surface on the bottom for the fuel fitting. Where are you going to have your fuel drain from?

Also, if your going to design it, you might as well design it to meet the 2007 IBA rules so don't forget to design in some baffles.

 
Last edited by a moderator:
I like this idea a lot - also the gravity feed - keeping it simple and reliable.

Would you consider altering the design to use the room where the passenger seat mounts. Remove that, since most LD rides are not done with a pillion and incorporate the fuel cell to fill that area and extend to the back. (Gotta have room for my trunk, though)

Similar to the Corbin Smuggler design, but for fuel.

All in all, I'd say you're on to something here...

Dang - another good idea I didn't think of!!

 
Would you consider altering the design to use the room where the passenger seat mounts. Remove that, since most LD rides are not done with a pillion and incorporate the fuel cell to fill that area and extend to the back.
I think that's the way this is designed...to take the place of the passenger *** perch.

 
good comments about where to place the feed connector, a place to mount a Givi Monokey trunk, bungee locations, and a capacity that keeps it within IBR rules (OEM+fuel cell capacity NTE x.x gallons).

 
Although minor, perhaps some "stand-offs" on the back that could accommodate some form of aftermarket brake lights (such as LED light bars for Back-Off Modules, etc.)

 
Three comments.

I'd like to see the "backrest" portion (leading edge) of the design tipped backward at a 5 to 10 degree angle from vertical.

I'd also like to see the top of the unit parallel with the ground once installed. This will raise the leading edge and increase the volume slightly.

Light mounts are highly desirable as suggested, but you might want to add other tabs for antenna mounts / helmet locks. Maybe a simple flange / extension off the back would allow farklers to attach their own aluminum angle for whatever they want back there.

 
Thanks for keeping this going. This is all good stuff.

The only real 'problem' I see with your design is there is no flat surface on the bottom for the fuel fitting. Where are you going to have your fuel drain from?
Excellent question. The bottom was designed that way for two reasons. 1. I wanted to avoid a flat bottom because it seemed to me that a flat bottom would allow the fuel to pool at some level. That volume, however small, would be unusable. 2. I want some way to trap some of the fuel around the outlet so that during steep inclines (or declines?) and rapid acceleration some fuel is always available.

I was planning on putting the fitting on the lowest point of the front face. Picture the outlet right where that "V" is on the front. Even if the container is tipped back, there is still some fuel to drain.

Also, if your going to design it, you might as well design it to meet the 2007 IBA rules so don't forget to design in some baffles.
I'm not smart enough to figure out baffles. (Could it be I find baffles baffling?) I was planning on using foam. For some reason, I keep thinking of baffles like baffles in a waterbed. They seem complicated. If there was an inexpensive way to baffle the thing, I'm all for it.

Would you consider altering the design to use the room where the passenger seat mounts. Remove that, since most LD rides are not done with a pillion and incorporate the fuel cell to fill that area and extend to the back. (Gotta have room for my trunk, though)Similar to the Corbin Smuggler design, but for fuel.
My mistake. That photo of the scale model resting on the back seat is a little confusing. By the time I had trasfered the paper prints to cardboard, cut them out and taped them together I was too tired to take the three extra minutes necessary to remove the rear seat and grab bar.

I included that photo to show the cardboard model at the same angle as the CAD model.

Some of the other photos were taken the next day, and the cardboard model is dropped into the space created after the rear passenger seat was removed.

The plan is to make the flat top so that your trunk will attach to the top. Here's a shot showing my Yamaha trunk Mount resting on the mock-up to show what I mean:

DSC03329.JPG


That Corbin Smuggler reference is useful. I wonder if I could mold a skirt out of foam and fiberglass to blend the tank into the bike. Hhmmm

Any EAA members out there with advice on how complicated (i.e. expensive) that would be?

Although minor, perhaps some "stand-offs" on the back that could accommodate some form of aftermarket brake lights (such as LED light bars for Back-Off Modules, etc.)
One cannot have too many brake lights.

Three comments.
I'd like to see the "backrest" portion (leading edge) of the design tipped backward at a 5 to 10 degree angle from vertical.

I'd also like to see the top of the unit parallel with the ground once installed. This will raise the leading edge and increase the volume slightly.

Light mounts are highly desirable as suggested, but you might want to add other tabs for antenna mounts / helmet locks. Maybe a simple flange / extension off the back would allow farklers to attach their own aluminum angle for whatever they want back there.
Very good ideas. I especially like flange off the back. Makes me think of Rob Nye's setup.

Parallel with the ground is what I meant when I wrote: "I already don't like how the flat top isn't level. I'll have to make some changes to correct that."

And, ...can you mount it on a seatpan?
Not if we want it to be IBR compliant. Gotta go right to the frame.

 
There is some benefit to having a minimal amount of unused fuel. SOMETIMES water settles out of suspension or it rains into your filler. Further, there is often debris that enters the fuel tank. Simple condensation can add water to the tank, and if the pickup is all the way at the bottom, your first batch from the aux tank will be water. Switch over from the main to the aux and the bike dies? Not a desirable feature.

Using a 1/2 inch high flange (or pipe fitting or whatever) will help the undesirables remain settled in the bottom of the tank so that they don't enter the rest of the fuel system. Almost all commercial fuel systems allow for this.

 
How are you going to mount it to the bike? similar to Dean Tanji's? or somthing different?

My tank is a copy of the Tanji design cept it's a tad bigger, with a total capacity of 25Lt same as the stock tank. The mounts tho, are different.

I used the two locating holes for the pillion seat and wack in some nut serts, these are the very front mounts.

Piccy:

44a01s5.jpg


once you do this tho, you have to cut the 2 dowels of the base of the pillion seat. No drama for me as i can count the number of times i've had a pillion on the bike with 2 fingers. Where the cross brace of the stock rack bolts to the frame of the bike, there is a piece of 25x12 RHS bolted using the existing two bolts.

Piccy of the stock rack cross brace:

5zo1nqd.jpg


A piece of 25x5 bar is bolted to the front mount and is welded to that piece of 25x12 rhs, forming on single mount. There are a couple of spacer blocks welded to that to get the tank a bit higher. The underside of the aux. tank has a piece of medium wall SHS welded to the underside of it and this is where the spacer block bolt to. The rear mounts for the tank us two of the three stock rack mounts, the uprights are made out of 25x12 RHS, a neat fit in the holes thru the fairing. A top bar of 25x12 RHS is welded to the top of the uprights and 3 holes drilled in that. Again a piece of medium wall SHS is welded to the underside of the tank and nutserts put into that and the rear mount bolts to that. It's not going to move anytime in a hurry.

The tank itself is made out of Al and is baffled. When making the baffles, put a small return on them, ie a C or Z section ( A flange if you wanna call it that), try to avoid just welding in just flat plate. When checking the tank for leaks, you can pressure test it if you want, or use Dye Marker,

i've only seen it in 2 pressure pack cans, one red the other white, you spray some of the red inside the tank and swish it around for a little bit and hten spray the white around the outside of the tank, continue rolling the tank around slowly in various directions.

If the is even the slightest microscopic pinhole in the welds or anywhere in the tank, it will show plain as day (trust me on that, it opened my eyes the first time i saw it in use).

For any holes, try not to use a grinder with a grinding disc on it, it can leave inpurities behind that can affect the weld in Al, use a die grinder with a burr made for Al. Grind the sucker out and reweld it. A boilermaker will be able to explain far more accuratly and in more detail then i can.

When i get a chance i'll take some piccies of the mounts, the tank is currently back on the bike ready for the next few wks of riding.

 
How are you going to mount it to the bike? similar to Dean Tanji's? or somthing different?

When i get a chance i'll take some piccies of the mounts, the tank is currently back on the bike ready for the next few wks of riding.
I hope your still planning on sharing your pics, and description

any updates? seems way cool...

dana
I'm sorry there haven't been any updates.

This project is still alive. I printed the scale drawings of the second revision like two months ago. I also bought some cardboard to build another mock up, and priced materials.

Then school started. All I've gotten done since then is get the names of two really skilled TIG welders who are experienced with aluminum.

I graduate in December and then the only thing on my plate will be getting ready for next year's riding season. I really want to do a B2B!

Thanks for your interest and thanks for keeping this tread alive.

(maybe I can set aside some time to build that mock-up over Thanksgiving break)

-Joe

 
Top