Duster19
Well-known member
Well, the almost 3 year wait/project for me has finally come to a happy end. I took my first long 600 mile test run on my TAT fuel cell from Joe (joe2Lmaker) and I thought his efforts of building and designing the TAT were worth my time to post a review. He also was great to work with and was always asking my questions and wanting feedback on what I was looking for in my TAT. As you can see, I'm able to keep my awesome Gaurald rack. I am NO expert and won't be offended if anyone wants to give me feedback on perhaps setting things up better.
First off there is already an awesome thread on the prototype Gen 2 cell and it's a good read if you haven't already read it. I will add a little of my own personal experience with my cell as well, but won't get into as deep a report as Don's.
https://www.fjrforum.com/forum//index.php?showtopic=126893&st=0
https://www.fjrforum.com/forum//index.php?showtopic=126303
First off, Joe's effort to make sure that my cell got to me in perfect shape was outstanding. The following are pictures of the box and extra care in padding that he did.
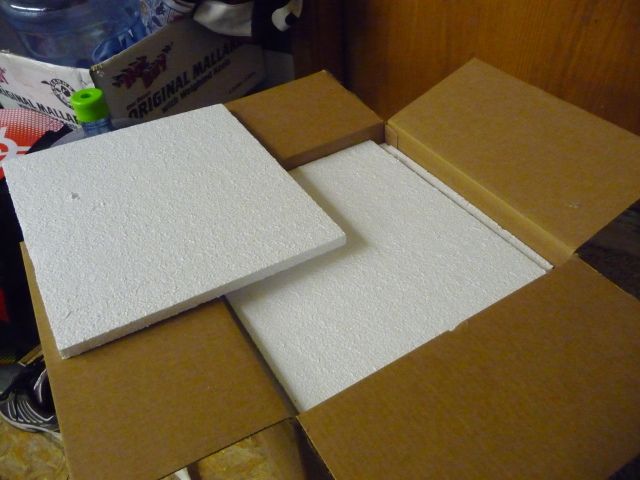
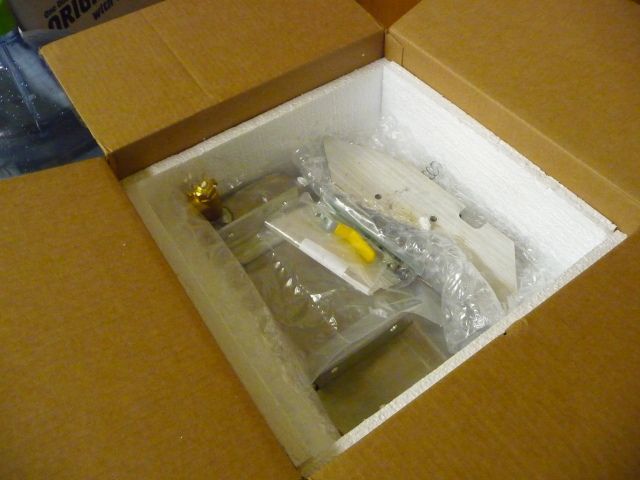
And what it looked like out of the box. Needless to say I was very happy with the end result.
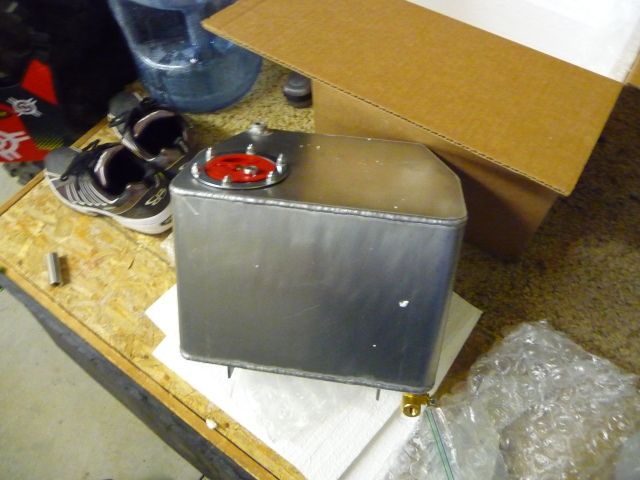
The next few pictures will show you basically how easy it is to install. There are some simple tricks to getting it installed, but nothing to complicated. The driver side has 2 zip ties that needed to be loosened in order to get the provided nuts (Joe found and used some kind of square nuts that fit under the rear subframe area). The one that sits closet to the main tank has springs added to it, so it fits nice and snug in the sub frame channel. This makes it super easy to line up and get the fuel cell bracket bolts started. As for the rear nuts, Joe added a clip to these so that you can help align and move them once in the channel. The drive side rear nut had to pushed in from the front where the passenger side has enough clearance to be put in place from the rear (I remove this one when not in use, because I worry about it falling out from vibration. The other 3 nuts will not go anywhere because of the springs and fact the rear on can not vibrate out the rear of the channel.
Here is a picture to help explain.
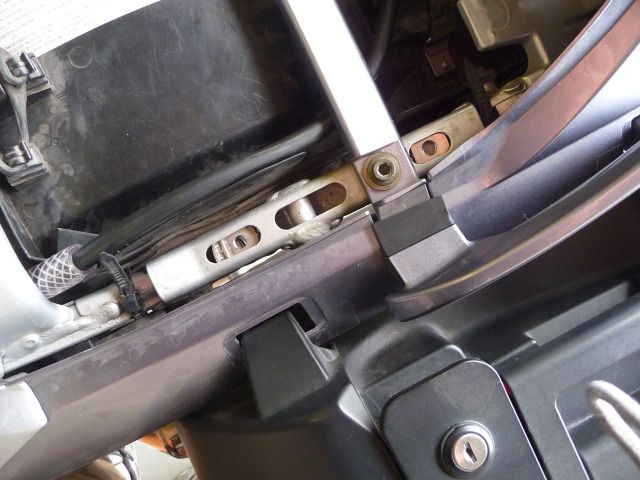
This picture will help explain the clip that Joe added.
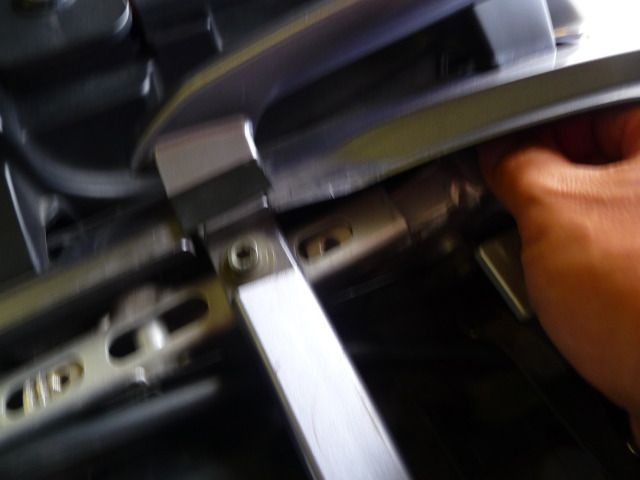
The first time I went to put on the TAT it only took me 5 minutes to line up the brackets with the nuts and to actually get the bolts started. Like I said the nuts with springs are super easy to get started. To be honest the second time I installed the TAT, the rear nuts took me 10-15 minutes to finally get them aligned and to actually get the bolt started (not sure if there is a better way of doing this or if my try and try again approach is the answer.
Once the brackets are bolted on it's time to bolt the fuel cell to the brackets. This part is super easy and only requires 4 allen head bolts. I will say that when it's all bolted on it's not moving at all.
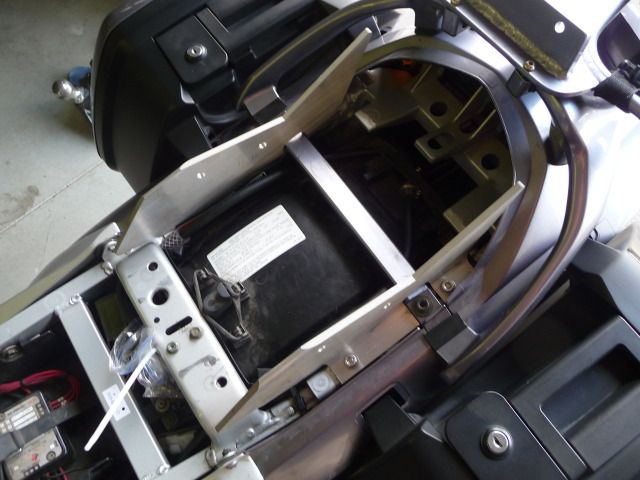
As you can see in the above and below picture, I went the cheap route and purchased a $8.00 quick connect from Rocky Mountain ATV(https://www.rockymountainatvmc.com/p/43/53/213/931/-/25848/Tusk-Fuel-Line-Quick-Connect/FUEL+QUICK+CONNECT). It's plastic and figured I'd try it out first over the metal Sampson one others have used. I zip tied a plastic bag over it in case it leaked. So far it hasn't even leaked one drop. I'm also using the following fuel filter. I went with the small ones, not really knowing how big the large one were. I'll say that they are really small, but so far have been working. (https://www.rockymountainatvmc.com/p/43/53/174/781/-/3769/Visu-Filter-In-Line-Fuel-Filter)
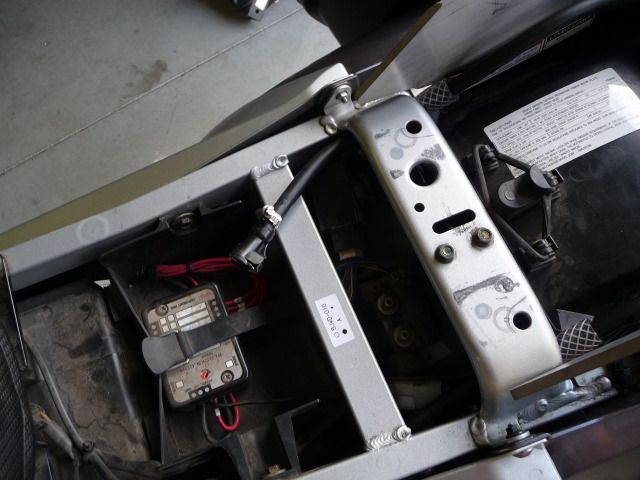
The last two pictures show the fuel cell installed and the on/off valve. I had to order 2 brass fittings. I went with a 1/4" ID 45 degree barbed for the main valve and a 1/4" ID 90 degree for the vent line. I'm running 1/4" fuel line through the entire system.
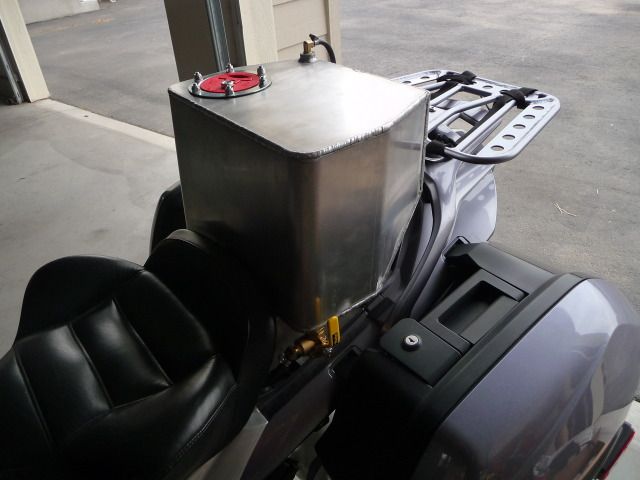
In this picture you will see my vent line. Not sure if it's needed but I put a fuel filter on my vent line as well. Figured if not needed it would be a perfect place to store an extra one in case it was needed on the main line.
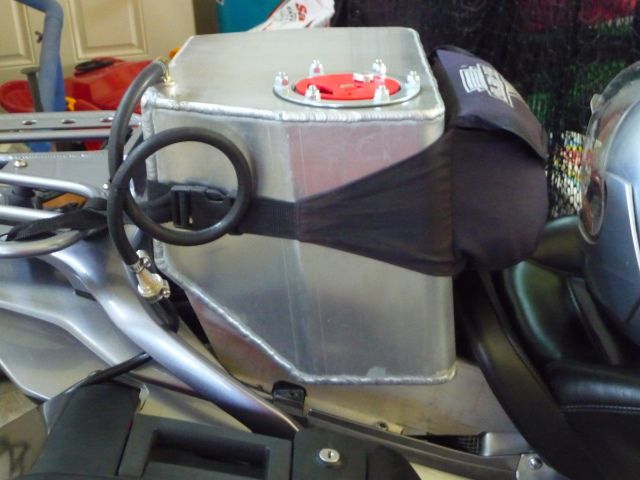
Now for the basic rundown on how it operates for me.
After reading Don's report, I decided to use his and Renojohns recommendations. When I'm about 80 miles into my main tank (3 bars down), I open up the TAT. It will take about 15 miles before my fuel gage will move up one bar. After about 30-40 miles I will notice one more bar added. It's at this time, that I have not been able to get the last (full bar) to come on. I will say that it's still adding fuel, because I traveled well over an additional 60 miles and the gage never went down one bar. I'm very happy with this fuel flow.
On my way home I decided to push my range and to see how low I could drain the TAT. I'm happy to say that when I fueled the main tank and TAT on the side stand (could get more fuel in if on center stand) I was able to get 335 miles and had 3 bars remaining on the gage and the TAT almost empty. It took 3.5 gallons to fill the main tank. So I figured I had about 2.5 gallons of fuel left and could have pushed things to the 400 mile range.
Thanks for taking the time to read my report. Sorry, it's not very technical.
Dave
PS. The next step is for Linda T to make me a sweet cover for it.
First off there is already an awesome thread on the prototype Gen 2 cell and it's a good read if you haven't already read it. I will add a little of my own personal experience with my cell as well, but won't get into as deep a report as Don's.
https://www.fjrforum.com/forum//index.php?showtopic=126893&st=0
https://www.fjrforum.com/forum//index.php?showtopic=126303
First off, Joe's effort to make sure that my cell got to me in perfect shape was outstanding. The following are pictures of the box and extra care in padding that he did.


And what it looked like out of the box. Needless to say I was very happy with the end result.

The next few pictures will show you basically how easy it is to install. There are some simple tricks to getting it installed, but nothing to complicated. The driver side has 2 zip ties that needed to be loosened in order to get the provided nuts (Joe found and used some kind of square nuts that fit under the rear subframe area). The one that sits closet to the main tank has springs added to it, so it fits nice and snug in the sub frame channel. This makes it super easy to line up and get the fuel cell bracket bolts started. As for the rear nuts, Joe added a clip to these so that you can help align and move them once in the channel. The drive side rear nut had to pushed in from the front where the passenger side has enough clearance to be put in place from the rear (I remove this one when not in use, because I worry about it falling out from vibration. The other 3 nuts will not go anywhere because of the springs and fact the rear on can not vibrate out the rear of the channel.
Here is a picture to help explain.

This picture will help explain the clip that Joe added.

The first time I went to put on the TAT it only took me 5 minutes to line up the brackets with the nuts and to actually get the bolts started. Like I said the nuts with springs are super easy to get started. To be honest the second time I installed the TAT, the rear nuts took me 10-15 minutes to finally get them aligned and to actually get the bolt started (not sure if there is a better way of doing this or if my try and try again approach is the answer.
Once the brackets are bolted on it's time to bolt the fuel cell to the brackets. This part is super easy and only requires 4 allen head bolts. I will say that when it's all bolted on it's not moving at all.

As you can see in the above and below picture, I went the cheap route and purchased a $8.00 quick connect from Rocky Mountain ATV(https://www.rockymountainatvmc.com/p/43/53/213/931/-/25848/Tusk-Fuel-Line-Quick-Connect/FUEL+QUICK+CONNECT). It's plastic and figured I'd try it out first over the metal Sampson one others have used. I zip tied a plastic bag over it in case it leaked. So far it hasn't even leaked one drop. I'm also using the following fuel filter. I went with the small ones, not really knowing how big the large one were. I'll say that they are really small, but so far have been working. (https://www.rockymountainatvmc.com/p/43/53/174/781/-/3769/Visu-Filter-In-Line-Fuel-Filter)

The last two pictures show the fuel cell installed and the on/off valve. I had to order 2 brass fittings. I went with a 1/4" ID 45 degree barbed for the main valve and a 1/4" ID 90 degree for the vent line. I'm running 1/4" fuel line through the entire system.

In this picture you will see my vent line. Not sure if it's needed but I put a fuel filter on my vent line as well. Figured if not needed it would be a perfect place to store an extra one in case it was needed on the main line.

Now for the basic rundown on how it operates for me.
After reading Don's report, I decided to use his and Renojohns recommendations. When I'm about 80 miles into my main tank (3 bars down), I open up the TAT. It will take about 15 miles before my fuel gage will move up one bar. After about 30-40 miles I will notice one more bar added. It's at this time, that I have not been able to get the last (full bar) to come on. I will say that it's still adding fuel, because I traveled well over an additional 60 miles and the gage never went down one bar. I'm very happy with this fuel flow.
On my way home I decided to push my range and to see how low I could drain the TAT. I'm happy to say that when I fueled the main tank and TAT on the side stand (could get more fuel in if on center stand) I was able to get 335 miles and had 3 bars remaining on the gage and the TAT almost empty. It took 3.5 gallons to fill the main tank. So I figured I had about 2.5 gallons of fuel left and could have pushed things to the 400 mile range.
Thanks for taking the time to read my report. Sorry, it's not very technical.
Dave
PS. The next step is for Linda T to make me a sweet cover for it.
Last edited by a moderator:


