Broken tab on plastic tank cover - help

Yamaha FJR Motorcycle Forum

Help Support Yamaha FJR Motorcycle Forum:

This site may earn a commission from merchant affiliate links, including eBay, Amazon, and others.

kurtfriedrich

Well-known member
Joined
Sep 21, 2007
Messages
142
Reaction score
0
Location
East Side of Seattle
I started in to to the throttle return spring mod using Rickster's great post https://www.fjrforum.com/forum/index.php?showtopic=18322&hl=

and despite his perfectly clear instructions, and while pulling hard to the aft, when one side of the plastic tank cover came off, the tab broke.

Maybe it had been previously weakened or maybe it was too cold, in any case, has anyone had success repairing this?

BrokenTab5.jpg


it snapped cleanly at the orange line.

thanks.

(also, how much is a new one?)

 
Gluing plastic posts onto side panels rarely goes well or lasts long. A two part epoxy is a a better bet, but still iffy. I dunno how a plastic welder would work on this kind of high stress application. On the side covers of my former Honda I had luck using a fiberglass repair kit where I used glass mats to reinforce the base of the post to the panel.

You may be able to get away without the post, it is the least expensive and least troublesome thing to try first.

I believe what I'm seeing (I'm a poor, lowly Gen I owner) is the plastic tank cover that runs around the base of the tank and fits in front of the seat. If this poor description is likely to be the correct item, then the part will run around $200 new, with some time spent looking for a good price.

 
Last edited by a moderator:
Kurt

In this case eBay is your friend. It's just a matter of time until one surfaces.

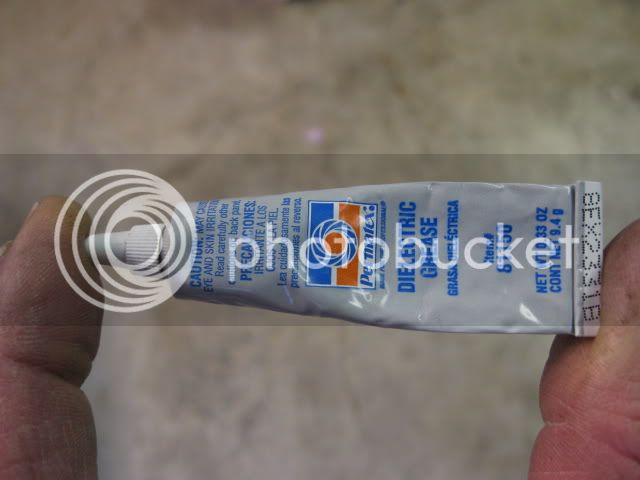
In the mean time now that you have it off, smear a dab of silicone dielectric grease on that grommet so it preserves the rubber and lubricates the joint. In fact, do this to all the rubber push grommets and bushings for the body work on the bike. A little goes a long way.

IMG_0400.jpg


smile.gif


Brodie

 
Another alternative to keep the rubber grommets and plastic posts slippn' & slidin' is:

23256.jpg


After breaking a couple of posts on my Honda side covers I started using silicon spray and have not popped a post since.

 
Last edited by a moderator:
I broke that plastic tab 1 1/2 years ago. I attempted to glue it with all sorts of plastic glue / or repair kits. Nothing has worked so far :angry2: . I am too cheap to buy a replacment. I only notice the missing tab when I do the TBS. I hope you find a fix so I can emulate.

 
That missing post won't be missed. When the tank band is installed and the seat in place, you can't even tell. And it doesn't flap in the breeze.

Lubrication is always a good thing.

 
If somebody comes up with a way to glue that pin on there, they'll get rich. I just glued one end of my plastic microwave door handle back on for the third time in about two months. First microwave I've ever had (mounted over the stove, in the steam) that lasted long enough to have something
else
break first.
:angry2:
 
On my bike, as plastic parts break or fall off
https://www.fjrforum.com/forum//index.php?showtopic=135632(post 6)
https://www.fjrforum.com/forum//index.php?showtopic=135632, I just leave 'em off.
....
:lol:
 
Not on an FJR but on other bikes, I have had great luck with very judicious prep work on the repair area and then using JB Weld 2-part while jigging up any Rube Goldberg support system that I could while it cures.

Don't so much as look at it for 48 hours 'cuz if you do, you're gonna touch it, poke it, adjust it, and the whole plan is shot!

I have even had success with pouring a gob of JB Weld into a form on a repair area and literally shaping the gob into the desired shape with a Dremel AFTER it has cured for a couple days.

Prep is key.

Just don't forget to account for Gravity 'cuz the JB will settle out as it warms and begins curing. This might require you to readjust the attitude of the part your repairing as it cures. Eventually it will stiffen enough to not have to mess with it any longer.

 
Last edited by a moderator:
If there is any depth left to the stubb it might be possible to drill a small hole thru the post and into the base and use a thin sheet metal screw to reattach the post. Obviously it would be bad to drill thru the panel. Then it is time for the JB weld around the base-you can prolly fatten it up for strength.. I have done several this way on my FJ1200 with good success.

 
That missing post won't be missed. When the tank band is installed and the seat in place, you can't even tell. And it doesn't flap in the breeze.
I totally agree. Till I read this thread I almost forgot I broke one about five years ago.

Buy a new part ya cheap ***. :lol:
Except that part costs about as much as a weekend getaway at a five star hotel. With meals.

 
Buy a new part ya cheap ***. :lol:
Except that part costs about as much as a weekend getaway at a five star hotel. With meals.
Bust would probably understand more in terms of sheep. Something like.... that would be worth 2 hours with a freshly shorn la a a a amb! :lol:

 
Last edited by a moderator:
Buy a new part ya cheap ***. :lol:
Except that part costs about as much as a weekend getaway at a five star hotel. With meals.
Bust would probably understand more in terms of sheep. Something like.... that would be worth 2 hours with a freshly shorn la a a a amb! :lol:
I hate to admit it Doc, but yer prolly right. :p

Actually if it was that expensive I'd serve several meals upon it, followed by several minutes of ***.

 
Last edited by a moderator:
Here's another idea:

Using a hacksaw, carefully cut two slots about 1/8 inch deep to form a cross into the bottom of the broken post. Next drill an 1/8 inch hole through the post from top to bottom. Cut and bend 4 large (non coated) paper clips into an "L" shape, with 1-1/2 inch legs and a 90 degree bend. Shove them up the 1/8 hole from the bottom or broken end of your post, and while pulling up on them to keep the 90 degree bend tight against the broken end of the post, bend them at the top where they stick out of the mushroom end of your post so they won't back out. Cut to fit as needed. They will stick out like spider legs from the bottom of the post. The slots you cut in the post with the hacksaw gives your 4 new spider legs a place to go, and locates them so they point out from the post in 4 directions. Scuff the inside of your panel with real rough sand paper, as well as the "legs" sticking out of your post. Bend the legs to where you want them to stay. Slather the whole mess with JB weld about 1/8 inch thick (thicker the better) to lock it in place. Maybe trim your "mushroom" a little to limit the amount of pull necessary to get it out in the future, and lube the hole as recommended elsewhere on this thread.

Gary

darksider #44

 
Last edited by a moderator:
Ok, thanks for the posts.

Here is what I decided. The base of the broken tab is the VERY thin outline of a semicircle, with a center blade. If you put it into and ink pad to make a stamp, you'd get a fancy curved "E" (also kinda like a cer-clip).

Basically, very little surface to glue (and frankly Yamaha, what a crappy design!)

So for my broken one, I ground most of the ridge around it (see pic) leaving only a small edge on the opposite of the open side. Then I found a flat washer that just barely fit the tab. Layed down a puddle of 24 hour epoxy, put epoxy on the base of the pin,

shoved the pin into the washer, put the washer/pin down, using the little piece of ridge to guide the placement. Then I added lots more epoxy on top of the washer, and filled in the stupid hollow pin too.

(I had to grind that ridge down as my washer wouldn't fit, maybe if you found a smaller OD washer with sufficent ID, you could leave the ridge?) My thinking is now the tab is not only glued to the bottom, but at least it has some side support too. I didn't use 2 washers for more support as I am afraid it would make the base too high, and the tab wouldn't make it into the hole and "click". There is some chance tomorrow when I reassemble it, even the one washer is too much, but as it is about as high as the former plastic ridge, I think it will work. (I'll post tomorrow if I am wrong.)

A day later, it seems stronger than the original.

And then, I decided to fill in that ridge area and the inside of the pin with epoxy on the side that was NOT broken off, thinking it will help avoid breaking that one off.

I found a place on-line selling Yamaha parts, and the price for this piece new was about $275!

Lastly, looking at how it all lays out, I don't think the trick is to pull back on the tank cover when you are removing it, I think it would be much better to hold the very front down, get your finger under the cover about two inches

behind where the tab is, and pull it out in a circular motion, with the center of the rotation the front edge you are holding down.

Here are the pics of the patched broken one and the good one before I added epoxy to it.

FJR-glue-job.jpg


FJR-glue-job2.jpg


Last edited by a moderator:
I've had great success with a method learned years ago. I don't remember the source.

As long as some additional bulk in the area of the break won't cause fit problems this method should work. Use Super Glue to make the initial repair. When it has set up, apply additional Super Glue around the break and before it sets sprinkle liberally with flour or baking powder. The powder will soak up the Super Glue and when the glue sets will add tremendous strength. Keep adding glue and powder 'til you've built up as much extra bulk as will fit. File, carve, or grind away any excess material.

This is just like applying acrylic finger nails (ask the Mrs.) which are remarkably tough.

 
I've had good success in the past by going to Home Depot and buying glue from the plumbing dept., specifically for ABS plastic. Clean both sides with the PVC cleaner and apply the glue. It melts both sides together and seems to hold very well. Also I've had success by getting glue from the hobby store that is used on the RC cars, specially for the areas around the engine in this little screamers. It's called "Insta Cure +, Cyanoacrylate". This stuff seems to work on anything of the PVC/ABS plastic type. I even fixed a crack in my vinyl window frame 3 years ago and it's still holding well.

Gene

 
Your local hardware store probably now stocks two-part plastic expoxy that comes in a double syringe affair like other expoxys. It will bond broken parts and once hardened is very tough.

 
Top