Front Axle Pinch Bolts Gen III

Yamaha FJR Motorcycle Forum

Help Support Yamaha FJR Motorcycle Forum:

This site may earn a commission from merchant affiliate links, including eBay, Amazon, and others.

jimjim

Member
Joined
Jul 14, 2013
Messages
21
Reaction score
4
Location
Marysville, OH
Found one of my front axle pinch bolts close to falling out loose, brand new just under a 1000 miles. Can someone share the torque spec for these?

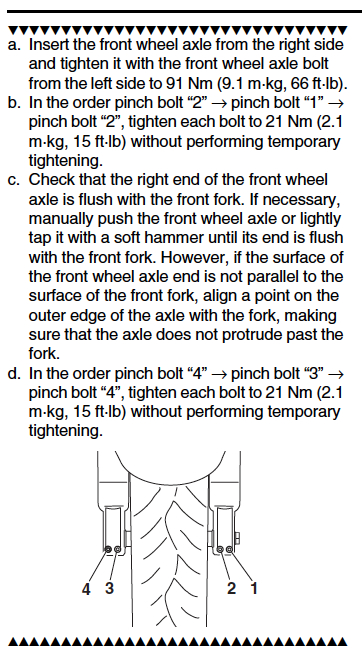
 
Note the order of tightening specified by Yamaha:

frontpinch.jpg


... brand new just under a 1000 miles...
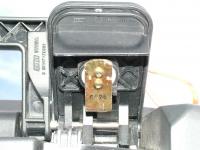
Since the dealer is responsible for putting on the front wheel, it's worth checking all the other stuff he should have done. The one they always "forget" is Loctiting the side-bag lock screws.

(Click on image for larger view)


If not done, these can fall out and leave your bags splattered on the road behind you.

Check the Bin Of Facts for all the other stuff the dealer should have done.

 
Ouch. That procedure just makes my head hurt.

You have 4 pinch bolts (just like those pesky ones that hold the fork legs) just alternate tightening until they are both at the specified torque. Yeah, when you tighten the one bolt it will make its partner bolt (on the same side) loose. Deal with that.

 
Last edited by a moderator:
Those pinch bolts are off center and as you tighten they will walk all over the place. Give it some attention. Put a straight edge on the tip of the axle and make it flush.

 
Apply a liberal amount of anti-seize to the threads. You may want to reduce the torque spec by roughly 2.0 foot-lbs. if you are trying to be precise with the torque. Torque specs are based on clean, dry threads.

But the anti-seize will keep those bolts and the mating aluminum castings healthy for a long time to come. I'm a firm believer in anti-seize for frequently serviced steel-to-aluminum connections, and 242 Loktite for others.

 
Apply a liberal amount of anti-seize to the threads. You may want to reduce the torque spec by roughly 2.0 foot-lbs. if you are trying to be precise with the torque. Torque specs are based on clean, dry threads.But the anti-seize will keep those bolts and the mating aluminum castings healthy for a long time to come. I'm a firm believer in anti-seize for frequently serviced steel-to-aluminum connections, and 242 Loktite for others.
Who is this HAshe guy?
smile.png


Last edited by a moderator:

Well, having removed/reinstalled the 2013 Gen III front wheel for the first time.. I found I could not follow the above sequence...
no.gif


Before I could reach 66ft-lbs, the axle would start to rotate in place. Had to snug down #3 and #4 to prevent axle slippage before the torque wrench clicked over at the 88 ft-lb setting.

The I followed the prescribed FredW method of just tightening the **** down properly. I did, however, put a dash of HAshe-approved anti-sieze on the fork bolts threads.
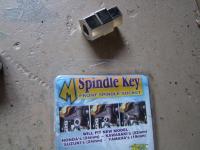
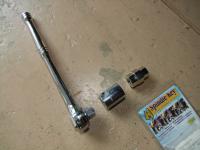
 
...
Well, having removed/reinstalled the 2013 Gen III front wheel for the first time.. I found I could not follow the above sequence...
no.gif


Before I could reach 66ft-lbs, the axle would start to rotate in place. Had to snug down #3 and #4 to prevent axle slippage before the torque wrench clicked over at the 88 ft-lb setting.

The I followed the prescribed FredW method of just tightening the **** down properly. I did, however, put a dash of HAshe-approved anti-sieze on the fork bolts threads.
Although I put up that Yamaha recommendation, I don't necessarily follow it myself
rolleyes.gif
.

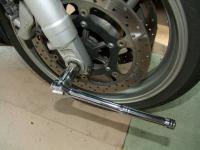
Yamaha's answer to the initial axle torquing is to use the hex "slot" in the right end of the axle to prevent it from spinning. I do have a suitable hex adapter so I can use a socket on the right end if I feel the need:

(Click on image for larger view)


Except I can rarely find it buried in the depths of my tool-box, so I do what you do, pinch it up a bit
omg2.gif
before tightening the nut, then I do follow Yamaha's pinch sequence. Maybe there is a reason behind it?

It also seems odd to me that when you pinch up the left fork, you must be trying to move the metal under the nut. Maybe only a smidgen, but still... If you do it the other way round (pinch the left side first then torque the nut), you'll be trying to slide the fork along the axle a bit.

So I do it my way, pretty much as you and FredW (but by feel, I don't possess a torque wrench).

  • First pinch the right side, just enough to prevent the axle turning
  • Torque up the axle nut
  • Slacken the right pinch bolts completely
  • Pinch up the left side as per the manual
  • Check the right end of the axle is flush with the fork (always is, but I check anyway)
  • Pinch the right side as per the manual
I use a bit of copper grease as anti-seize (as I do on almost all threads). If you use a torque wrench, you do take note of the torque reduction if you use anti-seize, don't you? This last comment added for the benefit of the less experienced who don't realise the significance, a quote from another thread:
...if you really do want to use the anti-seize material ... reduce the amount of tightening torque by about 40 percent. If you dont, you run the risk of cracking the ceramic and/or stretching or even breaking the threads on the plug shell....
 
Last edited by a moderator:
Home made spindle key can be a short bolt with a hex nut tightened onto the threads (use some epoxy if you like to lock it in place) to align with the head of the bolt. Insert head of bolt into axle end, put a socket on the nut to prevent spinning. It doesn't take much to hold it. Or, as Macatrophy says, snug up the pinch bolts on the right side to hold the axle temporarily.

I disagree with the Yammy method, as you will end up with one loose pinch bolt on either side, so I always snug them up to the same torque.

As for spark plugs, you never need a torque wrench on those, nor IMHO should you use one regardless of whether you used anti-seize on the threads. Follow the manufacturer's instructions, snug them in until the crush washer gasket contacts the head, then 1/4 to 1/2 turn more and you're done.

 
Some of this probably falls into the realm of minutiae that (otherwise) perfectly reasonable people will disagree about.

I agree that the best sequence to follow for tightening the axle on a 2nd (or 3rd) gen is:

1) Insert axle and start the big hex bolt (it isn't really a nut) into the left end of the axle as far as possible.

2) Snug up the right (off) side pinch bolts (not important to what torque spec, just don't overdo it)

3) Torque the hex bolt to spec (66 ft-lbs)

(now here is where we differ a little)

4) Loosen the right side pinch bolts and bounce the suspension to allow the fork legs to find their "happy place" on the axle.

5) Alternately, tighten the pinch bolt pairs in steps until they are at torque spec.

I would not worry if the axle end is flush with the outside surface of the right fork. I would be more worried about the axle pushing or pulling on the fork legs and creating stiction that influences the suspension compliance.

Wet (oiled, greased or locktite applied) torque should be reduced by from 10 to 40 percent of dry. Does this sound like a wide range? You're right, it is. The pinch bolts' dry torque spec is only 15 ft-lb. If you grease them with anti-seize (worst case) you should reduce the torque by the maximum 40 percent, down to 9 ft-lb. This would give the same equivalent clamping force to the axle (not all that important by the way), and also limit the possibility of pulling the alloy threads out of the fork clamps, but the pinch bolts would then be more likely to loosen on their own while riding down the road.

I've never noticed any corrosion of these bolts, or galling of these threads. I do not see a need for anti-seize on this application, and believe the potential side effects outweigh any perceived advantage.

 
Last edited by a moderator:
Fred's method will guarantee alignment, and is a procedure used on other bikes who do not have a "axle flush with fork" sequence.

I personally wouldn't use anti-seize on the pinch bolts, as they're never in there long enough to have any significant 'galvanic reaction of dissimilar metals" effects (you do change front tires at least once a year, yes?). However, I do put a drop of blue loctite on these ones and don't overtorque.

 
Bring up this topic and some ****-head (self) has to mention the 45 mph h.s.. I used the Fred W. method for years. I have bounced the front end so vigorously that I had the scooter doing stationary wheelies in the garage. All of this was to rid self of the head shake - didn't have it all the time. but it would reappear and I didn't have the answer. Went to GPS, Penske, and new tires galore. No help. I now have the answer. I now know exactly where that axle is in the fork tube slider. I measure it. I have put 10k on ea. of 5 front tires with no head shake. Those tires look like **** when I take them off, but no h.s.. That fork tube slider is a pretty rough casting, but there is a place where that axle is suppose to be. In my case it is flush (dead flush with the fork tubes dead parrell).

 
Technically, your procedure is what is called for in the 2nd gen factory service manual, and my procedure is what is shown in the 1st gen's FSM, quoted below:

INSTALLING THE FRONT WHEEL
The following procedure applies to (sic) both brake discs. (??)
1. Lubricate:
• wheel axle
• oil seal lips
2. Tighten:
• wheel axle 1
• wheel axle pinch bolt 2
CAUTION:
Before tightening the wheel axle nut, push down hard on the handlebars several times
and check if the front fork rebounds smoothly.
So we are both "doing it right." I know for a fact that my axle is not flush when it is in the right position. It stands about a millimeter proud of the lower leg casting when it's in the correct (happy place) position. It's great that you have found the magic elixir for your head shake, but that said, I don't really see how the lateral axle to fork leg relationship would either induce nor inhibit head shake.

Head shake is a form of steering oscillation. The root cause of any steering oscillation is always an (excessive) inconsistency in / of the rotating mass of the wheels, either misbalance, excessive wheel or bearing run-out, or excessive variations in the tire's construction or wear. I say "excessive" because there are always some inconsistencies present in each of these parameters, just to varying degrees.

A bike can be made less prone to the these nominal inconsistencies resulting in oscillation by using more relaxed steering angles (increased caster/trail) at the expense of slower steering, or else by damping the oscillations at the steering head. This is why on sport or race bikes with very steep/quick steering angles an auxiliary steering damper is needed. It's also why many folks will put roller bearings into their steering stems, whose larger contact areas allows increased bearing preload and results in increased mechanical damping of the steering.

 
Top