Jewelry for Naomi - ClearWater Sevina's topside - Erica's lower

Yamaha FJR Motorcycle Forum

Help Support Yamaha FJR Motorcycle Forum:

This site may earn a commission from merchant affiliate links, including eBay, Amazon, and others.

dcarver

Well-known member
Joined
Sep 5, 2005
Messages
13,824
Reaction score
3,482
Location
Creston, CA
Ok then. Doing something new with ClearWater lights and an unkown vendor.

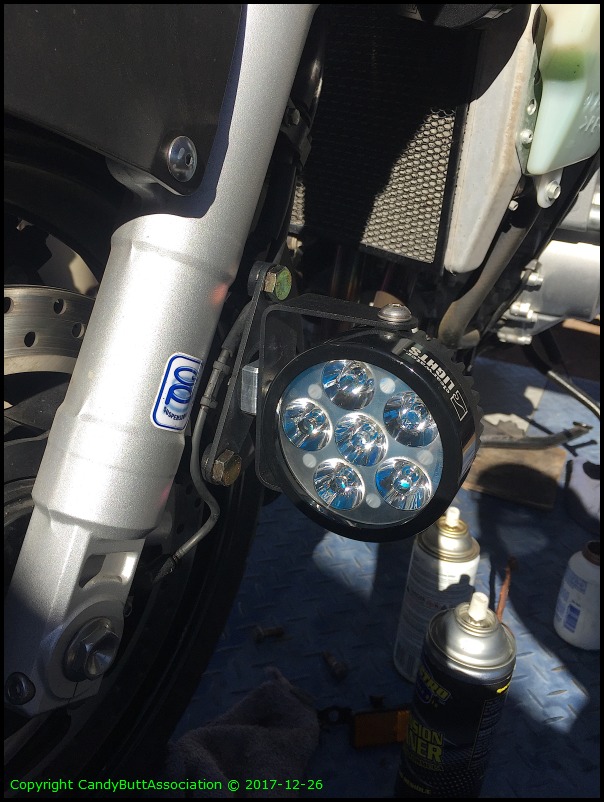
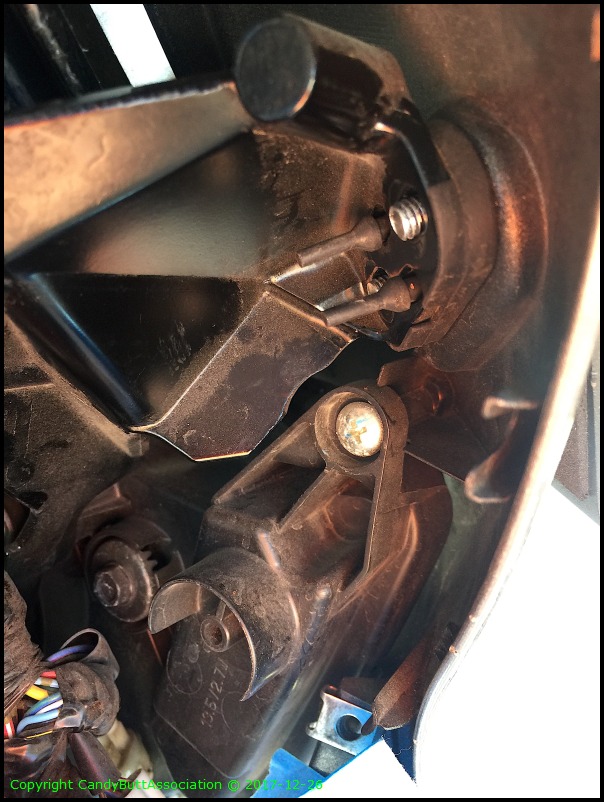
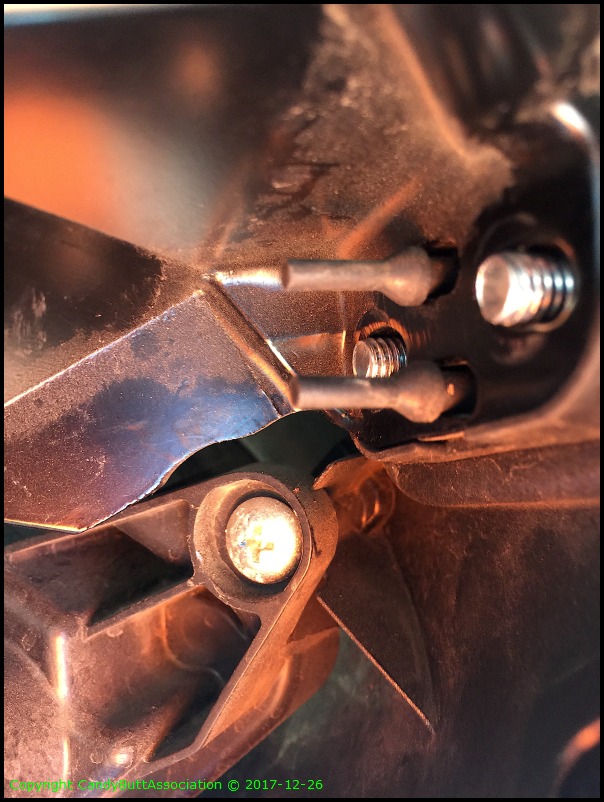
Sevinas under mirror bracket. Ericas on front caliper brackets.

Should be adequate to run Nevada at night at WarChild/Ignacio speeds..

No, I'm not all worried about running these lights at this location.
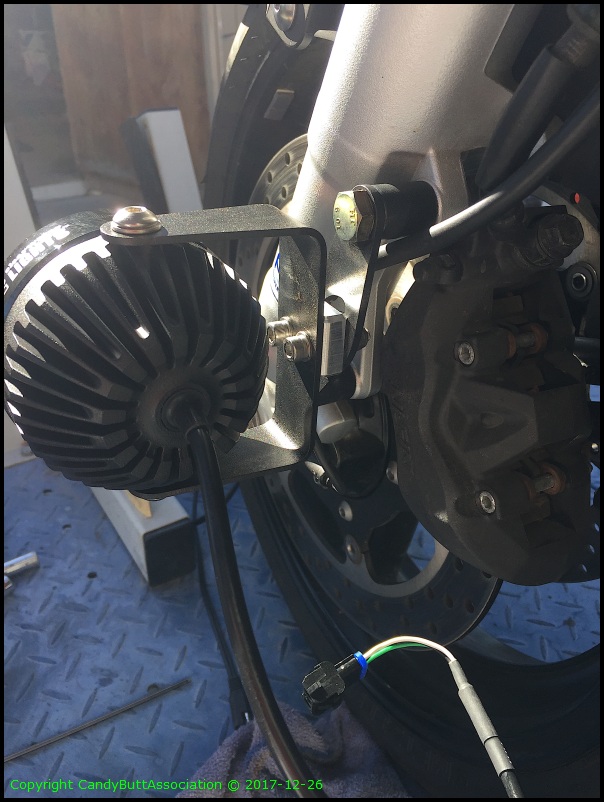
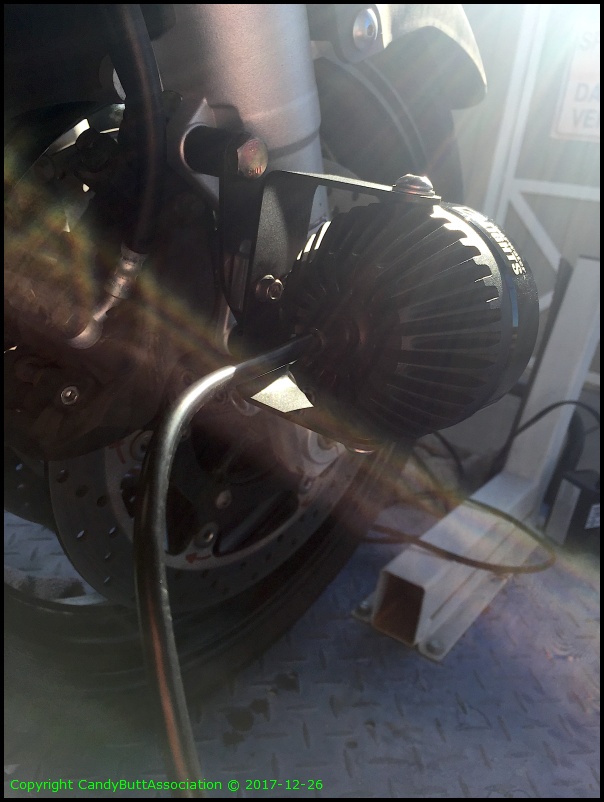

Backside view.


Regarding Sevina's under mirror. The studs for FZ mirrors are too short once CW bracket is in place. FZ mirror stud length.


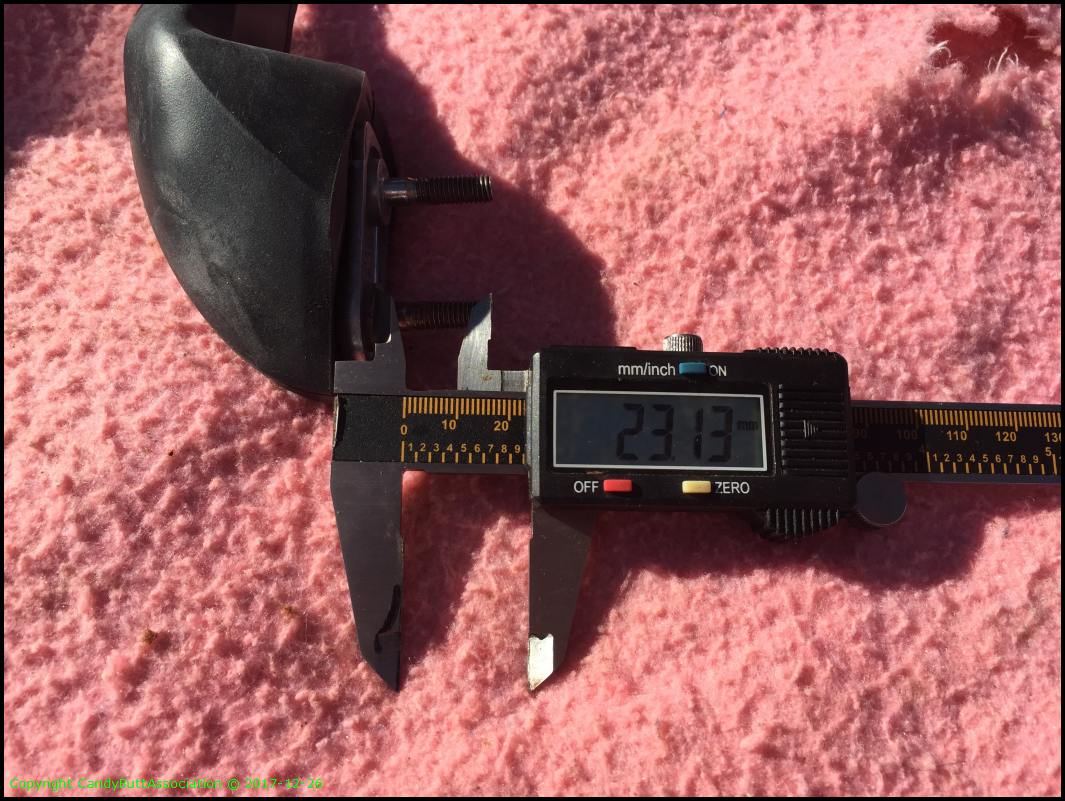
Inadequate nut engagement IMHO.


Went to Kals Off Road Racing in Atascadero to get opinion e.g,. extending mirror stud length via cut and weld or using Fred W's furniture extenders. To Kal's credit, he fell in love with Fred W's solution and REFUSED to even attempt my idea based upon cost and workability. I like peeps who tell the truth.. even when it costs the guy some easy money

More to come..


Last edited by a moderator:
I have a DC starter and that more than enought.
bike.gif


2018-01-03 Drilling Holes

Permalink Submitted by dcarver on Wed, 01/03/2018 - 08:59.


2018-01-03 Drilling Holes, Wiring

These pics are all over the place, sequence-wise. I've been working on what I can when I can..

Here's the proposed hole locations for left upper cowling.


and for the right upper.


Rider's view.


I take lots of pictures when nervous about drilling. It's a stall technique.


So I chickened out and thought I'd better find a place for the Master Relay. It's the 'brains'. A separate relay, a dumb one, runs the Sevina lights. This location is almost perfect, me thinks. It's tucked into a recess, is almost a press fit, and the wires hang down in case of rain?


3M Dual Lock. It's the stuff.


Check fit... front panel installed temporarily.


Sevina relay part number.


Clearwater Lights schematic.


Trial run to see if wiring is correct before tucking everything away and Ty-Rapping.


..and don't forget your grounds!


OK then, making progress, they light!


Two white wires are hi-beam, horn trigger for 100% brightness. The horn circuit is ground seeking meaning yet *another* relay would be required.. So I'm' not using the horn option. Yellow wire is Eastern Beaver harness allowing killing of hi or lo beam to save watts. PosiTapped to white wire.


Still pretty clean up in there. More wires are coming though..


The Sevina light is incredibly bright. At first I was powering from battery only, and at full volume via dimmer one of the lights would flicker. Back it down a few degrees and the pulse width modulator was good; no flicker. Called ClearWater, Skip recommended running the alternator as it was probably voltage droop. He was right.

I ordered a wiring harness extender for the RHS light, as I placed the stupid, ugly, Sevina relay in the fairing next to battery compartment. I need to get pic of that..


I need 28" extension, ClearWater has 36" pre-built so I'll find some room and hide the rest of it.


Full tilt boogie.


Originally, I was going to use motorcycle connectors to facilitate cowling and switch removal. Ivan at Hidden Power Cycle Clinic, Paso Robles, CA let me his borrow his crimper but needed it back by Tuesday after New Years.. and I didn't get that far along in the project so plan B...

This is Frank at HPCC. This is proof I returned the crimpers!


Some more wiring pics. This almost done... still pretty clean.


Struggled a bit with wiring for Erica's running below.. I think this will work.. But going to take a second look..


As the fork compresses, the wiring will need to 'bunch'.


With with wiring proven, time to drill? I'm a nervous Nellie.


Ok then, drilled! These two are for the headlight cut offs..


Here's my solution for the connector. It's a PosiTap trailer connector. It makes a very secure connection.


Brightness! Can't wait for the extender cable to arrive so I can get the last light fired up.
 
2018-01-04 Making Connectors and another Switch

Permalink Submitted by dcarver on Thu, 01/04/2018 - 14:42.


2018-01-04 Making Connectors and another Switch to Add

The hole maker. Prefer a UniBit but 1/2" hole too big for my switch size.


15/32" perfect.


The RHS completed. Hi/Lo beam cut out switch.


I wonder if the ty-wrap stickies will stay? The frame gets warm.


Arg. Broken clip. I thought I ordered one.. No can find..


Stupid panels. I couldn't figure out why the outer black panel wouldn't click into place. Then I looked twice. Ty-Raps. The drill marks where the two pieces index.


To teh left side.


Making a connector. The ClearWater wires are a PITA. Small AWG, silicone insulation? Each crimp soldered.


The green connector is brightness control circuit.


My connector, completed. I ordered water-proof connectorcs, crimpers, and pin extractors. Next service will replace.


Turned out OK. Wires twisted for photo shoot.


I didn't have the same color wires as CW so took notes..


Each wire tagged with the CW color..


Here I think it's all done. Next morning (today) I see the AuxTank switch dangling by wires. Crap.


Overview.


I'm hoping I got the connector wiring correct.


Thew clump under the heat shrink is dimmer control.


Better shot of dimmer control.

The potentiometer, square piece, had a tab to index thus preventing rotation. I cut the tab off. It won't move...


Well crap. Another hole, switch and connector needed.


Done. Good thing too. Almost out of room.


Good service loops.. Makes taking the cowling off easy. Note the hanging strap.


More to come. It quit raining so I gotta go..


Top