


No One
Well-known member
- Joined
- Apr 30, 2008
- Messages
- 558
- Reaction score
- 0
Hello gang,
Here are a few pictures of my V1 build. Ive been reading for the last month or two about many people using the V1 on there bike Etc., I have had a V1 scenes 93'... I know how good they are.") I wanted one on the new bike, also wanted it to be waterproof and to be secure. Just shy of unbolting the whole handlebar someone cant take it, but at that point they will take the whole bike.
I wanted one on the new bike, also wanted it to be waterproof and to be secure. Just shy of unbolting the whole handlebar someone cant take it, but at that point they will take the whole bike.
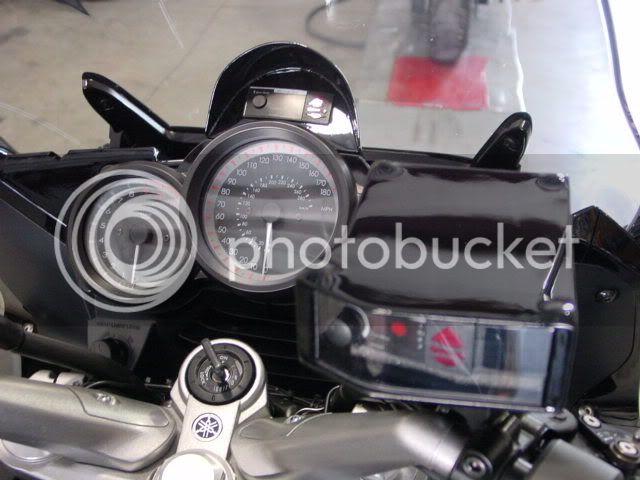
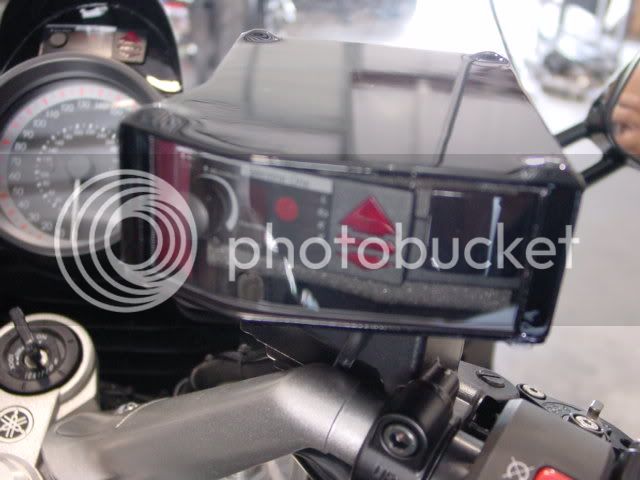
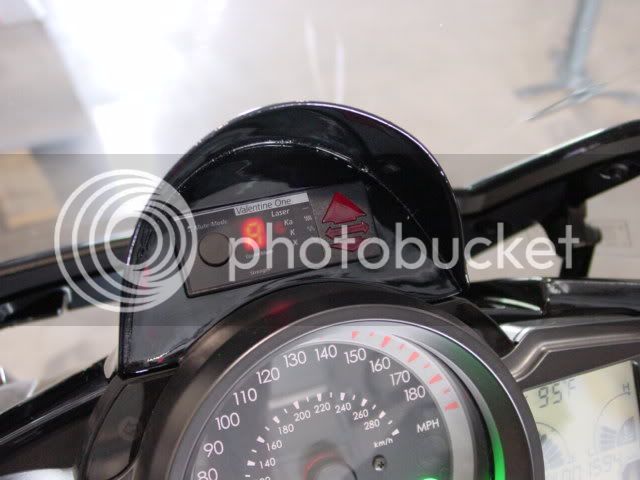
So this is what I came up with. As you can see there is a box that I made on the front brake reservoir that holds the new latest and greatest V1. I then took there secret mounting displays, tore it apart and made my heads up 'mount' for it.. This is out of 16g steel (the raw metal looking picture).. I also tagged into the factory board so I would have more control over the mode and the mute. These are controlled by a small momentary switch on the clutch side control housing that is aiming toward the front of the bike. (the small toggle is the main power On / Off when the bike is running, other wise I have it ultimately powered to an ignition on/off power).
I then took the V1 'motorcycle' head phones option and tore this all apart. I knew what I wanted to do with the board and its components. I tried to solder all ten leads off the board for one of the components and then make a 36" extension. But the board and its components are freaking small (to me), and I screwed the first one up. I then contacted a board member that I would like to take an opportunity to thank again, MBOTTOMS for helping me with what I wanted to accomplish with disassembling the board and then re assembling it back how I wanted, so it would to do what I wanted it to do.... What I proceeded to do was take the external On-Off / volume control / mute control and installed it in a Stainless Steel cylinder hanging above the clutch side, left grip. This will give me 95% of my total control of the whole unit(s) from my clutch hand with out taking any hands off the bars. Anyone that is familiar with this unit can tell you that it comes with a second alert 'speaker'. I took this speaker out of this board and mated it to a MONO 3.5 mm jack I got from Radio shack. I made it about 36"-40" long. What this allows me to do it take the small 'RADAR" speaker and EASILY tuck it into the folds of my full face with NO MOUNTING. I then run it down my shirt or jacket and plugs into the female 3.5 that is tucked between the tank and the front dash.
Ive been messing with this for a few weeks when I had some extra time here and there. Everything turned out great, all works 100%.. The speaker in the helmet is the coolest freaking thing. The whole thing is fantastic... I LOVE IT and cant wait to go on my first really long ride.
Water proofing, the box is all rain proof and all the other boards where water proofed with Acrylic Conformal Coating. The whole kit and caboodle is 99.999999999999999 % touring proof !
I have about 65 hours in this set up start to Finnish.. took me 10.5 hours to install the whole thing once it was built.

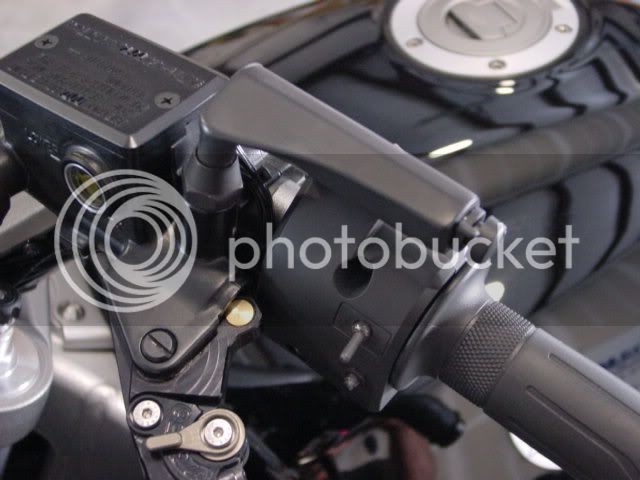
This is the tube that has the On / Off , volume control, and mute volume...This gives me the same control as the main unit that is locked in the box.
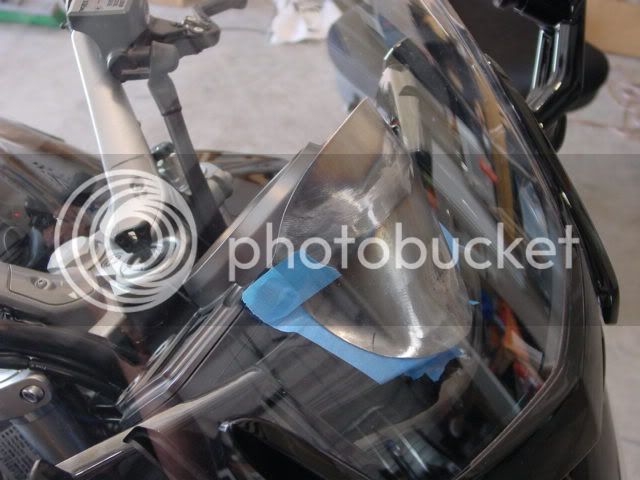
This is the mount raw steel before paint.
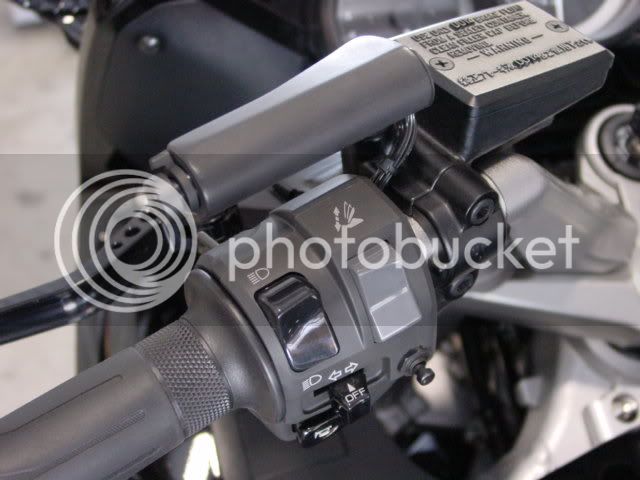
This is the controller from the front side. The toggle is the power On / Off for the whole system while the bike is turned 'on'.. The small momentary switch is below the toggle and it lets me mute, and change settings on the HUD with out taking my hands off the grip.
Here are a few pictures of my V1 build. Ive been reading for the last month or two about many people using the V1 on there bike Etc., I have had a V1 scenes 93'... I know how good they are.
I wanted one on the new bike, also wanted it to be waterproof and to be secure. Just shy of unbolting the whole handlebar someone cant take it, but at that point they will take the whole bike.So this is what I came up with. As you can see there is a box that I made on the front brake reservoir that holds the new latest and greatest V1. I then took there secret mounting displays, tore it apart and made my heads up 'mount' for it.. This is out of 16g steel (the raw metal looking picture).. I also tagged into the factory board so I would have more control over the mode and the mute. These are controlled by a small momentary switch on the clutch side control housing that is aiming toward the front of the bike. (the small toggle is the main power On / Off when the bike is running, other wise I have it ultimately powered to an ignition on/off power).
I then took the V1 'motorcycle' head phones option and tore this all apart. I knew what I wanted to do with the board and its components. I tried to solder all ten leads off the board for one of the components and then make a 36" extension. But the board and its components are freaking small (to me), and I screwed the first one up. I then contacted a board member that I would like to take an opportunity to thank again, MBOTTOMS for helping me with what I wanted to accomplish with disassembling the board and then re assembling it back how I wanted, so it would to do what I wanted it to do.... What I proceeded to do was take the external On-Off / volume control / mute control and installed it in a Stainless Steel cylinder hanging above the clutch side, left grip. This will give me 95% of my total control of the whole unit(s) from my clutch hand with out taking any hands off the bars. Anyone that is familiar with this unit can tell you that it comes with a second alert 'speaker'. I took this speaker out of this board and mated it to a MONO 3.5 mm jack I got from Radio shack. I made it about 36"-40" long. What this allows me to do it take the small 'RADAR" speaker and EASILY tuck it into the folds of my full face with NO MOUNTING. I then run it down my shirt or jacket and plugs into the female 3.5 that is tucked between the tank and the front dash.
Ive been messing with this for a few weeks when I had some extra time here and there. Everything turned out great, all works 100%.. The speaker in the helmet is the coolest freaking thing. The whole thing is fantastic... I LOVE IT and cant wait to go on my first really long ride.
Water proofing, the box is all rain proof and all the other boards where water proofed with Acrylic Conformal Coating. The whole kit and caboodle is 99.999999999999999 % touring proof !
I have about 65 hours in this set up start to Finnish.. took me 10.5 hours to install the whole thing once it was built.
This is the tube that has the On / Off , volume control, and mute volume...This gives me the same control as the main unit that is locked in the box.
This is the mount raw steel before paint.
This is the controller from the front side. The toggle is the power On / Off for the whole system while the bike is turned 'on'.. The small momentary switch is below the toggle and it lets me mute, and change settings on the HUD with out taking my hands off the grip.
Last edited by a moderator: