What did you do to your FJR today?

Yamaha FJR Motorcycle Forum

Help Support Yamaha FJR Motorcycle Forum:

This site may earn a commission from merchant affiliate links, including eBay, Amazon, and others.
I tippy toed my way to work over ice covered bridges and ramps. Yesterday's rain hadn't dried and it was 27°F this morning, it was scary in places. I made minimal direction changes and no momentum changes, I'm sure that it would have been a cinch to get the traction control light and ABS to come on but why offer Murphy a chance to intervene if you don't have to. I'm looking forward to the reward of a nice ride home. The long way.
You are a brave man. I rode once with snow on the road, and that was in 1975. These days I take the car if there is any chance of ice or snow on the road.

 
Last edited by a moderator:
In this Forum there will never be consensus on anything, even on which direction the sun rises
wink.png
So, IMO, to speed up the oil draining and perhaps get a little more complete draining the oil should be warmed up first. If you want to pull the drain plug and wait (and wait) you can drain it cold too. I like to delude myself that the quicker flowing oil does a better job of getting heavier particles to flush out than with a cold, slow flowing oil.
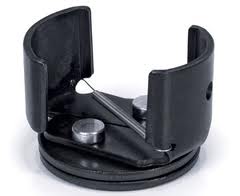
I've tried the screwdriver method for really stuck filters and only succeed in tearing the filter apart. If an oil filter is properly installed a strap type filter wrench should be fine. My '15 oil filter installed by Yamaha Factory was ridiculously tight. Over the years I have collected several types of oil filter wrenches. The wrench I used this time has a brand name of: OEM.

25128nopkg.jpg


577111d1319506481-ingeneous-oil-filter-wrench-imagescavebm0b.jpg


The harder you turn the wrench the more the cap is forced to close the two sides. The leading edges of the wrench sides digs into the filter and crushes indentations that creates all the gripping you need.
I own one of these too. They are GREAT! :)

 
I'm mounting my Valentine One on the dash shelf. Painted the waterproof case ($2.99) with some flat black rattle can. Not the best looking, but cheap and will keep it dry!

IMG_20160426_180714.jpg


Printing up some support pieces on the 3D printer to put between the Valentine One radar detector components and the dash shelf on the new bike. :)

IMG_20160427_095321.jpg


Purchased the Clearwater Darla.... Will post pics of the final install once they get in. Anyone have some tips for the headlight high beam wire ? I have a PDM60 so the other wires will go to that. I don't look forward to opening up the nose (seems like a ***** to remove the front cowl.
Just got the Darlas also for my 14ES. Talked to Clearwater today, they said you could get at the relay by taking off the inner black panels, not the whole cowl. Is that right?
This is true. Someone here recently did a . . . wait . . . click here.

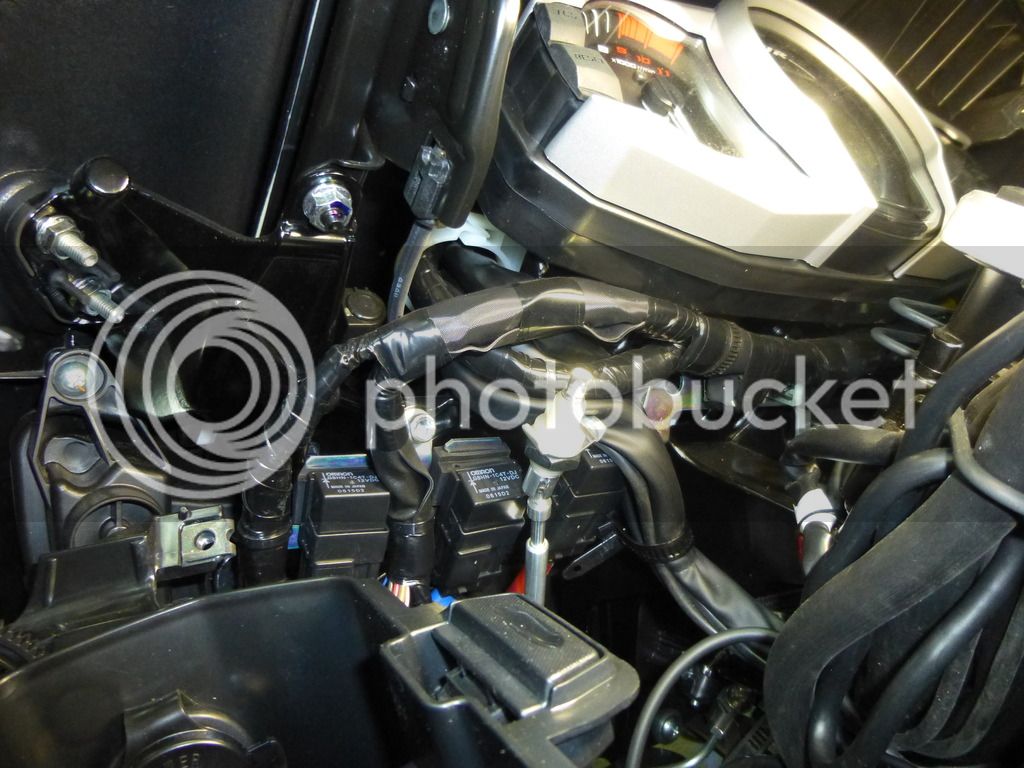
Here's what you'll be looking at:

P1010784.jpg


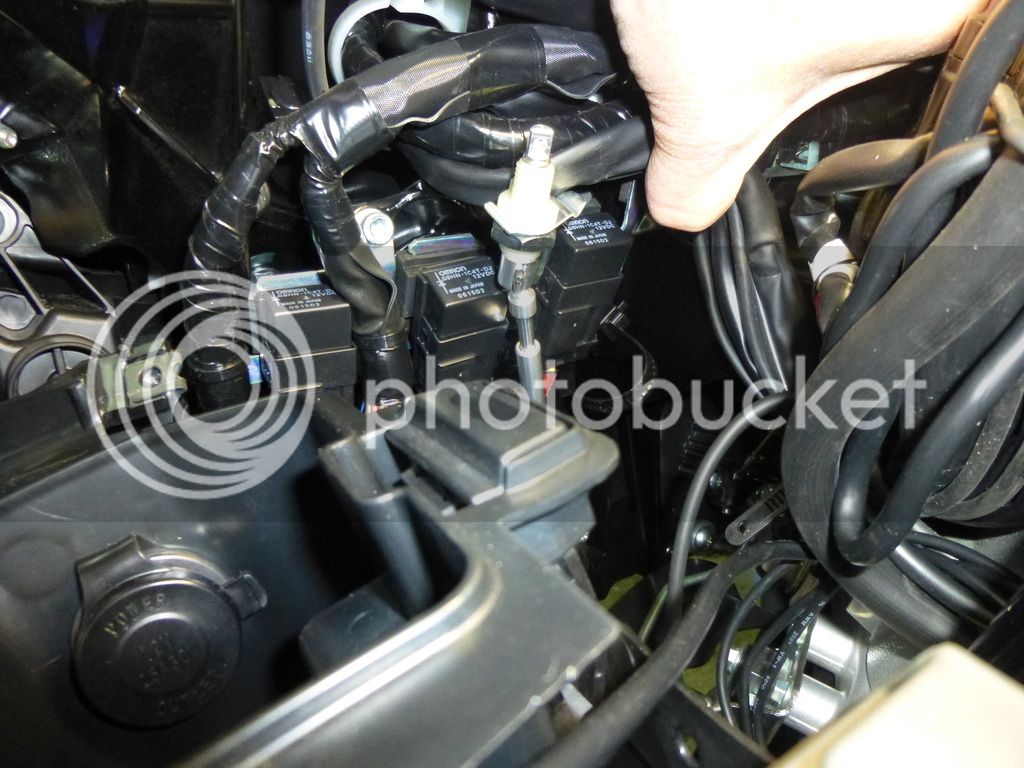
And another with the cable tie removed allowing you to slip the relay off its perch for easier access.

P1010786.jpg
Thank you for the info..... appreciate it !!!!

 
Purchased the Clearwater Darla.... Will post pics of the final install once they get in. Anyone have some tips for the headlight high beam wire ? I have a PDM60 so the other wires will go to that. I don't look forward to opening up the nose (seems like a ***** to remove the front cowl.
Just got the Darlas also for my 14ES. Talked to Clearwater today, they said you could get at the relay by taking off the inner black panels, not the whole cowl. Is that right?
Let me know how your install went.... My Darlas are currently being shipped so it might take 7-10 days before I get them (Canada is a long way from CA)....

 
Let me know how your install went.... My Darlas are currently being shipped so it might take 7-10 days before I get them (Canada is a long way from CA)....
Ha - at the right I get things done, you still may beat me to it.
smile.png


Did a TBS at 330 miles in prep for the ride this weekend. Just got back from a shakedown run and the difference was remarkable. I was kind of surprised that the factory didn't have them sync'd better than they were. Runs like a new bike should now, 4k buzziness way down =
smile.png


Last edited by a moderator:
Hey, I'll take that sugar any way I can get it
rolleyes.gif


I would like to think that the dealer would check it when they uncrate the bike in the first place, but not so much it would appear.

 
Looks nice!! Too bad we can't get this color matched. Mind if I ask how much you paid for that rack?
I paid 170 Euro for rack. List price is 197 Euro. It is really big & robust casted piart and those additional reinforcement steel frames + caster connection bars makes rear tail rock solid. I am sorry that yamaha did not do something like that for stock version. This is just "aftermarket" solution for not the best original desing...

 
Yeah - I am too. If that rack was available in a color matched version, I would have chosen that over the Givi SR-357. I looks much better and I can see by the design that will hold the load.

 
Yeah - I am too. If that rack was available in a color matched version, I would have chosen that over the Givi SR-357. I looks much better and I can see by the design that will hold the load.
And it would work with a Corbin Smuggler where the SR-357 doesn't.

Guess I should break down and buy one of Gary's kits.

170 Euro = $193.00 or there abouts ...

 
Last edited by a moderator:
I rode it to work in the rain and I rode it home dirty. I changed the engine oil and filter. I washed it. I put a coat of my favorite Yamaha spray polish on the tank, the front of the fairing and the windshield. I snapped the Givi V47 top box onto the back. I have it halfway packed up.

Leaving in the morning headed toward the Smoky Mountains with Pop and a friend of mine.

 
Got my check engine light taken care of today. As with others it was just a 'side stand' error?? Looks like Yamaha's got a "glitch"....


Latest posts

Top