Worst Maintenance Job On FJR?

Yamaha FJR Motorcycle Forum

Help Support Yamaha FJR Motorcycle Forum:

This site may earn a commission from merchant affiliate links, including eBay, Amazon, and others.

McRuss

Well-known member
Joined
Jun 21, 2005
Messages
167
Reaction score
4
Location
Lakehills, TX
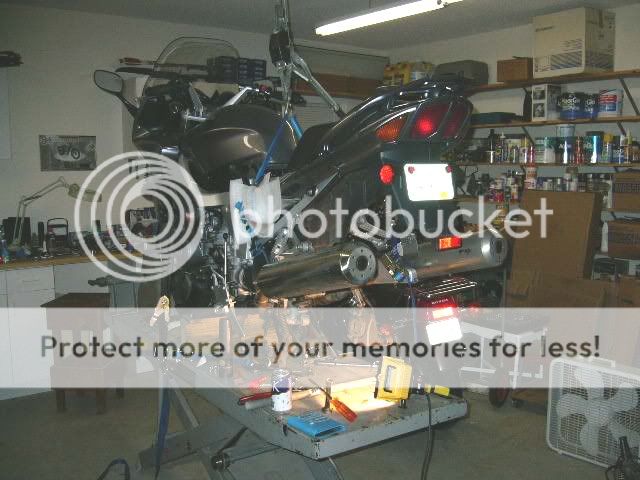
I started the rear suspension lube today. Found one of the bearings is shot even before I got the suspension out. Actually I dont have the suspension out. I'm beginning to think that this one should be performed by a seasoned FJR mechanic. I cant even get the center stand off, the first step after removing the wheel and drive shaft! What a miserable job this is going to be! Anyone else tried it?

 
Oh, I've been to the tech site, read the words, looked at the pictures. And one of the comments someone made was it was the worst job they had ever done on the bike. I know how to do the job, it is just extremely difficult to get at the bolts for the center stand, and it apparently has to come off to get one of the suspension bolts out. I'm about to fire up the gas wrench to get one of the nuts off the center stand bracket!

I posted this for two reasons: one, to warn folks about the difficulty of the project and two, to see if anyone had any tips not in the tech forum.

 
I posted this for two reasons: one, to warn folks about the difficulty of the project and two, to see if anyone had any tips not in the tech forum.
If that's your intent, I'll go ahead and move this thread to the "Technical" forum where other folks will see it more than if it remains here in the "Texas & South Central" forum....

 
there are two blots that are a pain in the *** on the center stand. i cut the heads off with a hack saw blade and put new stainless bolts in from the other side.

 
Thanks Warchild for moviing it, shoulda put it here to start with.

And I think the hacksaw bolt removal trick may be the answer! But how did you get a hacksaw blade in there? Musta loosened them enought to get on the bolt behind the head I supose. I cant even get the damn things loose! No room to work under there, and with the bike up on blocks, dont feel like having it fall on me if I use too much oomph to loosen them. I'm going to check with my local dealer, see it it is worth it to have them do the lube job. Anything less than $200 will be a deal!

 
I hope you have a good dealer. I took my bike in for a lose steering stem nut and was told it was fine. Took it home and did it myself. Problem went away.

 
From a previous post on this. Later,,, De :rolleyes:

Lessons learned from rear linkage lube. My ’04 FJR1300 was about 1 year old and had 9000 mi on it and I have ridden thru many rainstorms here in the Hotlanta area. After reading the many horror stories of rusted/non-greased parts, I bit the bullet to lube & inspect & here is what I found. Working from a 3’ high lift is great & having an overhead hoist above the lift is even better.

#1 Things needed: a 19mm hex socket (removes the front axle also) to remove & re torque the swing arm pivot shaft, a set of torx sockets for the one torx bolt on the front of the shifter mount, a good set of 6 point metric sockets (large ones too for re the swing arm pivot shaft nuts), a good set of combination metric wrenches, the factory service manual for the assembly pictures & torque values, a copy of the https://www.fjrtech.com/ article on lubing the pivot points for the instructions.

#2 There was no rust or fretting corrosion on any thing and all splines & bearings were greased & all shafts had a light coating of oil on them. If I had known this, I would have waited a few years to do this job.

#3 The center stands on the pre ‘04s (with their extra added gusset) may break, but they darned sure won’t fall off because of loosened bolts. These 4 bolts & nuts were the tightest & hardest to loosen of any I have ever seen. These 4 bolts were inserted from the outside, so the exhaust system has to be pried over & down to remove the bolts. While the book says to remove the exhaust system, you can do it without removing the headers by removing the muffler bolts & exhaust bolts to the center stand. When remounting the center stand, insert these 4 bolts from the inside so the exhaust won’t interfere. On the front 2 bolts I used a thick flat washer under the bolt head and purchased 2 thinner nuts (blue thread locker too) for proper exhaust clearance. I made sure that the weight of the bike was on the center stand before tightening these 4 center stand bolts/nuts.

#4 Remember which way the relay arm (the dog bones attach to the center of this) goes or you might have “falling rate” suspension. The arm with the bend in it goes to the back & is hooked to the Shock. A while back someone posted pixs of his relay are where he added grease fittings to it but I elected not to do this because I couldn’t see how the grease would get by the outer race of the needle bearing unless these bearing housings have a grease hole in them. Any ideas on this, guys & gals? Is there a hole in the bearing housing? I do believe that a grease fitting will work where there are 2 needle bearings separated by a space as in the center of the relay arm and on the swing arm.

#5 Remove the right muffler & the swing arm will have enough clearance to drop out.

#6 Didn’t pull the drive shaft out of the rear end cause it gets it’s lube from the rear end. Did remove the “U” joint and lube both splines with Moly lube. Looks like the “U” joint could go in either way but the splines on one end have a lead in bevel to help when inserting the drive shaft.

#7 Single best improvement was from lubing the shifter arm pivot, but it wasn’t from the added grease. This pivot is a shoulder bolt w/2 thrust washers & a “wave” washer & the proper clearance (read no slop) is obtained by screwing in the bolt till the wave washer is slightly compressed. The bolt is locked in place with blue thread locker from the factory. My bolt was too tight & was binding the shifter. You can easily check this by removing the upper shifter arm from the tranny shifter shaft & seeing that the foot shifter arm moves freely & isn’t binding. Mine was way too tight but I couldn’t tell it cause there is no slop in the linkage, until I disconnected it from the tranny. After removing the shoulder bolt & greasing it, I reinstalled it (with new blue thread locker) without binding it. What a difference. It shifted fine before but now it’s like warm butter. This shifter maintenance can be done by itself by removing the “Shifter/footpeg/sidestand” assy but this assy will have to be removed to remove the “U”joint.

Later,,,De

 
Good stuff.

I dont have a lift so am working at floor level. VERY difficult. Checked with the dealer, said between 3 and 4 hours for the job at $65 per hour plus parts. Looks like a $300 job. It may be worth it, those four center stand bolts are indeed very tight. And working from the floor, there is little room for leverage on a 14mm box end wrench, no room for a socket. An air rachet would be nice.....excuse to buy one? Maybe an HF special.

As for waiting a few years, my '04 has 26,000 miles, some rain riding but not alot, and there is slop in the rear dog bone bearings! Probably should have been done some time ago.

Back to the center stand: I have the two easy bolts loose. Now if I can just figure out how to get some leverage one the remaining two....Once the stand is out, the rest is piece of cake I think.

 
Well McRuss, don't keep us in suspense----How did this turn out & was yours dry or greased? It was tough from a lift, can't imagine doing it from the floor. I also can't imagine turning the shop guys loose on this job. Later,,, De ;)

04SwingArm002.jpg


De,

That is an excellent set of instructions you posted, thanks very much. I was psyching myself up to try this one at home, but I bailed on the swing arm service and (finally) at 31K miles had it done by a good shop. Cost was $145 for 2 and half hrs labor. Well worth it! Sunnyside Motorcycle

I did a ride-in for my (ahem) 26K mile service, and added the swing arm chore to the list of things I've neglected. Their attention to detail on many other items was superb. Highly recommended!

I've attempted a great deal of stuff on the FJR thanks to this board, but there is still a comfort level in having a professional (i.e. trusted) shop to go to from time to time. Thank you, Sunnyside!

 
Last edited by a moderator:
FJRay

I'm puzzled by your comments

i cut the heads off with a hack saw blade and put new stainless bolts in from the other side.
OK, so you cut off the heads, but how do you then remove the bolts as they have threads on? :(

.......................................................................

More and more of us are going to need to remove and lube the swing arm, so has no one found it easy to remove the centre stand with the bike on the ground?

What about the muffler being removed - I understand the previous write ups have recommended this be removed, but no mention of renewing the gasket - should a new gasket be fitted?

TIA

Paul

01 fjr

uk

 
yamaha1300rider, When the bolt head (it's next to the exh pipe) is cut off, the headless bolt can be pushed toward the center of the bike and removed. When installing the new bolts (from the inside please), put a washer behind the bolt head so the bolt won't be too close to the exh pipe and use a thinner nut with blue threadlocker on it so it also won't be too close to the exh pipe. Later,,, De :rolleyes:

 
UPDATE:

I finally got the centerstand nuts loose with help of a new 14mm wrench (sharp teeth), a rubber hammer and a string of profanities that made ME blush. Used the hacksaw blade trick as I could not get the exhaust down/out enough to get the bolt out. Took about 20 minutes per bolt, lots a fun and a few sore muscles, to get them cut off. So now everything is out. Bearings look ok, nothing dry. There is play though, where the bolts fit through the collars. Wondering if this is a sign of worn collars or should they be a loose fit? The two that attach the 'dog bones' to the castings are the sloppiest. The collar to bearing fit is good, no dicernable play. Not sure now if I should replace anything or just grease everything, get new bolts, and put it together. Any thoughts from you who have been there?

I haven't pulled the swing arm yet, not sure of the procedure for the locking nut on the left side. Is the hex wrench used to set the torque and then the lock nut just snugged down and locked in place with the keeper? What about the nut on the right side? Just thinking about this, haven't checked the book. On the old airhead GS I had, you had to center the pivot bolt first with the nuts on each side, then torque them.

PS, working on the floor sucks! I sold my drive on lift a while back, sure could have used it now! I see HF has one for 299....might have to take a look at it.

 
De - gottcha - thanks

Russ - looks like being an expensive task if you go for the lift :)

So what I've learnt from this thread is that you don't need to remove the centre stand to do lube the swingarm - thanks Bounce, and looks like I'll get the dealer to remove and lube the centre stand and change the orientation of one of the bolts.

Paul

01 fjr

uk

 
Lubing the linkage is not an easy job. One use of a pressure washer can make all that work useless. Knowledge gained from many years of motocross bikes. Use no pressure washer around any sealed part. Mainly wheel bearings, swingarm and linkage bearings. I stopped using a pressure washer years ago and all wheel bearing and linkage problems went away. A pressure washer can push water and dirt by a seal that is in perfect condition.

 
A new wrinkle:

I loosened the swing arm attachments and found something odd. The torque specs for the right side 'nut' and left 'locking nut' are 90ftlbs and 85ftlbs and the pivot shaft is 5.1 ftlbs. Both outer nuts were slightly more than finger tight, almost hurt myself when I leaned into the breaker bar expecing to break loose 90 ftlbs and they came loose. But the pivot shaft took all the leverage I would expect from 90 ftlbs!

Is the swing arm a factory install or is it put on during 'dealer assembly?" I hope the wrong torque settings didn't screw anything up. There is no play that I can feel, don't have the bearings out yet but will inspect them carefully.

PS, I agree about pressure washers! Wonder if that is why someone had to replace bearings at 9000 miles?

 
Top