Self Split: First Farkles on a new '14 ES

Yamaha FJR Motorcycle Forum

Help Support Yamaha FJR Motorcycle Forum:

This site may earn a commission from merchant affiliate links, including eBay, Amazon, and others.

Fred W

1 Wheel Drive
FJR Supporter
Joined
Nov 9, 2006
Messages
17,743
Reaction score
3,929
Location
Eastern VT
Posted this previously,. and ended up hijacking another guy's thread about his first farkles, then decided that I should create my own thread to detail the stuff I see as Necessary Farkles.

~~~~~~~~~~~~~~~~~~~~~~~~~~~~~~~~~~~~~~~~~~~~~~~~~~~~~~~~~~~~~~~~~~~~~~~~~~~~~~~~~~~~~~~~~

Not that this is a race or anything. but...
I've accumulated > 700 miles on my '14, enough to do the 600 mile service this past weekend, long before my 20 day temp plate ran out.
wink.png


Someone mentioned it previously but I really had never seen it before... the gear oil came out very cloudy, full of metal flakes, with a nice layer of metal paste on the magnet (guess that is what it's in there for). I bought my prior FJR post break-in and every gear oil change the stuff came out looking just like the stuff going back in. Engine oil looked a lot more normal-er.

The new farkles so far are:

SW Motech Sliders
Techspec Snakeskin Tank Protectors
Pyramid Fenda Extenda
Givi SR357 trunk rack for mounting my old V46 bag. New Red lid on order, will arrive next Monday
Genmar clone (from eBay) bar risers.
Whelen LIN3 and 3rd Brake Light flasher module (installed today)
Temporary, foam *** padding (ditched the bubble wrap) and faux sheepskin cover. This just until Russell seats arrive.
RealTime Industries Retroreflective decals for the saddle bags. (I selected the ones with the red tuning forks logo, of course!)


Farkles transferred over from my old 1st gen:

RamBone for mounting zumo 550 GPS in front of the tank

Bags Connection Tank ring and City Evo tank bag. Tank bag is electrified (via a plain old battery tender type cable) with Starcom1 Advance intercom, power source for the GPS, and power and velcro mounting point for Radar Detector (on top of the bag). Also have ability to charge any number of gadgets inside the bag

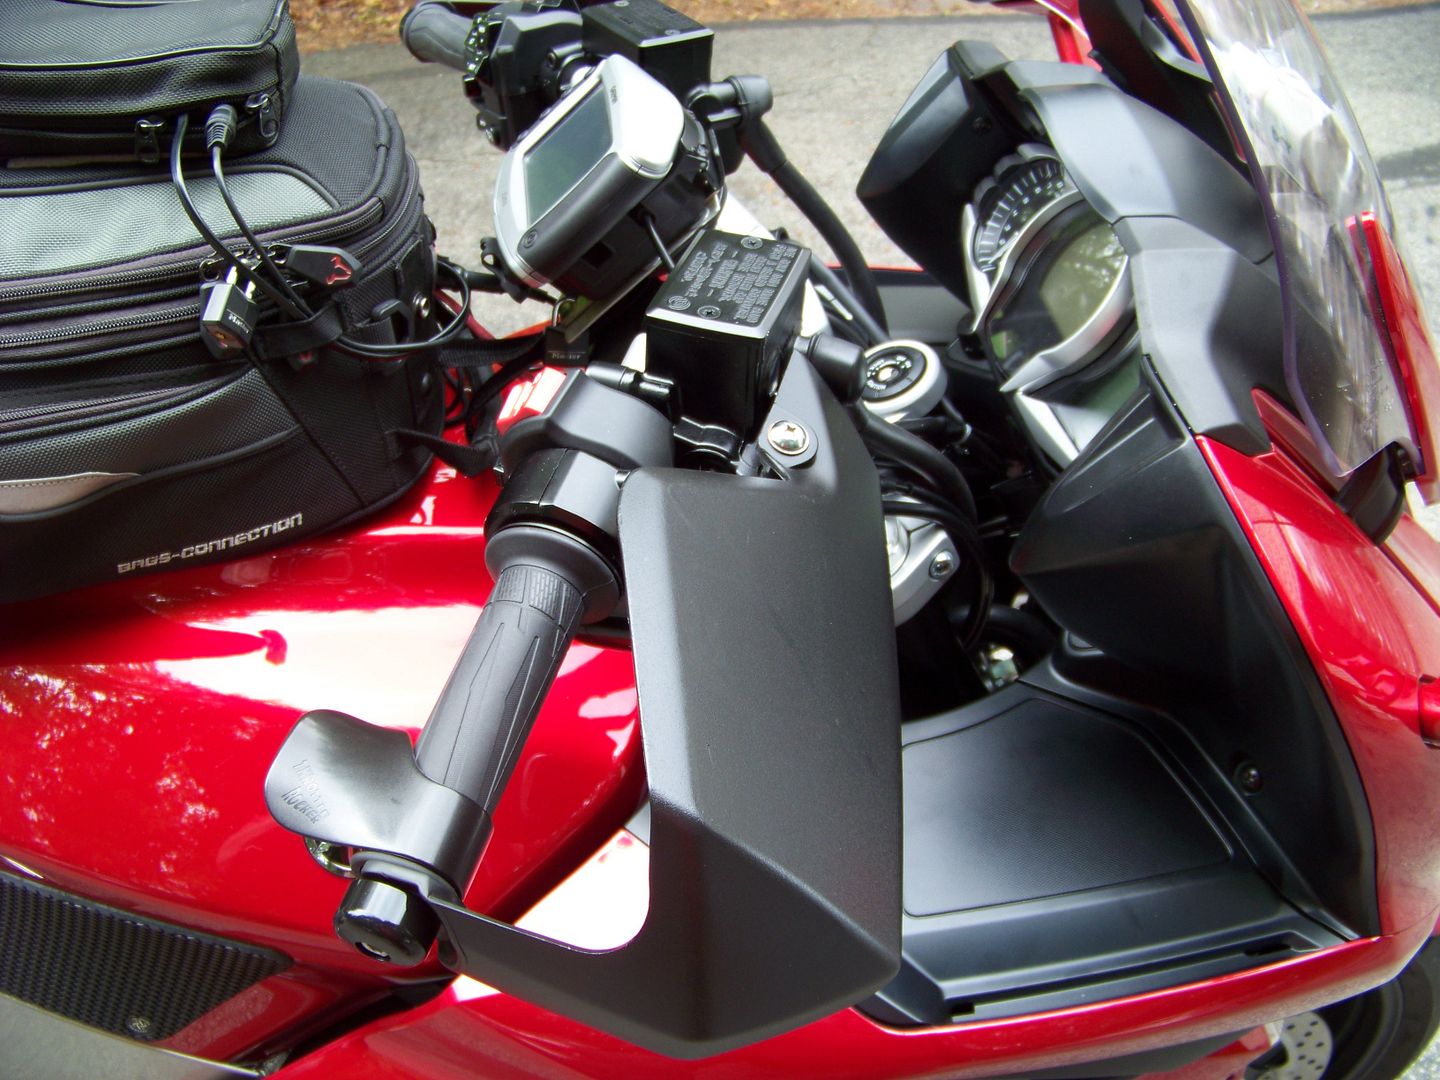
Vstrom Hand guards, work fine once bar risers are added. They interfered with the front faring with the lower stock bar location. Also added a washer on the right bar end (and a longer SS bolt) so the twist grip doesn't rub the edge of the hand guard.


Farkles still in the mail:

Russell Daylong, dual custom, full leather, Half Moon pattern. no GB discount, cost me a grand! ouch! (I'll forget that price just as soon as I ride a full day ride and never have to wiggle my *** around once). My build date is 1 October, but I sent my seats in early hoping they might have an opening.

Gen 3 Bigfoot from WynPro.
Candy Red lid for V46 trunk. Hope it's a decent match.


Farkles still in the design stage:

Mirror spacers that double as a mounting point for LEDrider LR4 aux lights.

Also, looking at the windshield options for when the mercury dips (further). I really like the stock shield for warm weather, it's super smooth, but doesn't give as much protection as the big shields will. Ideally like to buy just one big shield and not go through the 7 or 8 shield iterations I did with the 1st gen.


And then...
Gas, and tires and just ride.
wink.png


Some photos coming soon.

 
Last edited by a moderator:
So will the new owner notice some stuff missing?? Or has he started his own farkle list
Nah... he has a really good start. Not much he'll be needing to buy except tahrs and gas in the near future.

Dual Russell seats, Heli Bar risers, Ram Bone for his zumo 550, Bags Connection Daypack tank bag and mounting ring, fully modified 1st gen suspension front and rear, Givi SR rack, Power Commander III, Fendah Extenda, Vista Cruise, Heated Grips, FZ1 Mirrors...

Well, you get the picture.

I sold the boy the bike for exactly what the stealer was offering me in trade, fully farkled (which was ludicrous, IMO). But not so crazy when you're passing it along to the next generation. 'Course I also gave him back exactly what I collected from him for the VFR fully a year ago in trade.

Yeah, I'm a frugal "old man", but I also like to encourage him.
wink.png

Very nice, Fred. Don't worry, our kids are going to pay us back for everything, eventually. At least that's what I tell my kids they are supposed to do.
rolleyes.gif


Today I learned how to take the battery cover off, and more importantly, get it back on. My, that is quite a little Rubik's challenge, isn't it? Uprated the fuse in my battery tender cable so that I can run my air compressor off the cable, if (when) I need to. The wires are plenty stout enough to support a 15A fuse for a short time.

Also took the opportunity to transfer my Frugal Yankee PDB (Power Distribution Block) taken off the old bike, installed onto the new bike for powering our heated gear, which will be needed by Josie really soon. Temps have taken a tumble last weekend around here. I like the cool weather but she gets chilled easily.

Sorry Iris, still no pictures yet.
no.gif
Soon, I promise.

 
Last edited by a moderator:
Not yet... still looking. And I've had many of the panels off and the tank up now.

You're good, man. You're very good. Next time you pay for the lobstahs!
tonguesmiley.gif


OK, finally, time for some of the Farkle Fotos, as promised!!!

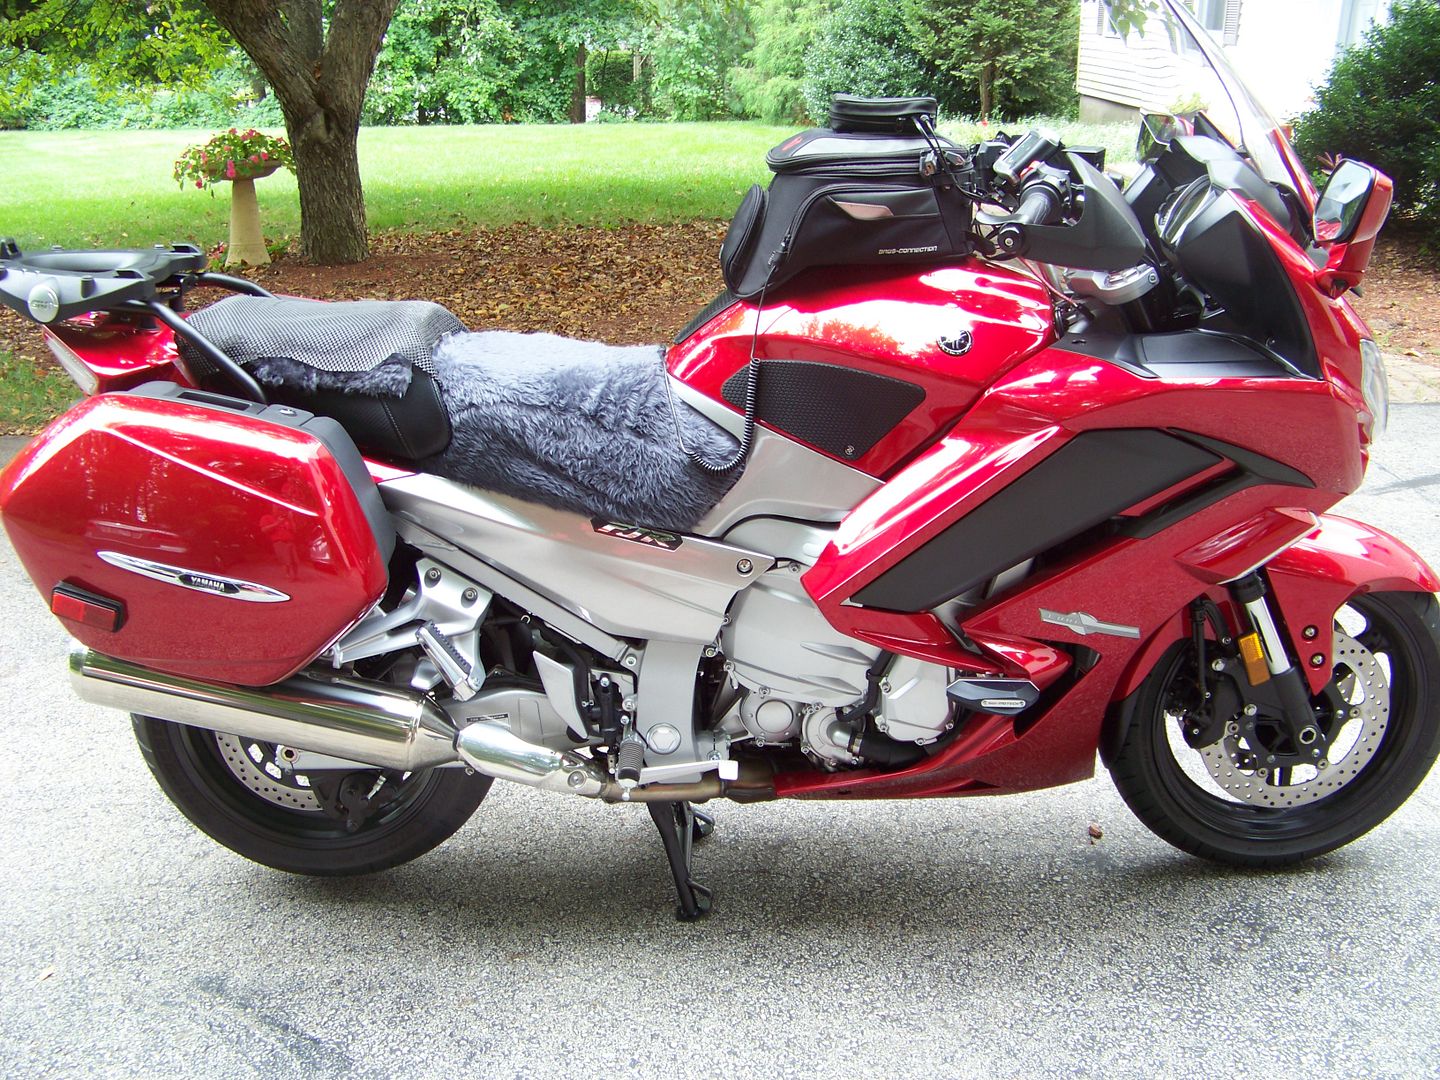
She's a beauty, ain't she? My youngest grandson, whose favorite color is red, told me I needed to name it Lightning (after Lightning McQueen).

100_4651.jpg


Above you can see the Techspec Snakeskin tank protection kit. The rear center piece fits nicely under the tank bag where it would contact the tank surface.

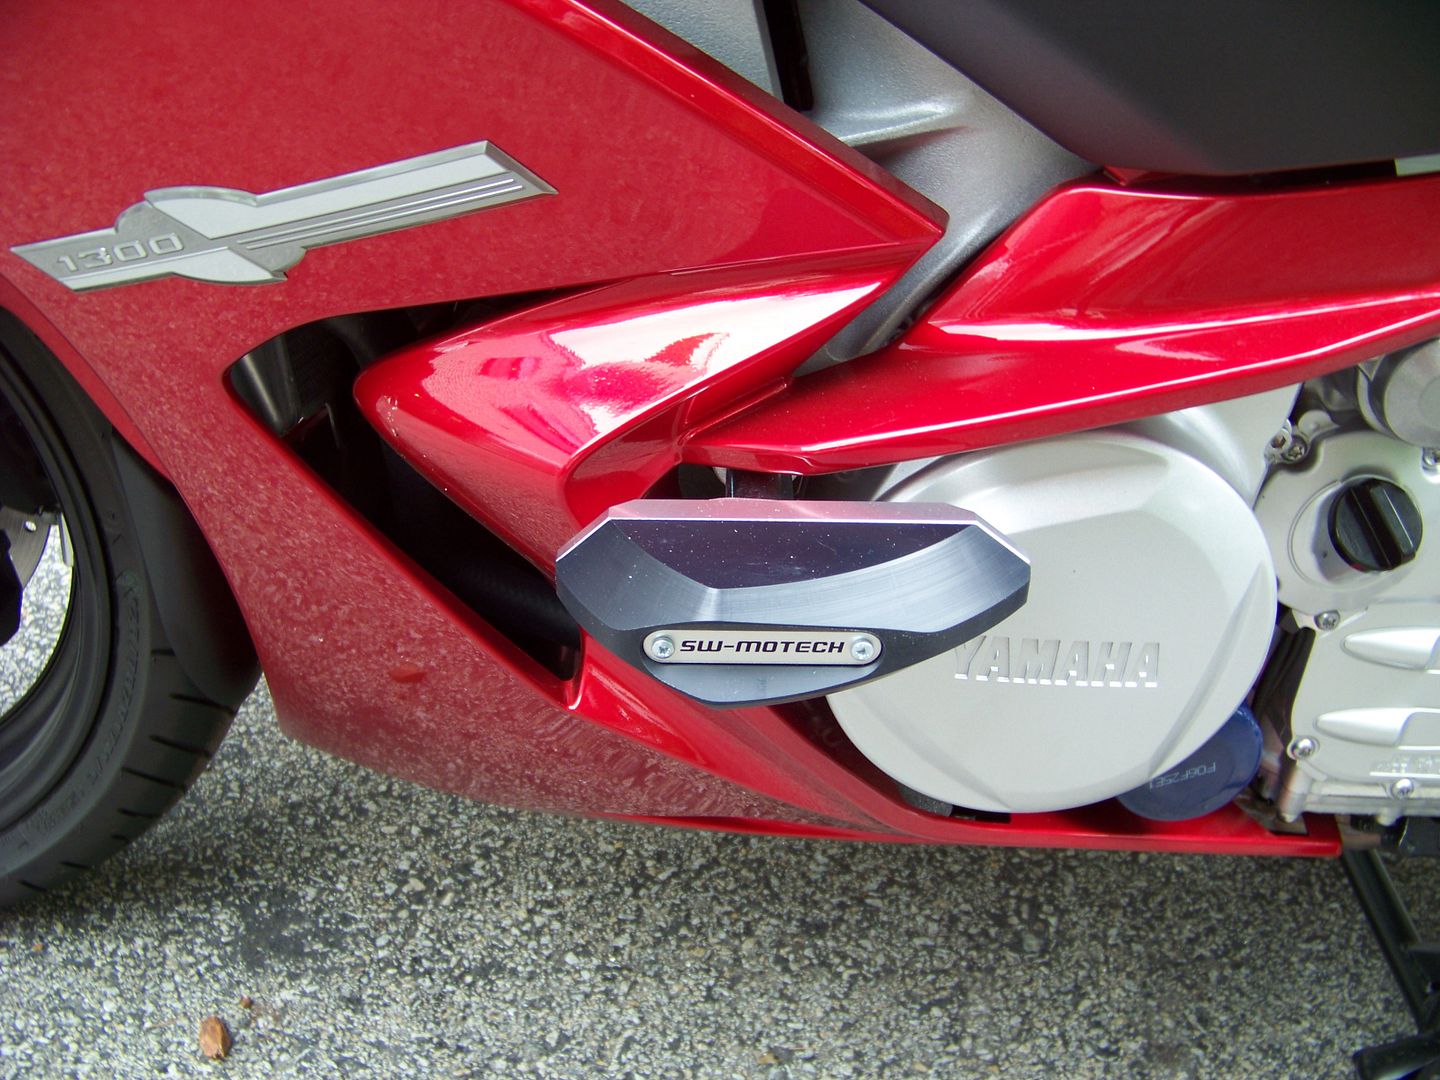
SW Motech Sliders went on first thing upon arrival...

100_4661.jpg


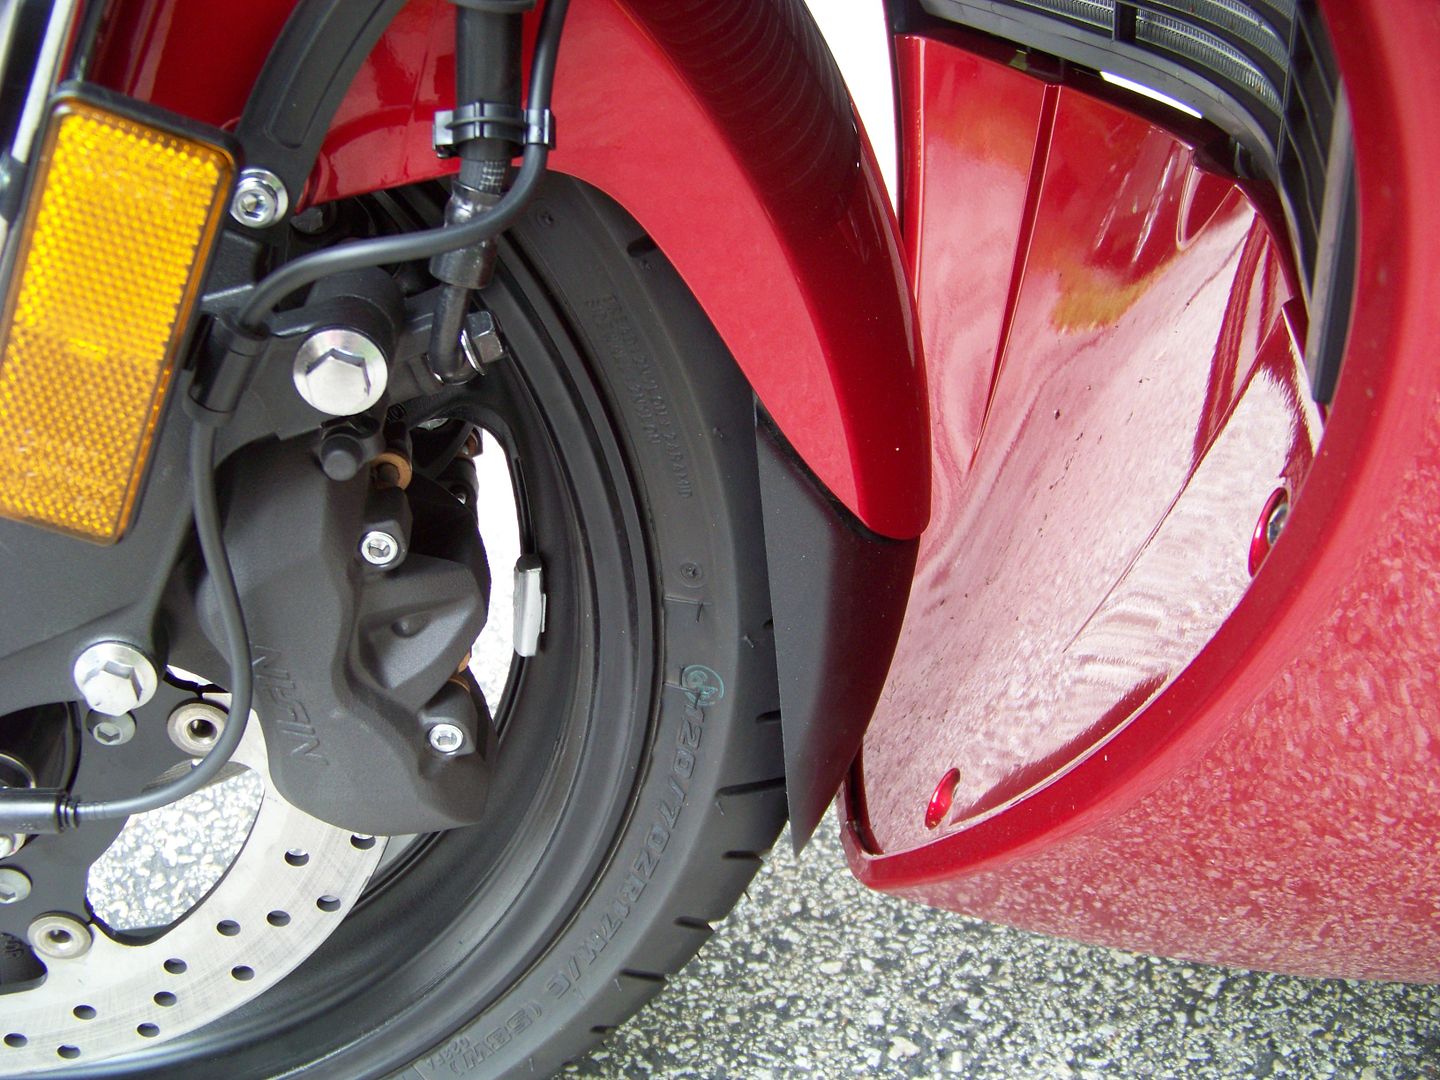
Fendah Extendah. Installed with 3M Acrylic Foam tape for a no screws or pop rivet install. I may redo it with glue as it rides pretty darned close to the tire at the bottom edge like this. If a big rock got wedged up there it might rip the thing off.
unsure.png


100_4662.jpg


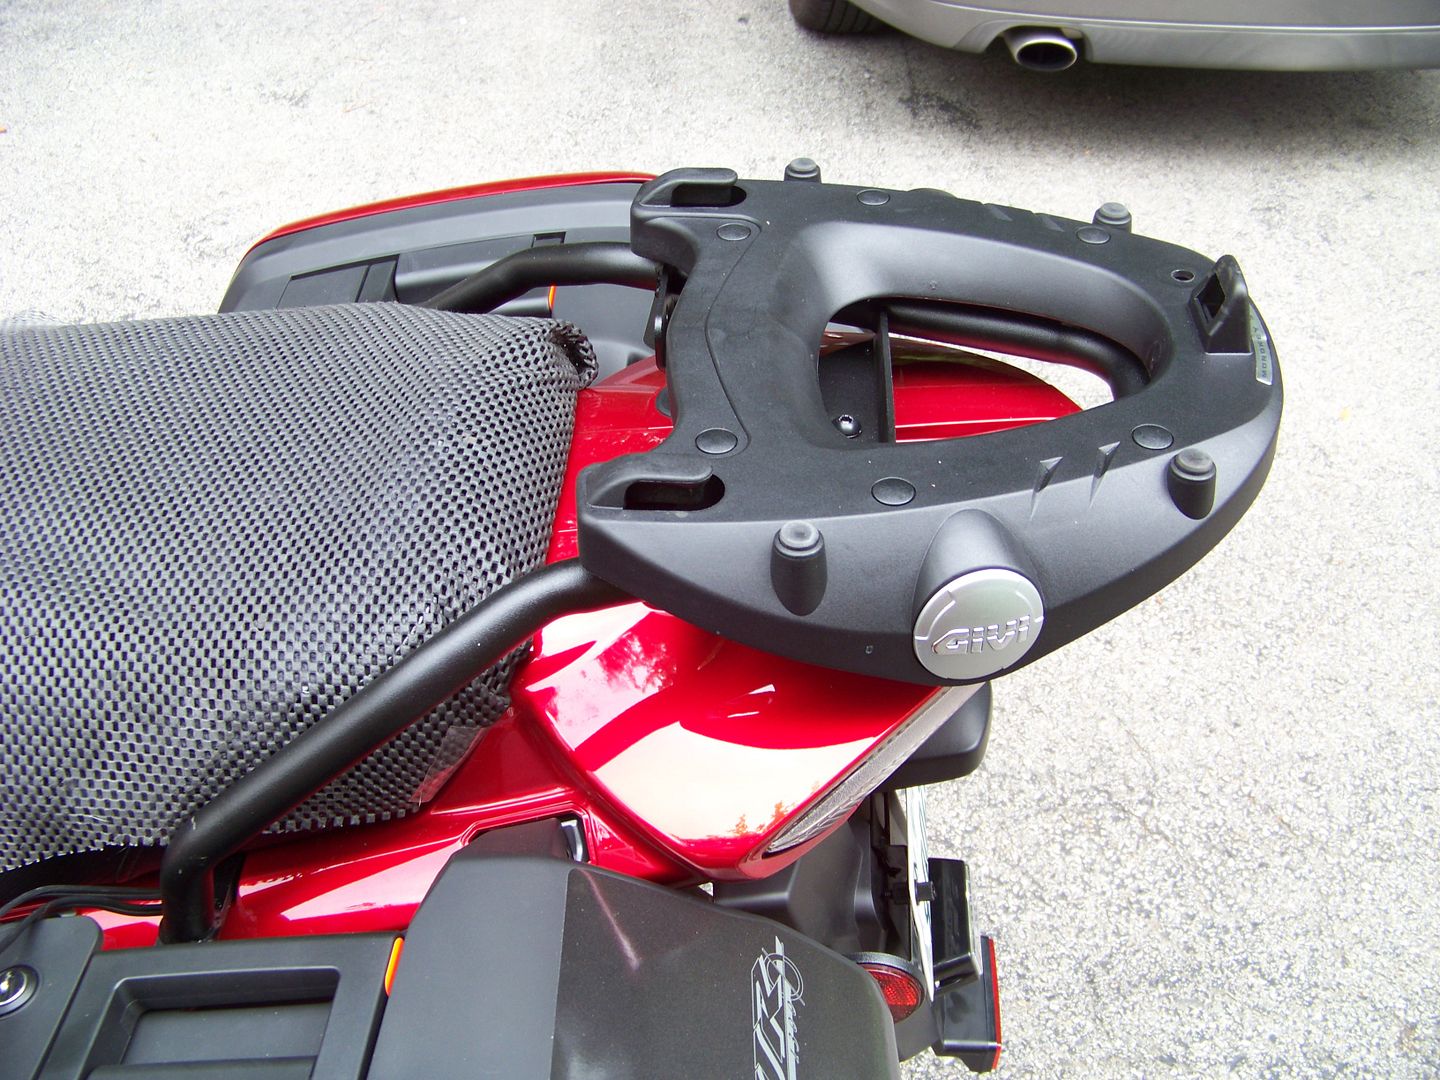
Givi SR357 trunk mount. I'll be mounting my old V46 trunk as soon as the new red lid comes in. Note new hole for the trunk security pin has already been drilled.
wink.png


100_4660.jpg


Real Time Industries retro-reflective saddle bag decals.

100_4657.jpg


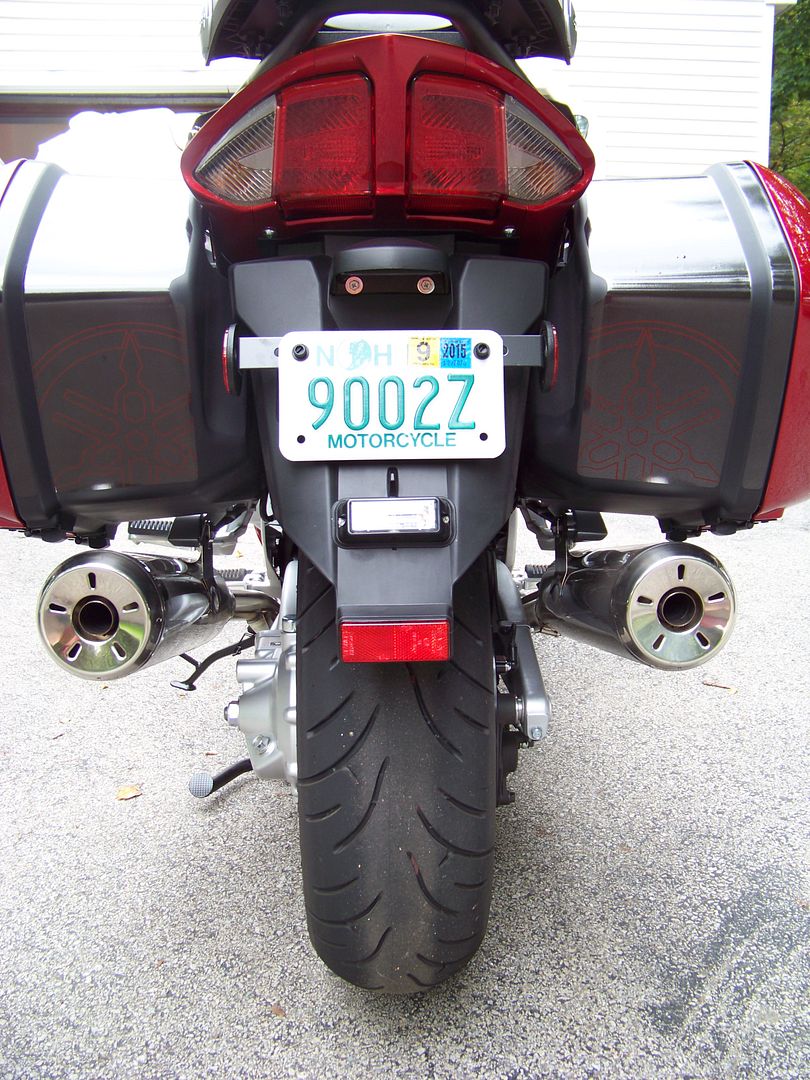
Kept my old plate number since I have it memorized. Yes, now anyone with access can run my plate number and find out where I live.
uhoh.gif
Oh no!!!

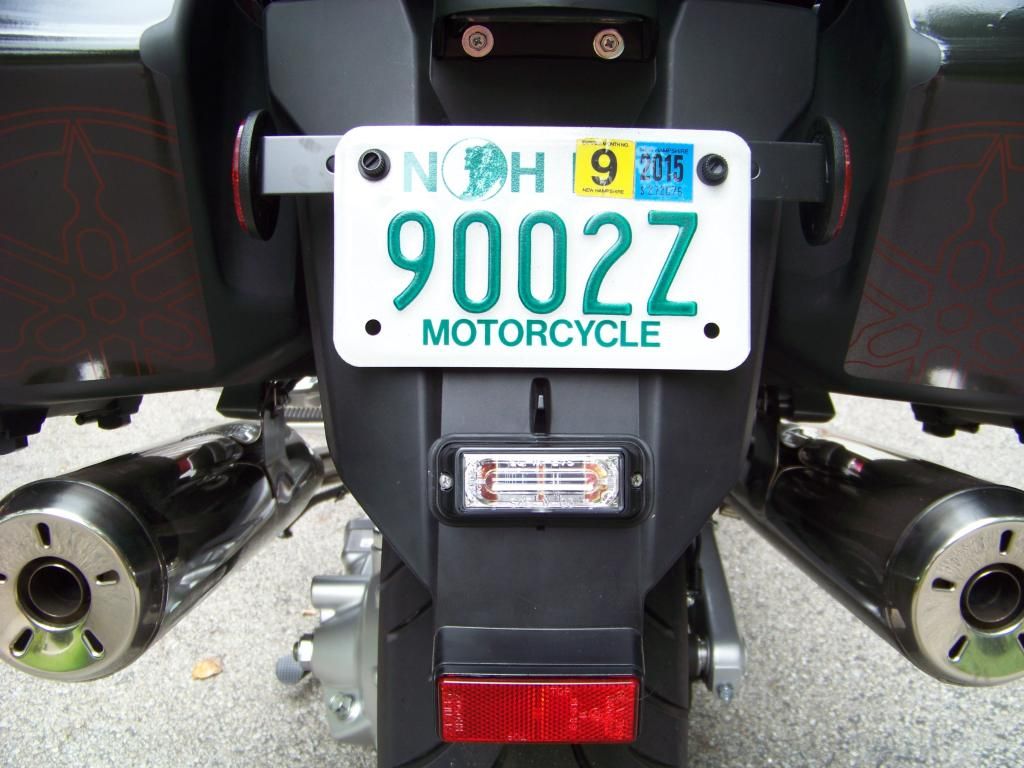
Close up of the Whelen LIN3 location below the plate. I looked hard at mounting it between the top of the plate and the license plate light, which is where my 1st gen has it. It would fit there OK, but only without the rubber base, and the fender in that area is not flat. The plate light would still work fine with the higher mounting spot, but I opted for the lower mount this time.

100_4658.jpg


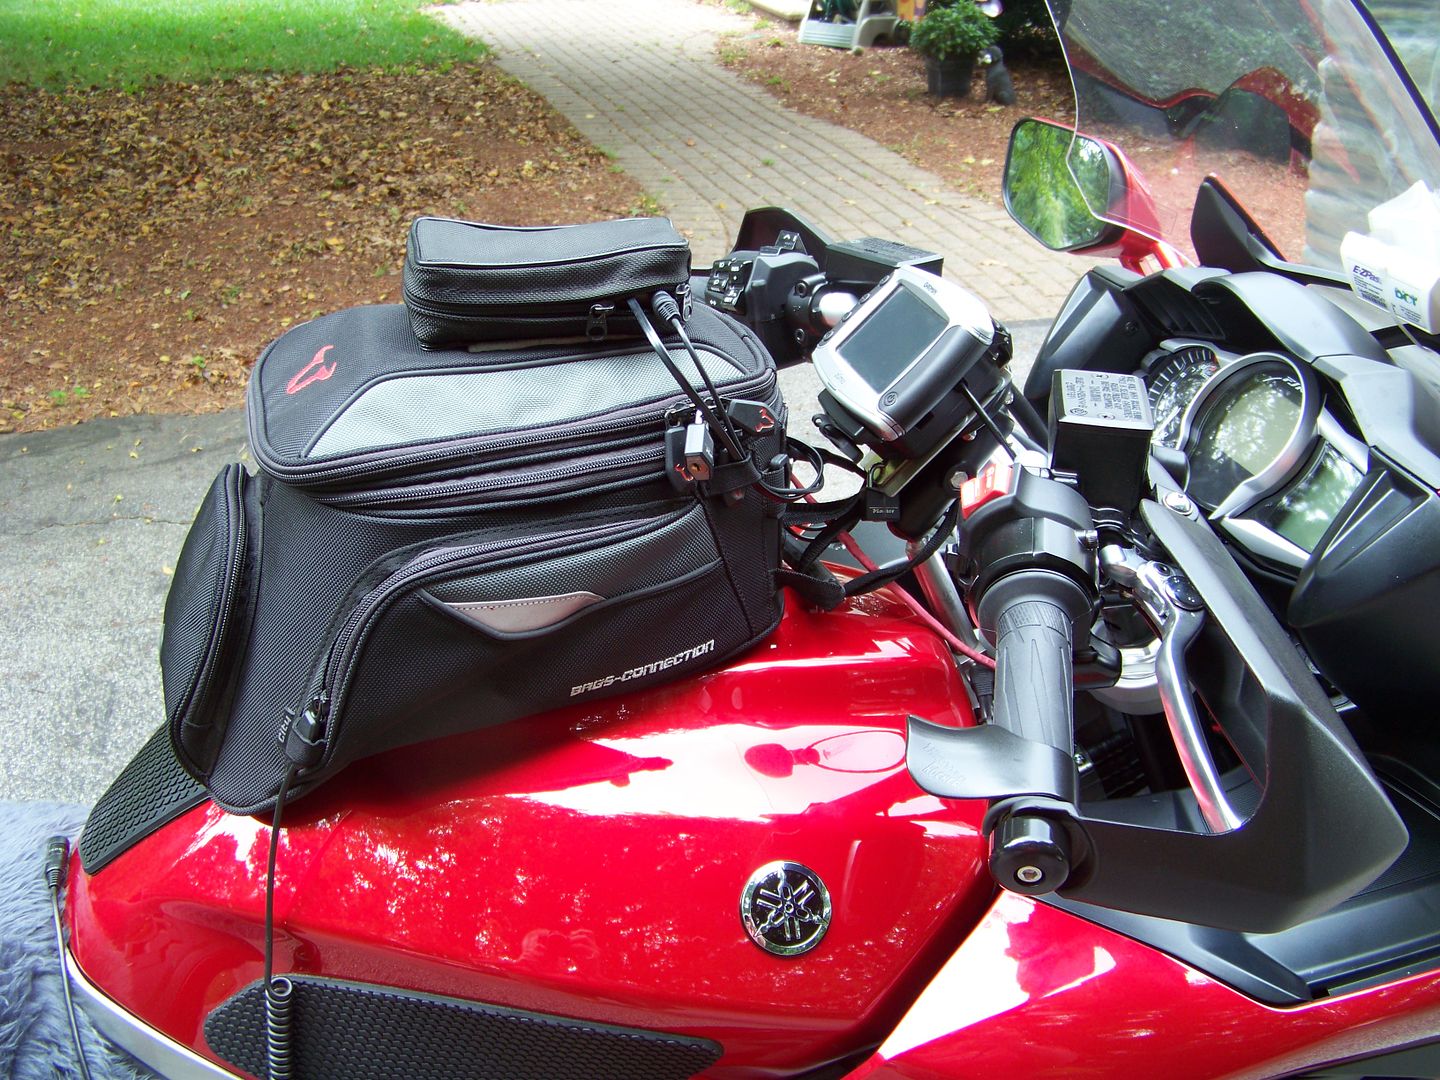
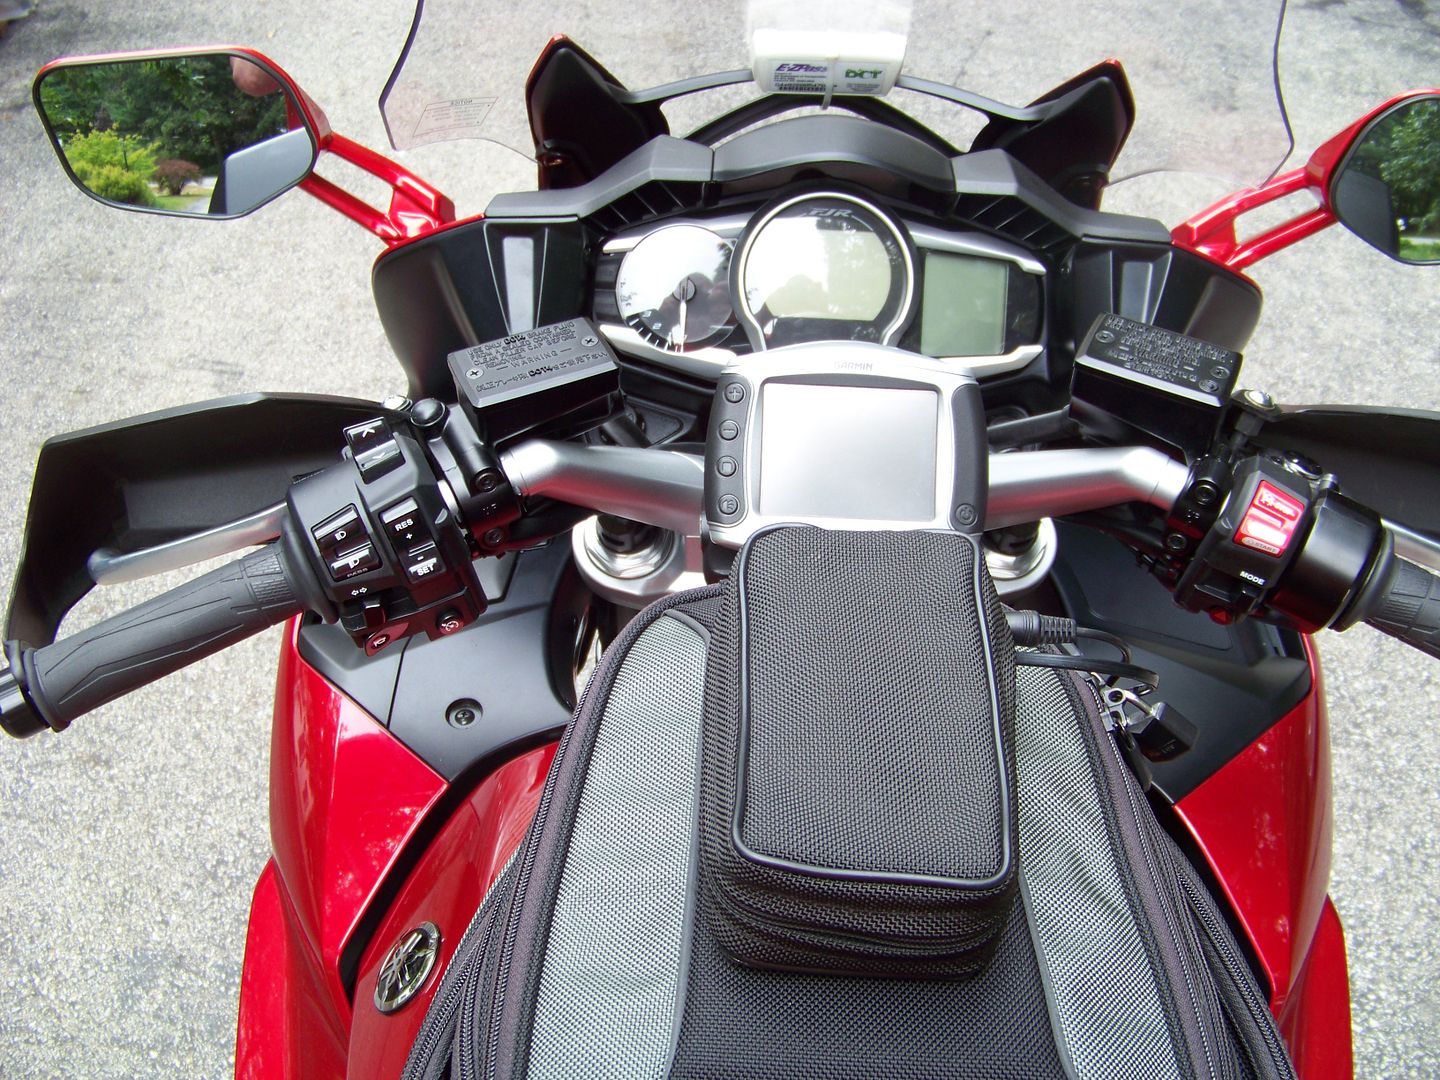
Closer look at the Bags Connection City Evo tank bag and Techspec. Also can see the Rambone mounting for the workhorse Garmin zumo 550 GPS.

100_4652.jpg


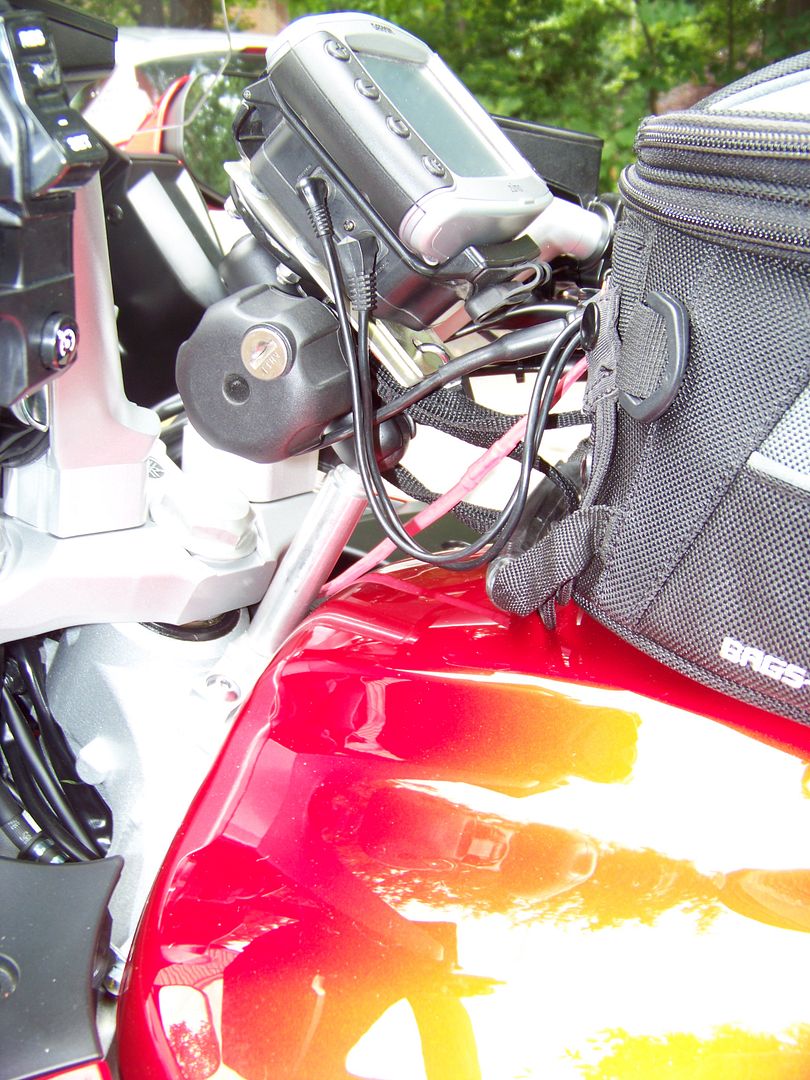
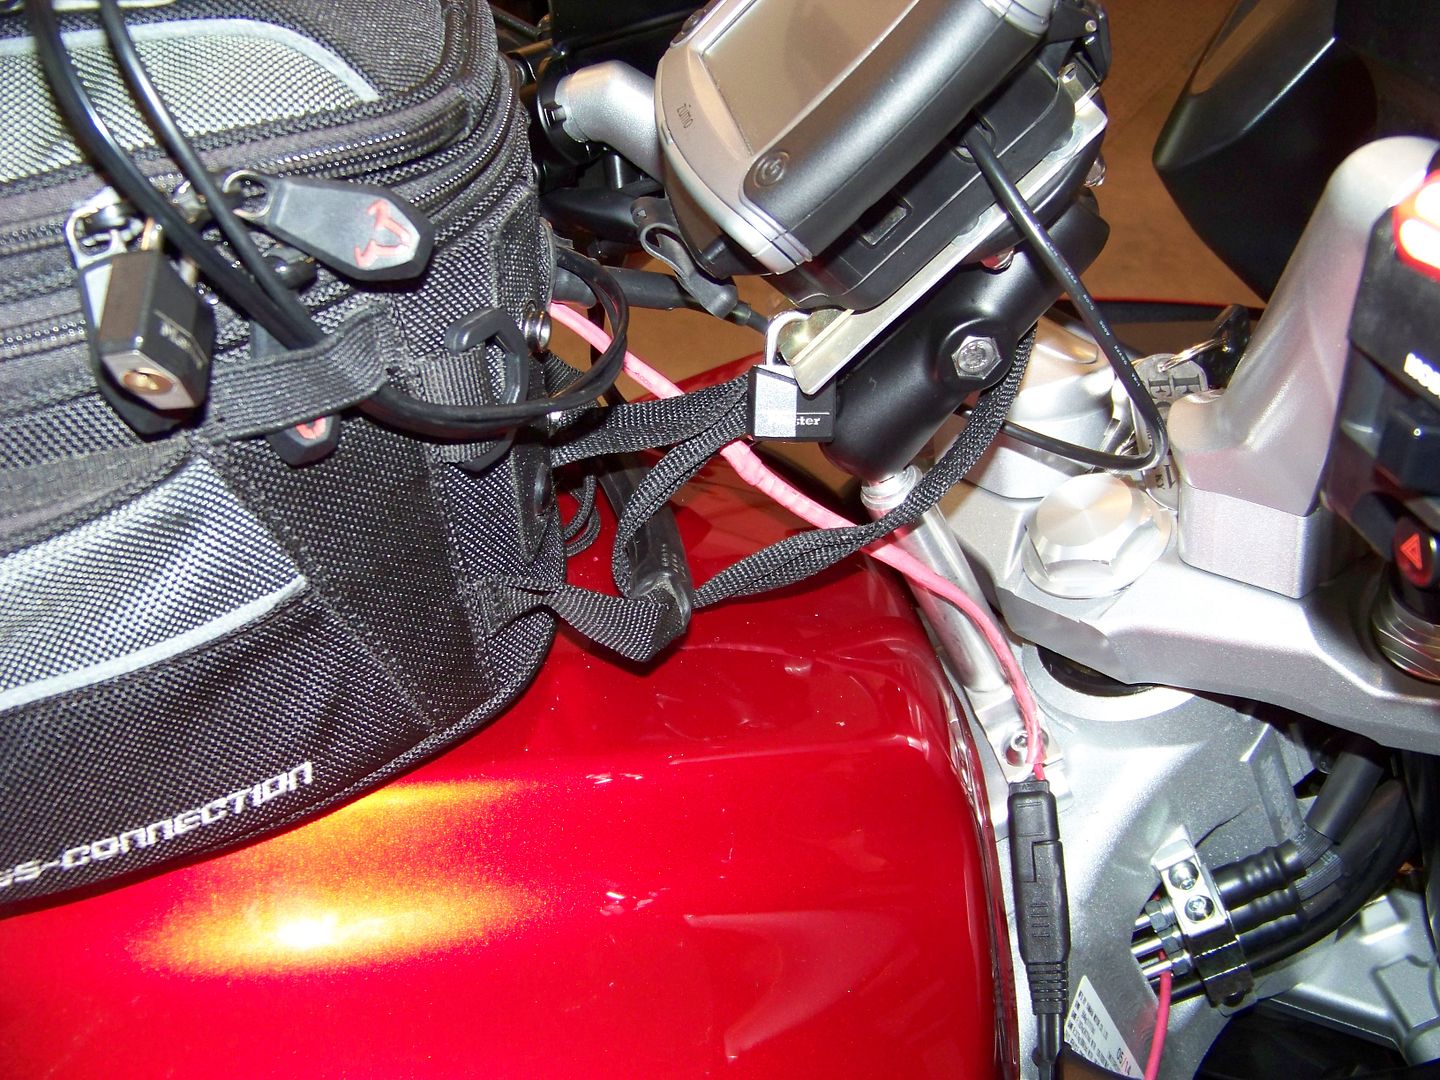
View from the other side showing the cabling to GPS and the RAM arm lock. That and my home made zumo security mount makes the GPS about as theft proof as it can be.

100_4667.jpg


Also note the GenMar clone Bar risers in the above photo.

Using the middle sized RAM arm on the RamBone puts it high enough to clear the friont of the tank bag, but low enough that I can still see all of the dash.

100_4663.jpg


One thing that I like about my current farkle config is that I don't have a bunch of gadgets mounted up on top of the handlebars (other than the hand guards). It looks a lot cleaner this way, and makes it easy to pack everything up for the night at a hotel.

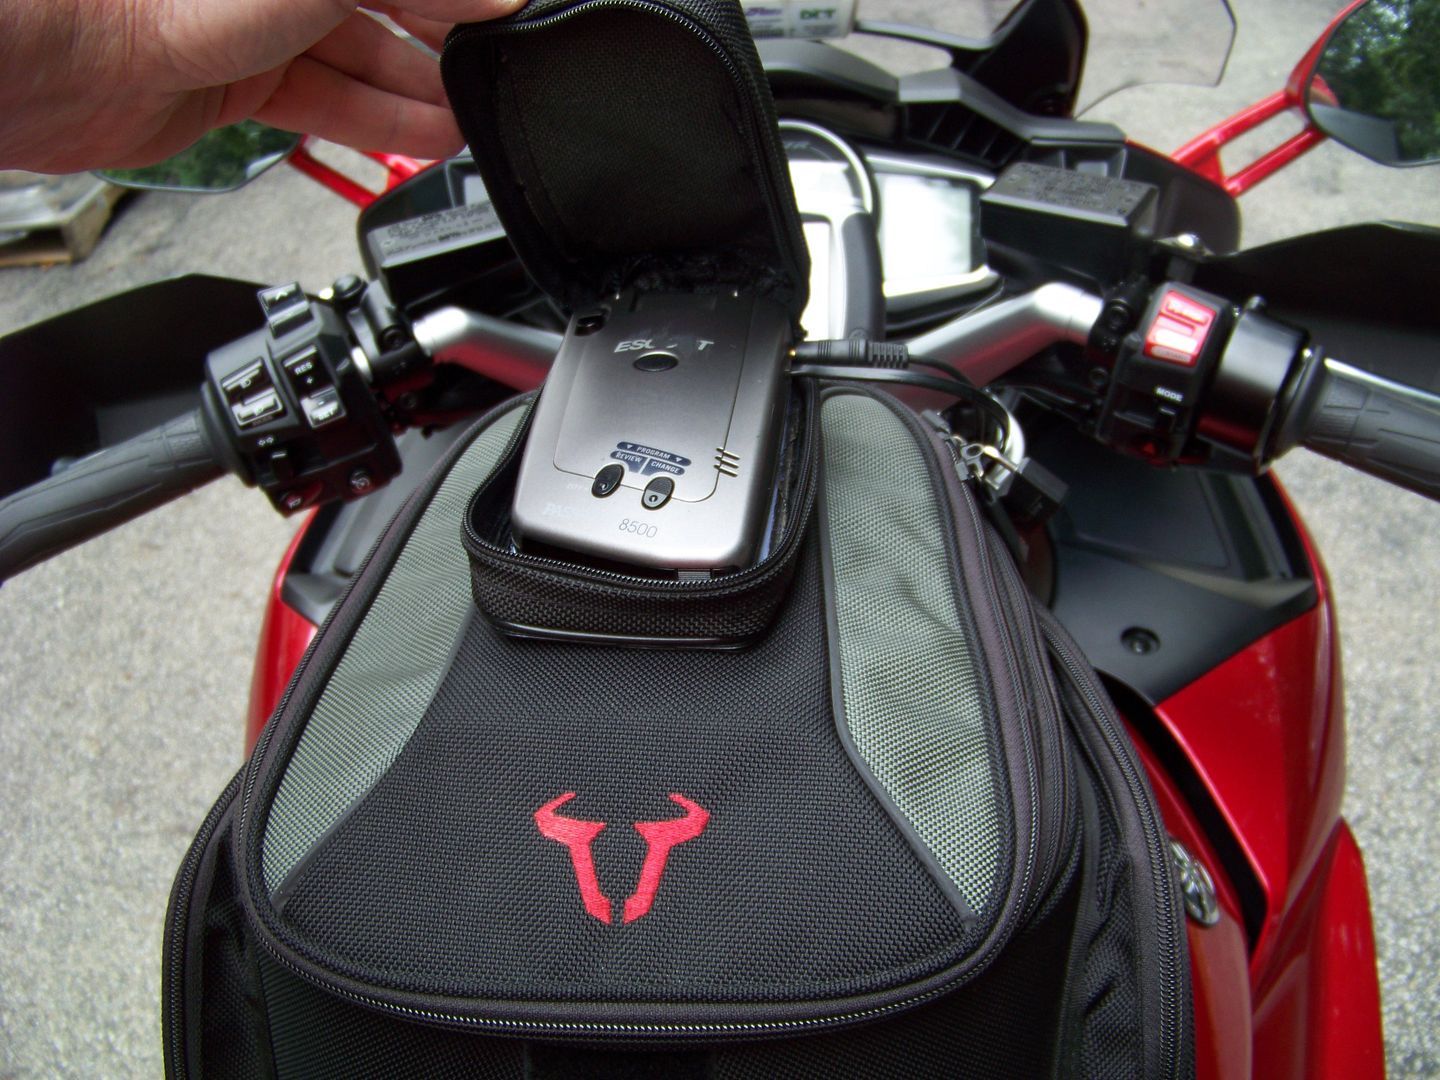
The small zippered bag velcroed on top of my tank bag is the stealth cover for my Radar Detector. I can either run with the RD covered like below, or with the RD out in the open. Only difference in performance is it will not pick up laser when in the bag. No big deal IMO.

100_4664.jpg


Having the RD on top of the bag is convenient on rain days. JUst throw your normal tank bag cover on the whole kit and caboodle.

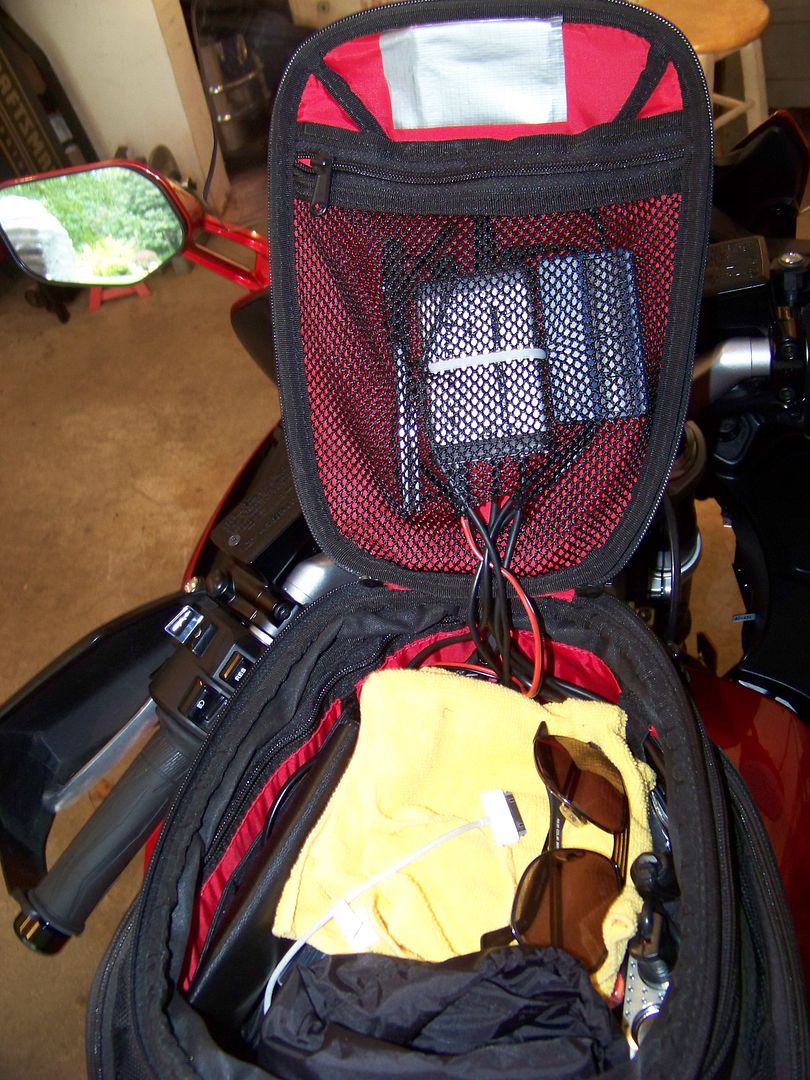
All of my electronic gadgets are wired thru the tank bag. I have a single SAE (battery tender) cable input to a 3 way power splitter inside the bag (on right side, only using two ports currently). This powers the zumo GPS through a quick disconnect-able cable, the Starcom1 that you see below in the mesh lid compartment, and the RD mounted up on the lid.

100_4672.jpg


The duct tape is covering a slit that I made in the tank bag's liner to allow me to insert a piece of sheet metal (repurposed curtain rod) that is supporting the weight of the RD on the semi-soft bag lid. Without the added support the lid sagged in badly. Also stash my garage door opener in here for quick access while rolling up the driveway.

Single SAE power connection for tank bag

100_4671.jpg


The strap that you see at the front of the tank bag looped around the GPS mount is to hold it when refueling without pulling on the cables.

The old, used V-strom hand guards fit fine once the GenMar clone bar risers were installed. Inserted a single flat washer and used a longer SS bolt on the right side bar end to clear the twist grip end. Only down side to the hand guards is no I really can't see behind me with the stock mirrors. That's OK 'cause we've got something in the works to fix that!
wink.png


100_4653.jpg


Also seen above is the throttle rocker. I slip one on each of my bikes. I'm a lazy SOB and don't like holding the throttle very tightly. Works for me. YMMV

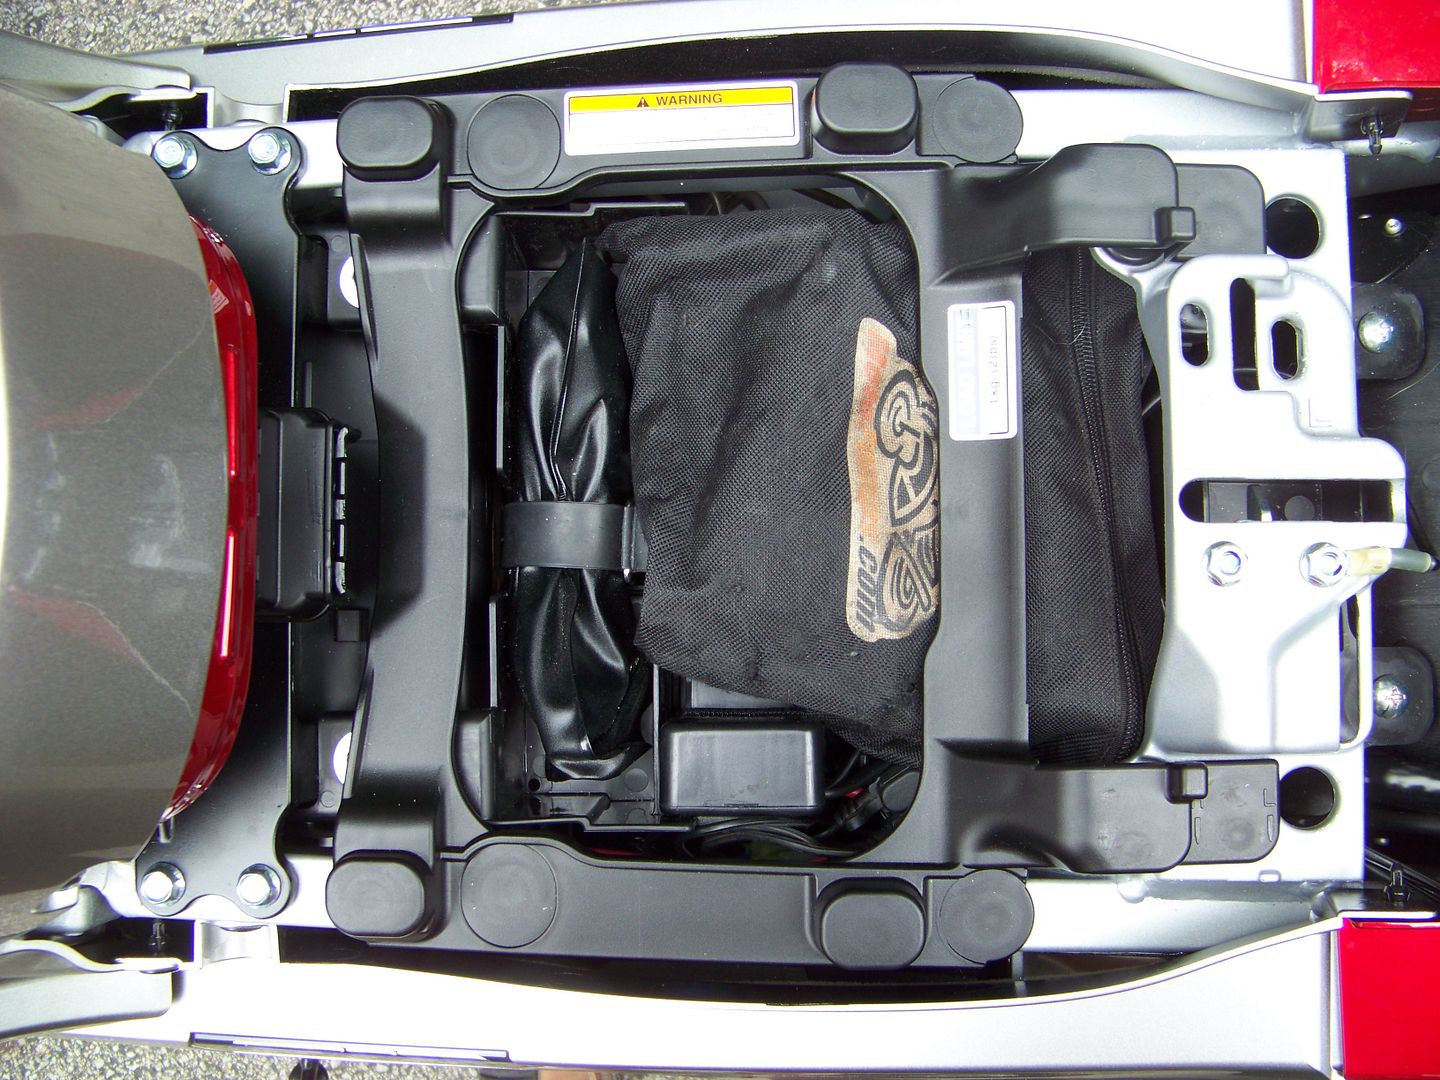
Under the seat I have room for my Motopumps.com tire plug and 12V compressor inflation kit, and also squeezed in my Yankee Frugal PDB. The PDB is just an always hot power distribution box for our heated gear. I ran a single 10 gauge wire from the battery to the PDB, and picked up a ground on one of the seat latch nuts. Since this is just for the heated gear, no worries about ground noise issues.

100_4669.jpg


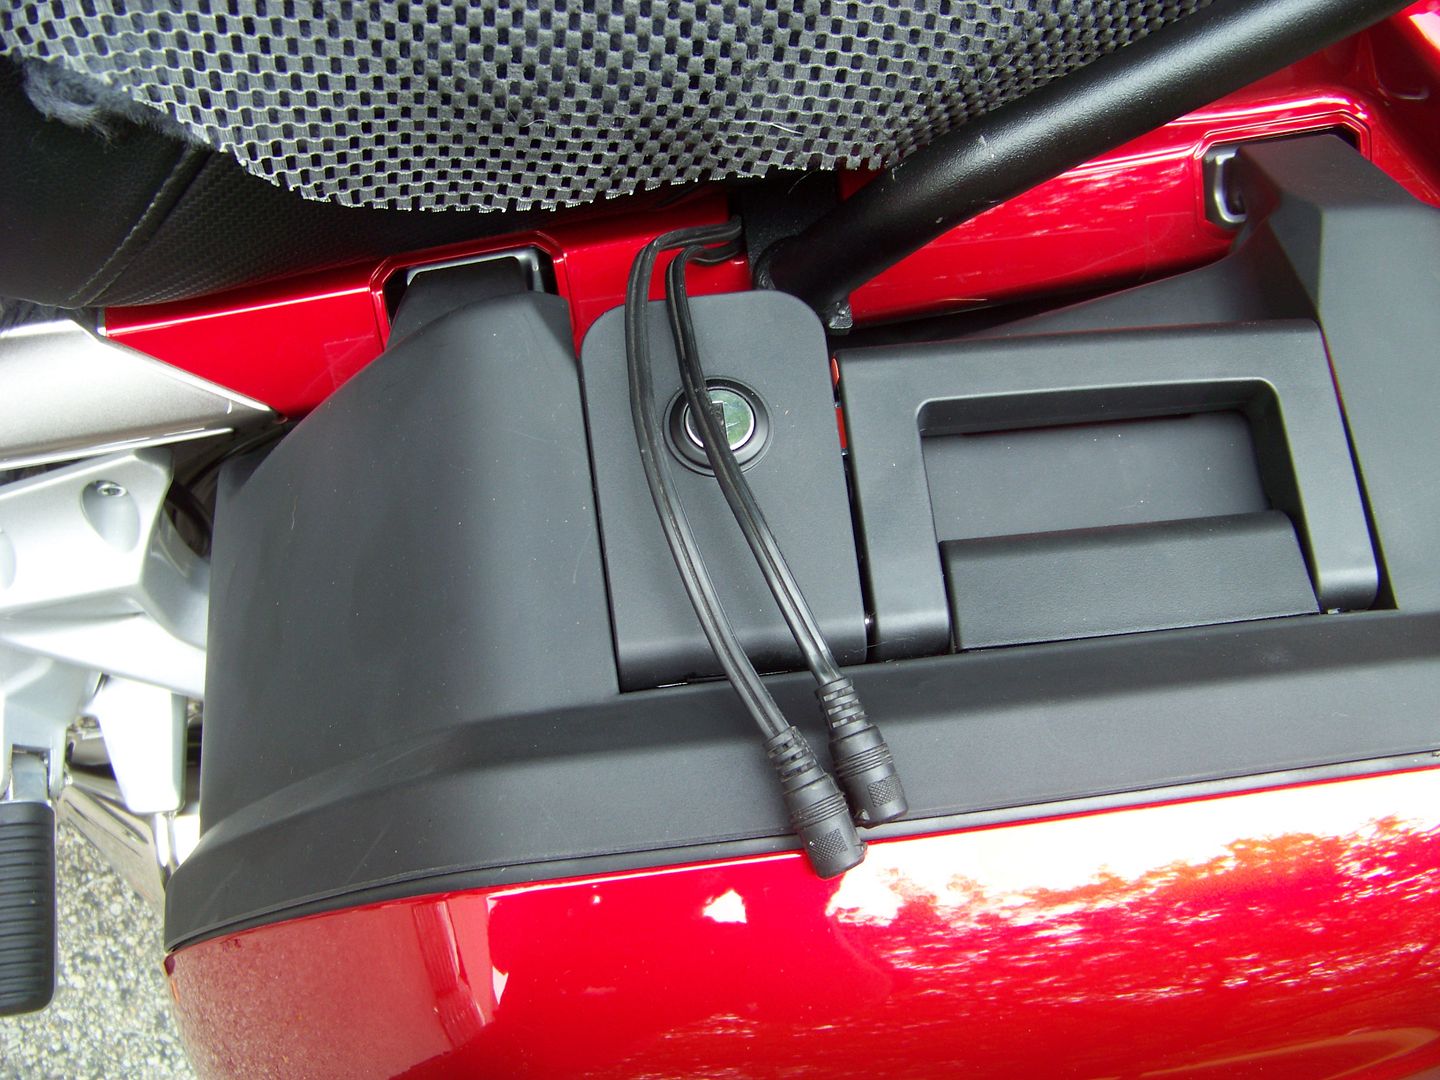
And I brought the two pigtails out from under the seat at the Givi SR Rack penetration. There is enough space around the Givi rack that you can just pull the cables back in and leave them under the seat when not in use.

100_4668.jpg


I have found from past experience that this is plenty of pigtail to have outside the seat, as the length of cable from the Heattroller is pretty good. We are always in the habit of plugging in after mounting up on the bike.

That's about it so far. I have my Russell on order, and you can see my lovely temporary seat mods to get us through until it arrives. I think it's pretty clear that I will not be competing for Russell's business any time soon.
wink.png


100_4674.jpg


It may look like ****, but it's a whole lot better than the bare "Yamaha Touring" seat.

The new Russel seats along with a new 3rd Gen Bigfoot for the side stand (already in the mail) and then whatever Dave and I can come up with for a combination mirror spacer and LED light mounting (we'll start a new thread on that soon) and I think this thing is ready for action!

 
Last edited by a moderator:
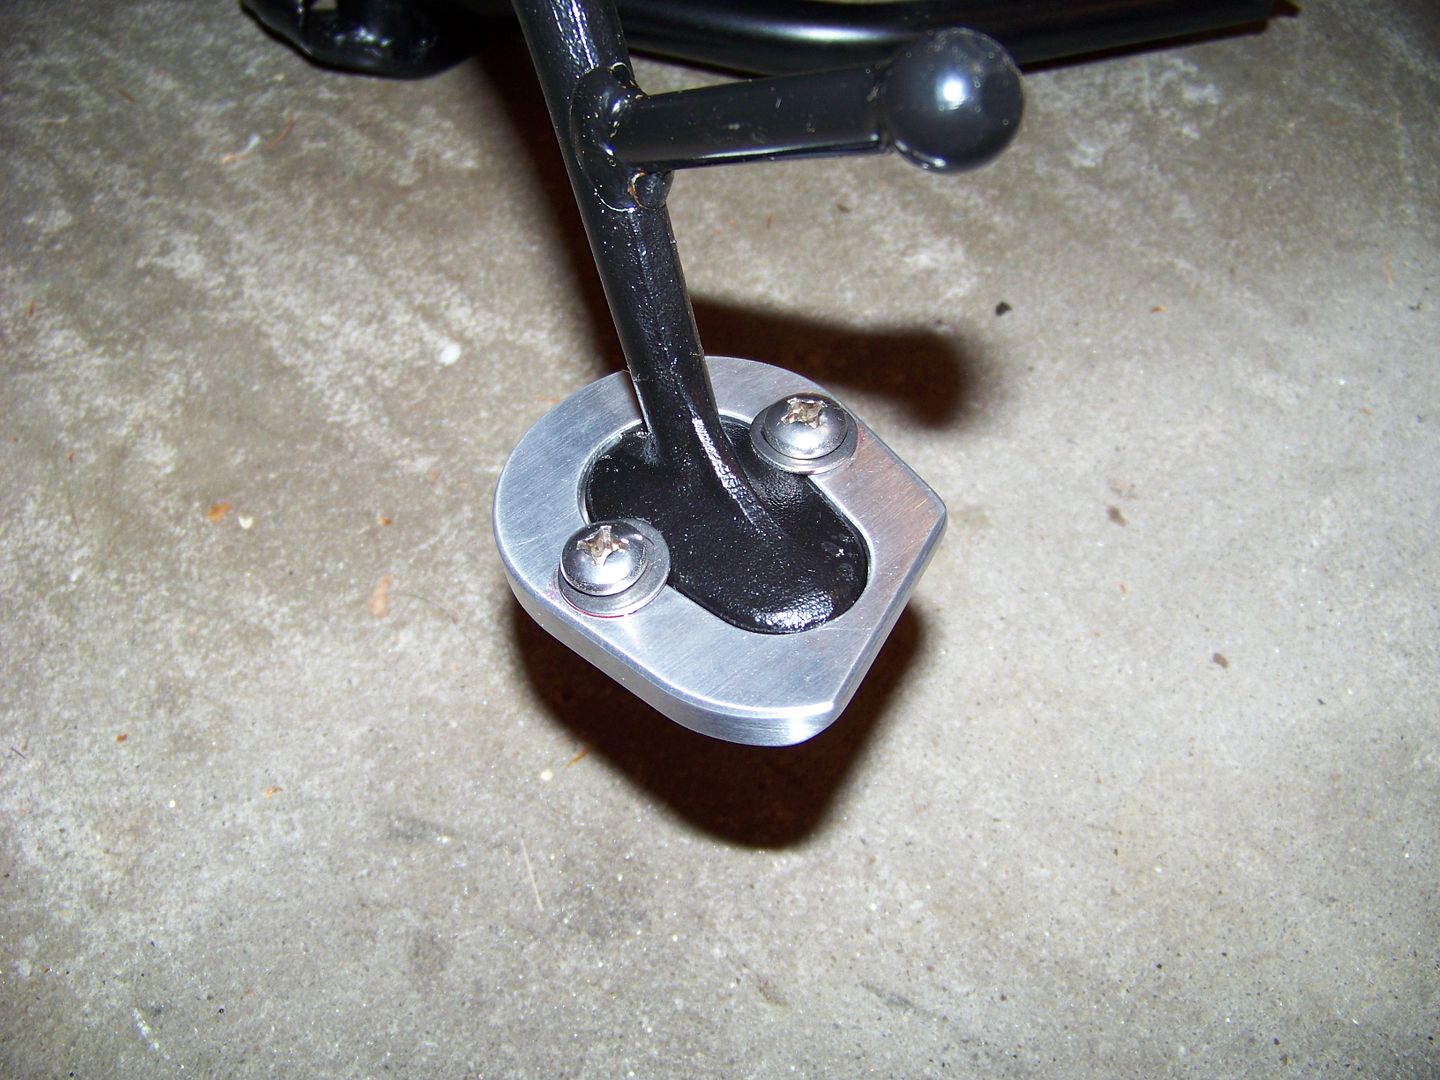
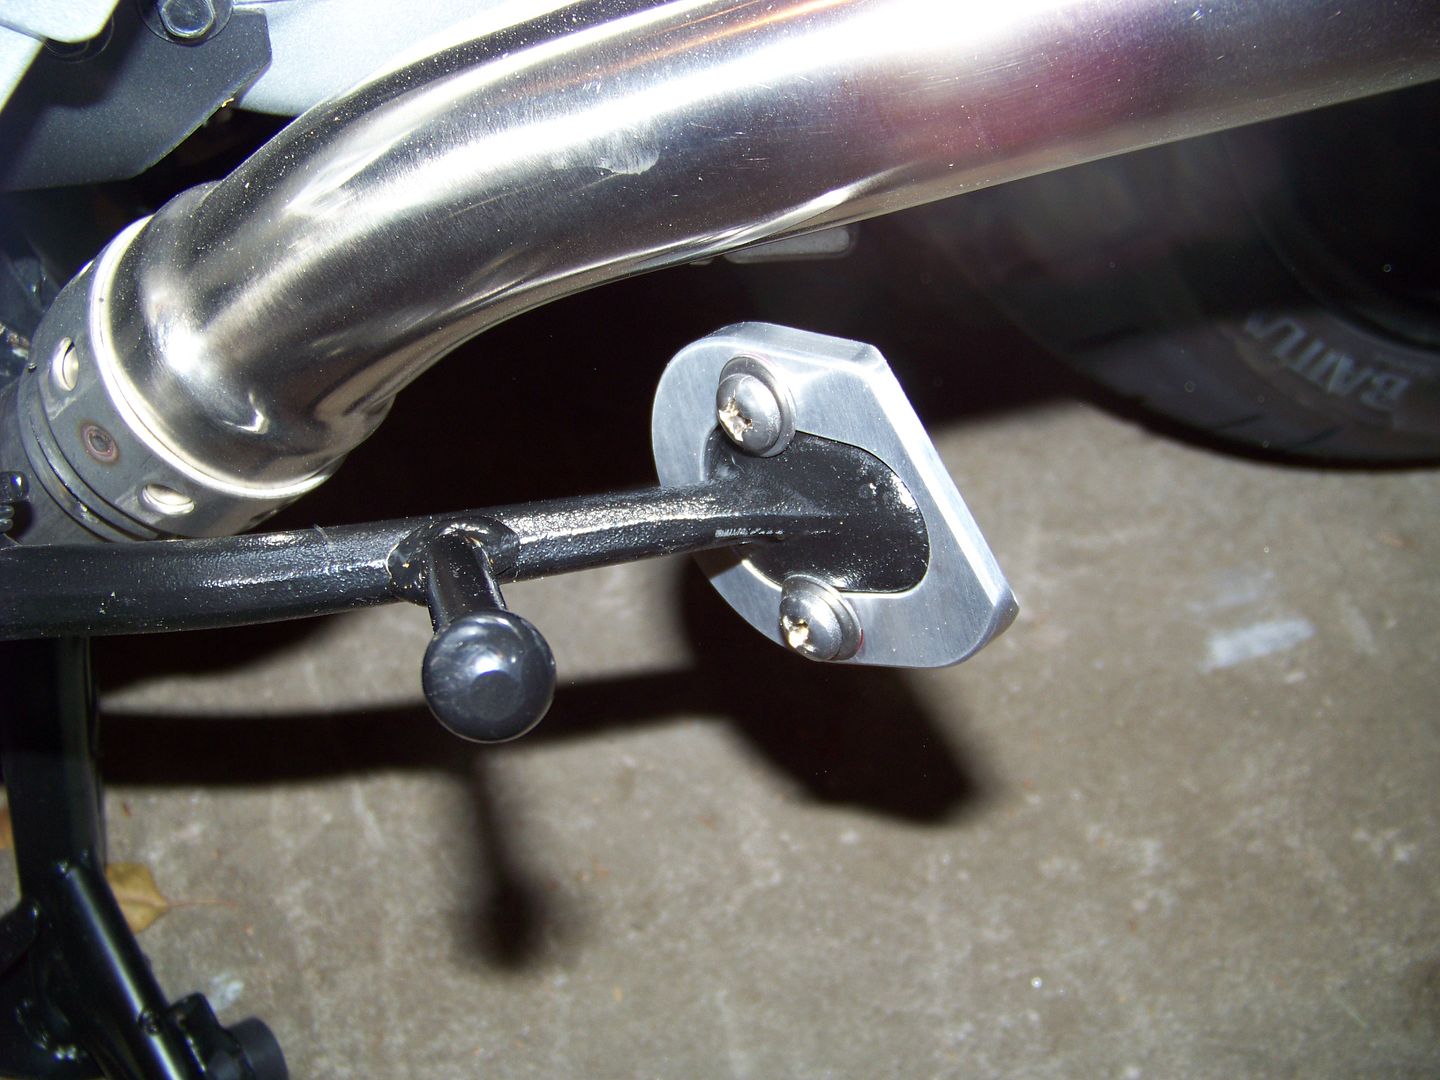
Package from my buds at WynPro Engineering came this afternoon. A new 3rd gen (modified) BigFoot and a second Rambone, so "the boy" will have a GPS mount for his new (to him) BBBB '05

Only needed to file a few of the offensive casting lumps off the foot of the side stand and she slapped right on 'dere, hey!

100_4675.jpg


I'm going to try just using red Loctite and see if it will stay tight. I did push the washers inboard a bit before tightening, with the hope they would bend to the curve of the foot some.

If not, I'll just do the JB Welding thing later, that I did 6-7 years ago on my 1st gen that has not moved a millimeter since.

I'll do some "what grinds down first" angular testing (no I'm not going to tip my new bike over!!) when I have someone around that I can rely on holding the bike up while I slide a piece of plywood (or flat cardboard) up against the wheels. If it does turn out to be the BigFoot, it looks like there is some "opportunity" to move the retracted position a bit higher, at least with the stock exhaust

100_4676.jpg


By the way, for those not aware, the angular grind on the 3rd gen BigFoot is to clear the re-positioned center stand "tang" (foot lever" which comes closer to the side stand. The repositioning may be why it is so damn easy to pop the 3rd gen FJR whale up on the center stand that I can (almost) do it in bare feet!

 
Last edited by a moderator:
Does that show up well located down there? Is it angled up a bit? Getting parts together to install mine ... waiting on plugs to come in ... I'm making a quick disconnect harness to not to splice into existing wires.

 
Does that show up well located down there? Is it angled up a bit? Getting parts together to install mine ... waiting on plugs to come in ... I'm making a quick disconnect harness to not to splice into existing wires.
Yes, the visibility is not reduced due to the upward angle. The up angle is only a few degrees anyway, and since many cars and all trucks are higher than the tail of the FJR, this may be a "good thing" to flash the bastids directly in the face. I'd not worry about that in the least.

My QD's were made only up inside the semi-weather-protected tail section of the bike. I made two (wire extension) splices that end up being behind the rear fender due to the limited (7") wires on the Whelen light head (other programming wires all taped up in the bundle after getting the light-head programmed for "constant on" mode on the workbench.

I coupled the + and - wires from the light head (red and black) to my 3rd brake light flasher modules output wires (Yellow and Black) with the male and female quick-disconnect bullet connectors that came with the flasher module. They are not the greatest crimp lugs, not waterproof IMO, but I have no doubt that they are good enough inside the confines of the tail section.

I used the provided scotch-lock crimp-on splices to get the Brake signal (yellow wire on FJR to red wire on 3rd brake flasher) and the ground for both the flasher module and the light head (all are black wires) from the wire bundle that passes through the left side of the tail section of the bike to get to the tail lights.

I just split the plastic sheathing on the left side with an exacto knife to gain access to those wires. You could re-tape it after, I did not bother. Let me know if you need more guidance on where to look for these on your bike.

 
Last edited by a moderator:
100_4661.jpg


I know functionality is key but those are damn nice looking, almost complimentary to the bike.

... waiting on plugs to come in ... I'm making a quick disconnect harness to not to splice into existing wires.
Have you considered Posi-taps here? IF you should ever want to remove it all those would make it pretty clean & simple.

 
Please let me know when you receive the candy red lid and how well it matches. I need to replace my gloss black E460 from my 2008 with a new one that color matches the 2014.

Not sure if I'll get the E470 (cheapest and most like my beloved E460), or go with the V47.

 
Top