Fairing Replacement

Yamaha FJR Motorcycle Forum

Help Support Yamaha FJR Motorcycle Forum:

This site may earn a commission from merchant affiliate links, including eBay, Amazon, and others.

mcatrophy

Privileged to ride a 2018 FJR1300AS
Joined
Aug 25, 2006
Messages
4,364
Reaction score
1,870
Location
Derby, UK
After the having had the bike blown over by the wind
angry.gif


(Click on any image for larger view)


I had to replace the mirror, front brake lever and upper and lower right side fairings (SWMBO really doesn't like to see my bike scratched - apart from marrying me she has excellent taste
yahoo.gif
).

I also needed to straighten the mirror mounting on the front fairing mounting frame as the mirror stub was almost touching the screen
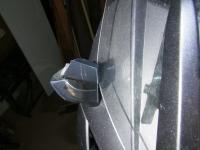


I take many pictures whenever I dissasemble anything so that I have a clue as to how to re-assemble it, so if anyone wants to know about removing lower side, upper side or front fairings, my pictorial record is here.

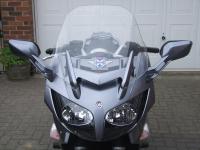
It's now (almost) as good as new
biggrin.gif


0_DSCF5564.jpg


Last edited by a moderator:
An excellent and most detailed documentary indeed.

You have great courage to work so close to that drainage grate. If I did that, the drain would suck tools, fasteners and all parts toward it and down through the grate.

Good job and great results.

 
Great job I am so glad I have a Gen 1 bike. For me I can do what you did in about 2 hours start to finish. And the windscreen mechanism on the Gen II is just so not worth it. All I have is a motor and screw to move mine up and down. I am so glad I never bought the 06 that needed repair.

 
QUOTE (Harvey @ Oct 2 2009, 01:59 PM) <{POST_SNAPBACK}>

...

You have great courage to work so close to that drainage grate. If I did that, the drain would suck tools, fasteners and all parts toward it and down through the grate.

...

Not really, it's only about 3 inches deep, the drain from it is several feet along, the grill lifts off easily, and the bottom is littered with dead leaves and other garden debris (that SWMBO keeps trying to make me clear up) that will hold anything that falls through.

QUOTE (DJB @ Oct 3 2009, 03:16 PM) <{POST_SNAPBACK}>

Great job I am so glad I have a Gen 1 bike. For me I can do what you did in about 2 hours start to finish. And the windscreen mechanism on the Gen II is just so not worth it. All I have is a motor and screw to move mine up and down. I am so glad I never bought the 06 that needed repair.

I could have done the job much more quickly if I'd had lots of practice, there's nothing difficult about it (except feeding those d*mn*d headlamp adjustment cables into the right path with two hands whilst offering up the front fairing with my other hands
unsure.gif
).

Also I wanted to learn what I could about where things were, and to take the pictures.

I spent more time checking connectors for corrosion, and had to glue the rubber washer thingy through which the screen mechanism slides (it remains to be seen if the glue I used holds it on).

I suspect Yamaha redesigned the windscreen mechanism to allow for the airflow underneath it as part of their air management system. Since I've heard of no problems with either the Gen I or Gen II mechanisms (apart from that rubber), its complexity doesn't worry me (knocks on wood).

Took the bike out for a spin today ("Got to make sure nothing's loose, dear!") over some local country roads, first time for ages. (For weeks, all my time has been spent creating her kitchen.)

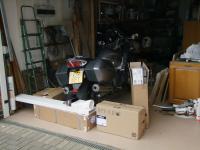
You can see my neglected bike through the right window ...(click on image for larger view)


... blocked off by kitchen stuff.


Once again, I am reminded of how much I love
love.gif
this bike on the road.

 
Last edited by a moderator:
Took the bike out for a spin today ("Got to make sure nothing's loose, dear!") over some local country roads, first time for ages. (For weeks, all my time has been spent creating her kitchen
Oh man, I can so relate! I had to remodel a bathroom and install a spa after I rode my FJR home on the initial break-in run. I tried to retire a couple of years ago, but have been picking up part time stuff ever since just to pay for it all. I keep telling myself she's worth it?

 
Nice job on that kitchen MC, I did the same thing to the first house we bought in Fort Lauderdale after we got married. 7 years later, when we were selling it to

move to West Palm Beach, the first lady that walked in the door to take a look, saw the kitchen and made an offer on the spot. It didn't hurt that I did the same

thing to both bathrooms. Sweeeeet!! :construction: :moil:

 
MC,Personally I kind of liked the duct tape on the mirror. It gave the bike some hardcore touring bike personality.... <_<

Matt
But it increases the drag, so I don't advise breaking the mirrors to give you the excuse to tape them.

 
After the having had the bike blown over by the wind :angry2: [SIZE=8pt](Click on any image for larger view)[/SIZE]


I had to replace the mirror, front brake lever and upper and lower right side fairings (SWMBO really doesn't like to see my bike scratched - apart from marrying me she has excellent taste :yahoo: ).

I also needed to straighten the mirror mounting on the front fairing mounting frame as the mirror stub was almost touching the screen


I take many pictures whenever I dissasemble anything so that I have a clue as to how to re-assemble it, so if anyone wants to know about removing lower side, upper side or front fairings, my pictorial record is here.

It's now (almost) as good as new :D
0_DSCF5564.jpg
This is going to help me tremendously in the coming days! Thank you for putting this tutorial together.

 
Top