Link to all my Gen II mods
I now have two different sets of highway pegs on my Gen II FJR that I’m happy with. It started out as a comparison but I decided to keep both of them, because both have merits.
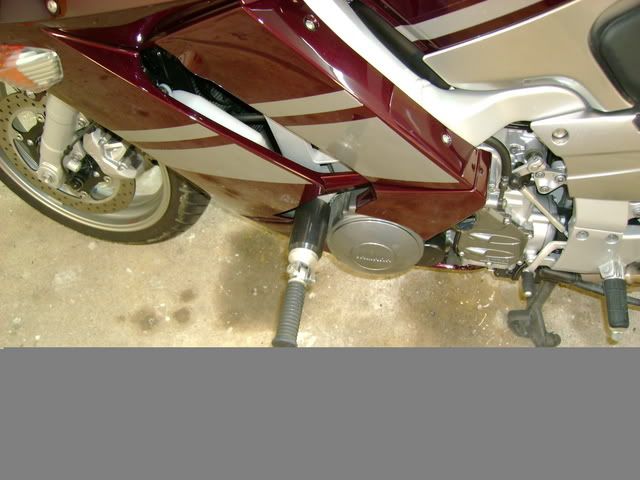
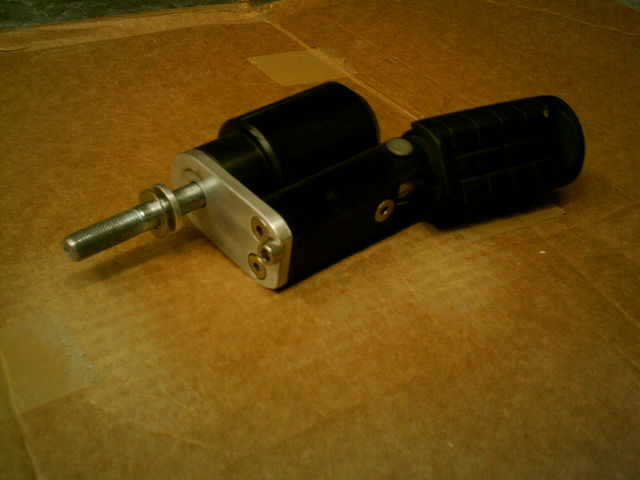
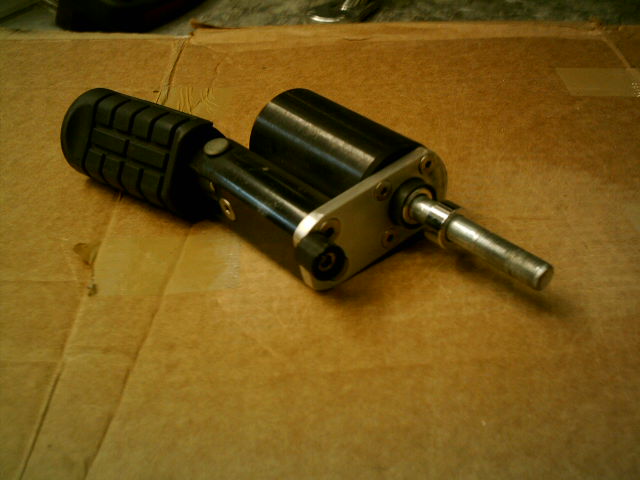
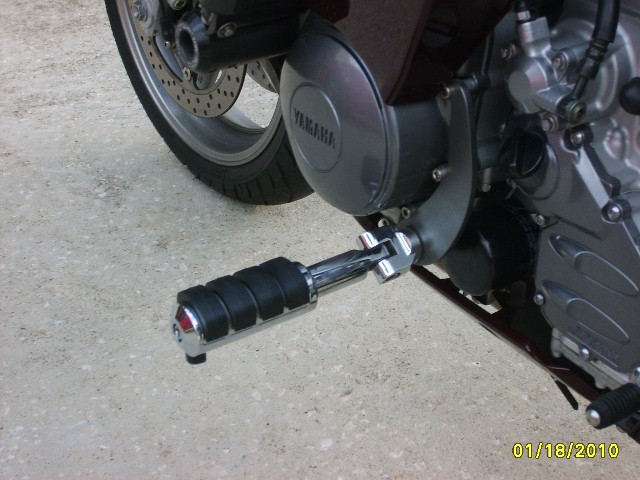
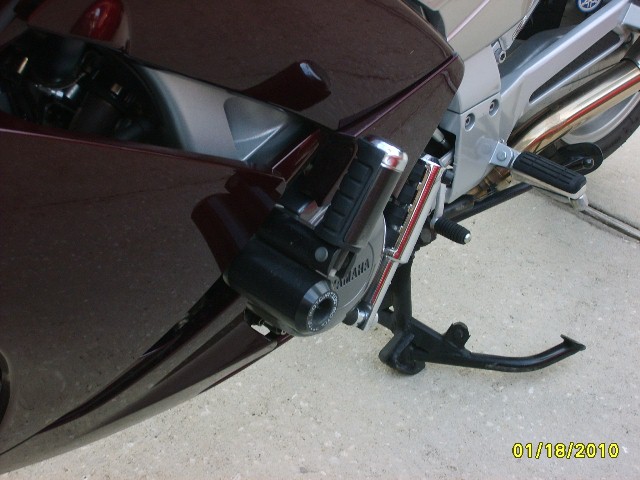
The first set I installed were Wild Bill’s highway peg plates coupled with some Kuryakyn pegs. I painted the plates to match the engine cases with Dulpi-Color Import Auto Spray (#8800564) in the 5oz can and it matches pretty good (paint and W-B plates discovered on this forum - thanks).
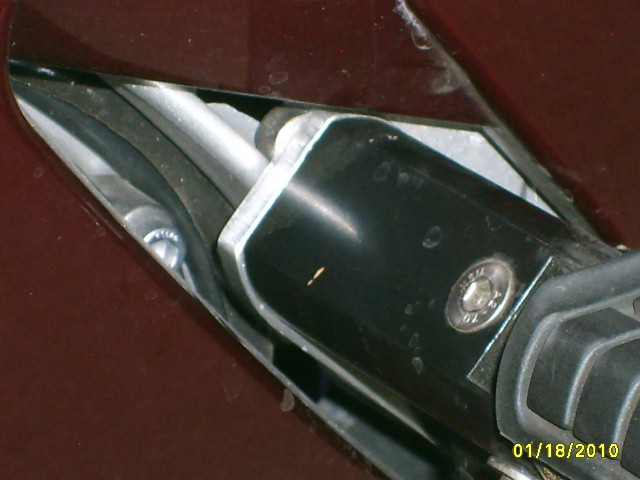
IMHO, for this low peg position to work, you need to get them out away from the engine cases quite a ways. But if you don’t keep the hinge point of the pegs close to the W-B plates (thus allowing them to fold up close to the engine), you risk cracking an engine case cover in even a minor tip over because they will be the first to hit the pavement. I found a set that hinges very close to the plate yet has a long reach for comfortable riding. Kuryakyn part numbers are 8061 (clevis), 8064 (extension), 8025 (peg). Personally, I would prefer something other than chrome on the pegs, but it’s alright. Remove the supplied 1” extension from the pegs and replace with the extension. You also have to enlarge the mount hole in the WB plates to accept the 1/2” bolt in the clevis. They will drag a lot sooner than the stock FJR pegs, so I added a little rub bung on the bottom in case I forget to flip them up after using.
Here are some pictures:
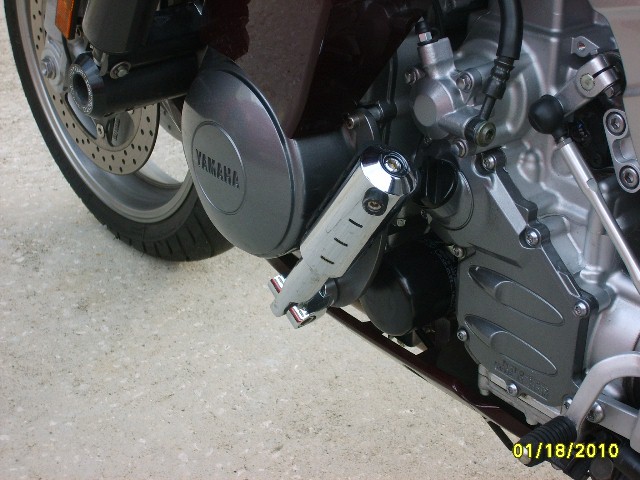
The only downfall of the W-B peg position is that you really can’t straighten your legs and rest them out in front of the pegs (for me, my feet seem to get to close to the ground during highway travel). They are very comfortable when just setting your foot on them, however.
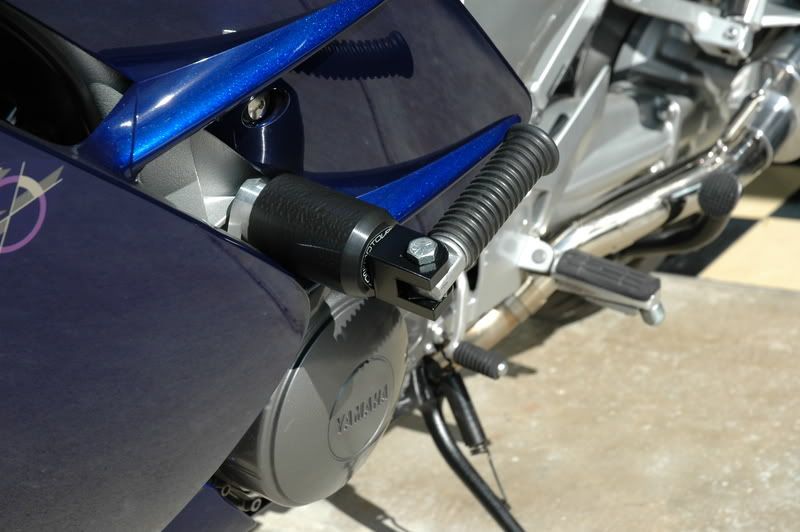
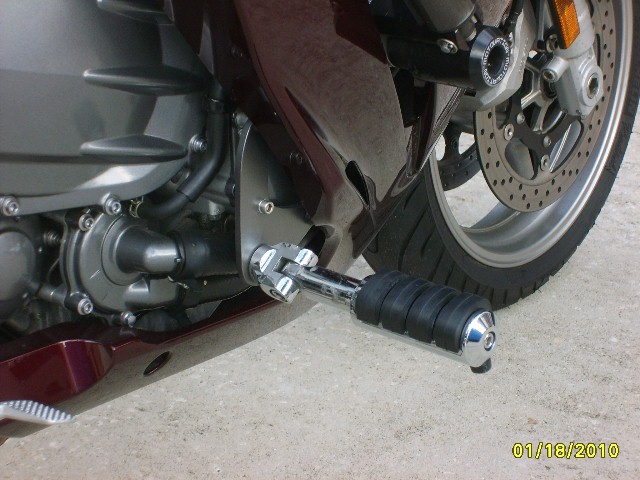
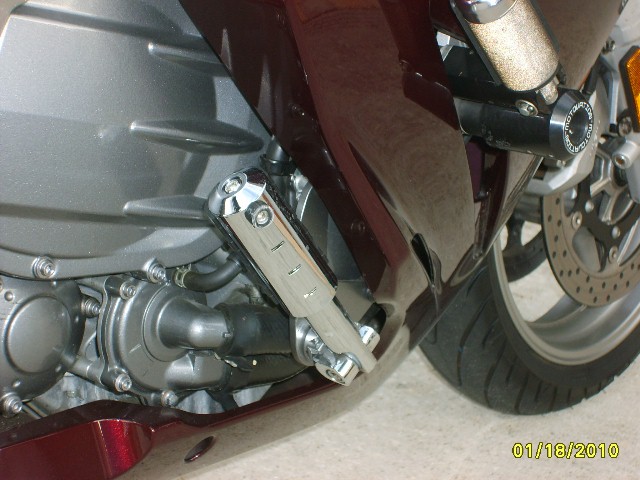
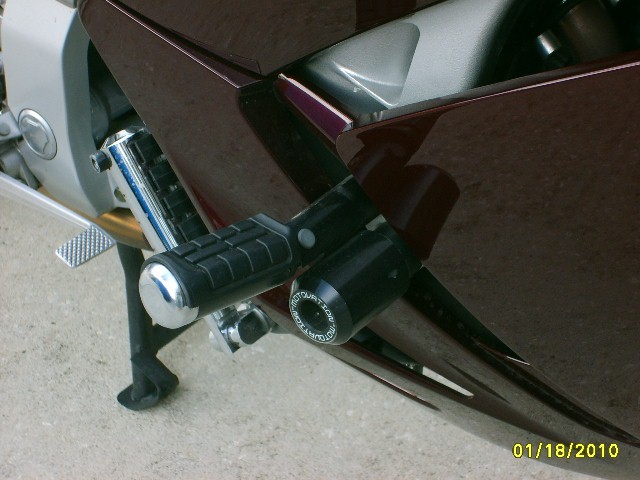
I then decided to try another set mounted up by the frame sliders for comparison. I tried a couple different variations in this location but settled on this one as the best solution. I mounted a set of flip-down passenger pegs from a Honda Valkerie directly to the frame slider. They flip up and still let the slider function as intended (this is the most important thing, IMHO). These work best when I want to straighten my legs completely and just rest the back of my leg on the peg. These Honda pegs don’t fold out completely horizontal and this is actually beneficial for keeping my leg from bouncing off (or at least it makes me feel like it won’t). I can rest the sole of my boot on them too, but in that position it seems the metal parts on the side of my boots could scratch the FJR painted bodywork, so I normally don’t do it.
Here are the Valkerie pegs:
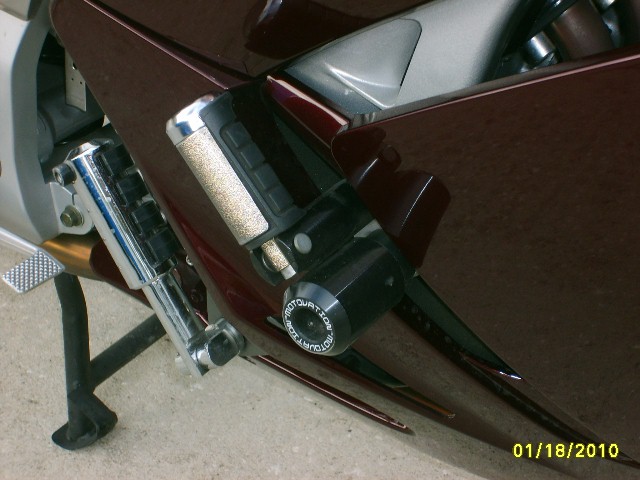
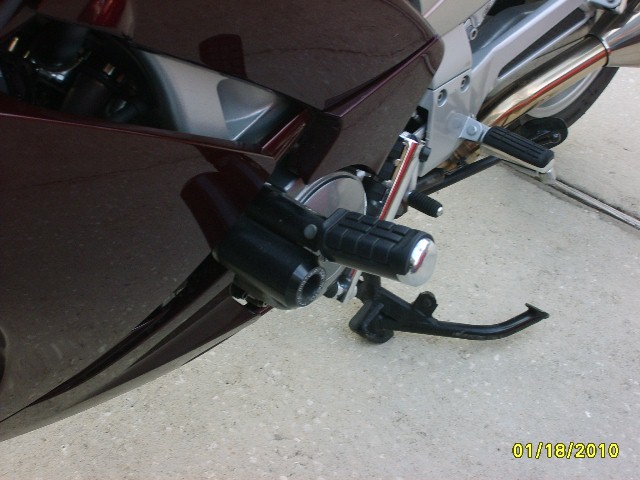
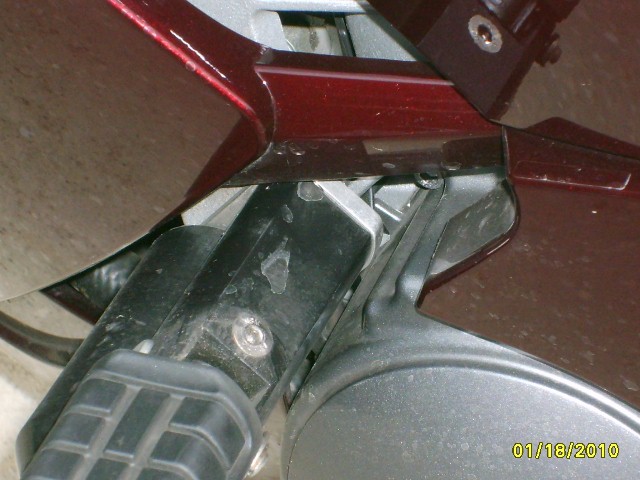
There is a custom-made aluminum plate that gets sandwiched between the slider and the engine providing the inside mount point for the peg. I made this plate match the profile of the Valkerie mount. Another bolt connects the slider and peg at the outboard end to stabilize the peg and this bolt threads into the slider. Since this whole assembly mounts to the bike with just one screw, I needed to add something to keep it from rotating on the bolt and hitting my bodywork. I used a third bolt (well, really just the head of it) on the inside of the plate to engage in a small existing frame pocket to keep it indexed.
I now have two different sets of highway pegs on my Gen II FJR that I’m happy with. It started out as a comparison but I decided to keep both of them, because both have merits.
The first set I installed were Wild Bill’s highway peg plates coupled with some Kuryakyn pegs. I painted the plates to match the engine cases with Dulpi-Color Import Auto Spray (#8800564) in the 5oz can and it matches pretty good (paint and W-B plates discovered on this forum - thanks).
IMHO, for this low peg position to work, you need to get them out away from the engine cases quite a ways. But if you don’t keep the hinge point of the pegs close to the W-B plates (thus allowing them to fold up close to the engine), you risk cracking an engine case cover in even a minor tip over because they will be the first to hit the pavement. I found a set that hinges very close to the plate yet has a long reach for comfortable riding. Kuryakyn part numbers are 8061 (clevis), 8064 (extension), 8025 (peg). Personally, I would prefer something other than chrome on the pegs, but it’s alright. Remove the supplied 1” extension from the pegs and replace with the extension. You also have to enlarge the mount hole in the WB plates to accept the 1/2” bolt in the clevis. They will drag a lot sooner than the stock FJR pegs, so I added a little rub bung on the bottom in case I forget to flip them up after using.
Here are some pictures:
The only downfall of the W-B peg position is that you really can’t straighten your legs and rest them out in front of the pegs (for me, my feet seem to get to close to the ground during highway travel). They are very comfortable when just setting your foot on them, however.
I then decided to try another set mounted up by the frame sliders for comparison. I tried a couple different variations in this location but settled on this one as the best solution. I mounted a set of flip-down passenger pegs from a Honda Valkerie directly to the frame slider. They flip up and still let the slider function as intended (this is the most important thing, IMHO). These work best when I want to straighten my legs completely and just rest the back of my leg on the peg. These Honda pegs don’t fold out completely horizontal and this is actually beneficial for keeping my leg from bouncing off (or at least it makes me feel like it won’t). I can rest the sole of my boot on them too, but in that position it seems the metal parts on the side of my boots could scratch the FJR painted bodywork, so I normally don’t do it.
Here are the Valkerie pegs:
There is a custom-made aluminum plate that gets sandwiched between the slider and the engine providing the inside mount point for the peg. I made this plate match the profile of the Valkerie mount. Another bolt connects the slider and peg at the outboard end to stabilize the peg and this bolt threads into the slider. Since this whole assembly mounts to the bike with just one screw, I needed to add something to keep it from rotating on the bolt and hitting my bodywork. I used a third bolt (well, really just the head of it) on the inside of the plate to engage in a small existing frame pocket to keep it indexed.
Last edited by a moderator: