A-B-C-D Cover Screws

Yamaha FJR Motorcycle Forum

Help Support Yamaha FJR Motorcycle Forum:

This site may earn a commission from merchant affiliate links, including eBay, Amazon, and others.

nervous

Well-known member
Joined
Mar 26, 2012
Messages
169
Reaction score
4
Location
Central, NY
Can someone please indulge me a quick couple Gen2 cover questions?

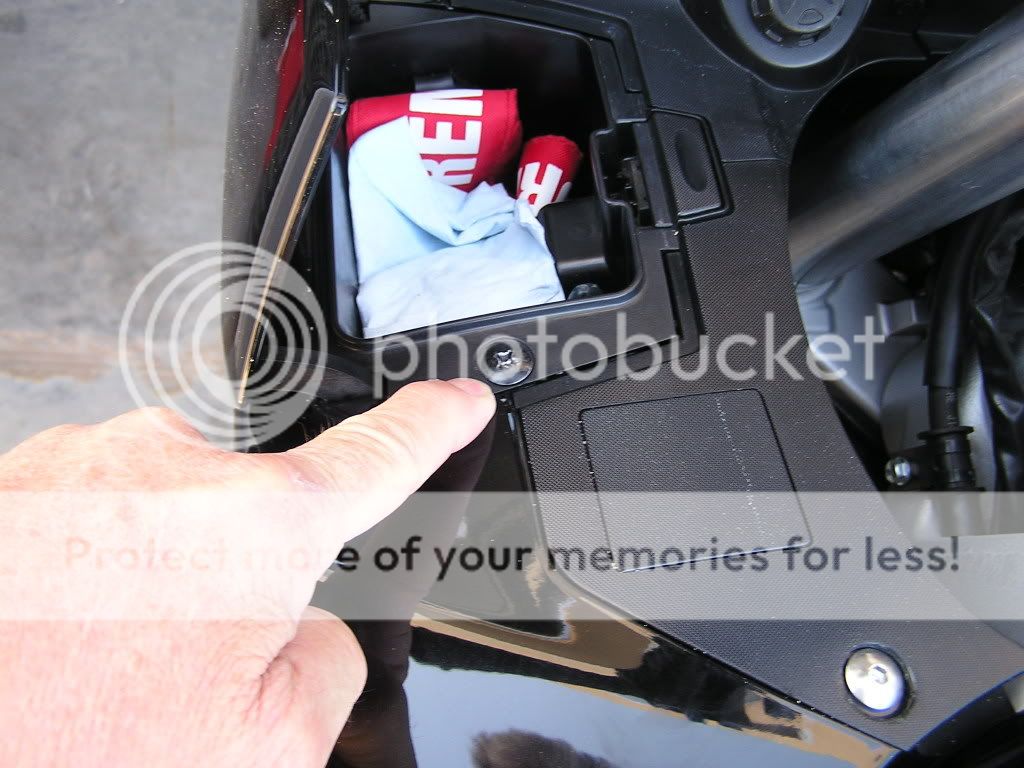
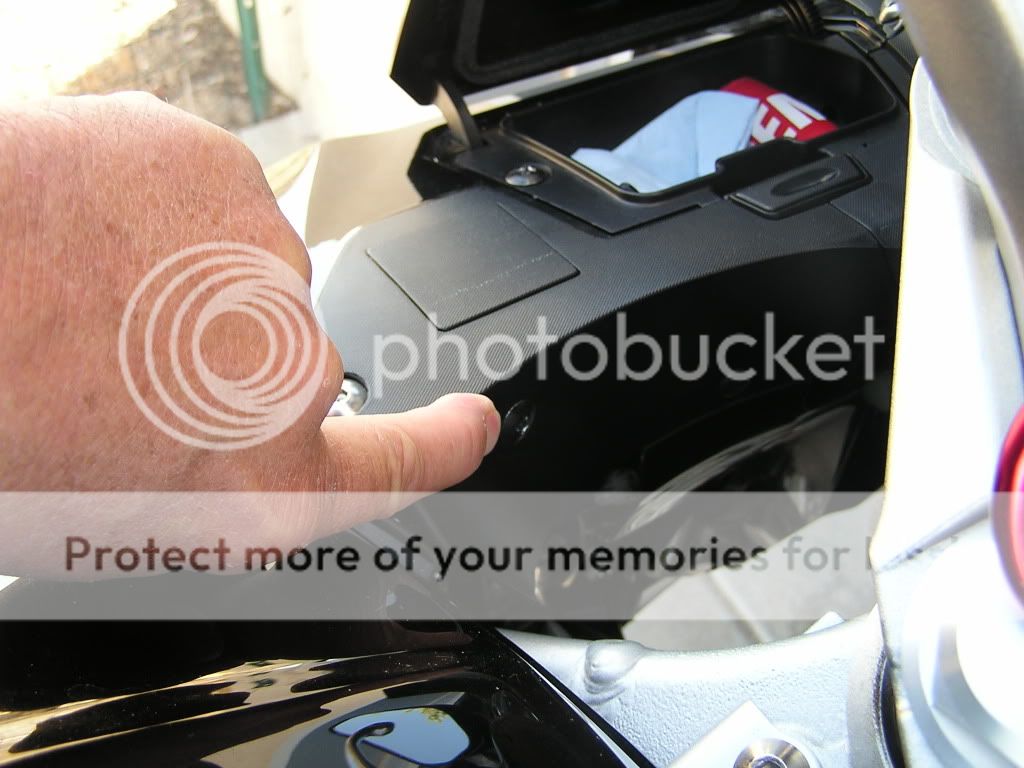
1) On the top panels, the A-B-C-D panels, I see there are three different kinds of screws. Chrome 4mm w/ white washers (I understand these fine) black finished 4mm and 2 Phillip's head screws. I know where the chrome ones go but what are the two Phillip's screw for and why are they Phillip's head? Has anyone simply bought a few more of the black 4mm screws and tossed the Phillip's ones out? Where on the panel do the two Phillip's head screws go? I know one is inside the 'glove' box but I can't recall where the other was in the first place.

2) I want to remove the Wild Bill's highway pegs. I can get to all the bolts on the left side but not the right. Can the just lower panels be easily removed without getting into removing all the upper plastic as well? I have been searching the forum throughout the day but the info that is out there seems to all involves full stripping of everything and has my head spinning right now.

Thanks

 
Last edited by a moderator:
Well - the phillips head screws don't go there. that's why you have a mix. There is one phillips head underneath the glovebox cover, but the visible screws for the abcd panels are polished and anodized 4mm screws. And of course, the bayonet fasteners. Where are the phillips placed?

 
Yeah I know. So many different fasteners you'd think there'd be some kinda guide. Been thinking of some type paint/dot guide. Went out and took a look. Have 1 black phillips head screw inside glove box and the other is installed in the hole, same side, same panel, looking down at front fork near gas tank. Hope this helps.

 
The phillips screws both involve the glove box. One inside, and the other on the inside of the panel. If your screwdriver is too long, it'll hit the triple tree. Basically, to the right of the box, maybe a little behind it closer to the tank. You should feel the hole.

As far as the pegs, you can get away with only loosening the panel. Take off the 'vent' fairing panels. Use a phillips to turn them loose, and pull them out. Gently coax that panel off so you don't break the tabs. Put some grease on that tab when you reassemble.

After that's off, take out the two allen screws in the bikes body, and the one on the very lower leg of the fairing; the one farthest back. Then remove the three that connect the upper and lower fairing.

That will give you enough movement that you can flex the fairing out of the way to remove the brackets and replace the screws. Its pretty obvious where everything goes when you put it back together.

 
Last edited by a moderator:
Well - the phillips head screws don't go there. that's why you have a mix. There is one phillips head underneath the glovebox cover, but the visible screws for the abcd panels are polished and anodized 4mm screws. And of course, the bayonet fasteners. Where are the phillips placed?
Just bought a new left over 2011 FJR and the screw that you mentioned under the glovebox cover is missing, can you give me the size,color or part # for this screw ?

Thanks....

 
Why you taking off the highway pegs?
Don't like them, won't use them and I know someone else will love them so there's no need to have them on there. For me I find them awkward to use and my shins bang into the fairing every time I move my feet forward. So, I'd be just as happy without them.
 
Well - the phillips head screws don't go there. that's why you have a mix. There is one phillips head underneath the glovebox cover, but the visible screws for the abcd panels are polished and anodized 4mm screws. And of course, the bayonet fasteners. Where are the phillips placed?
Just bought a new left over 2011 FJR and the screw that you mentioned under the glovebox cover is missing, can you give me the size,color or part # for this screw ?

Thanks....
#69 on this fiche:

2009 Cowling Fiche

This is it as I see it:

Glove Box Inside Screw

 
The phillips screws both involve the glove box. One inside, and the other on the inside of the panel. If your screwdriver is too long, it'll hit the triple tree. Basically, to the right of the box, maybe a little behind it closer to the tank. You should feel the hole.

As far as the pegs, you can get away with only loosening the panel. Take off the 'vent' fairing panels. Use a phillips to turn them loose, and pull them out. Gently coax that panel off so you don't break the tabs. Put some grease on that tab when you reassemble.

After that's off, take out the two allen screws in the bikes body, and the one on the very lower leg of the fairing; the one farthest back. Then remove the three that connect the upper and lower fairing.

That will give you enough movement that you can flex the fairing out of the way to remove the brackets and replace the screws. Its pretty obvious where everything goes when you put it back together.
Perfect. Thank you!

 
Well - the phillips head screws don't go there. that's why you have a mix. There is one phillips head underneath the glovebox cover, but the visible screws for the abcd panels are polished and anodized 4mm screws. And of course, the bayonet fasteners. Where are the phillips placed?
This solved this issue. Turns out that when the previous dealer installed the OEM handwarmer control they swapped screws. The missing 4mm 'B' panel screw was in the place on the inside of the cover you mentioned. Took that off, corrected the issue and we're all pretty again
Is there any trick or technique for reinstalling the larger plastic push rivet that secures the flappy, lower inside panel? I probably have to replace the rivet but that one is a bear to reinstall so far trying to hold the two pieces together, aligning the holes, placing the rivet and the, with the 5th hand, pushing the little center pin. I an thinking a small well-nut on that inner panel might accomplish a couple things, First you can thread into it and second, it would offer a rubber insulating surface to help prevent buzz? Crazy? A captive nut might work as well but would have to align without a lot of fussing.

 
Last edited by a moderator:
Well - the phillips head screws don't go there. that's why you have a mix. There is one phillips head underneath the glovebox cover, but the visible screws for the abcd panels are polished and anodized 4mm screws. And of course, the bayonet fasteners. Where are the phillips placed?
Just bought a new left over 2011 FJR and the screw that you mentioned under the glovebox cover is missing, can you give me the size,color or part # for this screw ?

Thanks....
#69 on this fiche:

2009 Cowling Fiche

This is it as I see it:

Glove Box Inside Screw
Thank You Sir !!!

 
Are you talking about the panel on the glove box side? If you are, it can be a *****. Mine goes together easily, but with BigPaz's bike, I had to lay on the floor and push that piece upward to align the holes. Then he put the rivet in from the top.

You may be able to do it by yourself if you just then the bars, get your shoulder in there and use an Allen wrench or something to feel for when the holes aligned. Maybe.

 
You know what they say about pictures and words and all that:

gloveboxscrew.jpg


sidescrew.jpg


Caveat: I also have removed said screws so am hoping there in the right place :rolleyes:

 
Last edited by a moderator:
Looks like there may be some variation in the hex bolts and binding screws. In fact, I seem to remember noticing something about that in the FSM --

top view on my 2011:

panel-hex-bolts.jpg


view inside showing binding screw:

panel-binding-screw.jpg


iirc, there's another phillips head binding screw fastening the grip heat control to the panel, but it cannot be viewed until the panel is disconnected

One thing for sure: Tighten all the spring nut panel fasteners only finger tight, and use only a tiny amount of locitite. DAMHIK :blink:

 
Why you taking off the highway pegs?
Don't like them, won't use them and I know someone else will love them so there's no need to have them on there. For me I find them awkward to use and my shins bang into the fairing every time I move my feet forward. So, I'd be just as happy without them.
The pegs turn out to be the least used item added to my bike. One of these days I'll get ambitious and take them off.

 
I don't use the highway pegs while riding around town, but I find them indispensable while on the road.

I'll put the toe of my boot on them, which puts my shins against the fairing. I'll hook the heel of my boot on them, which makes me straddle the fairing, legs actually outside the bike. Or I'll straighten my legs and rest the calves (top of my boots, actually) on the highway pegs. Flexing the legs and allowing the blood to move again is vital to me for not having to stop every half hour.

 
Top