bulk head fitting

Yamaha FJR Motorcycle Forum

Help Support Yamaha FJR Motorcycle Forum:

This site may earn a commission from merchant affiliate links, including eBay, Amazon, and others.

NMdcporter

Well-known member
Joined
Jul 8, 2008
Messages
97
Reaction score
0
Location
Rio Rancho, NM
I just review the directions for installing a bulk head fitting and wanted to verify that the directions on the site are the same for gen1 and 2. I have my tank up in the air and do not see the notch they talk about for the location of the bulk head fitting. My 2007 does not have a cut out in the heat shielding so I want to verify location from someone that has done this on an 2007 if possible.

Thanks for the help.

Dave

 
Last edited by a moderator:
The directions are similar, but the location and orientation is more important on a GenII.

Google search something like "2006 bulkhead site:fjrforum.com"

That's how I found this: <Link>

 
I just did it on my '07 a few weeks ago. Pretty much followed Hal's advice here. The only difference I had from Hal's directions was my little girly wrist was able to weasel a spray paint can cap with masking tape (from original instructions) under the site of the future hole. Made cleanup a bit easier.

I still don't know the difference from "be sure to torque down the locknut" and "don't over-tighten the locknut as the O-ring may bulge." I just made it gud-n-tite and moved on.

I'll try to post up some pics of the bulkhead fitting install tonight.

 
Maybe also try Smitty's write-up or "The Big Drill".

I still don't know the difference from "be sure to torque down the locknut" and "don't over-tighten the locknut as the O-ring may bulge." I just made it gud-n-tite and moved on.
Know what you mean. I found it best to have a priest, rabi, shaman, and therapist lined up in the garage to help me through that moment of terror. A stubby 3/8" driver and Warchild holding the tank as I reefed also helped. No leaky so far.

 
Last edited by a moderator:
A picture would be great eeksnake, I'm actually welding the elbow in, I'm lucky to have someone that can do this at almost no cost :yahoo: . It's great to have friends with all the toys and a professional shop. I welded my own mount but no way would I attempt the tank. All I have to do is bring the beer and hold his while he welds :p . I told him weld first then we drink as long as he wants (might be a late night :dribble: ).

 
Gang a lot of good information thanks. I do have a few questions.

1. Did you flush the new tank before using it?

2. Did you put an in-line filter on the line from cell to tank? I'm not sure it is necessary but would like to get opinions

3. How do you strap your tank down to the mount? I have seen in a picture what looked like a nylon strap being used. Just want to make sure it is acceptable for IBR.

Thanks everyone,

Dave

 
1. Did you flush the new tank before using it?
2. Did you put an in-line filter on the line from cell to tank? I'm not sure it is necessary but would like to get opinions

3. How do you strap your tank down to the mount? I have seen in a picture what looked like a nylon strap being used. Just want to make sure it is acceptable for IBR.
Answers...

1. No. Like Hal, I drained it, wiped it out and let it sit for 24 hrs.

2. Had one in hand but thought it was overkill since there's a filter built into the main pump. (Famous last words?)

3. It's a TourTank which uses 2 steel bands that are bolted to my mount plate. The mount plate is bolted to the frame. I believe this set up meets the IBR criteria for attachment to the bike.

As promised, here are a few "happy snappys" of a very nerve-wracking morning...

Sampson bulkhead fitting just prior to install:

Sampson_bhf.jpg


My Scientific Wild Assed Guess for placement (measurement is 2 3/4" from edge of main pump hole):

bhf_placement.jpg


Finished hole showing cap to catch filings:

bhf_finished_hole.jpg


Finished bulkhead fitting prior to fuel line:

bhf_installed.jpg


Fuel line routing under tank:

bhf_fuelline_routing.jpg


Nice pictures thanks, my one question on the flush was on the aux fuel cell. Did you fill and dump hte fuel out before connecting to the bike?

 
Nice pictures thanks, my one question on the flush was on the aux fuel cell. Did you fill and dump hte fuel out before connecting to the bike?
Oops. I misunderstood... :blush:

Flushing the aux fuel cell prior to use would be a wise precaution... Which explains why I didn't do it. :fool:

 
I'm using the same tank as you with a similar mount. I plan to use a good quality ratchet type tie down. I also plan to use an in-line filter. I will also flush the tank. It will be a good chance to check my fittings for leaks.

Canadian FJR

 
Most people do use an inline filter. It's just cheap insurance. I have a plastic throw away one on mine, and carry a spare on the bike.

 
Well gang a nice little 200 mile checkout ride with the new tank. I let my tank get to half full flipped the valve and it was cool watching the fuel gauge go back up. I didn't see any leaks but I did think of a couple more things I want to change. I'll post some pictures. I do need to figure out how to get a cover that would cover the tank and cover the seat area so I don't get any water under my seat.

Dave

 
Great to hear. Thanks for the updates. What method did you use to secure the tank to the mount?
Canadian FJR
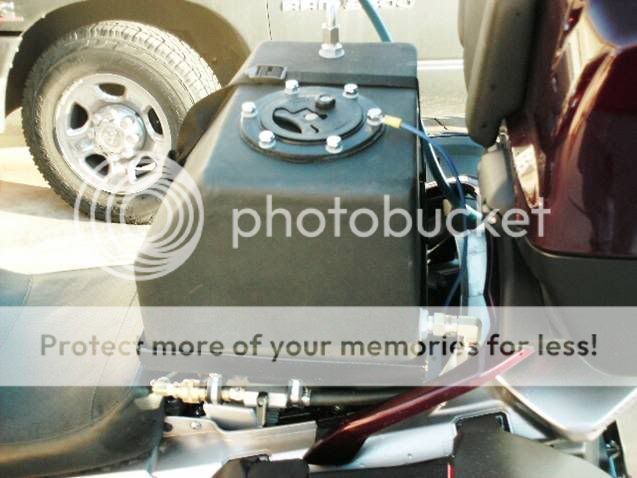
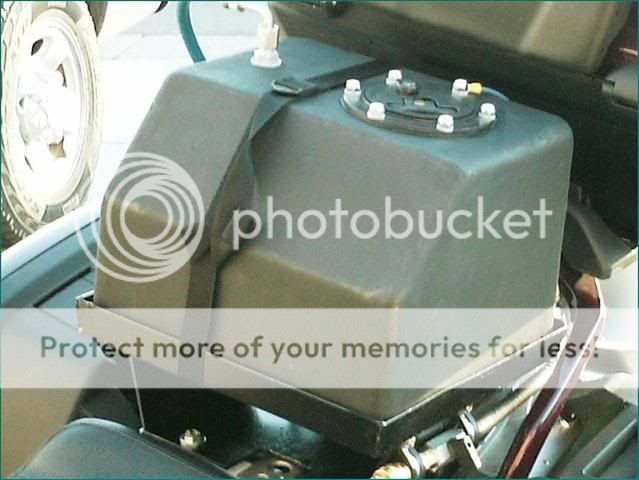
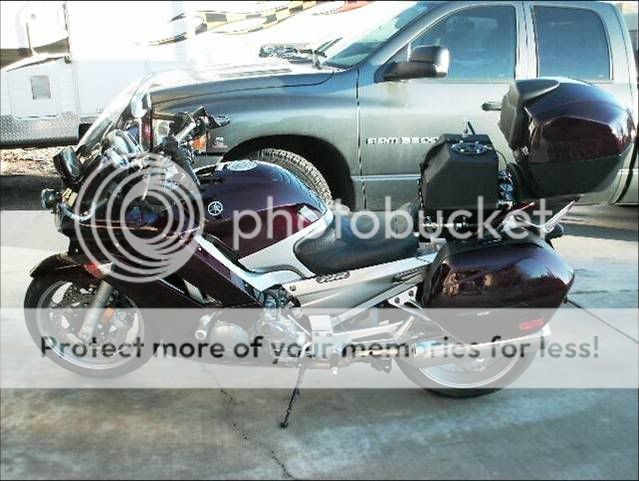
Right now I have a nylon strap holding the tank in place. I'm going to switch to one motorcycle tie-down strap (if allowed) once I get WC to look at my design and give his blessing. My goal is to get through tec inspect with as little trouble as possible at the IBR. Here is a picture of the almost final product. I have a couple of modifications I'm going to do since first test run. I can tell you one thing when it's full and you are shooting down the road you can tell it's there in the corners. I'm glad WC gave the feedback about height, I think lowering was the right thing to do.

Not sure about your tank but mine came with foam but it doesn't go all the way up it is only about 3 inches thick (I thought it would go almost all the way to the top of the tank).

Dave

Tank2.jpg


Here you can see manual shutoff, quick disconnect, vent line and ground wire.

Tank1.jpg


You can see weak strap it's tight and secure but not sure that is good enough and one of the two bolts holding mount down.

Tank4.jpg


Full picture of tank on FJR, I'm looking at a cover but not sure what I'm going to do yet.

 
Last edited by a moderator:
Looks good. I'm surprised that you can notice it, even when full. That's not much weight in that location. I am mounting mine on the rear carrier and I have had the top box loaded more than the full cell will weigh. Time wil tell.

Canadian FJR

 
Yeah I noticed in a couple of tight corners, the four gallons, tank, fittings and mount I bet weighs a little more then 50 lbs. Even with the foam, I personally think you can feel the fuel move a little.

Did you notice how deep the foam is in your tank?

Dave

 
Last edited by a moderator:
Thanks for the info. I was worried that maybe something was wrong since the foam wasn't all the way to the top. When get yours done please send pictures I would like to see.

Dave

 
Top