I got ambitious this weekend and figured I'd try and install all the electircal farkles that I've bought, but not yet got around to.
1. Low Beam HID lights
2. Reposition Hella FF200 Ballasts
3. Widders
4. CUNT box to control the Hellas and Widders.
Well, unfortunately doing the low beam HID's means there's not enough space with the existing Hella FF200 ballasts and the threads get even more complicated. I basically, had to redo everything including my barrier strip. Then a round of fuse popping because my radar detector power cord (made from phone line) decided to confuse things.
About 15 hours and counting.
I did get the lights working and THEY ARE FRIGGIN' bright. I ordered the 6000K low beams purposely to look a little bluer. [swishyvoice]I'm a slave to boulevard cruising and they complement my Galaxy blue paint job.[/swishyvoice]
A few sneak pics:
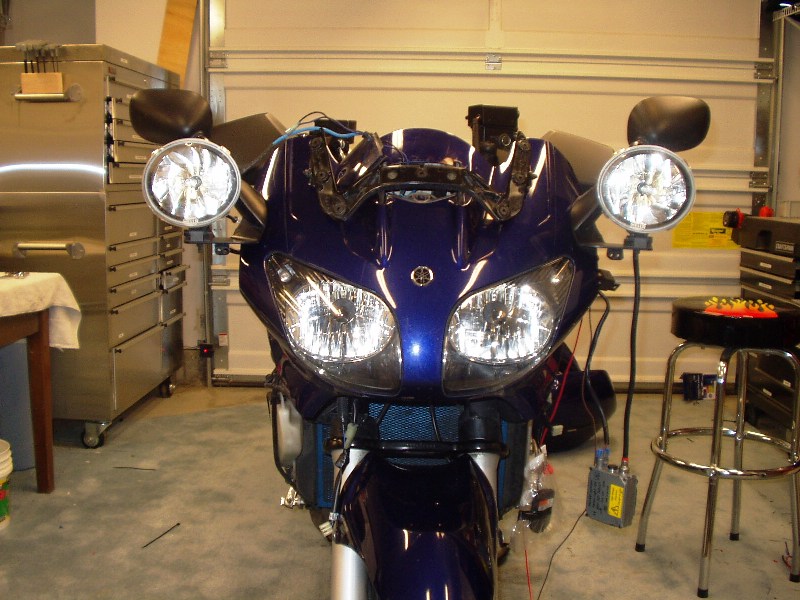
Front end apart

Old barrier strip rats nest

Stuffing Widder controller and toggle switch in CUNT box. The box is an indulgence from Bill McAvan and is top quality. Just enough room for it all.

New placement of FF200 ballast after learning from Doug Chapman. It's a SNUG fit. You can see the new placement and clean-up of the barrier strip.

Another tight fit for the HID low beam ballasts. With creative velcro use I think they just barely clear the windshield retractor. Igniters are in other nooks and crannies.

Still not done cleaning up wires. I need to shorten and do some creative zip tying of bundles. This part is daunting because I'm stuffing wires whereever I can. I'm hoping nothing goes bad because fixing this mess isn't by the side of the road type work. I am going to carry a spare set of H4's with me as I could retrofit it back in a pinch.

I couldn't help but fire up the bling-bling low beams. There's a blue tint to them and the cutoff along the door is much crisper than the stock H4 bulbs.

A side view and you can tell color difference between the FF200 flamethrowers and the 6000K low beams.
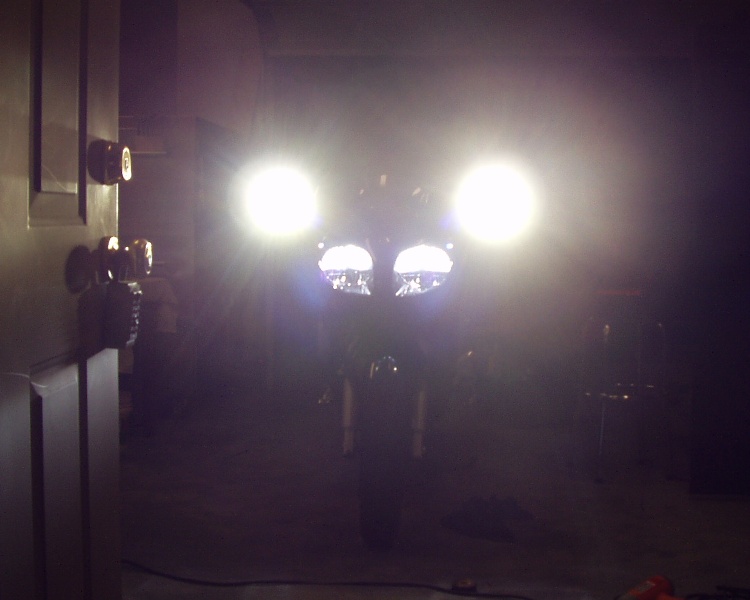
And here would be the perspective from a forest rat. I wonder if they'll notice the lower half of the headlight area is dim from the cutoff?
1. Low Beam HID lights
2. Reposition Hella FF200 Ballasts
3. Widders
4. CUNT box to control the Hellas and Widders.
Well, unfortunately doing the low beam HID's means there's not enough space with the existing Hella FF200 ballasts and the threads get even more complicated. I basically, had to redo everything including my barrier strip. Then a round of fuse popping because my radar detector power cord (made from phone line) decided to confuse things.
About 15 hours and counting.
I did get the lights working and THEY ARE FRIGGIN' bright. I ordered the 6000K low beams purposely to look a little bluer. [swishyvoice]I'm a slave to boulevard cruising and they complement my Galaxy blue paint job.[/swishyvoice]
A few sneak pics:
Front end apart
Old barrier strip rats nest
Stuffing Widder controller and toggle switch in CUNT box. The box is an indulgence from Bill McAvan and is top quality. Just enough room for it all.
New placement of FF200 ballast after learning from Doug Chapman. It's a SNUG fit. You can see the new placement and clean-up of the barrier strip.
Another tight fit for the HID low beam ballasts. With creative velcro use I think they just barely clear the windshield retractor. Igniters are in other nooks and crannies.
Still not done cleaning up wires. I need to shorten and do some creative zip tying of bundles. This part is daunting because I'm stuffing wires whereever I can. I'm hoping nothing goes bad because fixing this mess isn't by the side of the road type work. I am going to carry a spare set of H4's with me as I could retrofit it back in a pinch.
I couldn't help but fire up the bling-bling low beams. There's a blue tint to them and the cutoff along the door is much crisper than the stock H4 bulbs.
A side view and you can tell color difference between the FF200 flamethrowers and the 6000K low beams.
And here would be the perspective from a forest rat. I wonder if they'll notice the lower half of the headlight area is dim from the cutoff?
Last edited by a moderator:
 Close Encounters of the Third Kind comes to mind.