Drop-in Electrical Panel

Yamaha FJR Motorcycle Forum

Help Support Yamaha FJR Motorcycle Forum:

This site may earn a commission from merchant affiliate links, including eBay, Amazon, and others.

SockMonkey

Makin' Some Noise
Joined
Jul 29, 2007
Messages
1,004
Reaction score
5
Location
Tucson, AZ
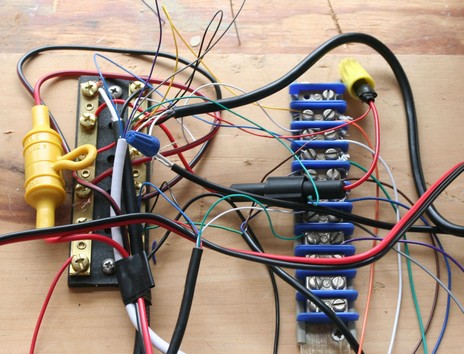
Pics of a drop-in electrical panel for various accessories that I built Saturday afternoon:

ElecPanel01.jpg


ElecPanel02.jpg


ElecPanel03.jpg


This panel supplies power and switching for the following:

1) PIAA 1100X Driving Lights (isolated circuit; AutoSwitch controls);

2) Power: Sat. Radio power supply (switched circuit thru FuzeBlock);

3) Power: AutoSwitch (switched circuit thru FuzeBlock);

Note: Primary from battery and Powerlet outlet connect directly to barrier strip

I opted to use the tray below the seat for this panel for accessability and serviceability reasons. There are still plenty of spaces elsewhere on the bike for other boxes should I choose to add additional accessories in the future. I'll finish routing the remaining cabling thru the bike today and post up pics of the completed project later.

 
Nice clean setup! If I were to post a picture of the electrical Gordian Knot that's underneath my seat, you'd probably run shrieking into the night... ;)

 
Last edited by a moderator:
Yah, dat be very nice !!

I appreciate it when someone has a method for dealing with a process and is willing to share it. I just noticed several points on your system that would be a huge improvement over what I have.

Of course, now I have to re-wire my farkles - for the fourth time. :blink:

 
Holy Crap! looks like something going on the space shuttle. Great job :clapping: It does get dusty under the seat though, hate to see a nice clean job like that get dirty.

Had my seat and tank off this weekend also but for a much less glamorous job. Installed a SS hose for the clutch, not sure it was worth all the trouble to get the old one out.

Keep us posted on the project, Sock.

Bill

 
Of course, you also get an A+ for anal retentiveness, too. :lol:
Yeah, I'm kind of funny like that... ;) It comes from years (and I do mean years) of wiring automation and control panels the size of most people's living rooms.

I finished the complete install last night. All primary, power, signal and relay trigger cable harnesses are run forward on the left side of the bike (looking forward) and follow the main wiring harness thru the engine bay on the inside of the frame and thru the frame neck. All cable harnesses are sheathed in braided jacket up to the termination or connector, and double sheathed if any wiring is 18 guage or less.

The Molex connectors on all harnesses except the primary and auxiliary outlet worked better than I'd hoped. I would have preferred to use automotive-grade Amphenol connectors, but these were more readily available (and I already have a Molex crimp tool, dies and pin extractors). Should anyone decide to do likewise, I recommend both crimping and soldering the pins to ensure longevity in a high-vibration application, but do not recommend using on circuits with current draw of more than 15 amps.

I'll post up more pics when I've got time (though probably not until this next weekend).

 
Last edited by a moderator:
Pffffffffffffft. My setup-

NMEA_200183_20mess_small.jpg


Note the safety non-conductive drop-in mount platform, the readily identifiable main Buss Deluxe Safety Fusing Device, the nice small wires so the voltages go really really fast. Anything you can do, I can do betterer.

 
Last edited by a moderator:
Pffffffffffffft. My setup-
NMEA_200183_20mess_small.jpg


Note the safety non-conductive drop-in mount platform, the readily identifiable main Buss Deluxe Safety Fusing Device, the nice small wires so the voltages go really really fast. Anything you can do, I can do betterer.
I only have one word: Zzzzzzzzzttttttt! You might want to rename your bike "Sparky"... :lol:

 
Beautiful job. I'm facing similar project over the next week to "wire up" all the stuff I've been accumulating following my recent 08 purchase. I'm dismayed by the limited space available though. My big old KRS seat trunk would hold tons of stuff, leaving under-seat area free, but not so with the FJR. Getting a fuse block, alarm, and couple other little things in there leaves no space for my tool roll. And all the rear seat space is already taken with a tiny air pump, plug kit, and web straps, etc.

Where do people put their tools (assuming no one is making due with the little factory joke of a tool pouch) ????

 
I'm working on mine right now, and it's going to end up looking a lot like SockMonkey's. If the stuff you're mounting doesn't require you to "get to it" there's more space under that seat tray. I put my permanent-mounted Heatroller unit and H-D garage door opener UNDER the seat tray. Might be a good spot for an alarm or other things. Also note in SockMonkey's setup there is still the spot at the front of the seat tray for stuff, and there's quite a bit of room under the passenger seat, too.

Personally, since I'll be using both those places (2nd fuse block under passenger seat and Starcom1 in seat tray) I'm planning on moving the lightweight stuff into my tankbag.

 
Looks beautiful. You must be an electrician in your other life. Keep the pictures coming. We amateurs need to see how the real pros do it so we can work up the nerve after you have worked out all the kinks. Great job. :rolleyes:

 
Top