First 05 ABS tire change experience

Yamaha FJR Motorcycle Forum

Help Support Yamaha FJR Motorcycle Forum:

This site may earn a commission from merchant affiliate links, including eBay, Amazon, and others.

HaulinAshe

Well-known member
Joined
Mar 10, 2006
Messages
3,625
Reaction score
91
Location
Dallas, NC
My broken arm has mostly healed, but a friend at a local Yami shop offered to mount and balance the new tires for me if I would dismount and remount the wheels. Well, there's nothing I like more than a good dismount/mount session so naturally I felt up to the task at hand. (I KNOW somebody is gonna have a freakin field day with this post!)

Anyway, I have probably changed a thousand MX tires and thought I knew a fair amount about working on bikes. But this was my first ABS experience and it was to say the least... challenging! Thought I should pass along what I learned today, just in case it might save somebody some grief.

1. Having some sorta handy-dandi support block or other contraption for lifting the front wheel is a must. I fashioned one out of 2x4, based on a post I had seen. Works great when combined with a decent floor jack.

2. One of those nice bike lifts like your local dealer uses would make changing tires a much more pleasant and extremely shorter experience.

3. When using the home-grown backstand and jack method, a small block of 2x4 or 2x6 is priceless. You can nudge it under the tire and by adjusting it's position back and forth, you can get the wheel sitting at just the right height to get the job done. There's no way I could get the floor jack to stop exactly where I needed it to. But the wood block was the just the tool for the job.

4. Put all the damn spacers back into position before even thinking about aligning the wheel into it's spot. You stand a snowball's chance in hell of putting that spacer in AFTER the wheel is anywhere close to position.

5. Grease the axles and have them sitting vertically and within arm's reach before you start aligning the wheels. When you do manage to get everything in place, all you can think about is shoving your axle in that baby as quickly as possible. I know I actually heard myself say "Now just hold still Baby". :p

6. Check, check and recheck the ABS sensor alignment. Don't take the notches for granted. Being very careful to align those notches early saves you a lot of grief on the reassembly.

Okay, I think that's about it.

 
Last edited by a moderator:
Thanks for the write up.....I'm sure this will be another one of those challenges that makes a hair or two fall out of my head.....probably pulled is more like it. All things new take time to learn.

Good Job.

 
Anyway, I have probably changed a thousand MX tires and thought I knew a fair amount about working on bikes. But this was my first ABS experience and it was to say the least... challenging! Thought I should pass along what I learned today, just in case it might save somebody some grief.
You should've read the FJRTech article on this procedure, it might have save you some grief....

FJRTech: ABS Rear Wheel - Removing/Reinstalling

 
You should've read the FJRTech article on this procedure, it might have save you some grief....
FJRTech: ABS Rear Wheel - Removing/Reinstalling
I'll second that and what the FJRTech article says about the Yamaha service manual on this issue. My Honda service manuals for the Blackbirds are a LOT clearer and better written than my Yamaha service manual for the FJR. Neither compares to the illustrated instruction WC and H Marc provide, though.

First time is always a bitch and it gets easier after that. The thing I've noticed is that the FJR wheels are tougher to spoon tires onto than my Blackbird wheels (both stock sets AND the Carozzerrias). Actually, the Carozzerrias were by far the easiest to install tires on, and it wasn't just that I waited until last, when I was most practiced, to do it.

 
Last edited by a moderator:
aligning ABS notches :blink: please educate me! I have 8k mile on stock battlaxes and will be replacing before much longer. I am aware of Dale's FJRTech site but is there a reference on that page about aligning ABS notches? I will have to take my tires and wheels off and to the local shop and this will be a first for me too.

 
I find removal of the left exhaust really helps to gain access on the rear.

No need to jack up the bike at all to get the wheel out and you have a nice clear view remounting the rear caliper and abs ring.

I unbolt the two bolts holding the passenger footrest and then undo the exhaust clamp. A little high temp rtv might be required on the install

Takes 2 mins saves lots of frustration.

Chris

 
Notches.

On the back there is a notch in the ABS sensor holder and a tongue on the rear calliper, they keep the abs sensor and calliper aligned.

As you slide the rear calliper on make sure the tongue on the calliper slides in the notch on the abs sensor mount.

Not sure of the front, I haven’t had cause to remove the front yet.

Other helpful tips

Don't operate the brake peddle or levers if the callipers are dismounted, you will push the pads together and then you have a bitch of a job separating them.

I have a small 2" l x1/2" w by 1/4" thick piece of hardboard.

I insert this between the pads to keep the pads separate while the calliper is dismounted from the disk just incase.

While sliding the calliper on to the disk, as soon as the disk inserts between the pads you can remove the hardboard and it just slides on.

Chris

 
aligning ABS notches please educate me!
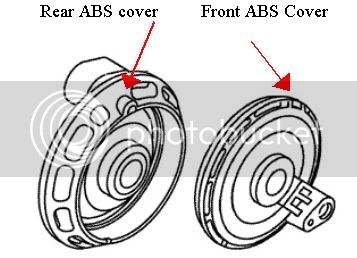
It's really no big deal at all, sounds complicated but it is nothing. Shown below are the two ABS covers that have to come off when you remove the wheels. The arrows point to the locations where the cover needs to be lined up, you would never notice them as being important when the ABS covers are off. Before you remove the wheels take a look at each of the covers and you will see a pocket in the cover that has a tab/ridge sitting in it. Up front the tab is part of the front fork. The purpose of the tab is to keep the ABS cover from spinning. The ABS covers have the ABS sensors installed in them and it has to allow the wheel to turn without turning the cover hence the little pockets. The first time you do the wheel change it will take a little care and some fiddling to get it all to line up. As JeffAshe previously mentioned, it helps to have all the wheel parts including the axle at hand 'cause once you get all the covers and spacers lined up you want to get the axle through to hold them all in alignment.

ABSCovers2.jpg


Edit: I see BugR answered while I was typing. I need to speed up my typing.

 
Last edited by a moderator:
aligning ABS notches please educate me!
It's really no big deal at all, sounds complicated but it is nothing. Shown below are the two ABS covers that have to come off when you remove the wheels. The arrows point to the locations where the cover needs to be lined up, you would never notice them as being important when the ABS covers are off. Before you remove the wheels take a look at each of the covers and you will see a pocket in the cover that has a tab/ridge sitting in it. Up front the tab is part of the front fork. The purpose of the tab is to keep the ABS cover from spinning. The ABS covers have the ABS sensors installed in them and it has to allow the wheel to turn without turning the cover hence the little pockets. The first time you do the wheel change it will take a little care and some fiddling to get it all to line up. As JeffAshe previously mentioned, it helps to have all the wheel parts including the axle at hand 'cause once you get all the covers and spacers lined up you want to get the axle through to hold them all in alignment.

ABSCovers2.jpg


Edit: I see BugR answered while I was typing. I need to speed up my typing.
Ionbeam

Is that pic for the front or rear?

I was talking about the notch on the outside of the ABS cover on the rear lining up with the brake caliper.

It's there so the cover remains stationary as the back wheel rotates

If the cover moves it will rip the sensor out.

Chris

 
aligning ABS notches please educate me!
It's really no big deal at all, sounds complicated but it is nothing. Shown below are the two ABS covers that have to come off when you remove the wheels. The arrows point to the locations where the cover needs to be lined up, you would never notice them as being important when the ABS covers are off. Before you remove the wheels take a look at each of the covers and you will see a pocket in the cover that has a tab/ridge sitting in it. Up front the tab is part of the front fork. The purpose of the tab is to keep the ABS cover from spinning. The ABS covers have the ABS sensors installed in them and it has to allow the wheel to turn without turning the cover hence the little pockets. The first time you do the wheel change it will take a little care and some fiddling to get it all to line up. As JeffAshe previously mentioned, it helps to have all the wheel parts including the axle at hand 'cause once you get all the covers and spacers lined up you want to get the axle through to hold them all in alignment.

ABSCovers2.jpg


Edit: I see BugR answered while I was typing. I need to speed up my typing.
Ionbeam

Is that pic for the front or rear?

I was talking about the notch on the outside of the ABS cover on the rear lining up with the brake caliper.

It's there so the cover remains stationary as the back wheel rotates

If the cover moves it will rip the sensor out.

Chris
:blink:

 
:huh: :blink:

Is that pic for the front or rear?
Yes.

I was talking about the notch on the outside of the ABS cover on the rear lining up with the brake caliper.
I thought I was too.

It's there so the cover remains stationary as the back wheel rotates
No argument from me, I agree.

If the cover moves it will rip the sensor out.
At the very least it will tug test the wires.

BugR, :drag: ??? :yahoo: :lol:

 
Last edited by a moderator:
IonBeam

Looked at your picture again, Ok I was confused but it is confusing

It looked like the two covers in the picture were being aligned together with the notch indicated by the arrows.

Chris :p

 
Looked at your picture again, Ok I was confused
Chris, it looks like it is finally time to wash that face shield :rofl:

av-648.jpg


I've also been there, done that a lot so it seemed to be clear to me. In fact, as soon as my 4th set of rubber gets here I get to do it yet again.

 
<_< Hmmmmm...... lemme try this again.......

The close-up, detailed photo of how the ABS notches line up for the rear wheel is clearly shown in the FJRTech article I gave you:

FJRTech: ABS Rear Wheel - Removing/Reinstalling

It may not be surprising, then, to find out that a close-up, detailed photo of how the ABS notches line up for the front wheel is clearly shown in the FJRTech article for that procediure, namely:

FJRTech: ABS Front Wheel - Removal/Reinstallation

:D

 
Looked at your picture again, Ok I was confused
Chris, it looks like it is finally time to wash that face shield :rofl:

av-648.jpg


I've also been there, done that a lot so it seemed to be clear to me. In fact, as soon as my 4th set of rubber gets here I get to do it yet again.
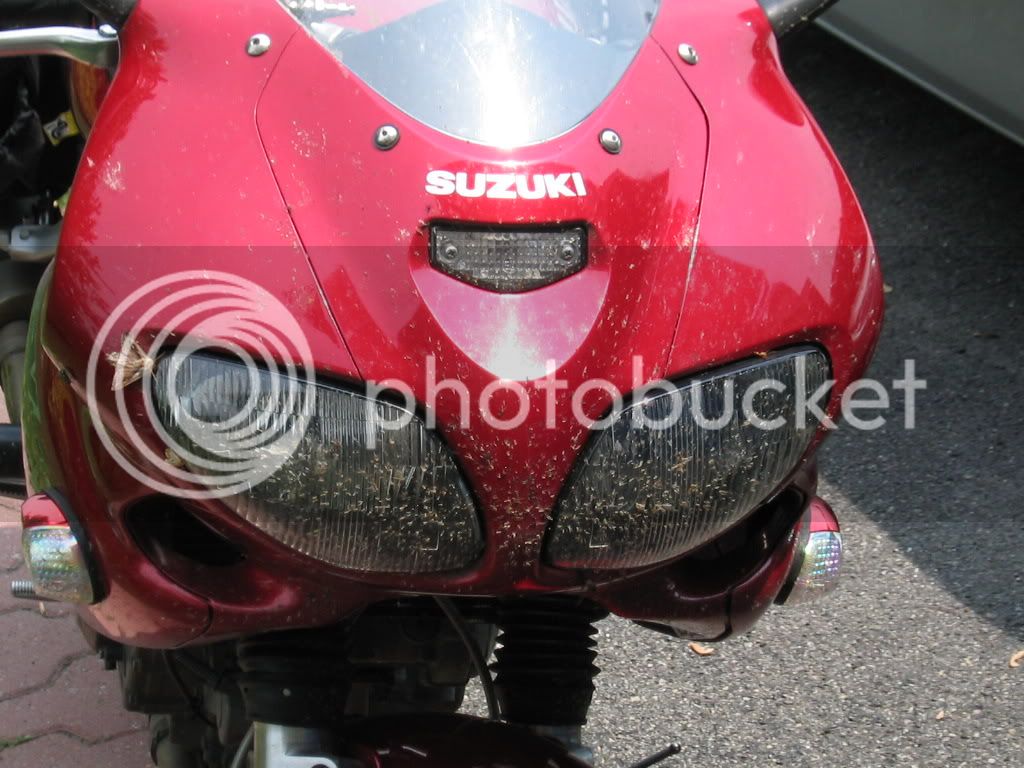
Why do people think that I don't wash my visor, blackfly season has started, mozzy season and gladfly's are not far behind.

Here's a pic from my SV after a typical spring afternoon

Chris

f8b1e4b1.jpg


Last edited by a moderator:
Now that all new FJR's have ABS, it would be nice if Yamaha moved the rear ABS sensor, etc. to the drive assembly. Let it pick up the speed off the large gear in the drive. One less hassle to deal with when taking the wheel on & off.

 
<_< Hmmmmm...... lemme try this again.......
The close-up, detailed photo of how the ABS notches line up for the rear wheel is clearly shown in the FJRTech article I gave you:

FJRTech: ABS Rear Wheel - Removing/Reinstalling

It may not be surprising, then, to find out that a close-up, detailed photo of how the ABS notches line up for the front wheel is clearly shown in the FJRTech article for that procediure, namely:

FJRTech: ABS Front Wheel - Removal/Reinstallation

:D
Of course, this is the correct answer. There shouldn't be any confusion left after checking out these web pages. Be warned that these links contain graphic and anatomically correct pictures ;)

 
Last edited by a moderator:

Latest posts

Top