spoilsport
Well-known member
I spent the last few evenings installing a fuzeblock, townsend bracket, and GPS on the 2013.Unfortunately, the dash cowling needs to be removed in order to access the battery. As noted previously, this cowling is tricky to remove. I ended up using a plastic putty knife to pop the pieces apart. I was able to put them slightly apart with my hands and insert the blade of the putty knife and then pry them apart. It worked fine and didn't mar any of the surfaces. The plastic piece that covers the battery now has a faux trap door on it. Too bad it's not real! It it were, it would be easy to access the fuses and jump a dead battery.
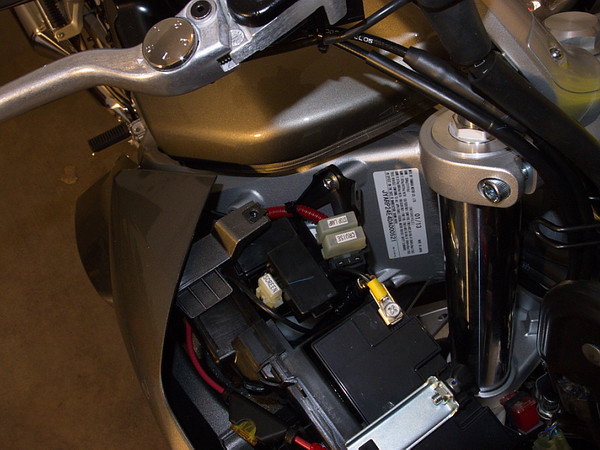
I used 1/4 inch split wire loom to run 12 gauge red and black wire from the battery. The loom is routed under the tank and along the right side of the bike. You can see the loom in the center of the picture. Note that the red connection is fused.
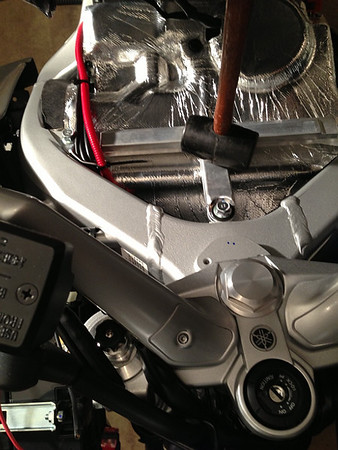
From this point, it is easily routed under the tank.
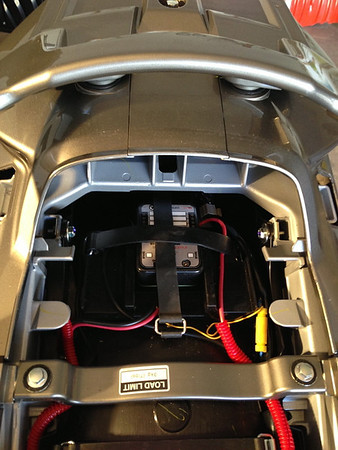
I installed the fuzeblock in the rear compartment of the bike, where it is obviously intended to go (since the rail spacing is the exact size of the fuzeblock). It is important to insert the fuzeblock with the primary connections facing toward the front. This allows the accessory connections to extend rearward past the rails so that the accessory wires don't interfere with the fuzeblock fully nesting between the rails.
The switched power is conveniently accessed by tapping the blue wire contained in the black insulated bundle that runs along the left side of the bike back to the rear lights. I carefully split the insulation with an X-acto knife, pulled out the blue wire and easily tapped it, as shown by the yellow connector on the left in the photo.
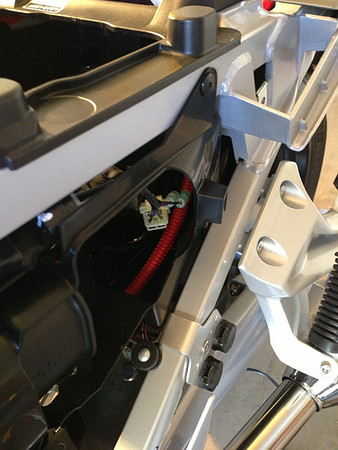
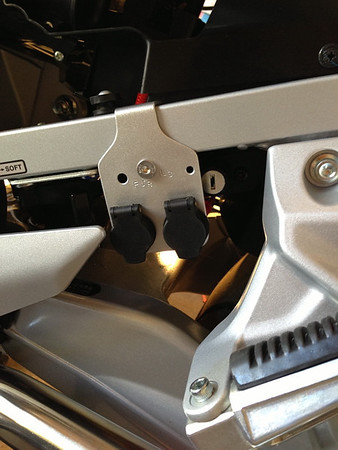
The wiring for the Townsend bracket is along the left side of the bike. A 1/4 inch split wire loom was used here, also. A helmet lock will go above the powerlet sockets. The terminals on the powerlet were drilled out to accommodate heavier gauge wire and the jumpers to the second socket. The sockets were wired to unswitched terminals to allow for trickle charging.
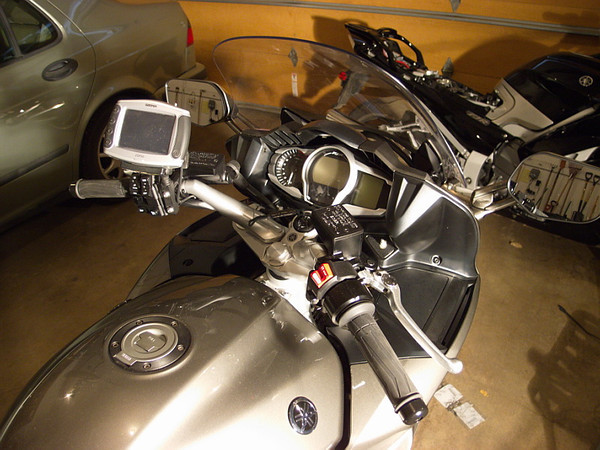
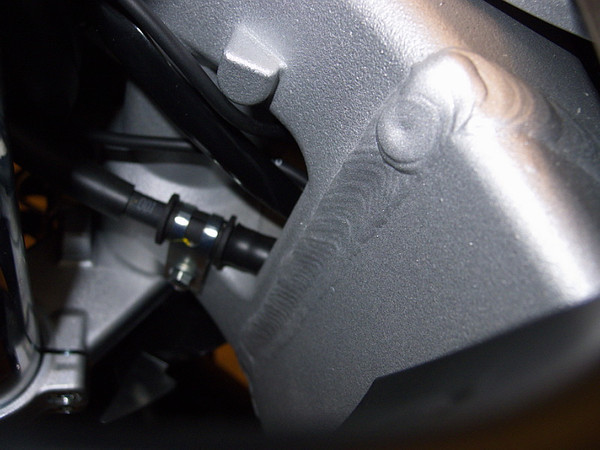
The Zumo GPS cable was run along with the other cable along the left bar and down to the gap below the steering head, ensuring that there was adequate slack by rotating the bars to full lock. From there, I ran the cable under the tank and inserted it into the loom from the battery going to the fuzeblock, and wired it to switched terminals.
Final thoughts...
I am very impressed with the fuzeblock's contruction and features and highly recommend it. Also, the Townsend bracket for the Gen III has no installation issues and looks good (thanks Scott). I am a big fan of powerlet (BMW style) connectors, which are very reliable and compliment the reliability theme of the FJR. I also highly recommend using a spit wire loom, especially for the wiring to the battery. The last thing you want is fraying or pinching of the insulation resulting in a short.

I used 1/4 inch split wire loom to run 12 gauge red and black wire from the battery. The loom is routed under the tank and along the right side of the bike. You can see the loom in the center of the picture. Note that the red connection is fused.

From this point, it is easily routed under the tank.

I installed the fuzeblock in the rear compartment of the bike, where it is obviously intended to go (since the rail spacing is the exact size of the fuzeblock). It is important to insert the fuzeblock with the primary connections facing toward the front. This allows the accessory connections to extend rearward past the rails so that the accessory wires don't interfere with the fuzeblock fully nesting between the rails.
The switched power is conveniently accessed by tapping the blue wire contained in the black insulated bundle that runs along the left side of the bike back to the rear lights. I carefully split the insulation with an X-acto knife, pulled out the blue wire and easily tapped it, as shown by the yellow connector on the left in the photo.


The wiring for the Townsend bracket is along the left side of the bike. A 1/4 inch split wire loom was used here, also. A helmet lock will go above the powerlet sockets. The terminals on the powerlet were drilled out to accommodate heavier gauge wire and the jumpers to the second socket. The sockets were wired to unswitched terminals to allow for trickle charging.


The Zumo GPS cable was run along with the other cable along the left bar and down to the gap below the steering head, ensuring that there was adequate slack by rotating the bars to full lock. From there, I ran the cable under the tank and inserted it into the loom from the battery going to the fuzeblock, and wired it to switched terminals.
Final thoughts...
I am very impressed with the fuzeblock's contruction and features and highly recommend it. Also, the Townsend bracket for the Gen III has no installation issues and looks good (thanks Scott). I am a big fan of powerlet (BMW style) connectors, which are very reliable and compliment the reliability theme of the FJR. I also highly recommend using a spit wire loom, especially for the wiring to the battery. The last thing you want is fraying or pinching of the insulation resulting in a short.
Last edited by a moderator:


