Getting the Cam Timing Right

Yamaha FJR Motorcycle Forum

Help Support Yamaha FJR Motorcycle Forum:

This site may earn a commission from merchant affiliate links, including eBay, Amazon, and others.

pwnsauce

Member
Joined
Mar 8, 2016
Messages
17
Reaction score
4
Location
Seattle, WA
Hey all-

I recently attempted the first TBS edit: valve adjustment on my 2014 FJR. As expected, the valves were on the tighter end of the tolerance range, and one intake valve was out of spec, so I re-shimmed everything to a bit above the midpoint of clearance. That was the easy part
smile.png


Now, getting the camshafts back in and timed properly has been the death of me. I'm on my seventh (!!) try to get it right; each time I put the camshafts back in and cinched down, the holes in the top of the camshafts never properly align with the arrow on the camshaft caps. They're always close, but I feel this is a case where close won't cut it. Since I'm doing this work with the engine in the bike, I can't see the timing marks on the camshaft sprockets themselves, so I've had to rely on the holes at the top of the cam lobe.

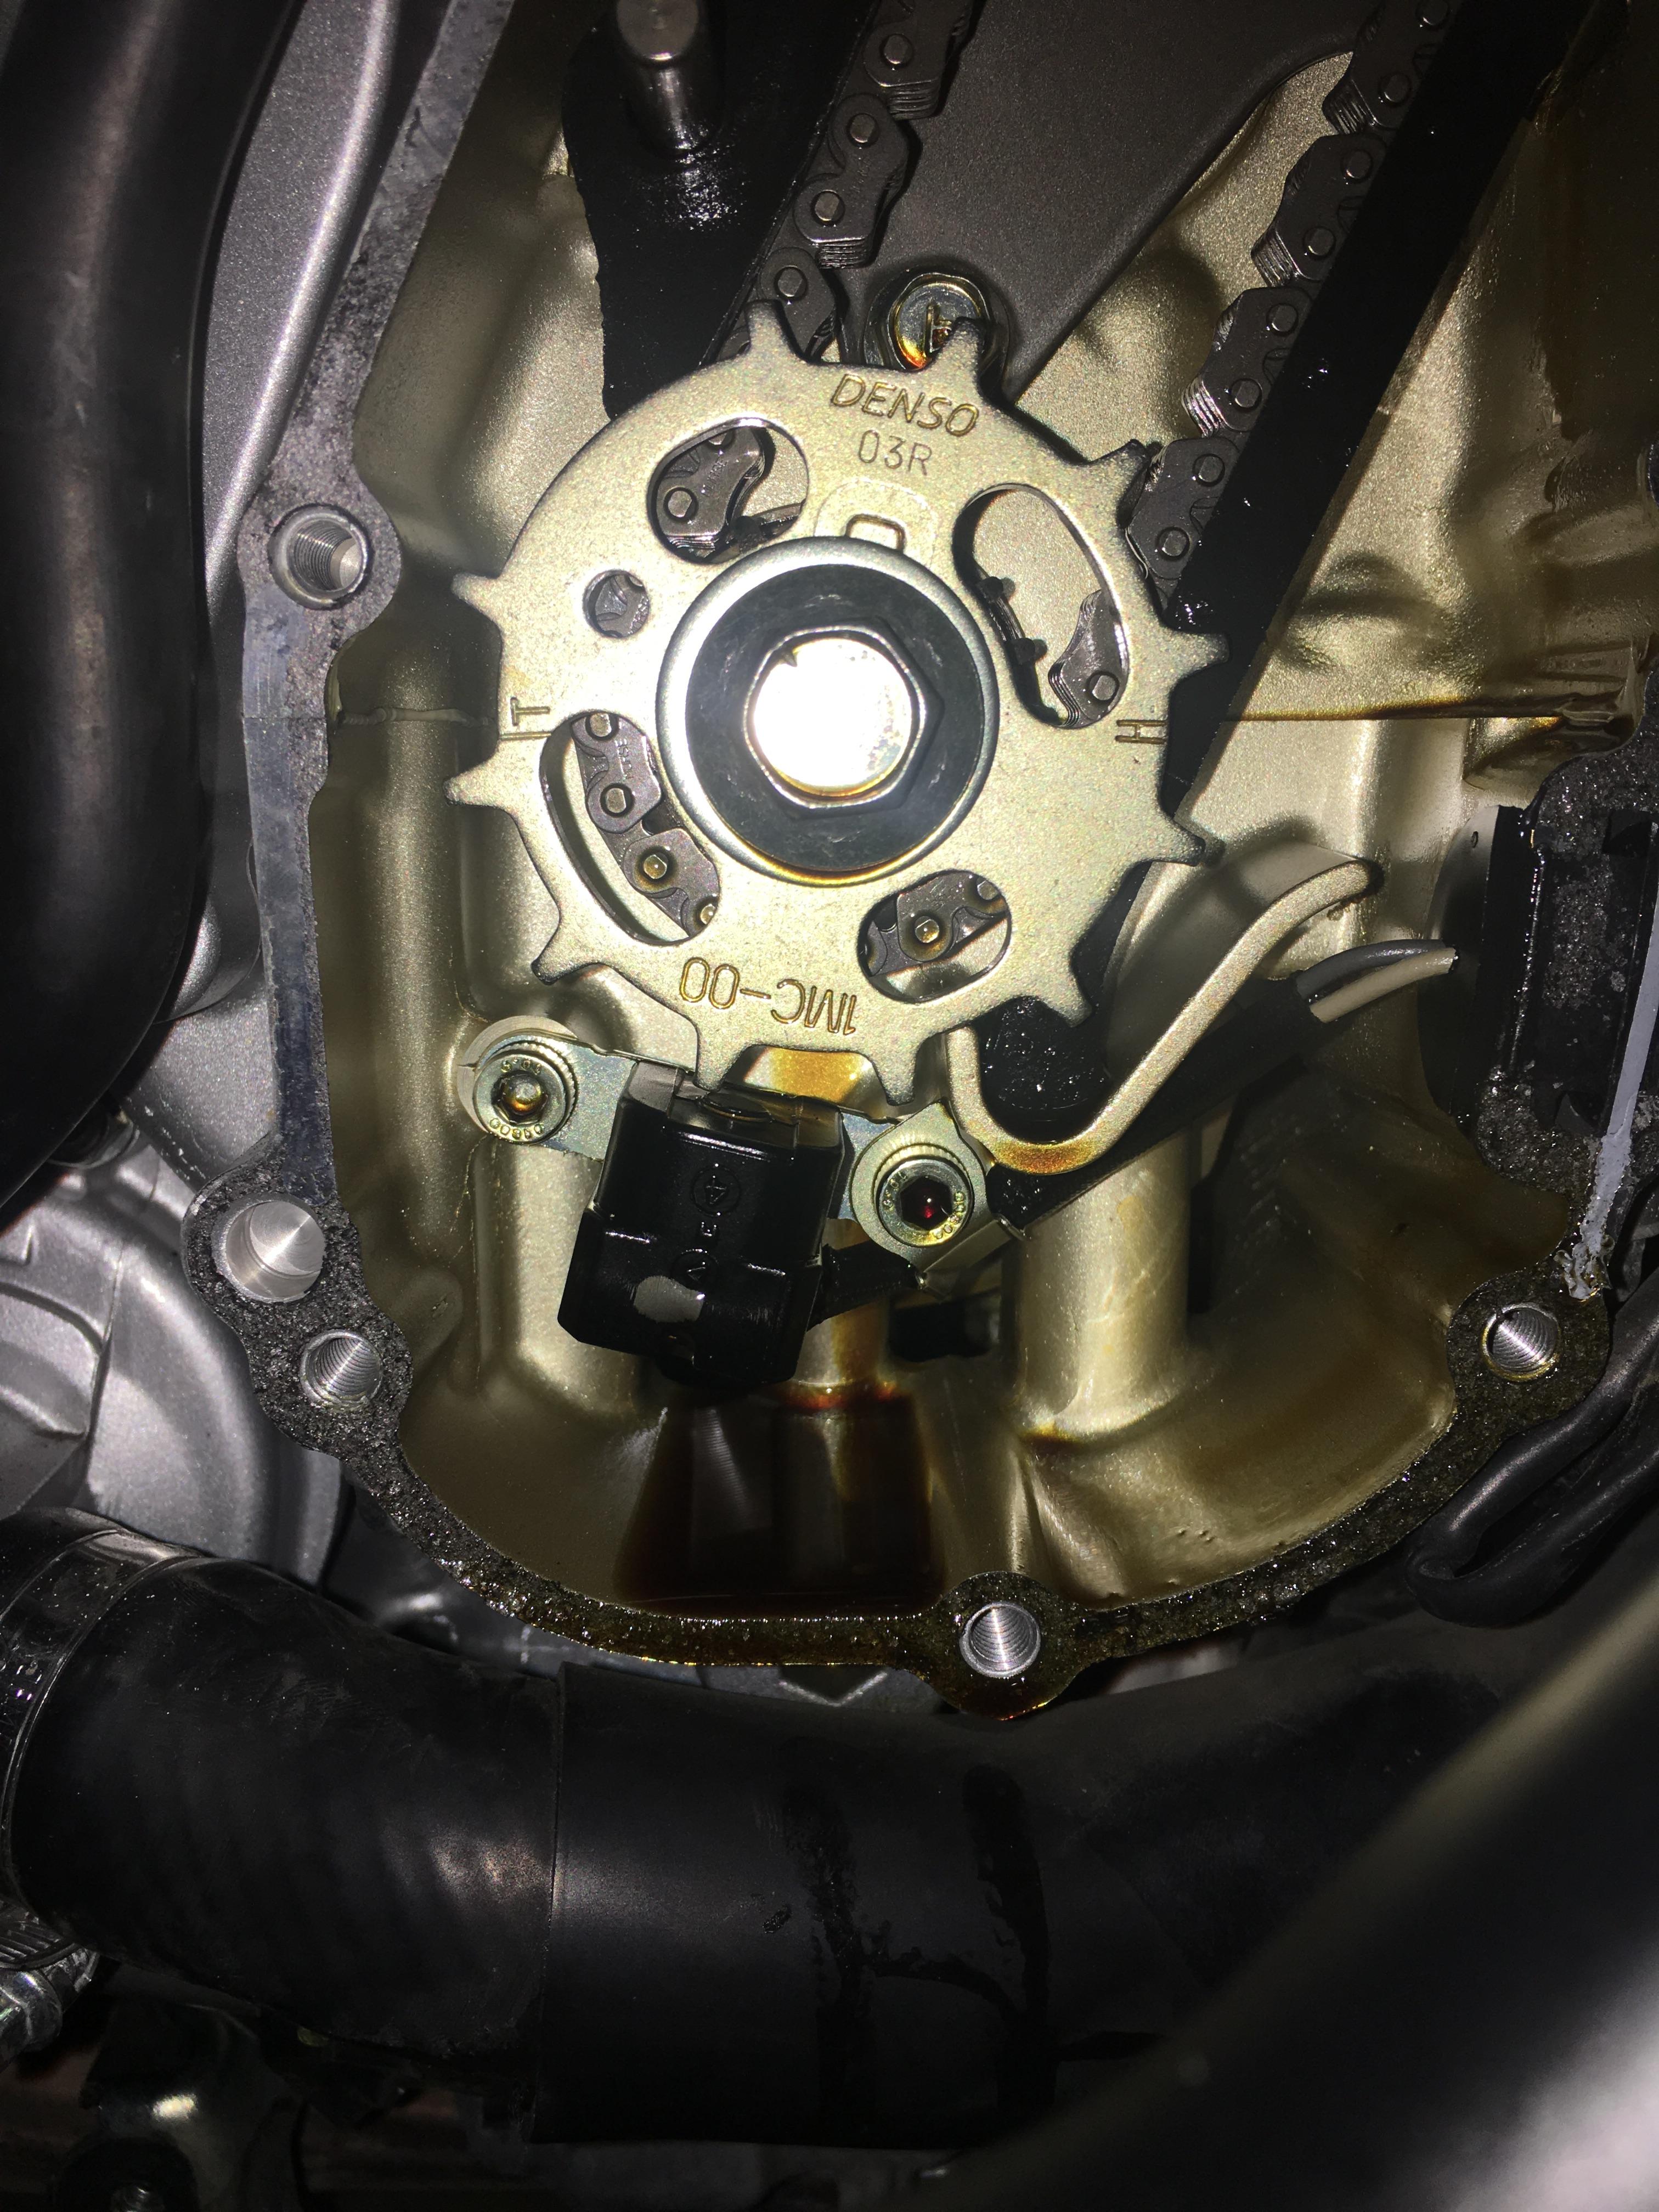
This is what I end up with:

Timing rotor
eaxnXou.jpg


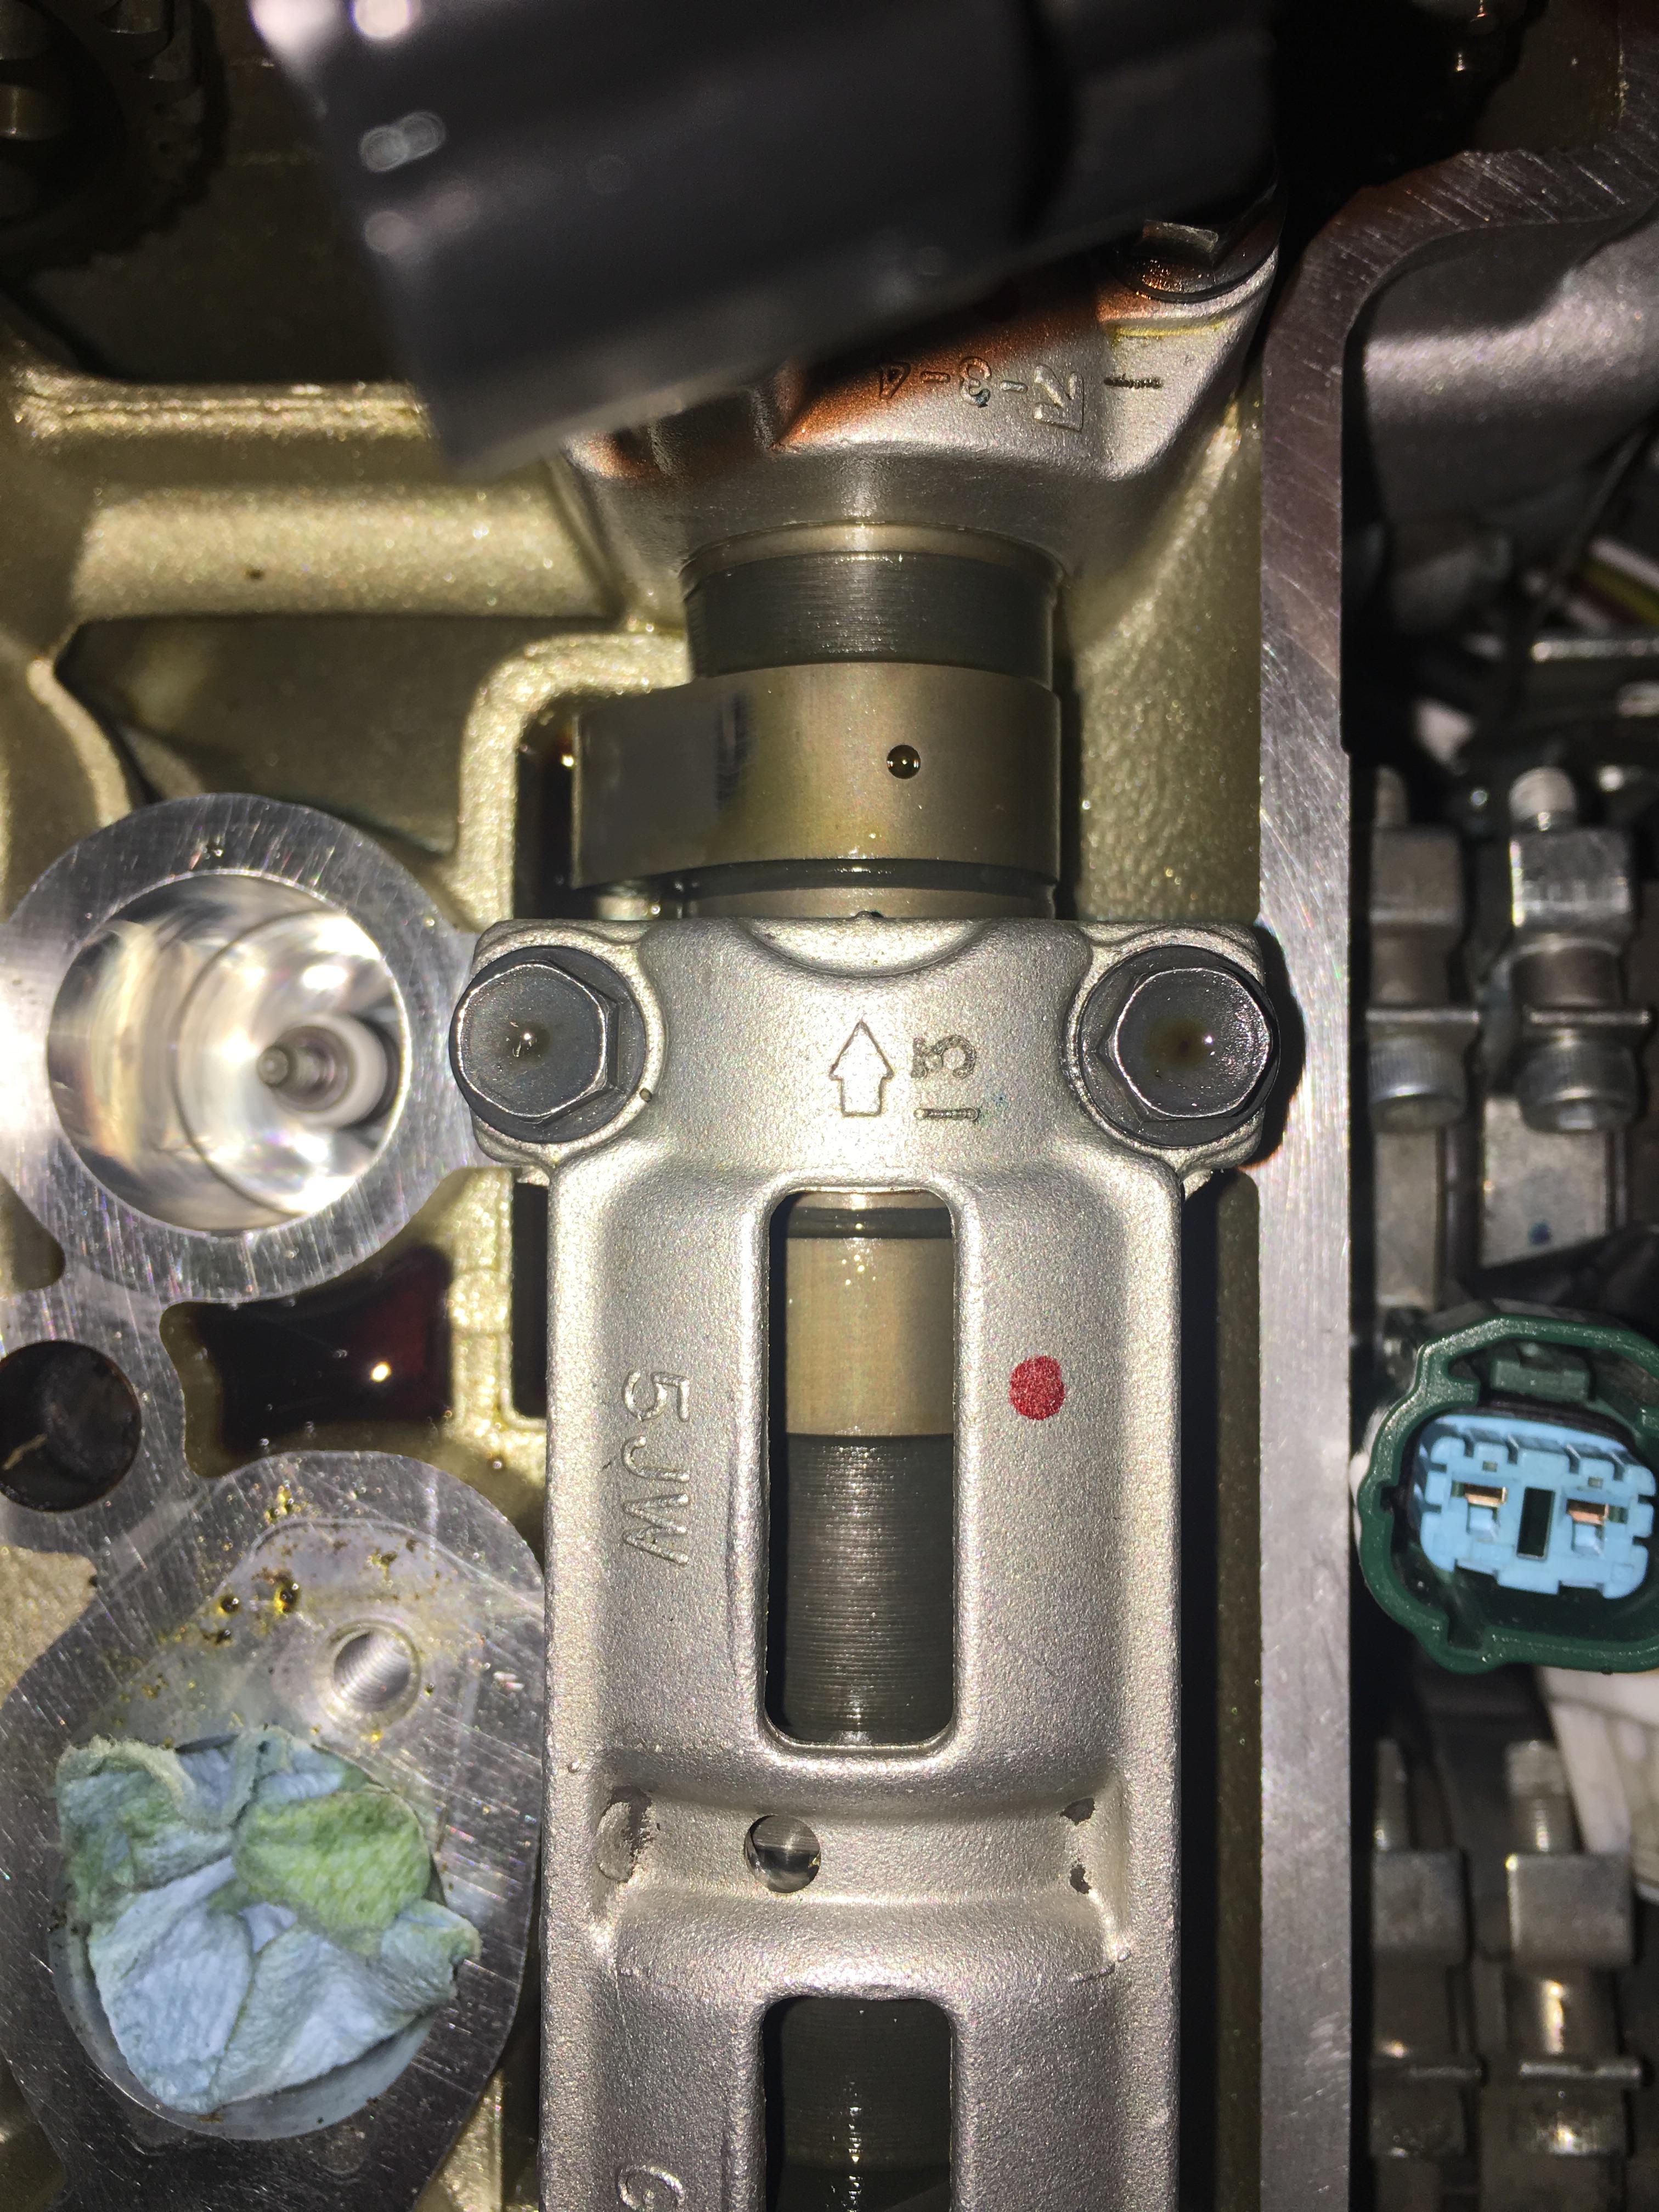
Intake camshaft (seems to be retarded a bit):
w0NJF77.jpg


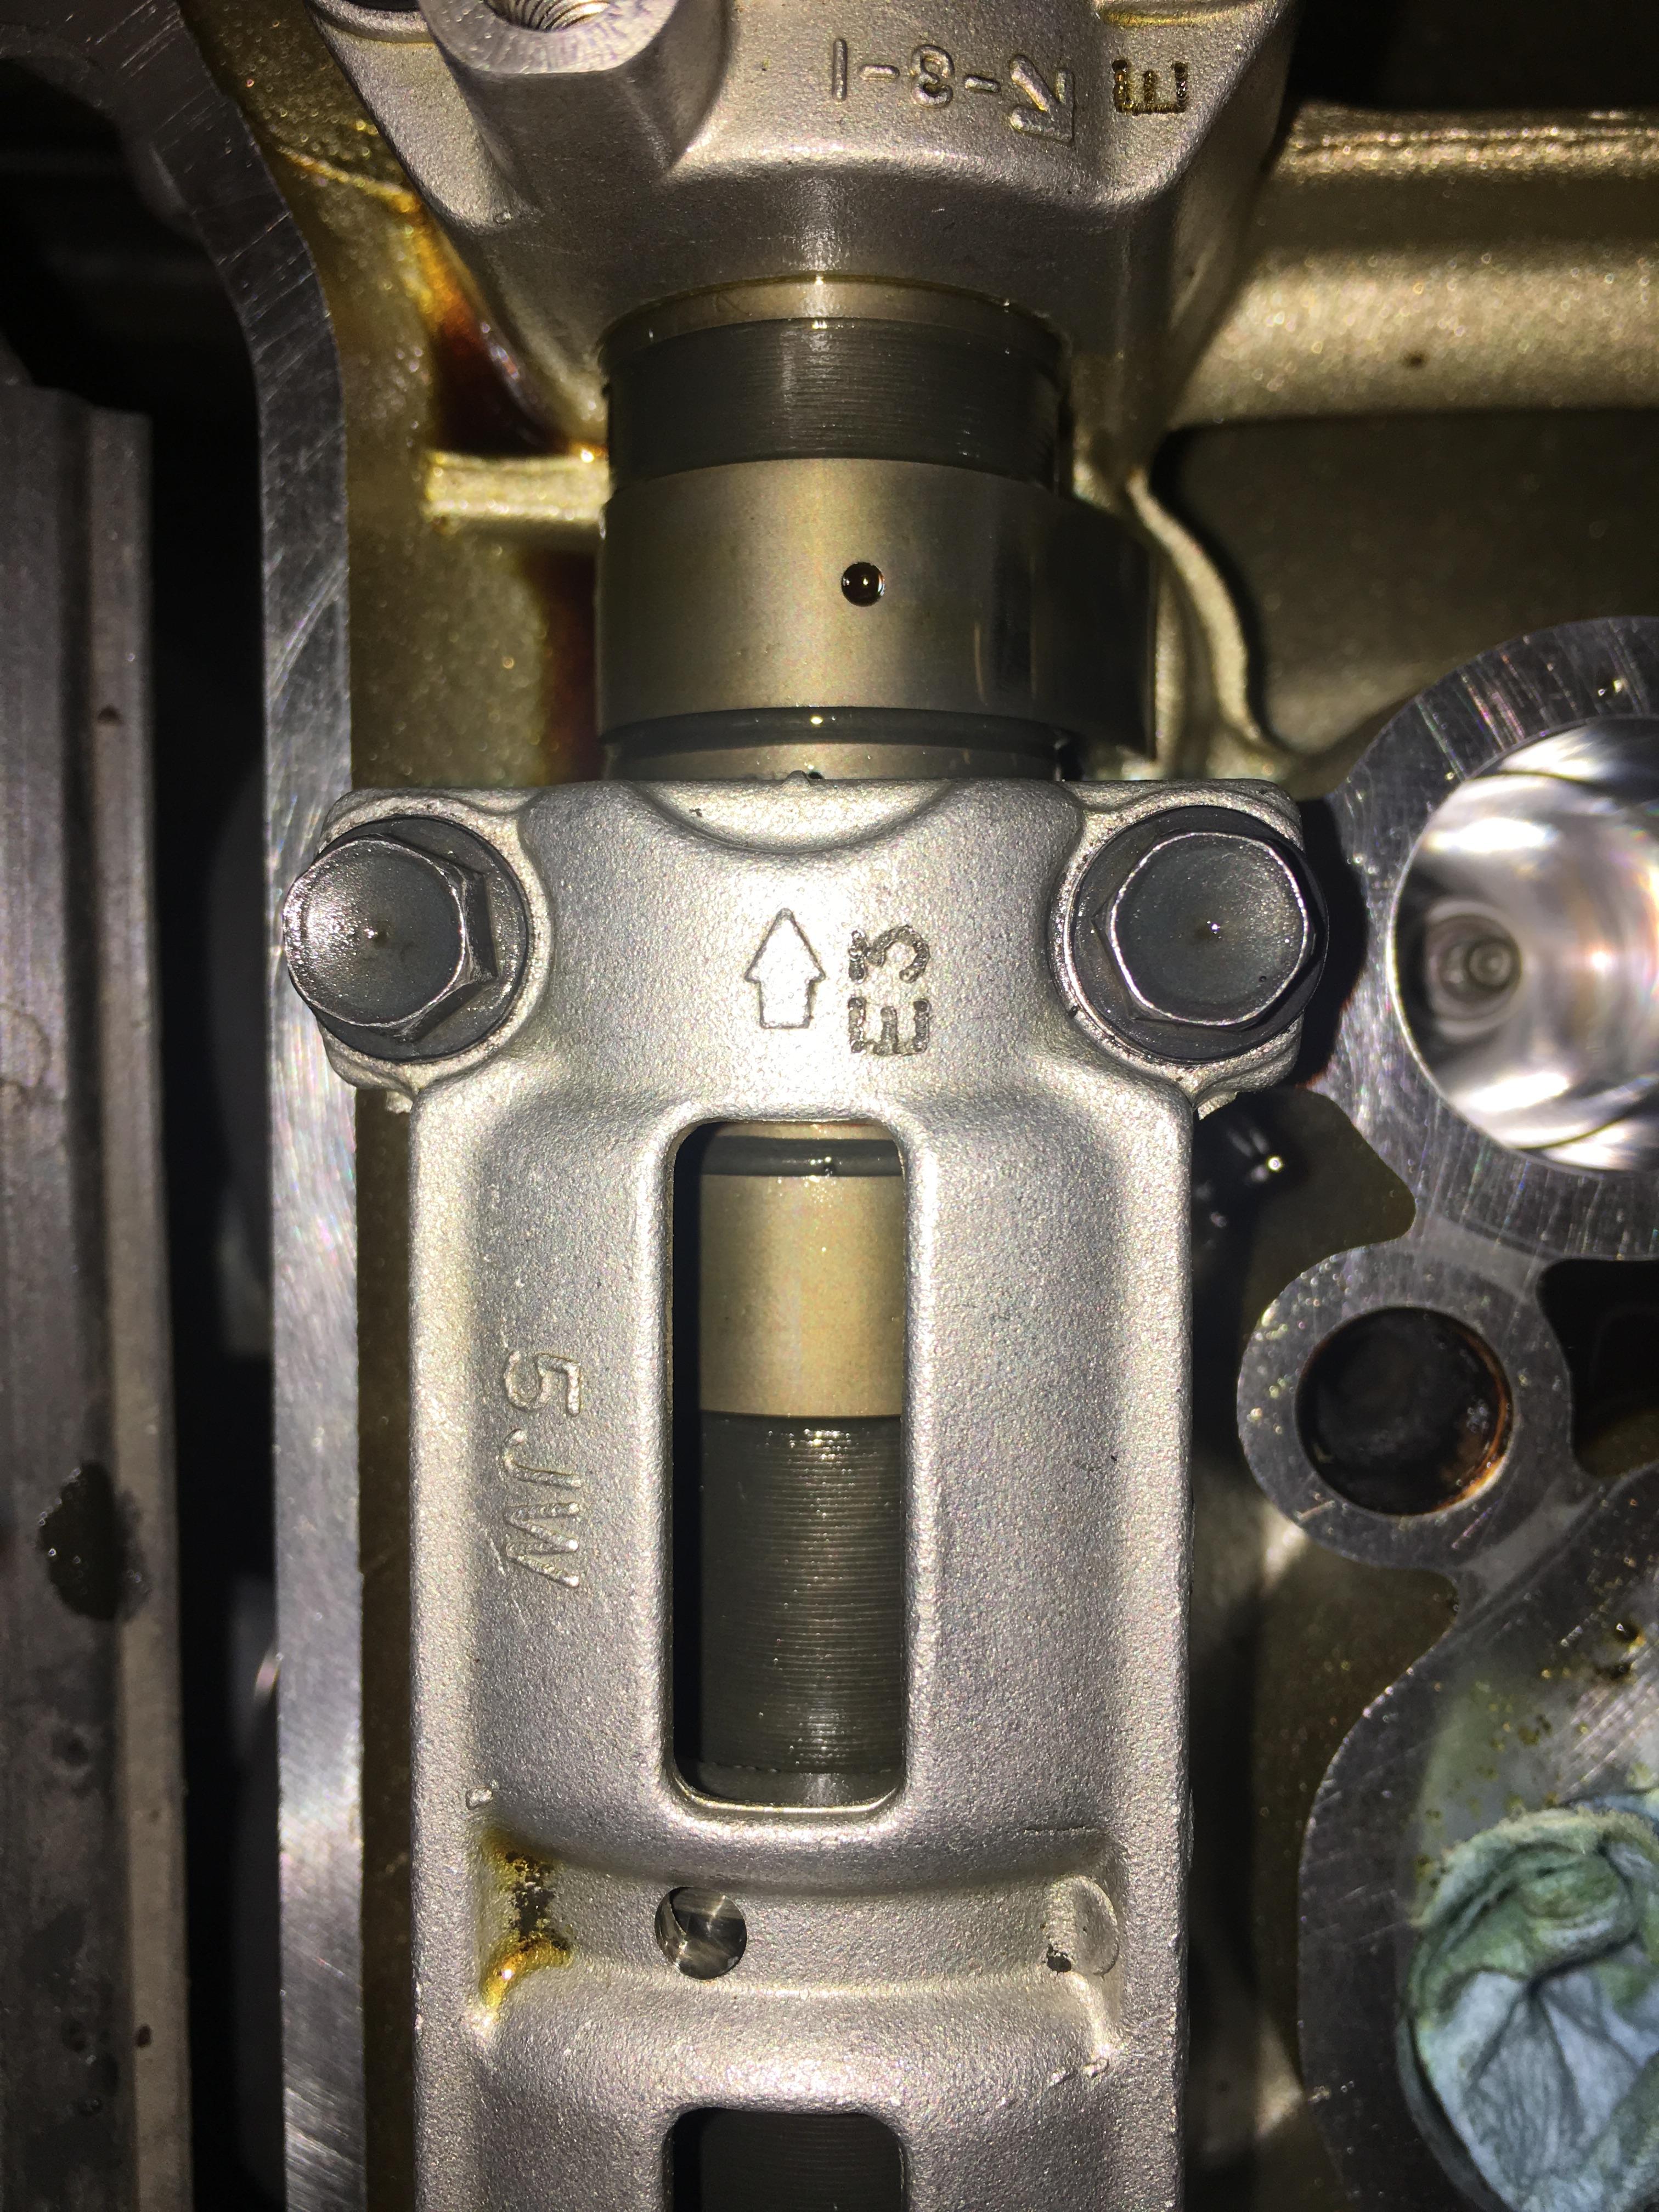
Exhaust camshaft (also seems to be retarded):
h30lX2j.jpg


Does that look right, or should I keep trying until everything lines up perfectly? I've noticed the holes on the camshafts will drift a bit as I tighten down the camshaft caps, so it's difficult to get everything to line up and stay lined up.

 
Last edited by a moderator:
I assume you mean valve check, not TBS. It's gotta be right, not close. The real reference points are on the outsides of the cam sprockets. Hard to see but possible with penlight and inspection mirror.

 
Last edited by a moderator:
Unless it's the angle of the pic, looks like you need to rotate the crank very slightly CW to get the timing mark lined up with the casing split.

--G

 
I went to the local auto parts store (third trip in total for this valve adjustment) and picked up an inspection mirror. It helped a ton, and this time I lined up the reference points on the cam sprockets instead of pointing the holes on the cam lobes upwards and hoping for the best. Once everything was put back together, the cam holes lined up perfectly with the arrows, and the timing mark on the crankshaft also lined up perfectly with the side of the bike.

 
by your first photo the "T" mark is not perfecly aligned.

don't look the cam holes, look only the sprckets marks and install first the exhaust cam, then the intake

after everything is on and torqued, manually try to rotate the crackshaft very gently...2-3 times and check and re-check the alignment many times before start it

anyway in the factory service manual everything is well explained

 
Glad you figured it out. Not sure why people are so afraid of those marks on the top. They are as valid as the ones on the side and easier to see. When everything is in time you can check the arrows on the sides of the sprocket with a mirror too, but they will always agree.

One tip: When the valves are aligned with their marks up top, I find it difficult to get the chain onto the lower sprocket correctly when the crank is sitting at the TDC timing mark. Instead, I turn the crank backwards about 5 degrees CCW (yes it's OK to turn the crank backwards when it isn't connected to the valves) before slipping the chain onto the lower sprocket. Then when you've tensioned the chain and turned it CW to the timing mark, it will take all of the slack out of front vertical run of the chain, and everything should be in time.

 
I think that the next time I have to pull the cam I will use a Sharpie to make reference marks on the inside of the cam sprockets before doing anything else. The design engineers obviously did all of their work with the engine sitting on a bench; not in the frame!

The last valve check was over 40,000 miles ago so I am well past due. Last time, all exhaust valves were close to the middle and since some of the intakes were at or below the minimum spec, I set them all to a bit over the halfway point of the range. I guess (hope) that changes won't be necessary this time. I only have had to make adjustments once in the first 120,000 miles - now at 164,000.

 
I agree with Ross - while it is possible to see the timing marks on the outside of the cam sprockets with a good light, a mirror, and a lot of luck - it sure would be easier if those marks were on the inside.

 
You folks are making something easy into something not so easy.

Looking at the bottom two photos provides the answer.

You can see the arrow on each of the camshaft caps. On the end of each cap you can see a small vertical nib protruding out at the point of the arrow.

Get a small straight edge ruler, etc. and slide the long edge up against the end of the cap. Slide the ruler along the cap end until the end of the ruler stops against the small vertical nib.

Now the ruler will be laying flat down atop the camshaft lobe. Where is the pip on the camshaft lobe relative to the end of the ruler?

If the pip is in good alignment with the arrow it will be easily seen just at the end of the ruler.

If the camshaft sprocket is off one tooth it will be obvious -- the center of the pip won't be at the end of the ruler.

Always orient the other end of the ruler toward the front of the engine. That way you won't have to look over the ruler to see the pip.

 
Last edited by a moderator:
It's always hardest the first time. Crank was slightly off, cams will also be.

If in doubt spin it over and recheck. REC. removing plugs much easier to turn with no compression.

 
Top