Fred H.
Well-known member
Well, it didn't go without a few bumps, but I got it done.
A complete photo gallery of the project can be seen here:
https://www.pbase.com/fredharmon/giviv46
Everything went smooth until I pulled out the grommets and put the bolts into the E250 and started to tighten them. The second bolt pushed right through the plastic on the E250 and broke through the bottom.
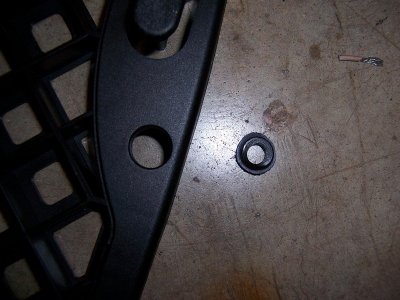
I called Givi and they told me that the E250 was not designed to be mounted through the grommet holes, and should only be bolted down through the webbing. The grommets also need to be in place so that the trunk is properly supported, and the only reason for those holes is to hold in the grommets.
No problem, Gorrilla glue to the rescue. I repaired the broken piece of plastic and so I could put the grommet back in, and went about finding a new way to mount the E250 to the OHFJR rack. There were no holes in the rack that lined up with the webbing, so I had to drill them myself. The rear ones were no big deal, but the front ones required a bit more thought, as the FJR plastic tail is only a few millimeters under the OHFJR rack, so I didn't want any hardware scratching up my plastic when I bolted it down. I considered a couple different approaches, and there does appear to be enough room to install a bolt from the bottom so the head of the bolt is facing FJR tail and then putting the nut on top, but this would mean that the E250 would have to be installed on the OHFJR rack first, and then the whole thing bolted on the bike. The problem with doing this, is the E250 covers up the rear bolt that the OHFJR rack bolts down with, so you would have to cut a hole in the E250 to be able to access that bolt to install it. Instead, I just decided to drill the holes front holes and tap them for the bolt and then cut the bolts off flush. This way I could install the OHFJR rack and then just lay the E250 on top of it and bolt is in place.
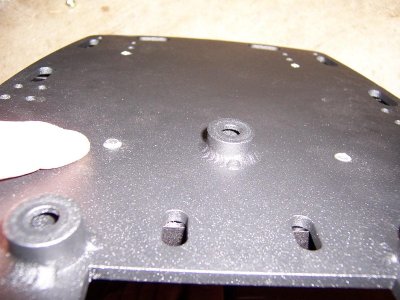
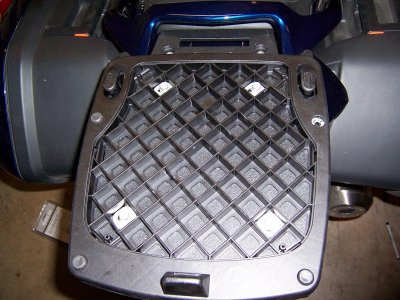
Rear holes drilled
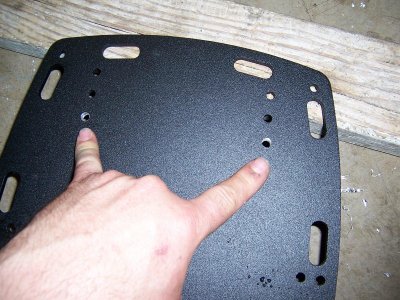
Holes taped and front bolts installed and cut off flush so they won't scratch the plastic on the FJR tail
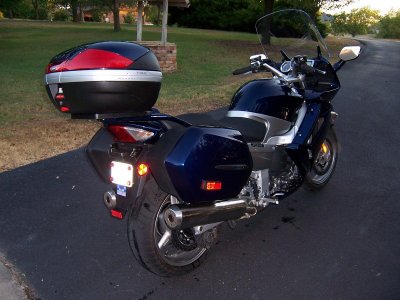
Once I got the holes drilled and tapped it all went together just fine. I am real happy with the finished product, and I think this really looks better than the Givi 357 mount, though it doesn't have the forward support arms that the 357 has that probably help reduce movement as well as supporting the load.
E250 bolted down properly through the webbing using the rectangular washers and hardware provided by Givi.
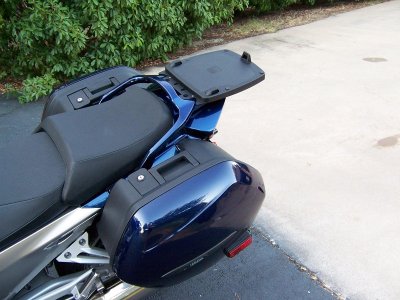
With the Givi box removed, the rack is not such an eyesore, which is why I went this route in the first place.
I spoke to Duane on the phone about the problems I ran into, and I suspect he may make some changes or at least provide some spacers to go under the bolts so they don't break through the rack like mine did. In the end, I feel better knowing I have it much more solidly mounted by using the webbing as it is designed to.
A complete photo gallery of the project can be seen here:
https://www.pbase.com/fredharmon/giviv46
Everything went smooth until I pulled out the grommets and put the bolts into the E250 and started to tighten them. The second bolt pushed right through the plastic on the E250 and broke through the bottom.
I called Givi and they told me that the E250 was not designed to be mounted through the grommet holes, and should only be bolted down through the webbing. The grommets also need to be in place so that the trunk is properly supported, and the only reason for those holes is to hold in the grommets.
No problem, Gorrilla glue to the rescue. I repaired the broken piece of plastic and so I could put the grommet back in, and went about finding a new way to mount the E250 to the OHFJR rack. There were no holes in the rack that lined up with the webbing, so I had to drill them myself. The rear ones were no big deal, but the front ones required a bit more thought, as the FJR plastic tail is only a few millimeters under the OHFJR rack, so I didn't want any hardware scratching up my plastic when I bolted it down. I considered a couple different approaches, and there does appear to be enough room to install a bolt from the bottom so the head of the bolt is facing FJR tail and then putting the nut on top, but this would mean that the E250 would have to be installed on the OHFJR rack first, and then the whole thing bolted on the bike. The problem with doing this, is the E250 covers up the rear bolt that the OHFJR rack bolts down with, so you would have to cut a hole in the E250 to be able to access that bolt to install it. Instead, I just decided to drill the holes front holes and tap them for the bolt and then cut the bolts off flush. This way I could install the OHFJR rack and then just lay the E250 on top of it and bolt is in place.
Rear holes drilled
Holes taped and front bolts installed and cut off flush so they won't scratch the plastic on the FJR tail
Once I got the holes drilled and tapped it all went together just fine. I am real happy with the finished product, and I think this really looks better than the Givi 357 mount, though it doesn't have the forward support arms that the 357 has that probably help reduce movement as well as supporting the load.
E250 bolted down properly through the webbing using the rectangular washers and hardware provided by Givi.
With the Givi box removed, the rack is not such an eyesore, which is why I went this route in the first place.
I spoke to Duane on the phone about the problems I ran into, and I suspect he may make some changes or at least provide some spacers to go under the bolts so they don't break through the rack like mine did. In the end, I feel better knowing I have it much more solidly mounted by using the webbing as it is designed to.
Last edited by a moderator:
 It will actually make the rack easier to mount as the mounting bolts and spacers will be semi-permanently mounted onto the Givi plate. This way no one will lose the spacers or the bolts.