Brodie
Darksider #16 - and Proud of it !
I've been asked in another thread how I did my Heat Troller set-up for heated seat and heated gear on my bike. Rather than PM the information, I decided to share it on the open forum. My idea of a good installation is to have the wire runs as far from the usual maintenance areas as possible. The less you need to disturb the wires the longer they will give good service without becoming intermittent. This includes placing the knobs or other controls in places that don't require removing for servicing the bike.
Below is the interface for both my heated seat, and my heated gear. Note that I placed it in the fixed section of the dash, not in one of the removable panels.
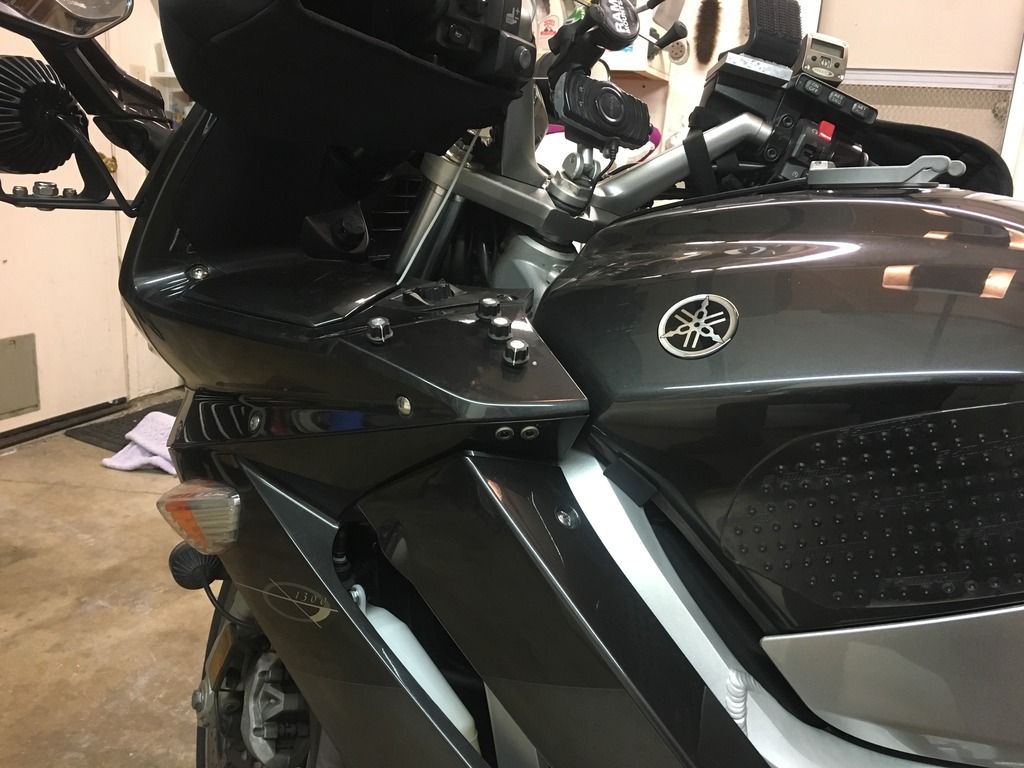
If you look closely you will see the 2 COAX ports for my heated gear. It's a good place for a pair of coil cords to to plug into. I typically route the coil cords from my Gerbing liner through the left pants pocket zipper in my 'Stitch, then drape it between my leg and fuel tank. This allows me to get off the bike without having to un-plug first.
The next picture shows how I wired up these COAX ports. Since I built these I seem to recall seeing COAX ports that are already provided with these short pigtails.
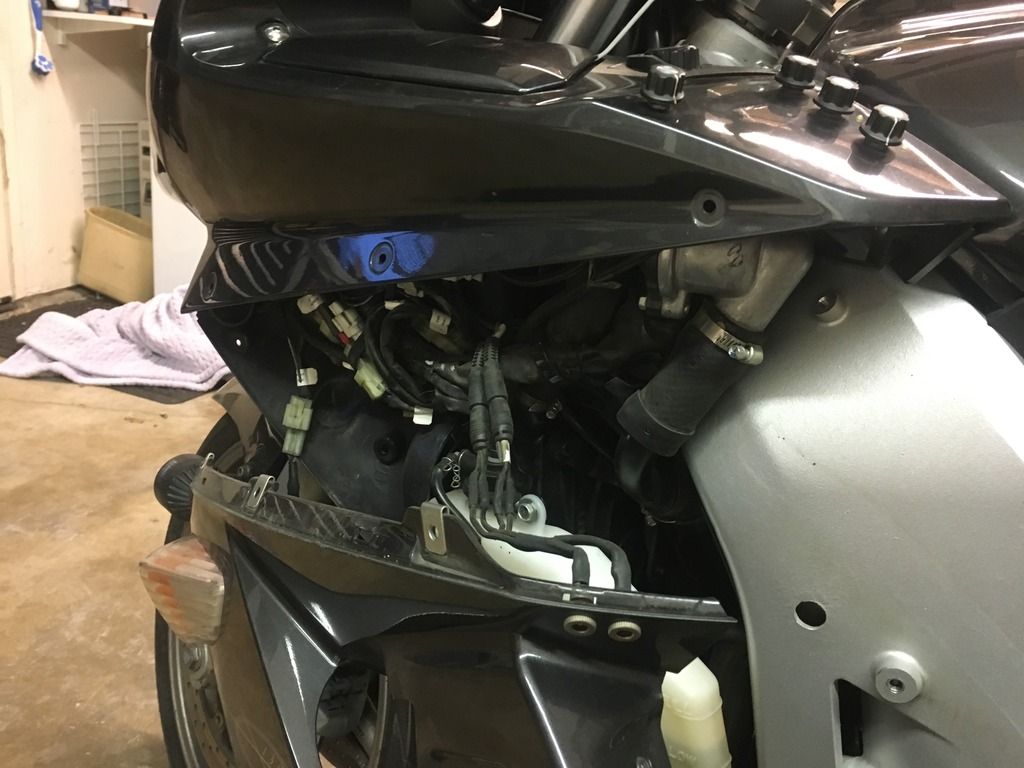
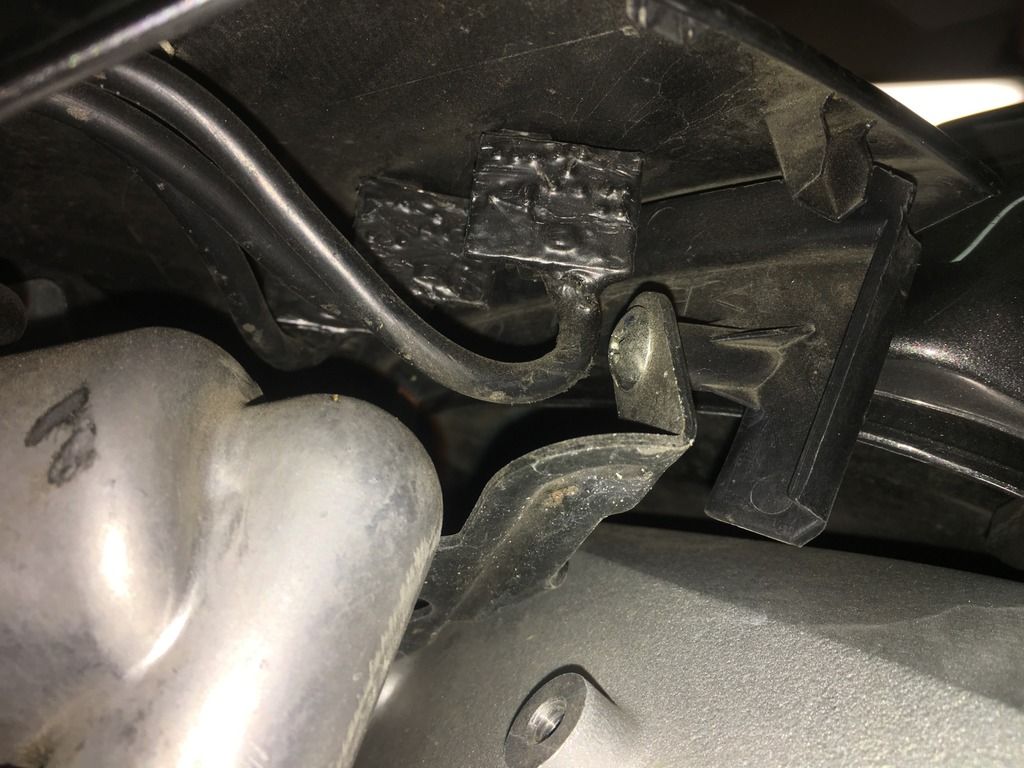
In keeping with my practice of discreet wire routing, I fed these extensions alongside the OEM wire harness from the under tank area.

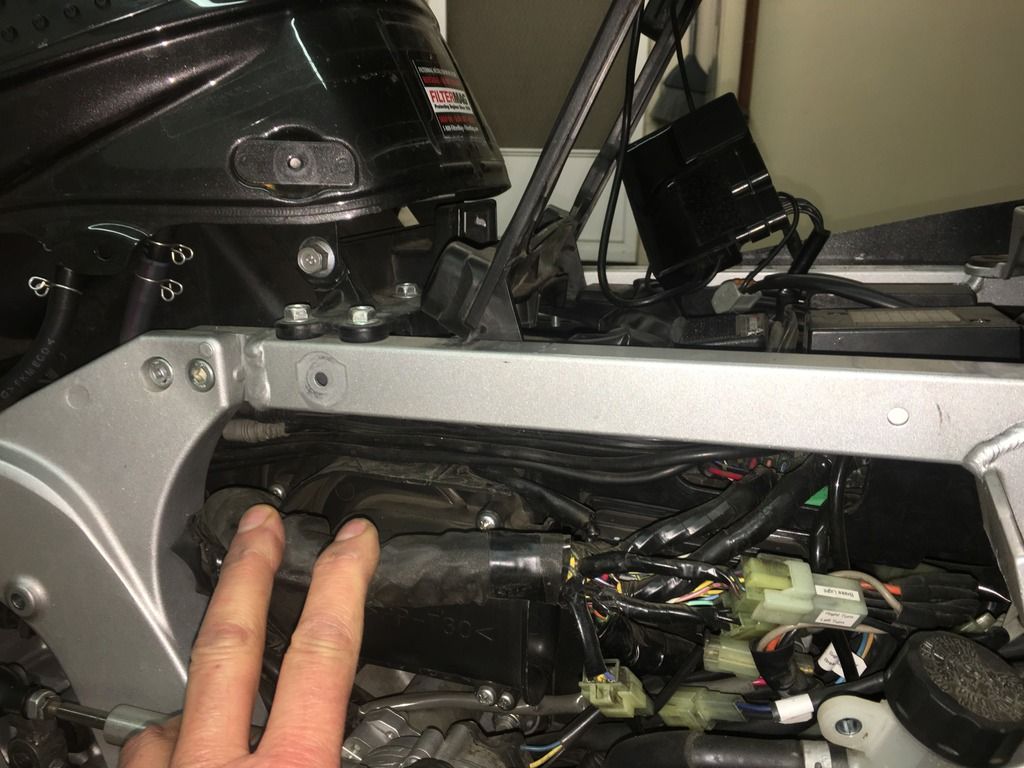
These COAX extensions (36" long IIRC) follow along the main wire harness rearward toward the air filter/side panel area and connect to the Heart Troller pigtails.

The Heat Troller pigtails are just long enough to come out through a passageway from under the seat, and run along the air box to where the sub frame bolts up. Note also that the 3 remote control cables share the same wire run. With everything tucked out of the way it seldom gets disturbed by the regular service performed on the bike.
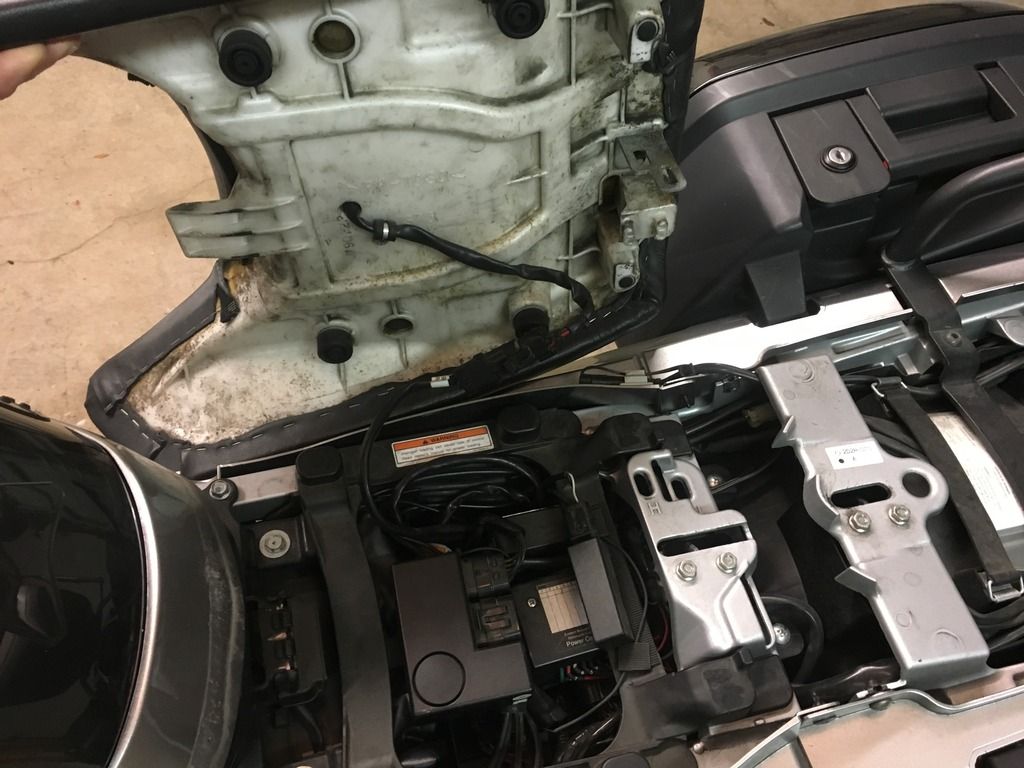
The picture below is the reverse view looking from the right side of the bike to where the wires enter into the area beneath the seat. Note the Eastern Beaver PC8 Power Center in this central location. I put it here to keep all the wire runs as short as practical for minimal voltage drop. The Heat Troller in the foreground is a dual control remote panel mount for heated gear. The smaller one toward the right is a heated grip Heat Troller with single remote panel mount.
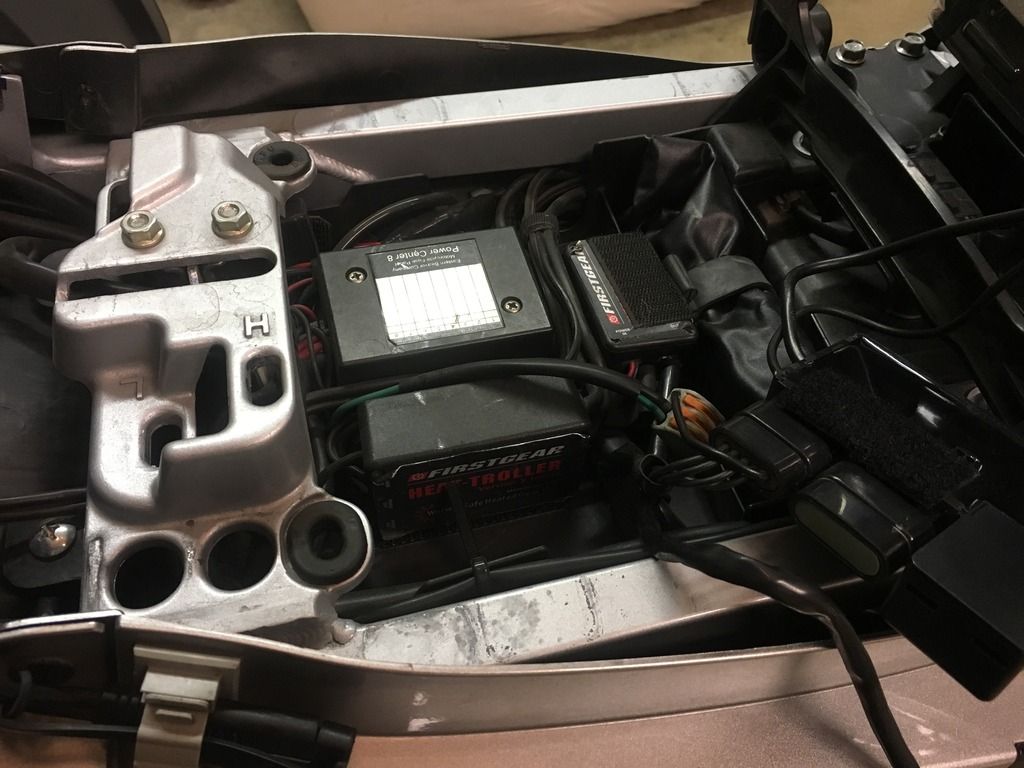
When all put back together my Bill Mayer heated seat is connected to the heated grip Heat Troller by a GM WeatherPak connector. I chose this because it gets taken apart every time I remove the seat. This WeatherPak connector is more readily available nation wide at the better auto parts stores in case it needs servicing. Also note it gets crowded in there on this Advanced Edition FJR because the YCCS module is directly below all this stuff.
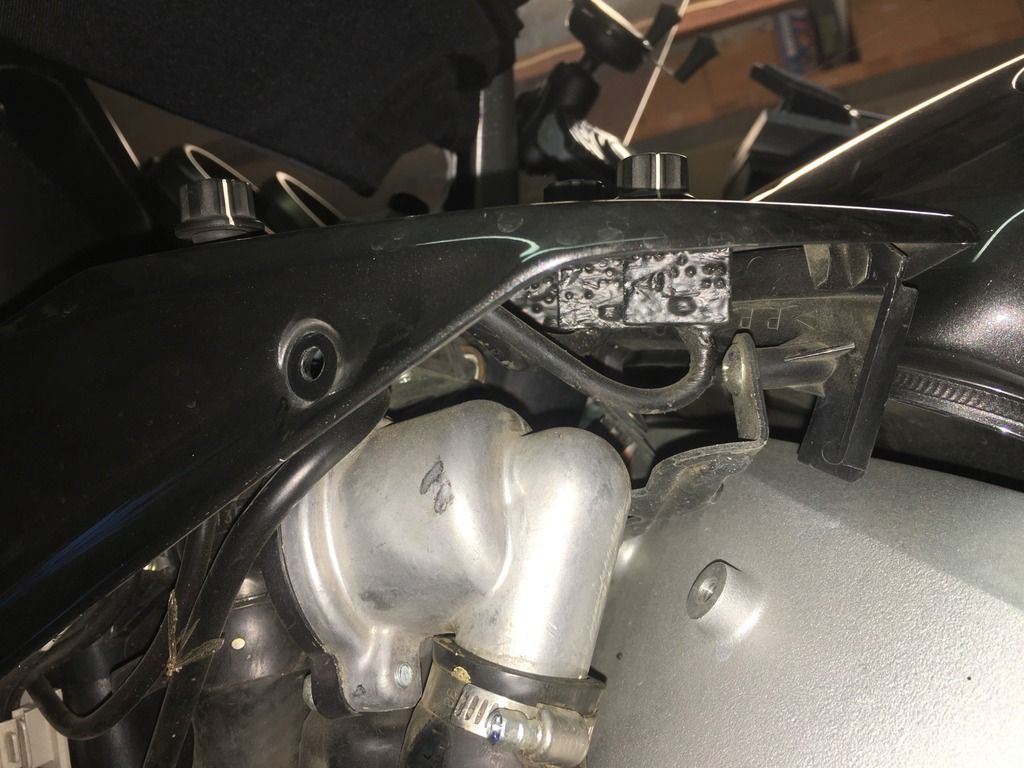
Two more close ups of where the actual remote knobs live. Between the small circuit panels and the COAX power outlets for the heated gear there's not much room next to the radiator thermostat housing and cap. If you plan to do something like this, proceed cautiously, that is a rather pricy piece of plastic to replace.
I hope you enjoyed the exposé.
Brodie

Below is the interface for both my heated seat, and my heated gear. Note that I placed it in the fixed section of the dash, not in one of the removable panels.
If you look closely you will see the 2 COAX ports for my heated gear. It's a good place for a pair of coil cords to to plug into. I typically route the coil cords from my Gerbing liner through the left pants pocket zipper in my 'Stitch, then drape it between my leg and fuel tank. This allows me to get off the bike without having to un-plug first.
The next picture shows how I wired up these COAX ports. Since I built these I seem to recall seeing COAX ports that are already provided with these short pigtails.
In keeping with my practice of discreet wire routing, I fed these extensions alongside the OEM wire harness from the under tank area.
These COAX extensions (36" long IIRC) follow along the main wire harness rearward toward the air filter/side panel area and connect to the Heart Troller pigtails.
The Heat Troller pigtails are just long enough to come out through a passageway from under the seat, and run along the air box to where the sub frame bolts up. Note also that the 3 remote control cables share the same wire run. With everything tucked out of the way it seldom gets disturbed by the regular service performed on the bike.
The picture below is the reverse view looking from the right side of the bike to where the wires enter into the area beneath the seat. Note the Eastern Beaver PC8 Power Center in this central location. I put it here to keep all the wire runs as short as practical for minimal voltage drop. The Heat Troller in the foreground is a dual control remote panel mount for heated gear. The smaller one toward the right is a heated grip Heat Troller with single remote panel mount.
When all put back together my Bill Mayer heated seat is connected to the heated grip Heat Troller by a GM WeatherPak connector. I chose this because it gets taken apart every time I remove the seat. This WeatherPak connector is more readily available nation wide at the better auto parts stores in case it needs servicing. Also note it gets crowded in there on this Advanced Edition FJR because the YCCS module is directly below all this stuff.
Two more close ups of where the actual remote knobs live. Between the small circuit panels and the COAX power outlets for the heated gear there's not much room next to the radiator thermostat housing and cap. If you plan to do something like this, proceed cautiously, that is a rather pricy piece of plastic to replace.
I hope you enjoyed the exposé.
Brodie