I keep an EZ Pass on the FJR as there are a couple of highways around here that are toll roads (I-93 in NH and I-95 in NH and ME). I don't ride these roads all that often, but when I do it is nice to be able to use the fly-through and not stop to pay a toll. Plus you get a discount (in NH) for using an EZ Pass vs. cash.
For a while I was just letting them photograph the plate and charge me (automatically) that way (note: you have to be sure to register the plate number with EZ Pass or they send you a ticket in the mail), but they recently made it so you lose the EZ Pass discount if they have to charge you via photograph. So that makes it worth making sure the transponder is up on the windshield and can be read at the toll booth.
At first I mounted the transponder to the back side of the windshield, but the curvature of the shield is enough that the 3M Dual Lock fasterers do not engage very securely. So I decided to fab up a little "Yankee Frugal EZ Pass holder". (Yankee Frugal is the northeast version of redneck!)
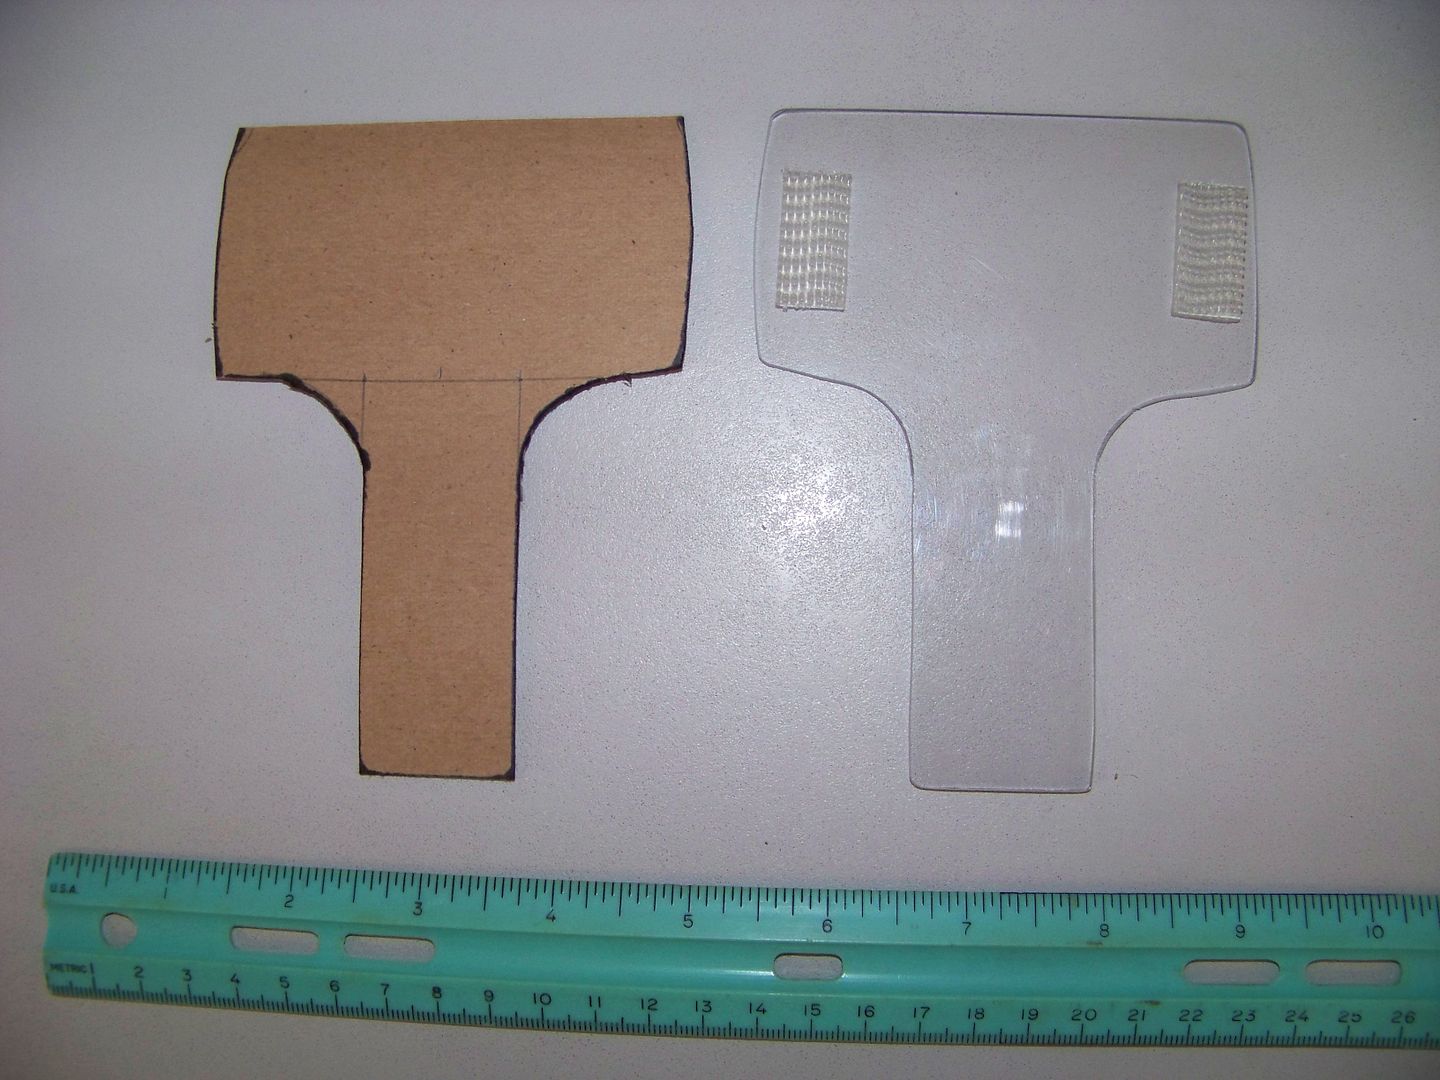
I just traced the shape of my transponder onto a piece of cardboard, and then added a 30mm wide x 75mm long "handle" off the bottom. I ised the cardboard template to mark the pattern on an 8" x 10" x .093" thick sheet of Lexan Polycarbonate sheet from Home Despot for $4, and then cut that out using a saber saw. Smooth the edges with a file and sandpaper.

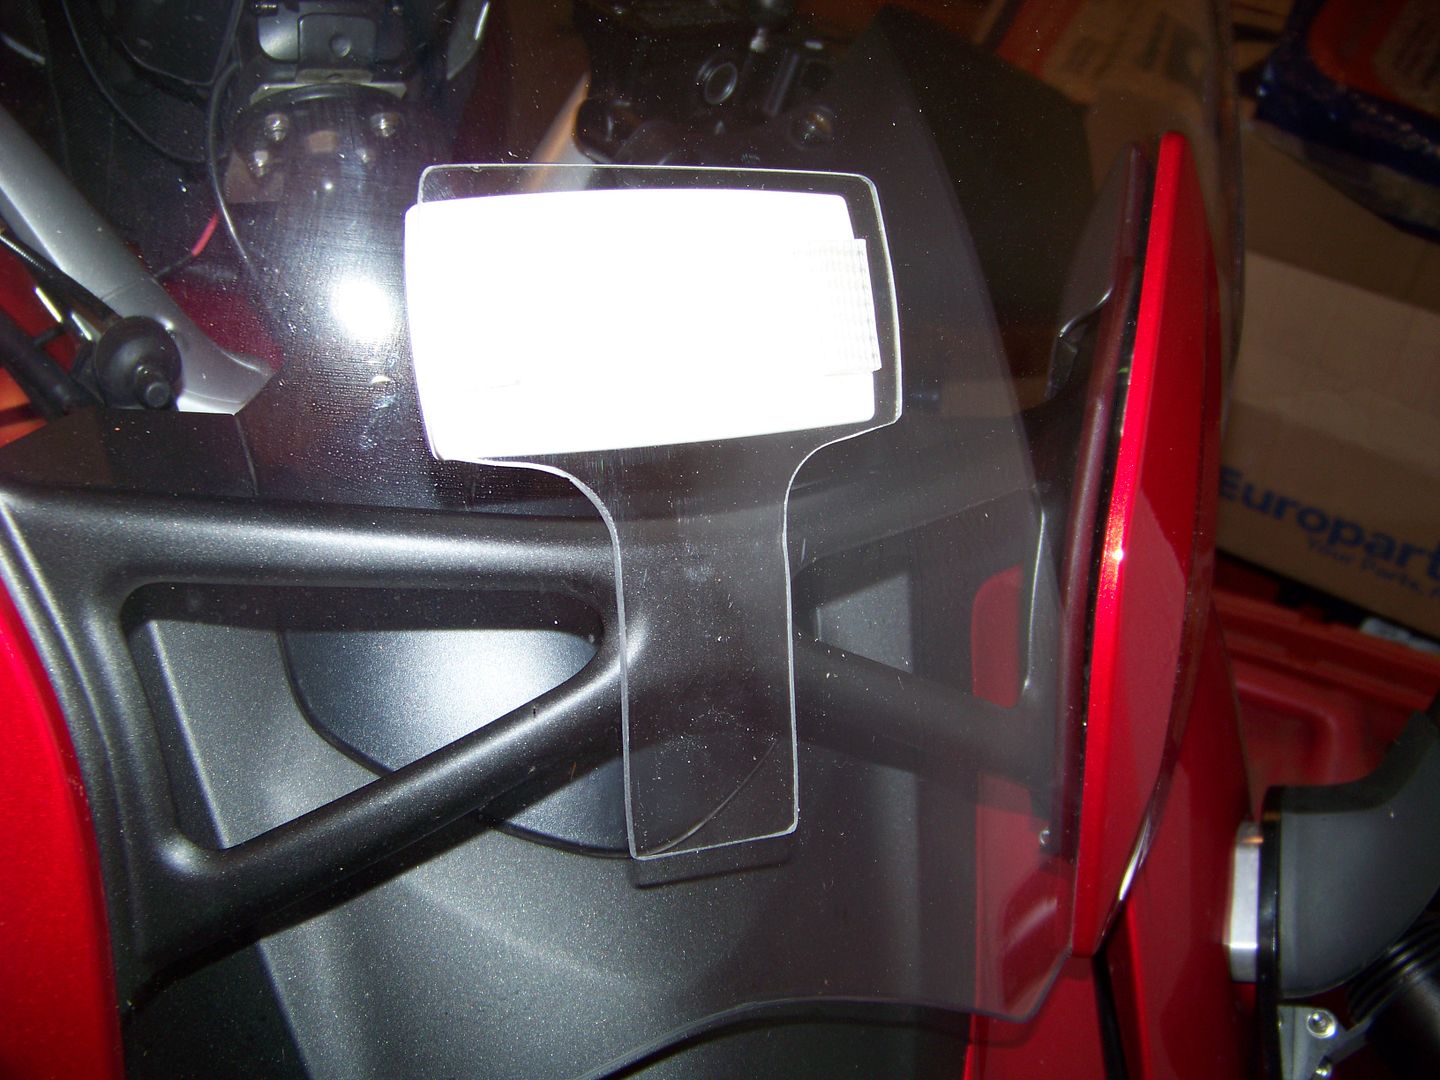
Stuck the transponder to the holder with a fresh pair of Dual Lock strips (you can get them for free from EZ Pass at their office), and then slip the "handle" of the holder down between the windshield bracket and windshield. There is just enough clearance to creat enough tension to hold it securely, but it is simple to slip it out and throw the whole thing in a locked bag when you don't need it, or don't want it walking away.

If you wanted to make it more permanent and eliminate the ability to slip it out, you could just heat the lexan and bend the bottom edge to wrap back around the bottom of the bracket, then mount the windsheild over it.
I had considered drilling a single hole and putting a ty-wrap around the transponder, but I'm pretty confident the dual-lock will do the job now that the mounting surface is perfectly flat.
That is all...
For a while I was just letting them photograph the plate and charge me (automatically) that way (note: you have to be sure to register the plate number with EZ Pass or they send you a ticket in the mail), but they recently made it so you lose the EZ Pass discount if they have to charge you via photograph. So that makes it worth making sure the transponder is up on the windshield and can be read at the toll booth.
At first I mounted the transponder to the back side of the windshield, but the curvature of the shield is enough that the 3M Dual Lock fasterers do not engage very securely. So I decided to fab up a little "Yankee Frugal EZ Pass holder". (Yankee Frugal is the northeast version of redneck!)
I just traced the shape of my transponder onto a piece of cardboard, and then added a 30mm wide x 75mm long "handle" off the bottom. I ised the cardboard template to mark the pattern on an 8" x 10" x .093" thick sheet of Lexan Polycarbonate sheet from Home Despot for $4, and then cut that out using a saber saw. Smooth the edges with a file and sandpaper.

Stuck the transponder to the holder with a fresh pair of Dual Lock strips (you can get them for free from EZ Pass at their office), and then slip the "handle" of the holder down between the windshield bracket and windshield. There is just enough clearance to creat enough tension to hold it securely, but it is simple to slip it out and throw the whole thing in a locked bag when you don't need it, or don't want it walking away.

If you wanted to make it more permanent and eliminate the ability to slip it out, you could just heat the lexan and bend the bottom edge to wrap back around the bottom of the bracket, then mount the windsheild over it.
I had considered drilling a single hole and putting a ty-wrap around the transponder, but I'm pretty confident the dual-lock will do the job now that the mounting surface is perfectly flat.
That is all...
Last edited by a moderator:


