Project CB350 Cafe racer

Yamaha FJR Motorcycle Forum

Help Support Yamaha FJR Motorcycle Forum:

This site may earn a commission from merchant affiliate links, including eBay, Amazon, and others.

garyahouse

newbs need the forum
Joined
Aug 15, 2010
Messages
2,157
Reaction score
597
Location
Spring Hill, Florida
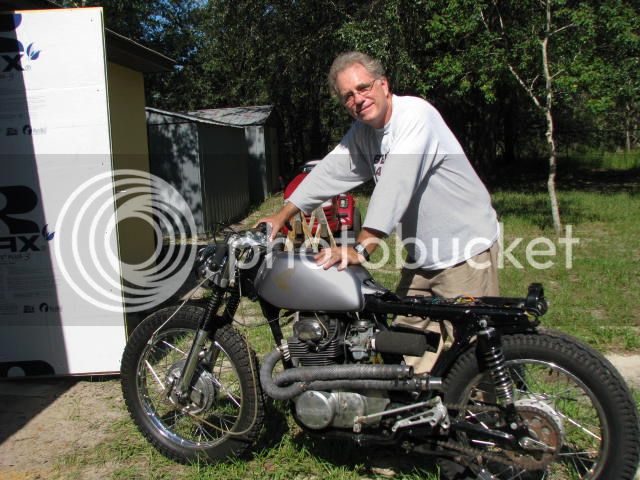
This summer a dream was born. I rebuilt the old shed into a stronger, larger, insulated, air conditioned and well lit workshop. Before it was even done, I purchased one, then another 1972 Honda CB350 twin(s). One was supposed to be a cafe racer, the other, a parts bike. Total investment, 1450 for the bikes, and maybe as much or more for the workshop. I'll try to post some pics of the workshop as time goes on, but for now, the first actual repair that I'm doing involves the rear shock mounts. It's an interesting story, but I'll talk about all that later. For now, just know that I'm no pro. I work with the meager tools and facilies that I have, and hope for the best. As the topic above stated, I'll be learning as I go.

So I finally began.

The shocks were held on by stripped out nuts. After removing them, notice the threads, or lack thereof... A wrong sized nut stripped off anything even looking like threads.
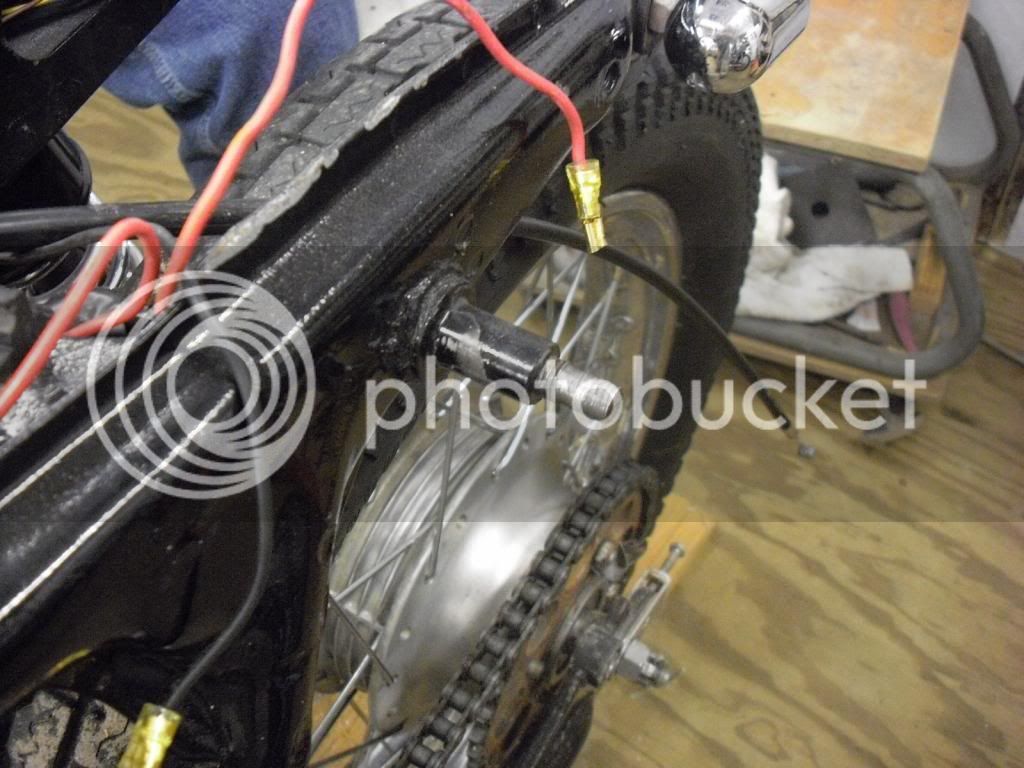
CIMG1143_zps0c8a9885.jpg


Below, I cut off most of the butchered threads, leaving a stub on which to lightly thread a nut to center up a drill bit that just fit inside the threads... in order to pilot drill the remainder of the factory stud. This keeps the drill centered.
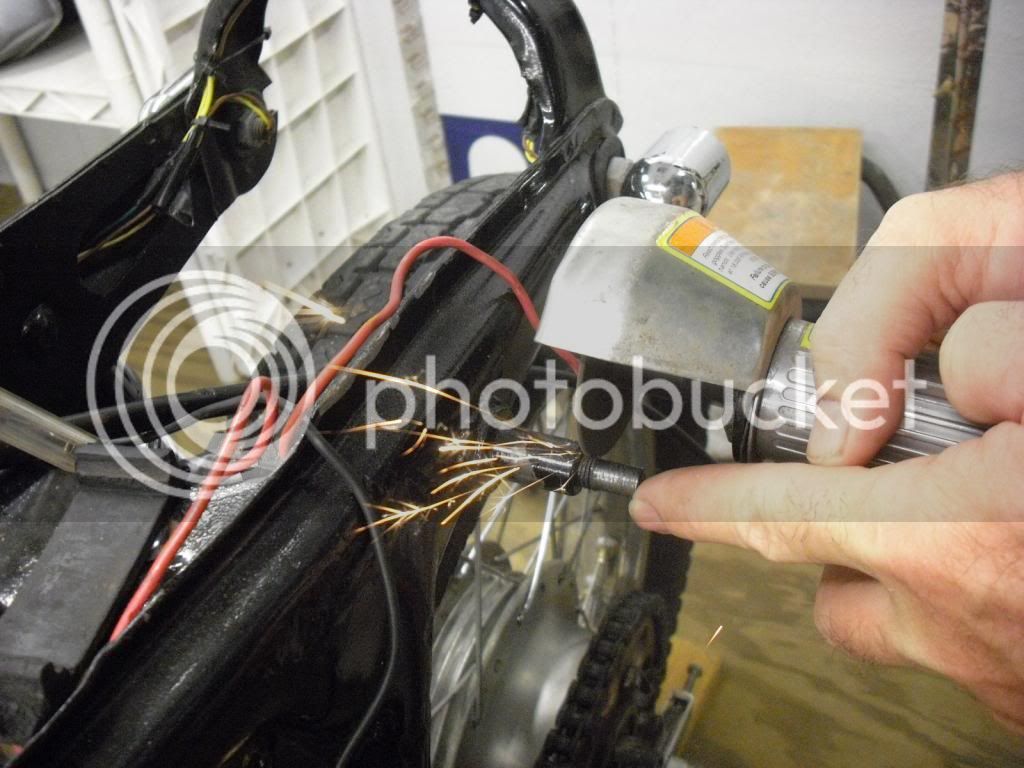
CIMG1144_zps2a13c65a.jpg


After drilling it out to the right size, I threaded it to about 1/2 inch deep with an 8 mm tap...
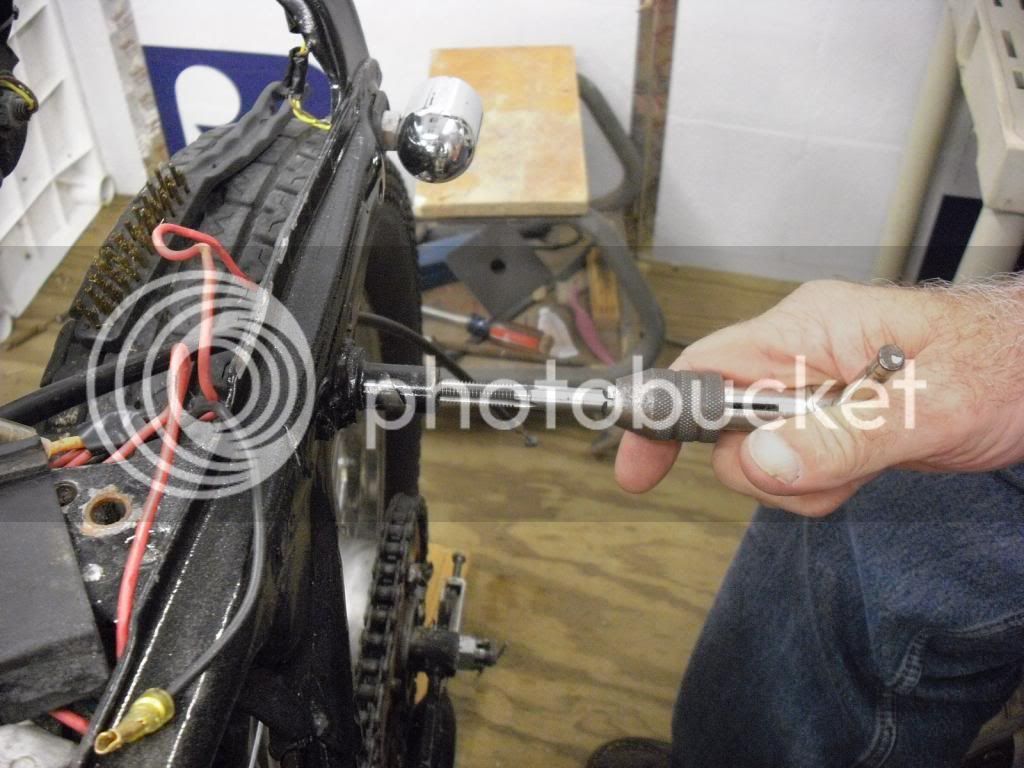
CIMG1145_zpsdfebfbae.jpg


Then after grinding off the last remaining threads, I measured up an 8 mm threaded rod and lock-tited it into the new tapped hole..
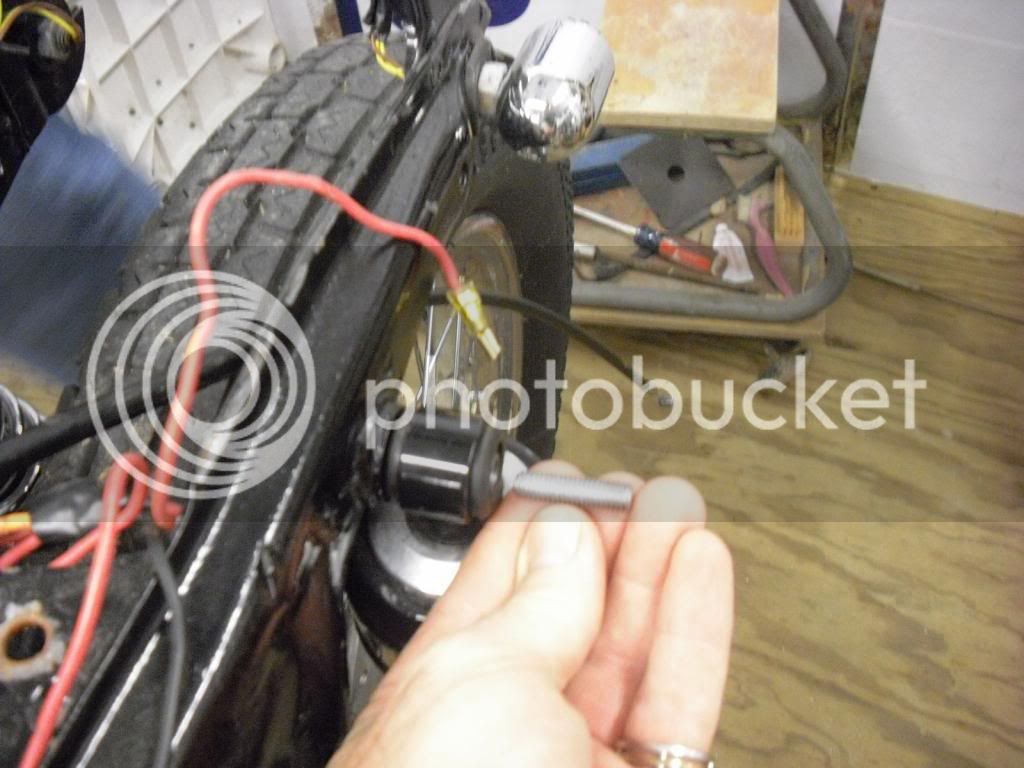
CIMG1146_zps0bca2dbf.jpg


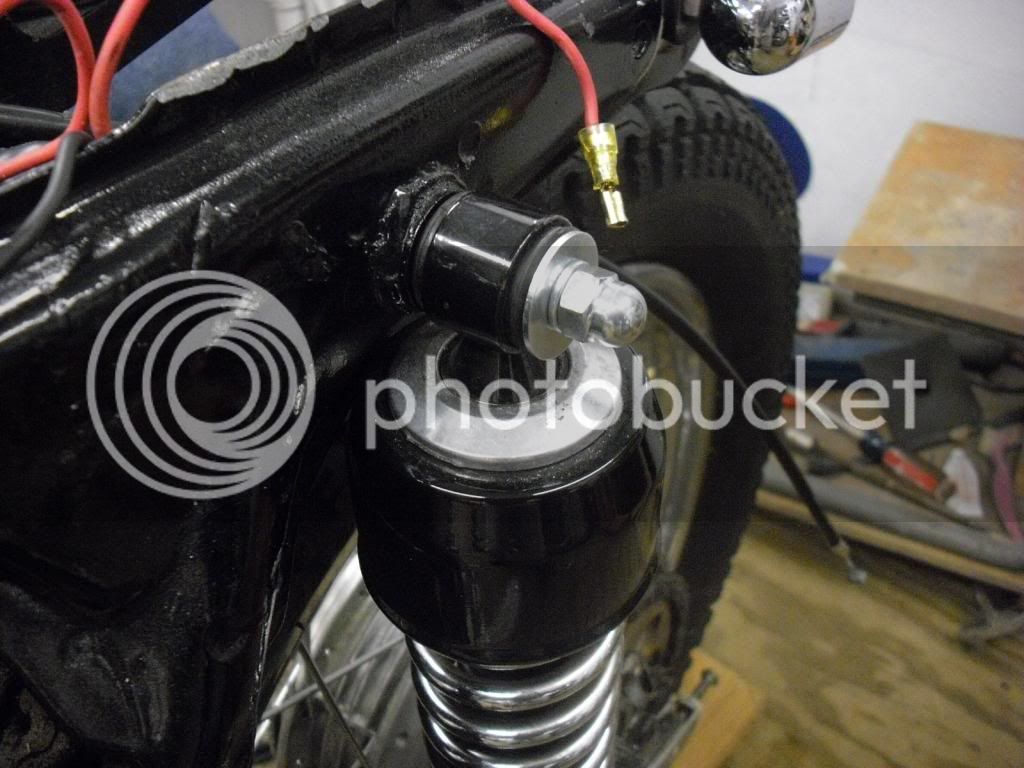
And finally, I put on a couple new washers and stainless steel acorn nut to finish the job. Multiply this times two, and now both sides are repaired and we can move on to the next item.
CIMG1147_zpsaaa51fa8.jpg


Stay tuned to this station for more of my backyard butcher block antics.

Gary

darksider #44

 
Last edited by a moderator:
Yeah, looks good !

My second bike was a 73 CL350. I guess Honda figured that raising the pipes to the left side and adding 1 tooth to the rear sprocket made it a scrambler.

It did really wheelie kinda cool.

 
Last edited by a moderator:
Gary,

Do yourself a big favor and get in touch with the guys from AHRMA. These old Hondas are very popular and a blast to race. In a couple of months you will be out at the track "Swappin Lies" and trying to figure out a way to get that thing around the track One second faster.

Gray Ray #65

Moto Series

 
Gary,
Do yourself a big favor and get in touch with the guys from AHRMA. These old Hondas are very popular and a blast to race. In a couple of months you will be out at the track "Swappin Lies" and trying to figure out a way to get that thing around the track One second faster.

Gray Ray #65

Moto Series
Thanks Ray, but that's not my thing. This old dog is too old to be learning how to race. I'm probably the only guy on this forum that has NEVER touched down a foot peg. I drive like gramma compared to most forum members. I even obey the speed limits... good grief. Maybe that's why I went 21 years w/o a moving violation. Anyway, don't get me wrong, I have just as much fun as the next guy at places like Tail of the Dragon, but I have no interest in going the fastest or beating anybody else. I ride because I enjoy it, plain and simple. I'm just not into racing. However, I am enjoying doing a light refurbish job on an old Honda in an effort to learn a few things. Took the forks off and found 7 ball bearings missing from the steering stem. Just bought some new ones from Honda. Working on getting a buffer set up to do some polishing tomorrow.

Gary

darksider #44

 
Well this is interesting. Good repair by the way. The thought that comes to mind is how fun to work on bikes when their is no pressure to get it back on the road.

 
I'm jealous, I've been jonesin for a cafe project. Wanna do a Honda four cyl. But a 350 is cool. Used to ride a 350 scrambler back in the day. Rumor has it that some rode one throuth the high school just before graduation, but I'm sure it's urban lenged.
cool.png


That looks like a fun project. I know a guy in my town that has an old honda dream 300 he would love to sell me, but I need another project like a moose needs a hat rack!!! Have fun with it and keep us posted.

 
I chose the 350 twin because it is a simple motorcycle, and they can be had pretty cheap as they're not as popular as the bigger 4 cylinder bikes. Since I do most of my work alone, a smaller, simpler bike was the better choice for me.

Today I picked up a couple 10 mm bolts to bolt up the bottom of the shocks. The previous owner was a kid who rebuilt the bike into a cafe racer but he was a total butcher. He had a knack for trying to thread course thread bolts into fine thread nuts. Whatever he touched, he butchered. It's gonna take some work. I have to take every thing apart including all the wiring, the carbs, you name it. Not sure about the engine. I was told it ran about a year ago. Somebody took off the electric starter... why I don't know. Rust and corrosion everywhere. I'm beginning to set up my electrolysis bath for rust and corrosion removal. More pics to come.

 
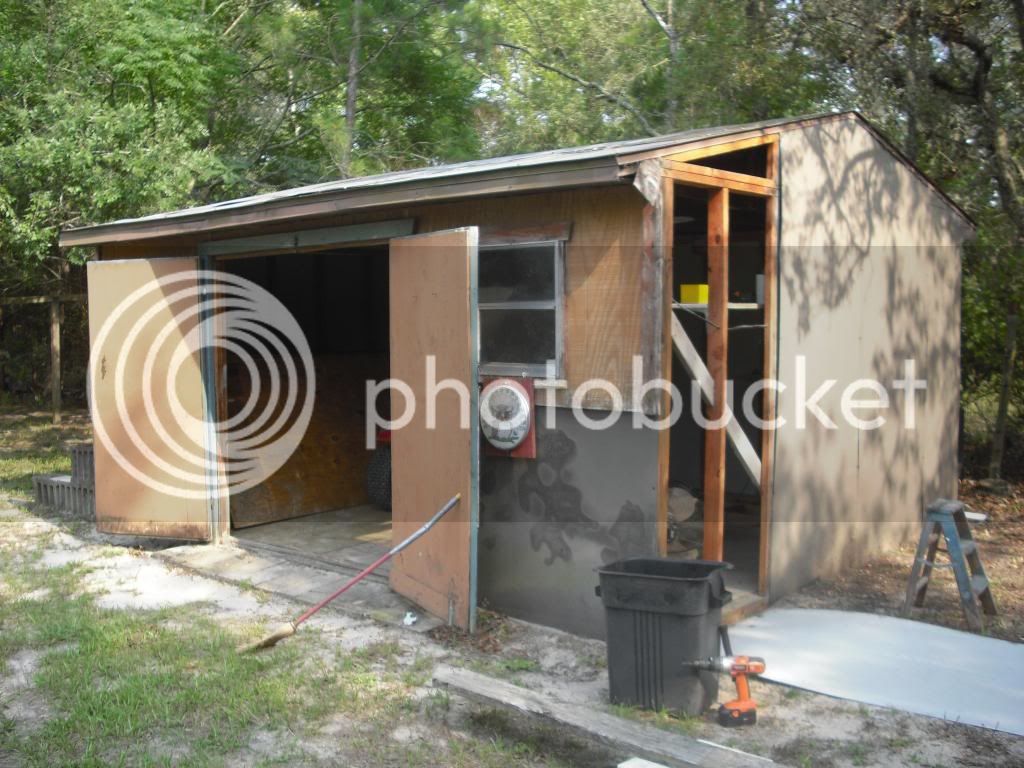
While I'm waiting for daylight and the chance to dig into the next couple items on the Honda, a little history on my dream. It started with dad's old shed out back. I spent a lot of time deciding whether to try to add on to the existing 1 1/2 car garage (huge and expensive undertaking) or throw about 1500 into the shed to make it into a decent sized workshop. After much sweating, I decided on an 8x12 addition to the shed. But this also involved a great deal of rebuilding of what dad already built some 32 years ago. So it was a dual project. Tear down, repair, rebuild and then add on.

It began by removing one of the steel wall panels to expose the framing in order to line up the new addition.

CIMG0848_zps9217e400.jpg


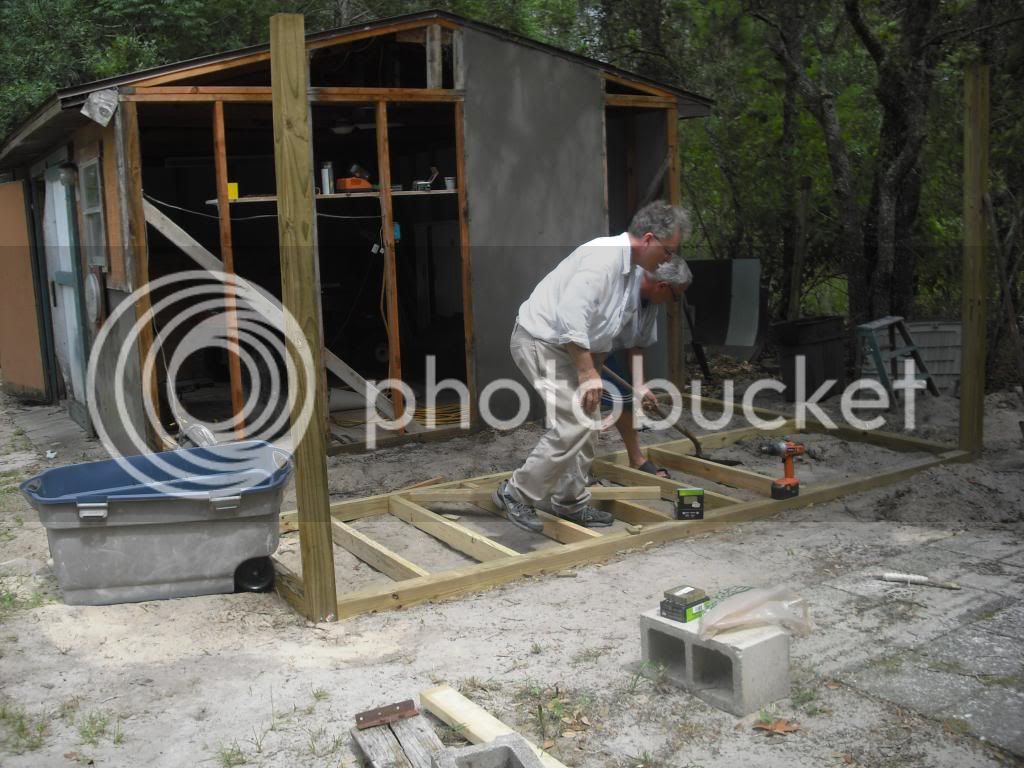
Below, the existing shed was 12 x 16 when I started. Next item was to run my strings to level up the new floor with the old. I sank my PT 4x4's down about 3 feet and loaded in the concrete to lock em down. Next I began framing up the floor with PT 2x4s. You can't see it here, but I put 12x12x2" concrete pads every few feet under the 2x4s for support. Wish dad would have done that on the other end of the shed, it settled a couple inches over the years. No, I didn't tear it all up and re-level it, it will just have to do.

CIMG0859_zpsbc668559.jpg


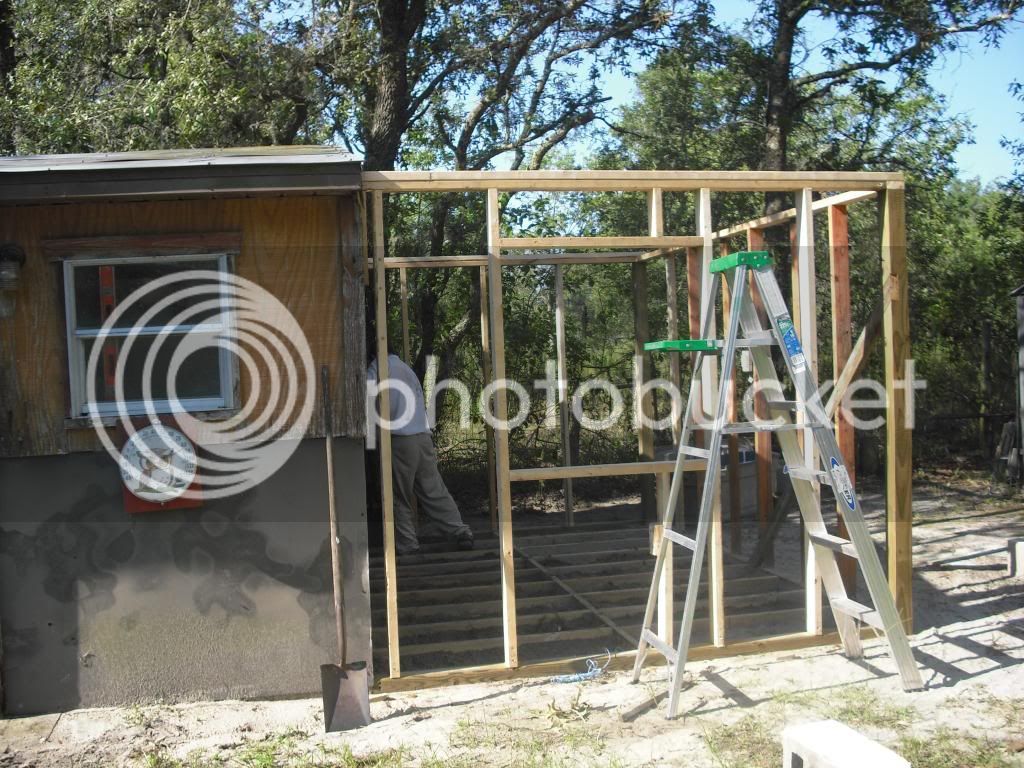
Below, floor framing is done, and I've framed up the walls. The old windows you see were scrapped in favor of larger ones that used to be in the house (replaced years ago by energy efficient ones).

CIMG0960_zpsc9c28da7.jpg


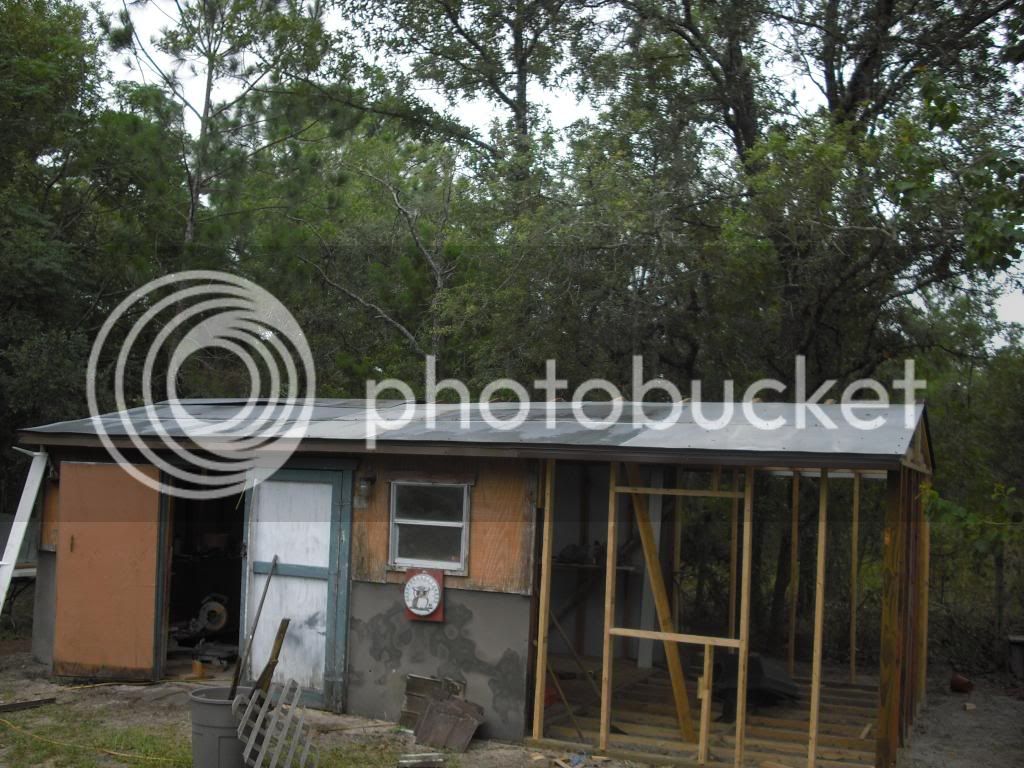
Below, I've finished the rafters and installed the steel roof panels. These are the same panels dad used to build the shed in the first place. Stuff's called galvalum. Will not rust, like, ever. What was the walls is now the roof, and the wall panels will be replaced by Hardiboard panels... a concrete based product that will never rot.

CIMG0977_zpsd0f6f417.jpg


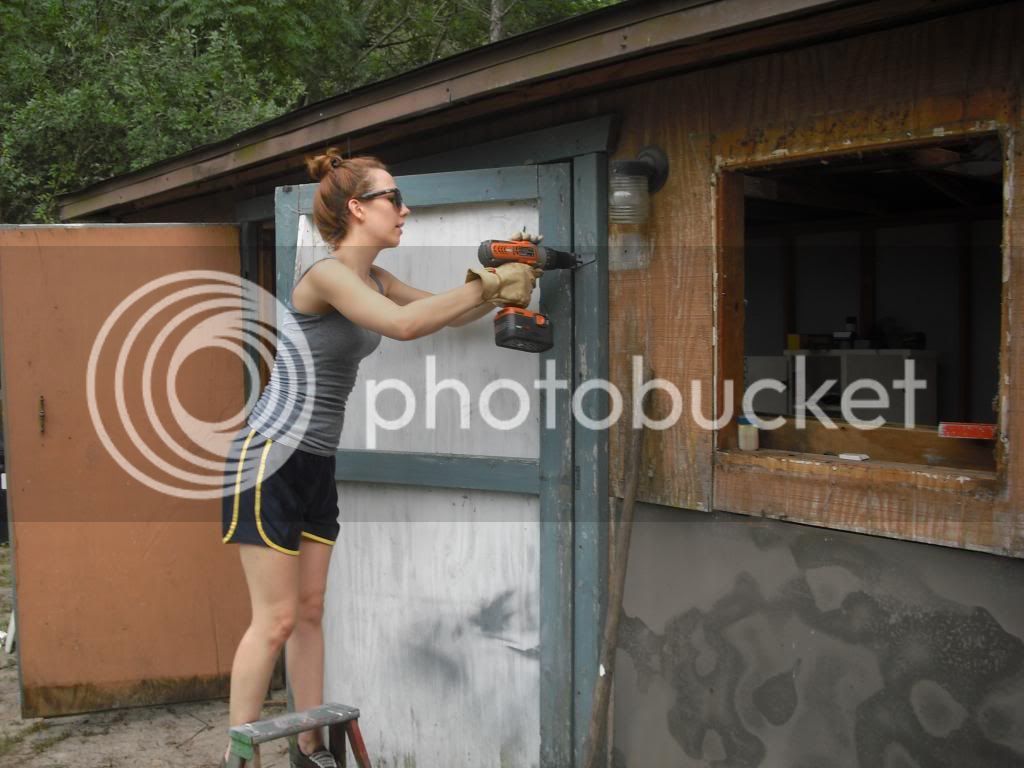
My daughter Kathleen came over from Orlando to help out one day. Here she's removing the doors as we prepare to re-stud the old front wall of the shed to accommodate the new door and windows

CIMG0980_zps15e8296e.jpg


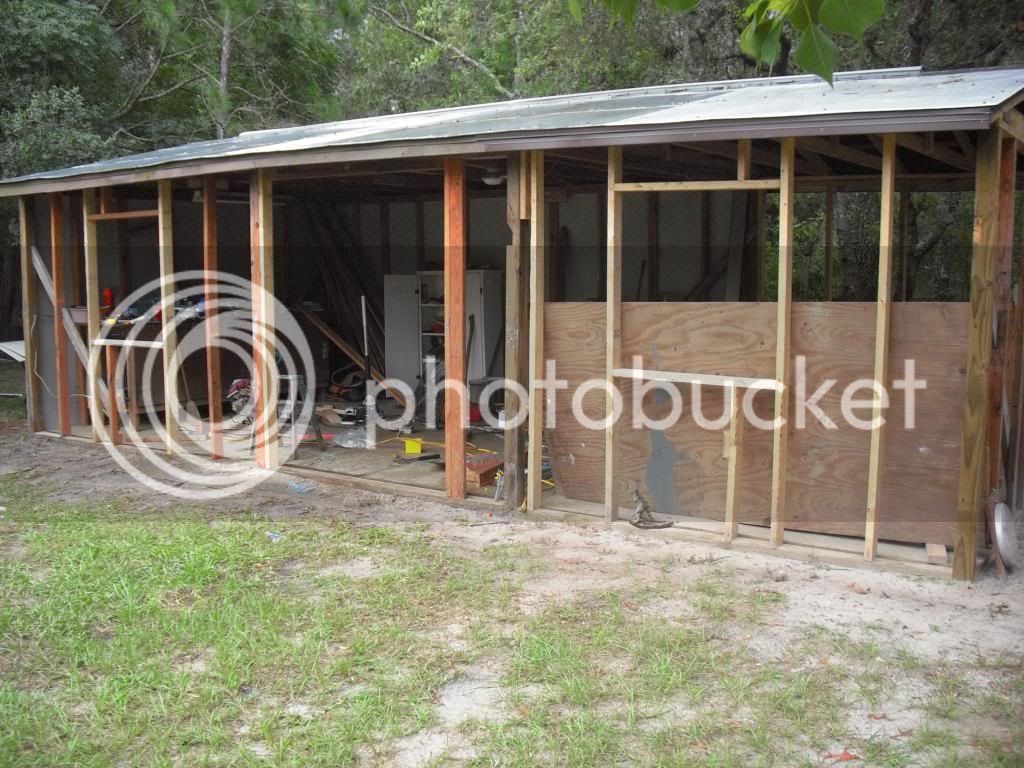
Below, I've reframed and ready for sheathing... note that I've moved the door location to be central to the new structure.

CIMG0992_zps20de9dbe.jpg


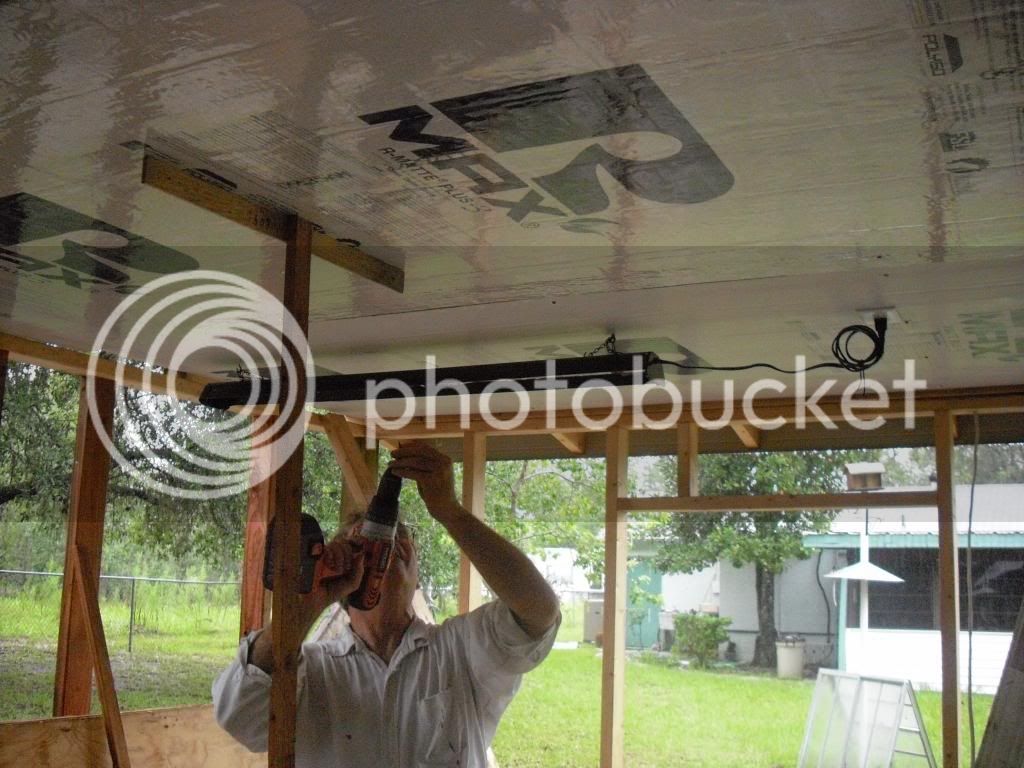
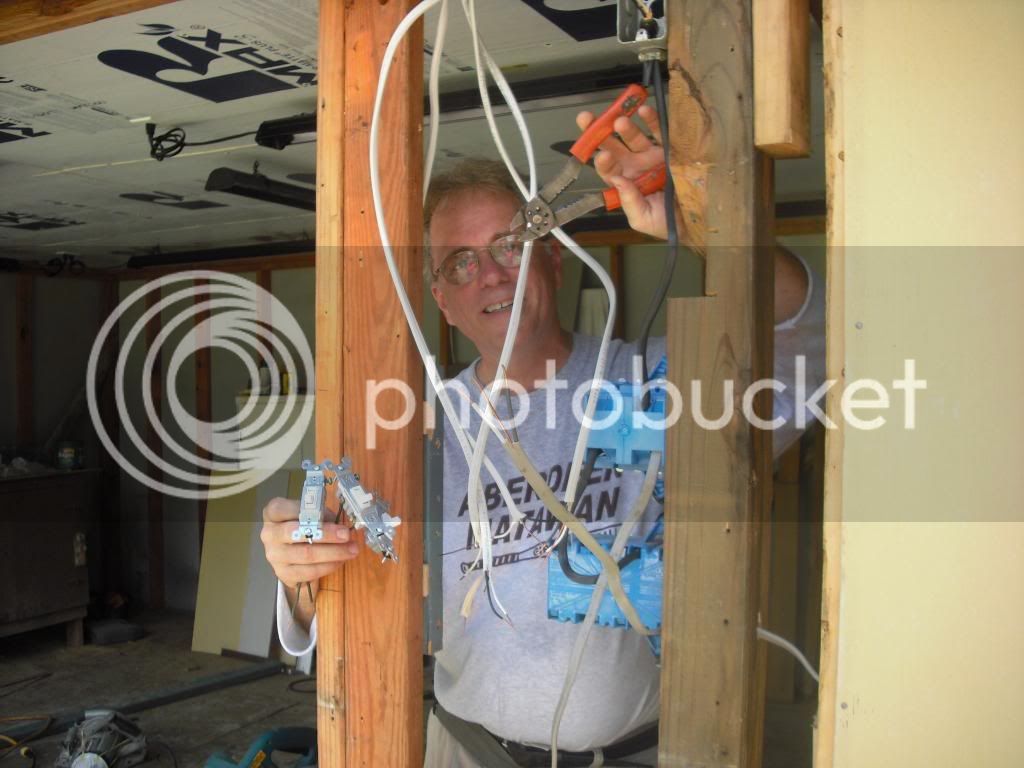
Next I began running all the wiring through the ceiling and hanging the first of the 3/4 inch insulation board. Here I'm installing the first of my lights. All of what you see was done as cheaply as possible. These lights were on sale at Home Depot for less than 10 bucks each. When completed there will be 9 lights on three separate switches.

CIMG0993_zps7f1a5256.jpg


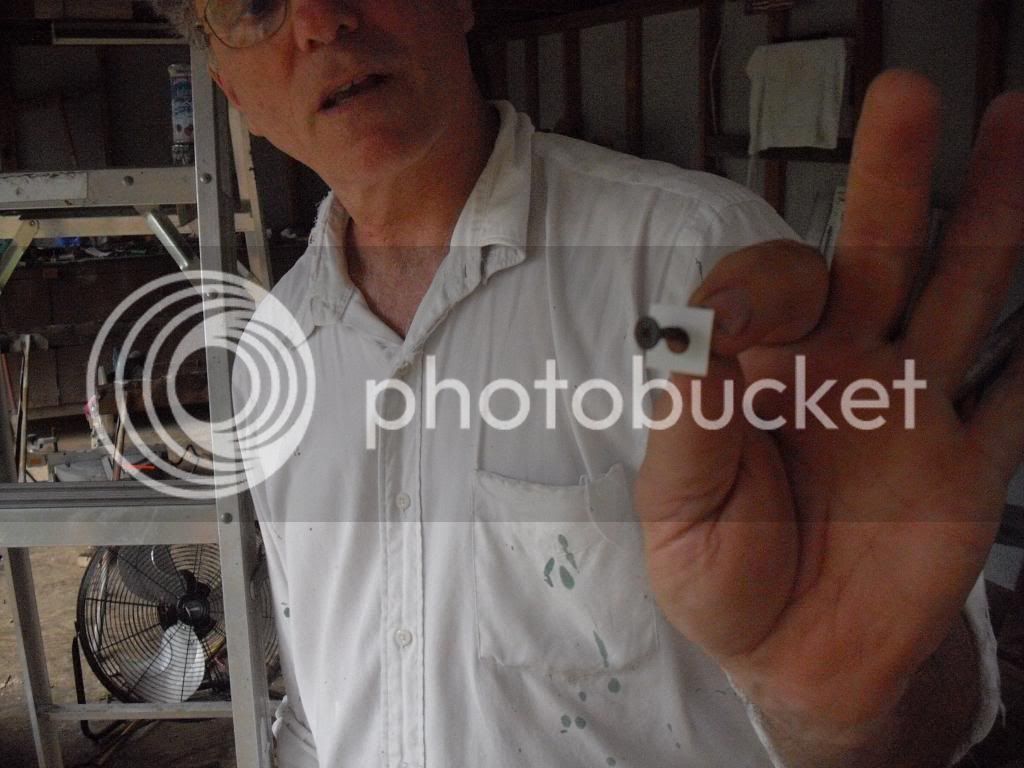
Below, I'm showing off my "washers." The screws I used to attach the ceiling were tearing right through the soft insulation facing. I needed a washer of some sort. Determined to cut my costs, these were cut out one at a time from some old vertical mini blinds I had laying around (a thick vinyl), and hole punched. All told we made hundreds of them. I say "we" because mom was working away with the hole puncher while I was putting them up; that is until she got herself a blister. Bless her heart, mom turns 88 this year.

CIMG0997_zps6cd6bd6e.jpg


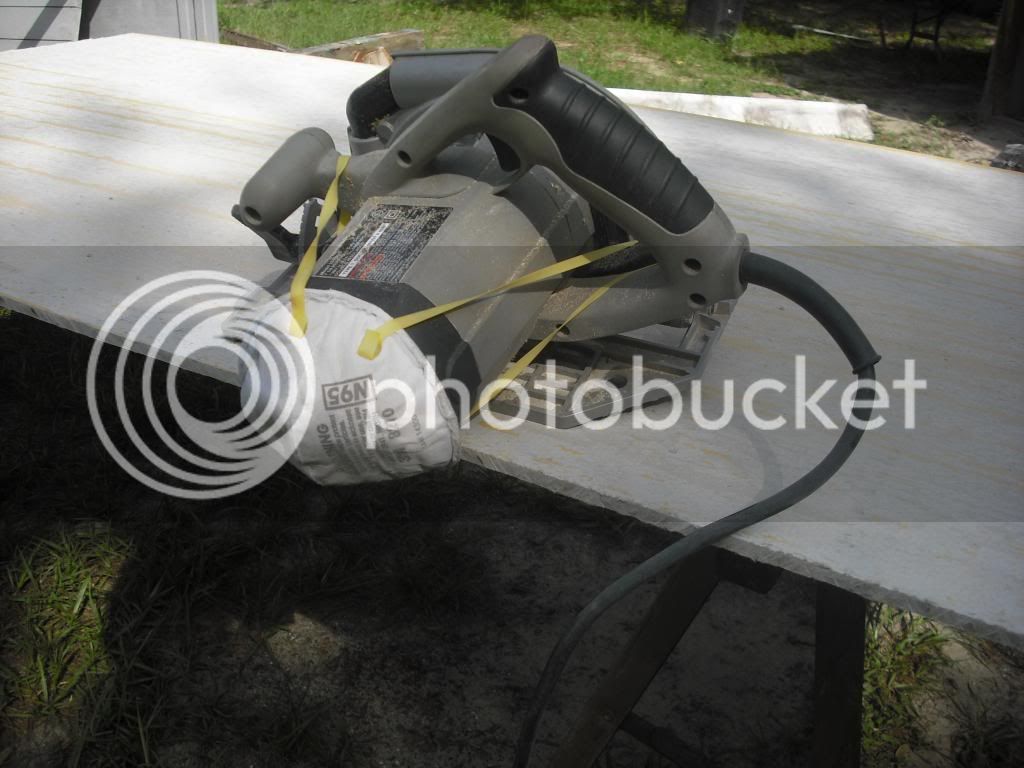
Below, I'm getting ready to cut the hardiboard. When ya cut this stuff, it produces a cloud of concrete dust. Don't laugh, but here my saw is protected from breathing that junk.

CIMG1012_zps9bea26af.jpg


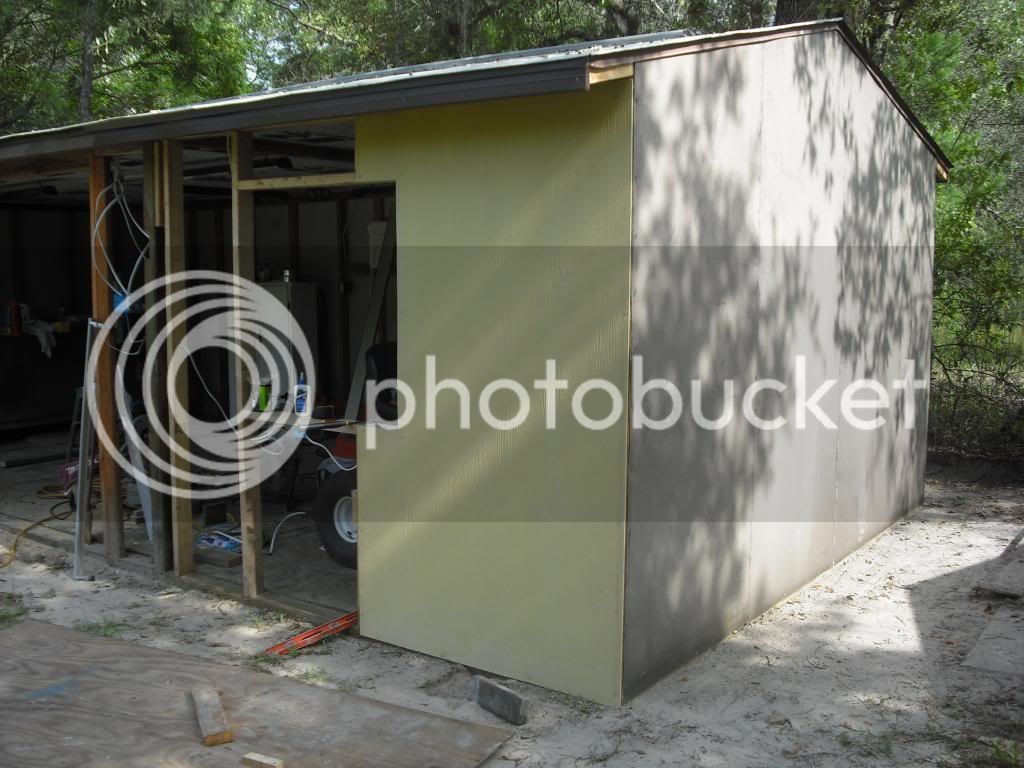
Below, the panels are going up. I re-used the same steel panels from the wall that I removed - on the new wall to the right here.

CIMG1014_zps4331c8db.jpg


Wiring anyone? Above my head you'll notice the ceiling is completed and some of the lights are installed.

CIMG1017_zpsc169f1bb.jpg


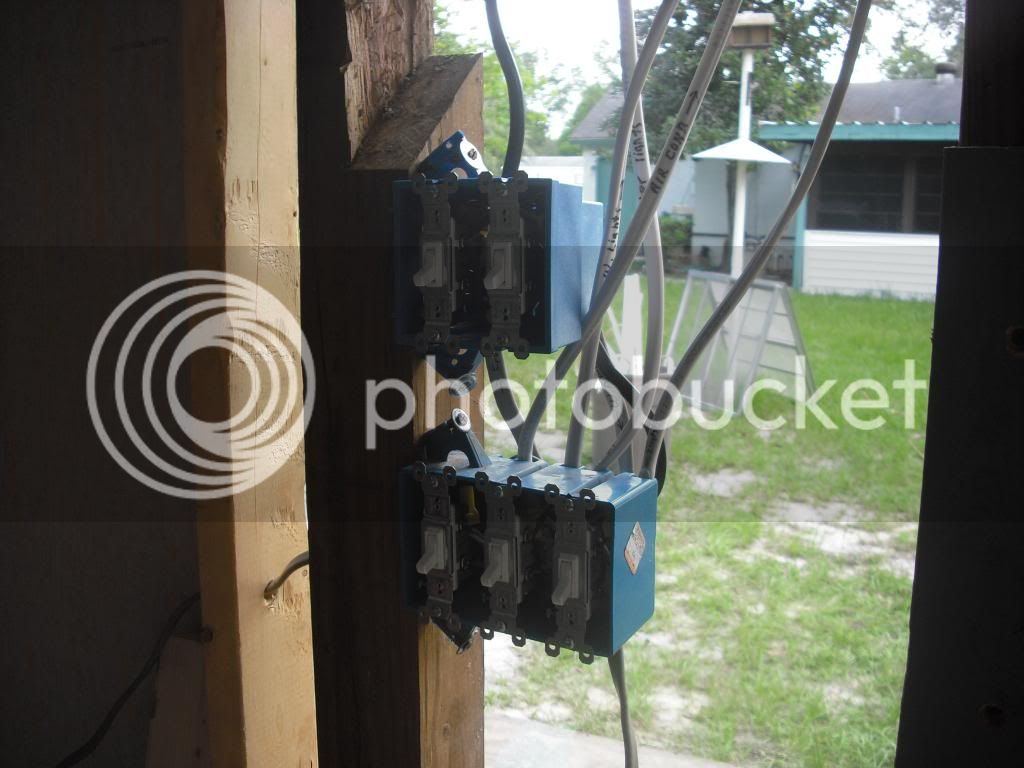
Below: all wired up. Ended up with something like 75 feet of wiring all together. In the background you'll notice the old window waiting to be installed. 20 years of grunge from store cleaned off of them pretty well.

CIMG1020_zpse4a0ef2e.jpg


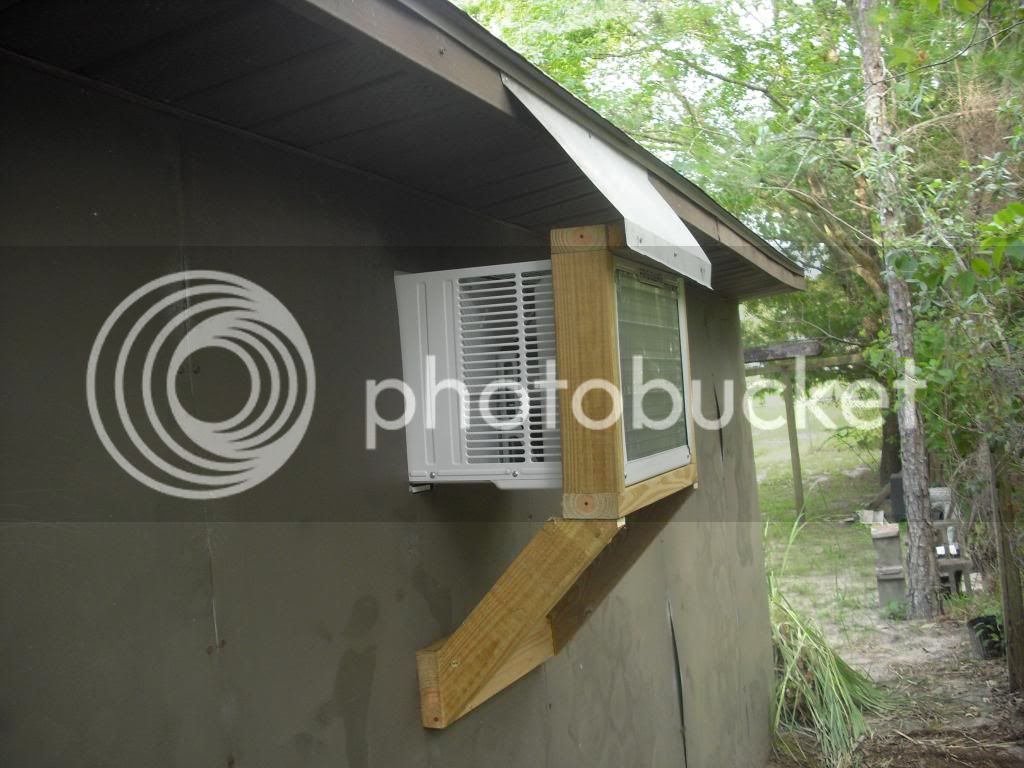
Below, notice the little roof I built over the 10,000 BTU air conditioner. Should help a little. This is the back wall of the workshop.

CIMG1023_zps6c62caa8.jpg


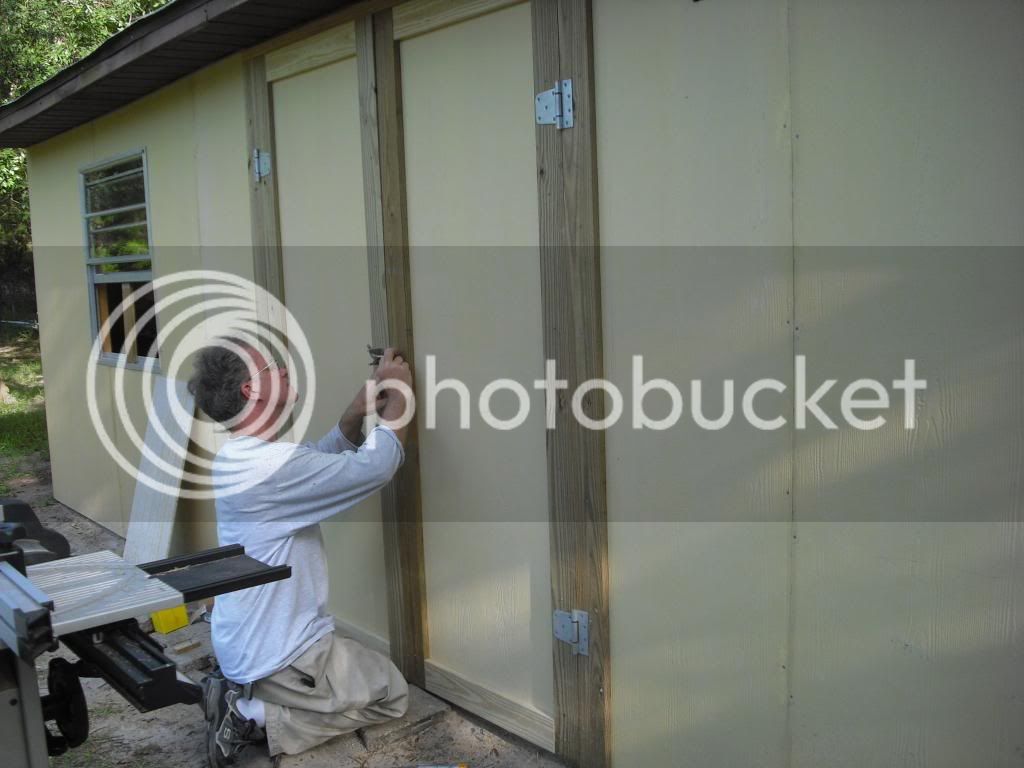
Below, I'm finishing up the front wall. Here I'm putting the latch on the double doors. They're made of hardiboard too.

CIMG1040_zps7adb7fed.jpg


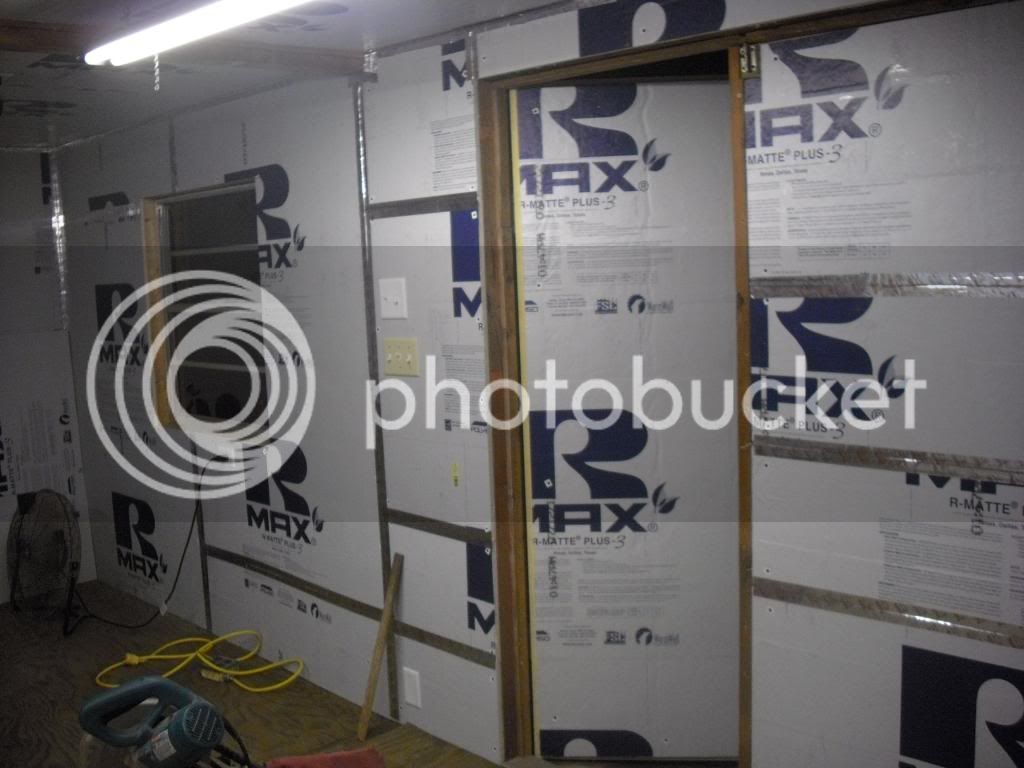
Below, the inside is fully insulated. However, there is no inner wall, per say. It's just a workshop and should be fine. The panels are fairly stiff as long as you don't slam into them.

CIMG1050_zpsd5a95e95.jpg


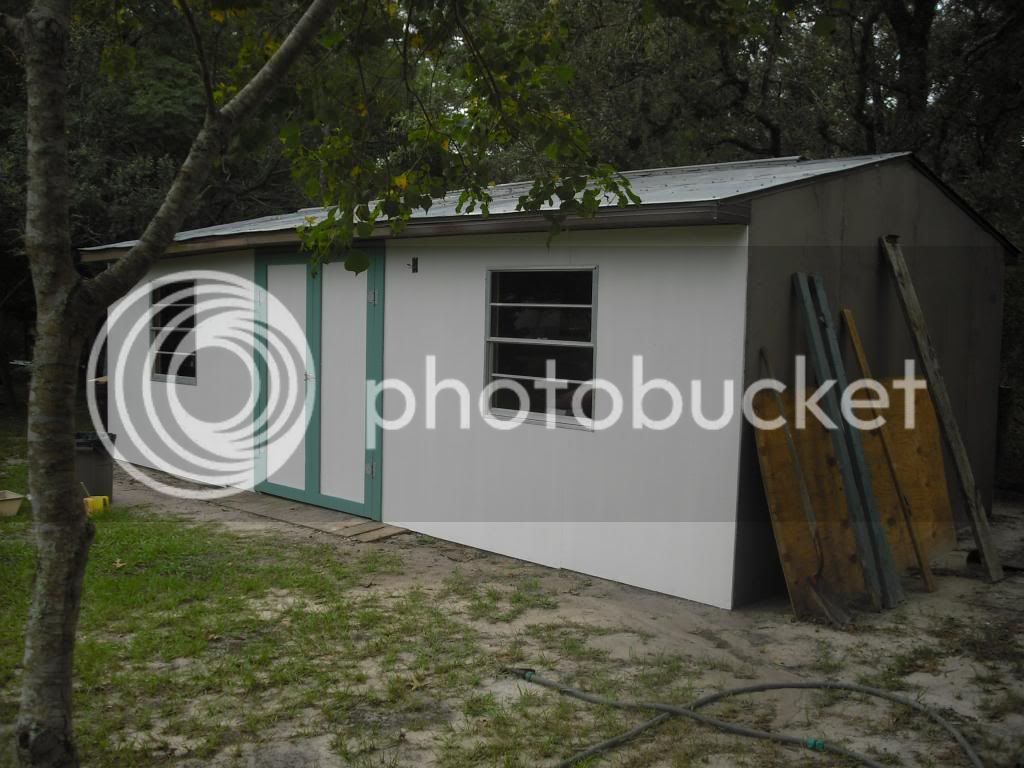
Below, all done. You can just barely see the roof vent I installed. I wanted to make sure I had some ventilation in the "attic." The shed has soffits all around, and 20 feet of roof vent up there. So, my 8x12 addition is complete. Even without the air on, it never got over about 87 or so INSIDE the shed this summer, even with temps in the middle to upper 90's outsider. Now my workshop is 12x25 and ready for...

CIMG1051_zps8addcf3c.jpg


It's first "customer." This 1972 CB350 Honda twin was purchased from a young lady who'd bought it for 1800 from a kid who turned it into what you see, got it running, and made his profit. She was intending to drive it as is. It was her first motorcycle and she had no idea she was getting ready to crash and burn on this thing. It is absolutely NOT ready to be ridden as it is in this picture. Good thing it wouldn't start for her and she got frustrated and gave up. She might have died on this thing. I picked it up from her for 1200, but have never heard it run. It came with some brand new aluminum rear sets and new carbs, worth 500 by themselves. Anyway, now it's my problem.

IMG_0336_zps3b1516e4.jpg


Stay tuned. Tomorrow I'm planning on getting the rust off the forks. I'm planning to try using electrolysis to do it.

 
Last edited by a moderator:
I think you did a great job on the "shed" workshop. It does what you need and stayed cost effective. You can't beat that.

Now I'm watching to see what you can pull off with this CB...

 
Today I worked on putting together a electrolysis system for removing rust and old paint. I have been researching the different methods of getting corrosion and paint off of aluminum and steel, and have decided that this is the way to go.

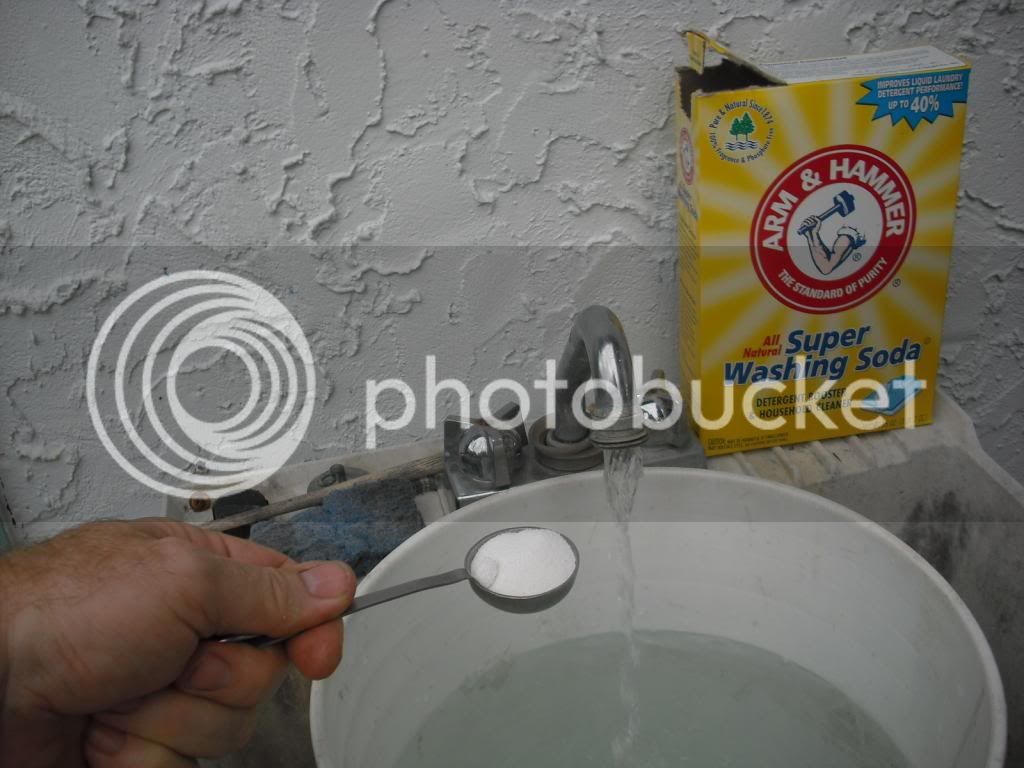
Below, I used the standard recipe of 1 tablespoon of Arm and Hammer washing soda per gallon of water. It's available at most grocery stores for about $3.50. Give it a good stir, and haul it off to the workshop.

CIMG1149_zps669792e3.jpg


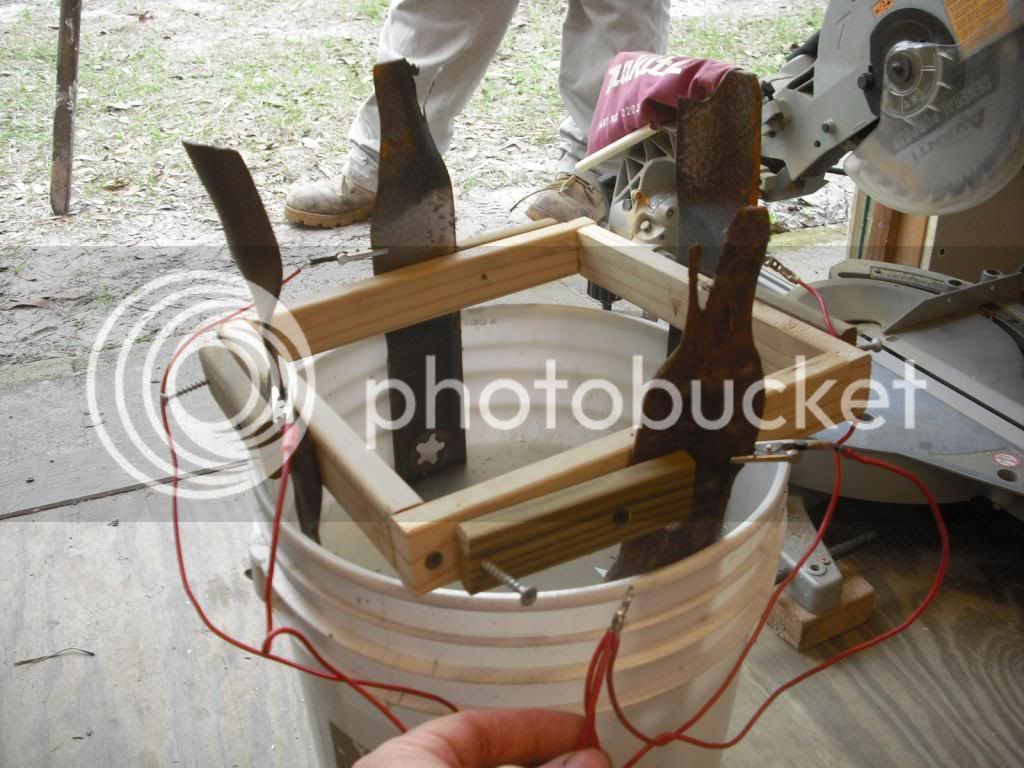
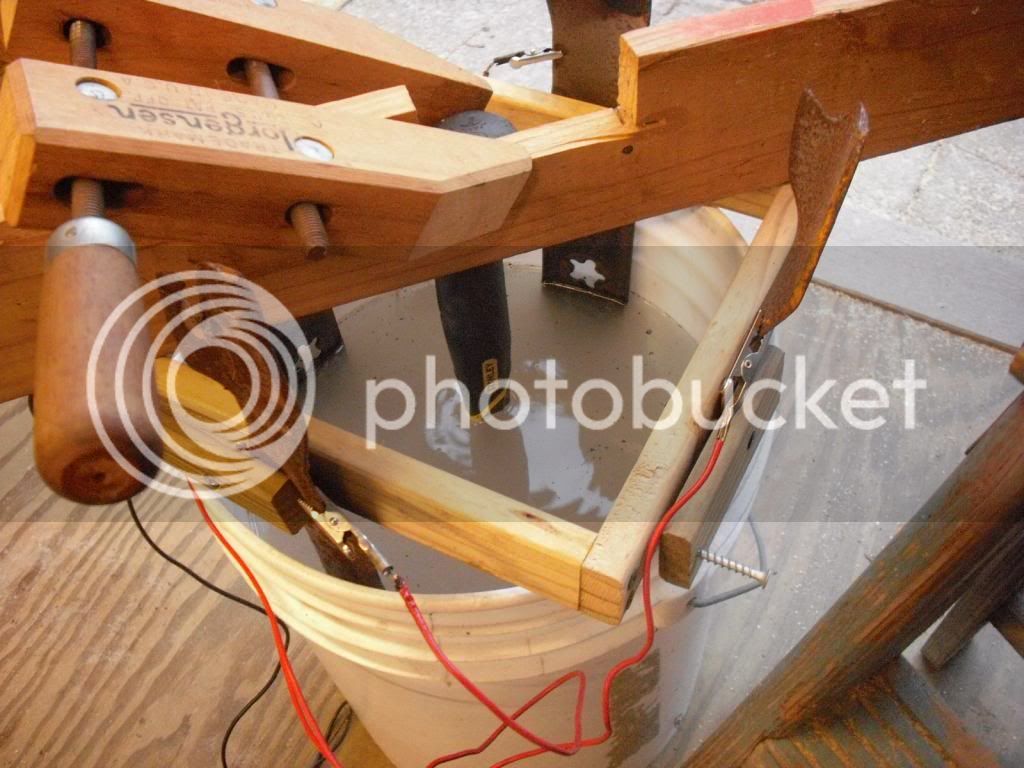
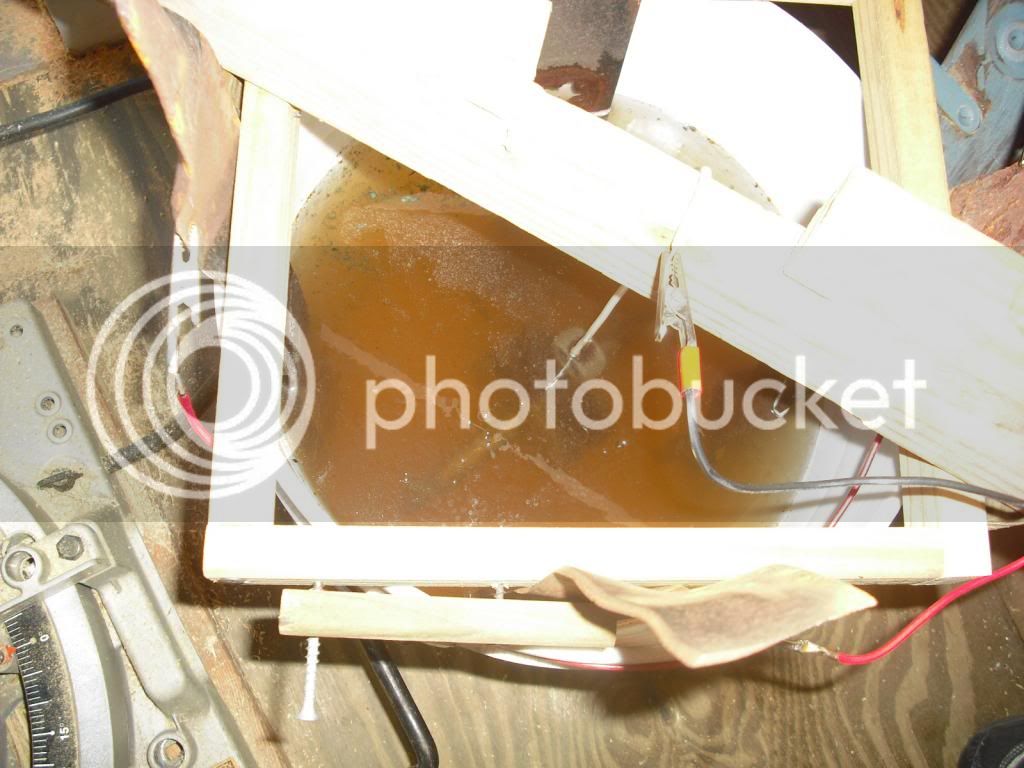
Below, I filled a 5 gallon bucket and built a small jig to hold my annodes. I built the jig with 1x2's and some glue and drywall screws. Each "clamp" is adjustable and can hold what ever size piece of steel I might want to stick in the tank. I chose 4 warn out lawn mower blades to do the job. Any steel will work, but avoid stainless, galvanized or coated steel. Many use rebar. Electrolysis works best in "line of sight," so I wanted to surround my rusty parts with my anodes.

CIMG1153_zps9d0ba3f9.jpg

Above, I soldered up 4 alligator clips to some 14 gauge wire and soldered all four leads together into one "LEAD." I used red wire so I'd remember that these anodes are connected to the positive lead of the battery charger.

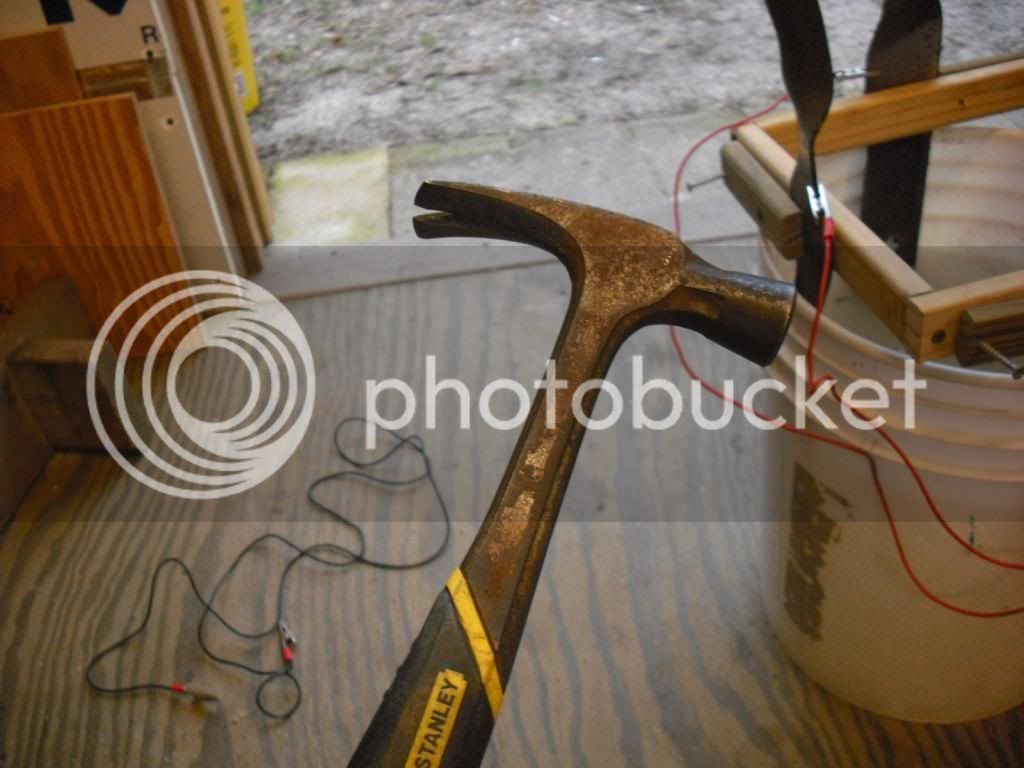
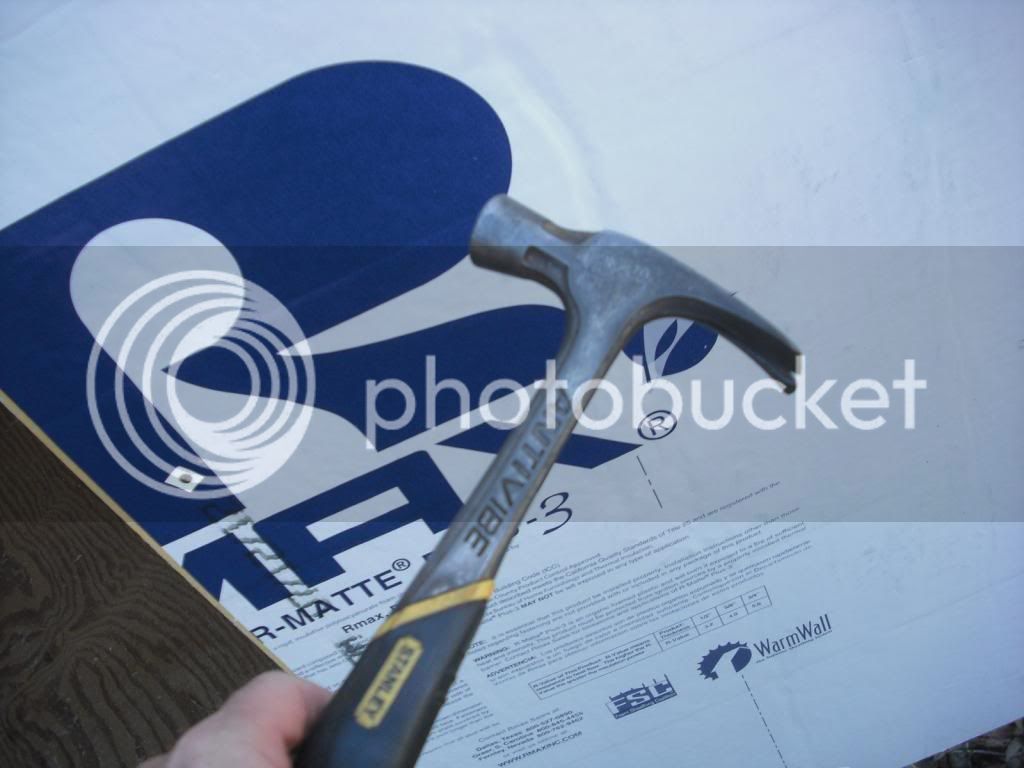
Below, I selected a rusty hammer as my first victim.

CIMG1155_zps4857f04a.jpg


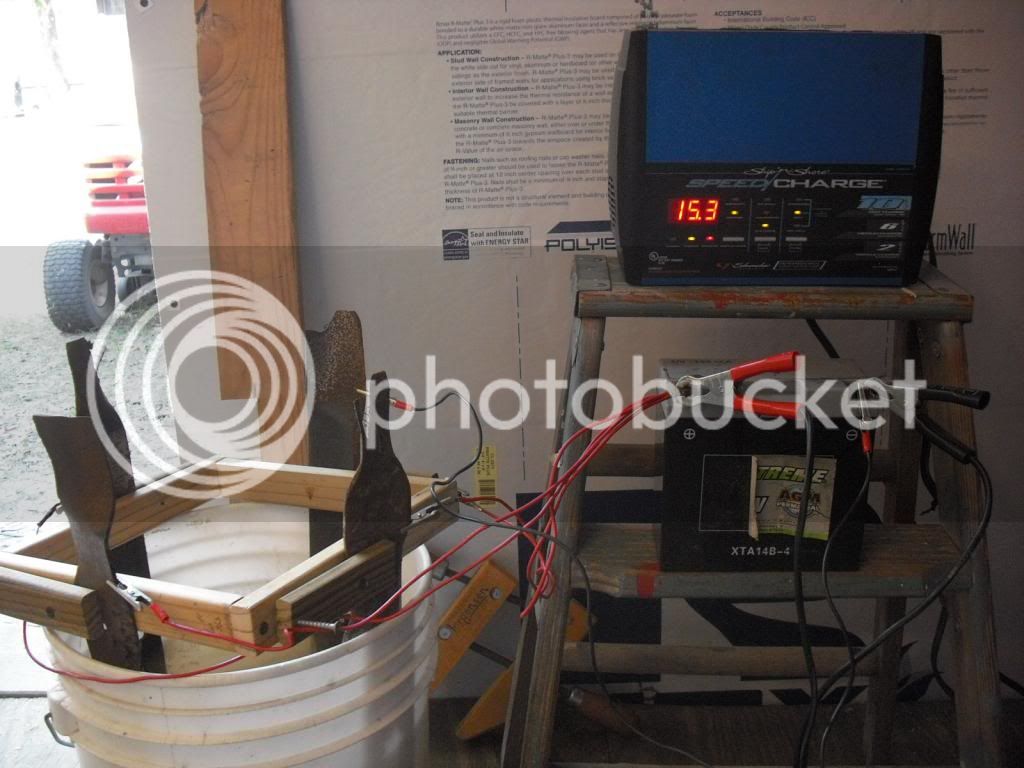
Below, you can see how I clamped the hammer to a board I had laying around, and suspended it up its rubber handle in the solution. Several online sources recommend using a battery hooked in parallel. with the charger. So I hooked up my old FJR battery to the anodes and to the hammer. I dropped the negative clamp into the solution and clamped it to the end of the hammer. The other end of this negative clamp went to the negative terminal of the battery. Then I hooked the positive terminal of the battery to the anodes. As soon as I did, the solution started bubbling. Can you see the bubbles in the reflection shown on the surface of the water?

CIMG1157_zps7b829b71.jpg


Afterwards, I hooked the battery charger on to the rapidly draining battery. Charging at 6 amps, it showed 11.9 volts. The battery was really tired. But it doesn't matter, it worked fine. I'm new at this, so I'll have to play with it a little to see if I left it in long enough. (Edit note: pic below changed to show entire setup)

CIMG1164_zps7ba084c3.jpg


One hour later, the hammer appeared to be rust free. The surface still has an etched type finished where the rust WAS, but the rust itself appears to be gone. A little rub a dub with a wire brush and a coat of WD40, and all done...

CIMG1162_zps75d10f7b.jpg


Another little project:
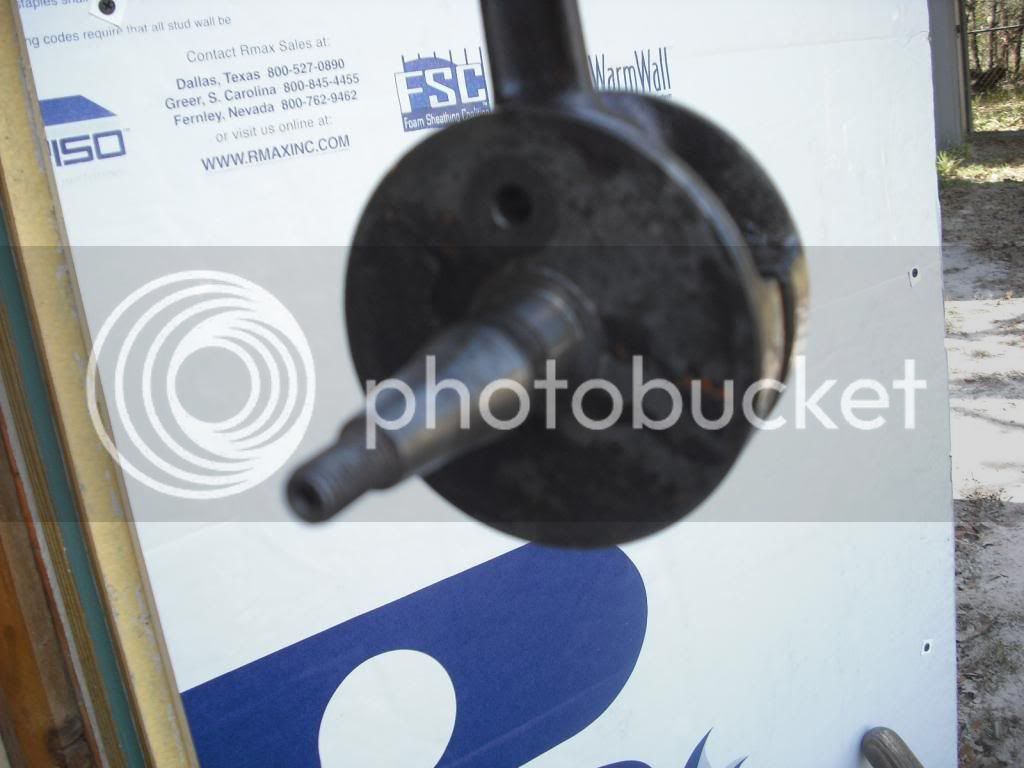
My buddy Michael had a rusty crankshaft that he wanted cleaned up:

CIMG1165_zps79b043fd.jpg


Below, I stripped the insulation from - and made a hook on each end of - a piece of 12 gauge copper wire, and hanging the crankshaft on the hook, dunked it in the tank @ 10 amps. You can see the bubbles rising a little better in this picture. I ran it for about 2 hours. It came out just fine.

CIMG1168_zps0f649cc1.jpg


Warning:

  • do not short anything negative to anything positive. Use your head.
  • think: ventilation... this process produces hydrogen and oxygen. Hydrogen is explosive. Do this out in the open.
  • Never use anything but plain uncoated steel for anodes. Beware stainless steel which produces chromium something or other... I forget the exact name. This stuff is deadly and not to be poured out on the ground.
  • You can put the negative clamp in the solution, but DO NOT put the positive clamp(s) in.
Gary
darksider #44

 
Last edited by a moderator:
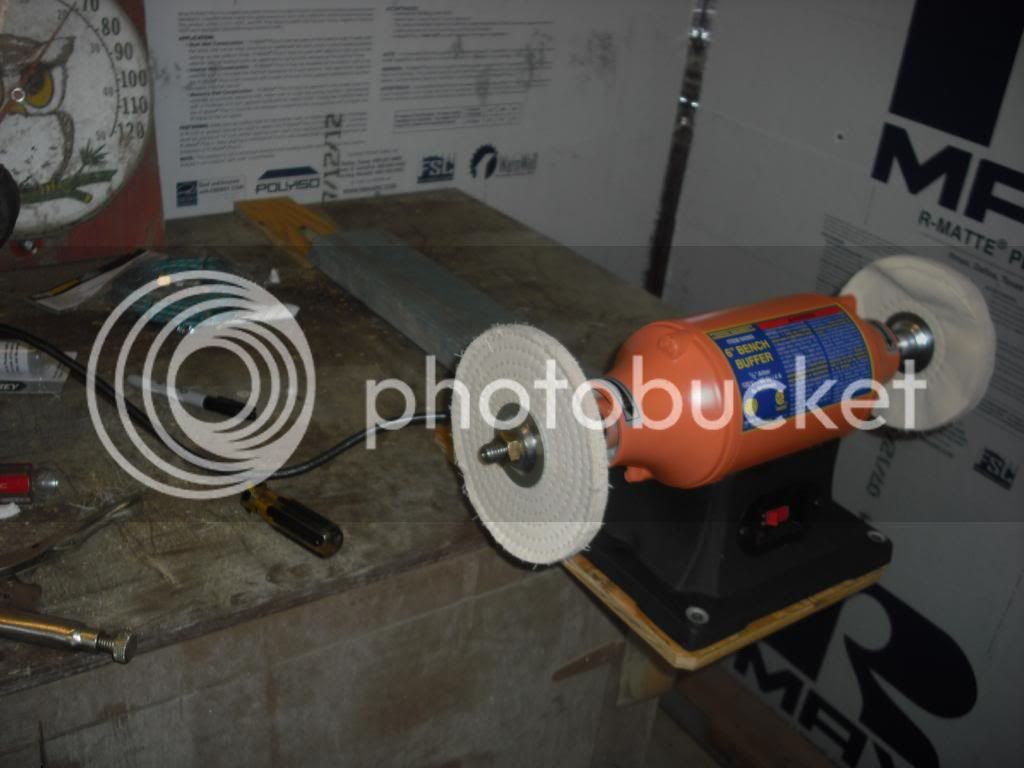
Crankshaft experiment turned out fine, but I'll be deleting it from this thread in a couple days. Wanna stay on topic a little more than I have been. Anyway, needed to get some more equipment to work with around here. Headed up to Harbor Freight (right by where I work) to get a buffer. I had to mount it on the bench, but i have very limited space. You'll notice below that it's hanging out over the bench. I did this because I'd like to have a little extra maneuvering room when I'm buffing various parts. You'll notice the temp is pretty comfy. Florida's wonderful this time of year.

CIMG1169.jpg


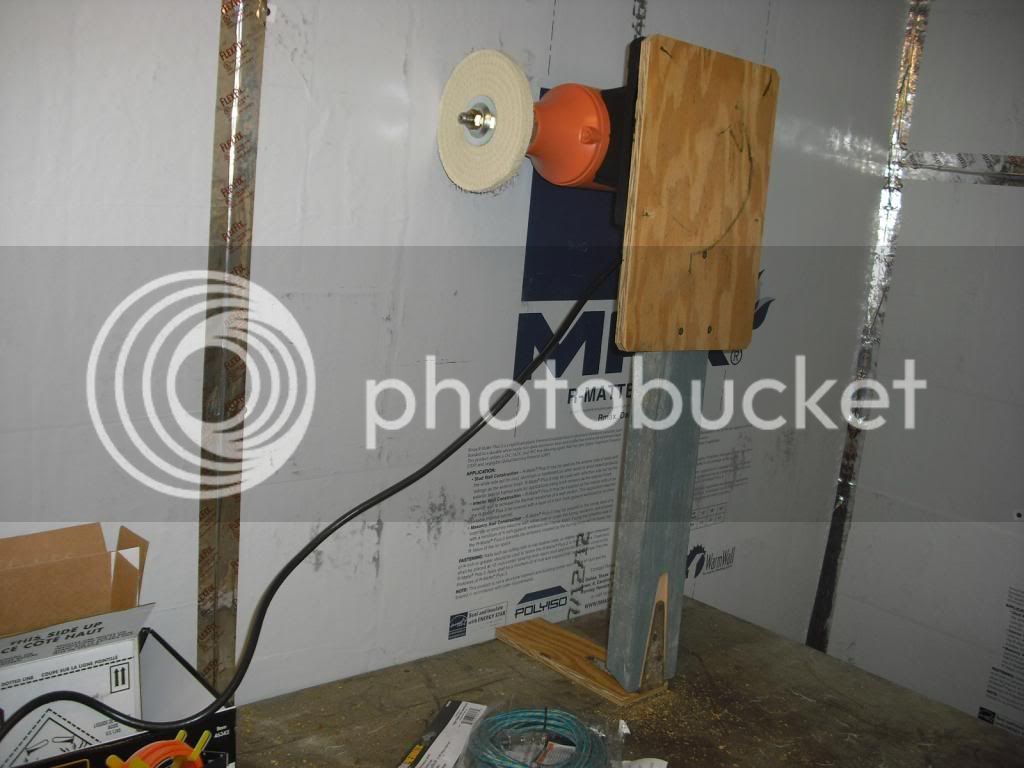
Below, I decided to mount it so that it would be solid while I worked on it, but I could swing it up out of the way when not in use. I need all the bench space I can get. You can see the simple method I used... some scrap lumber, a hinge and a few screws was all it took. It leans against the wall, up out of the way.

CIMG1170.jpg


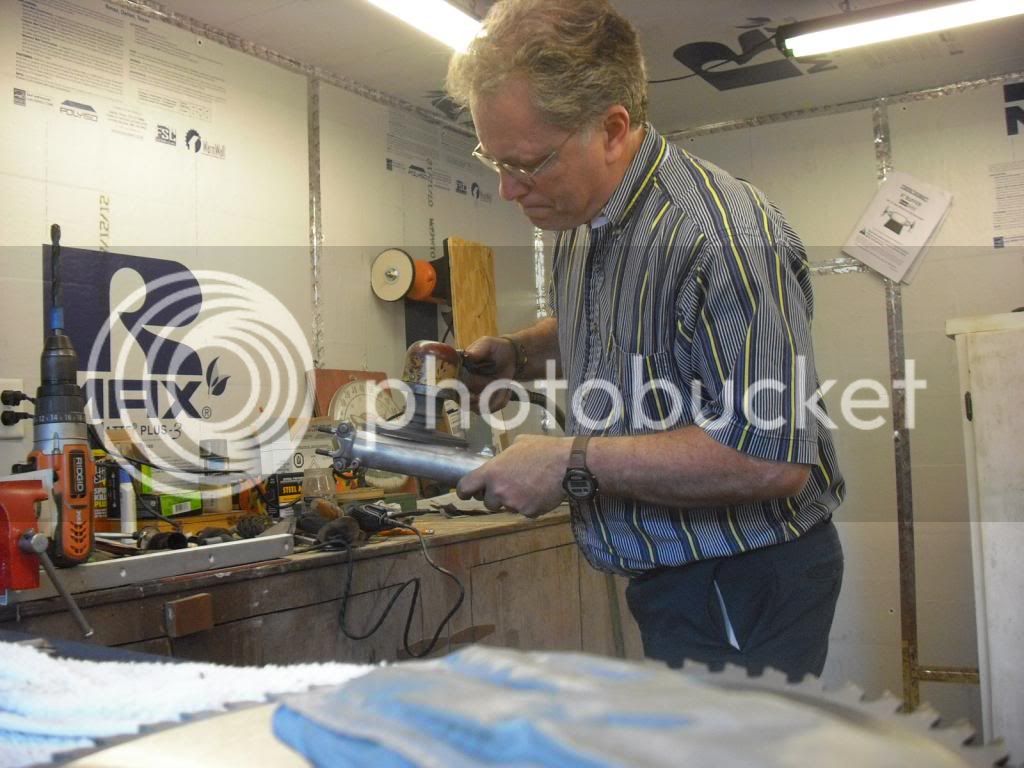
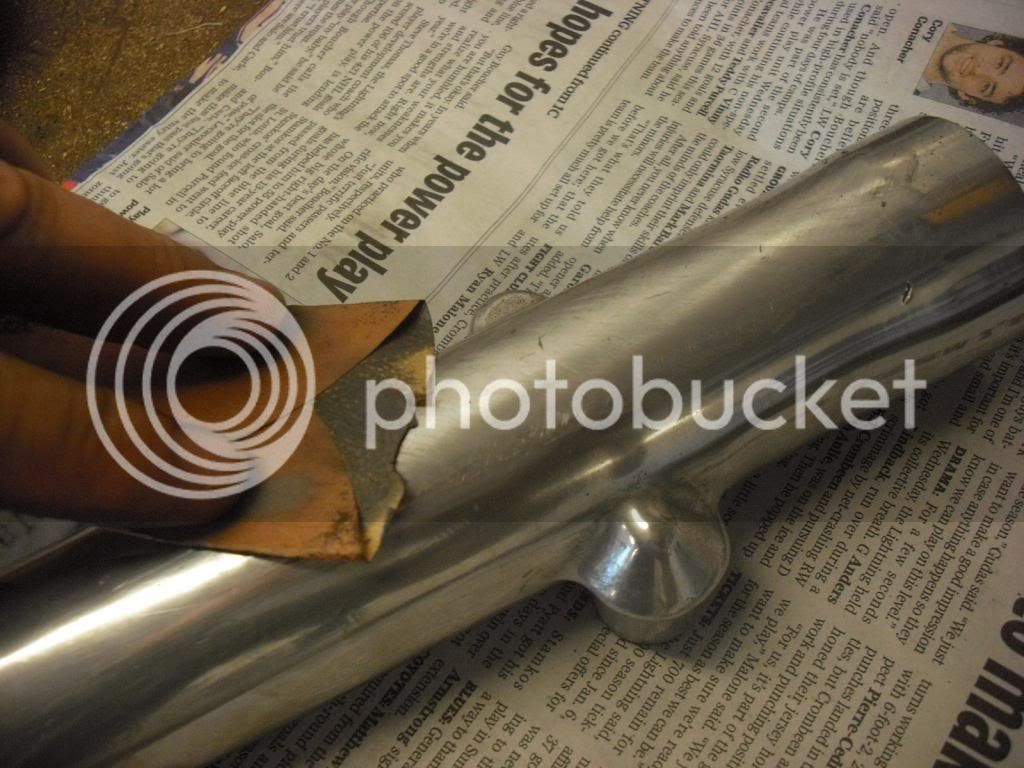
Below, I'm beginning the process of cleaning up the forks. I've disassembled them and here I'm sanding all the divots out of the aluminum lowers. I'm using a dual action sander with some 320 grit paper to get off the majority. I know there's a zillion ways to do this, but I'm using the tools I have around. Gotta keep everything moving around to prevent flat spots.

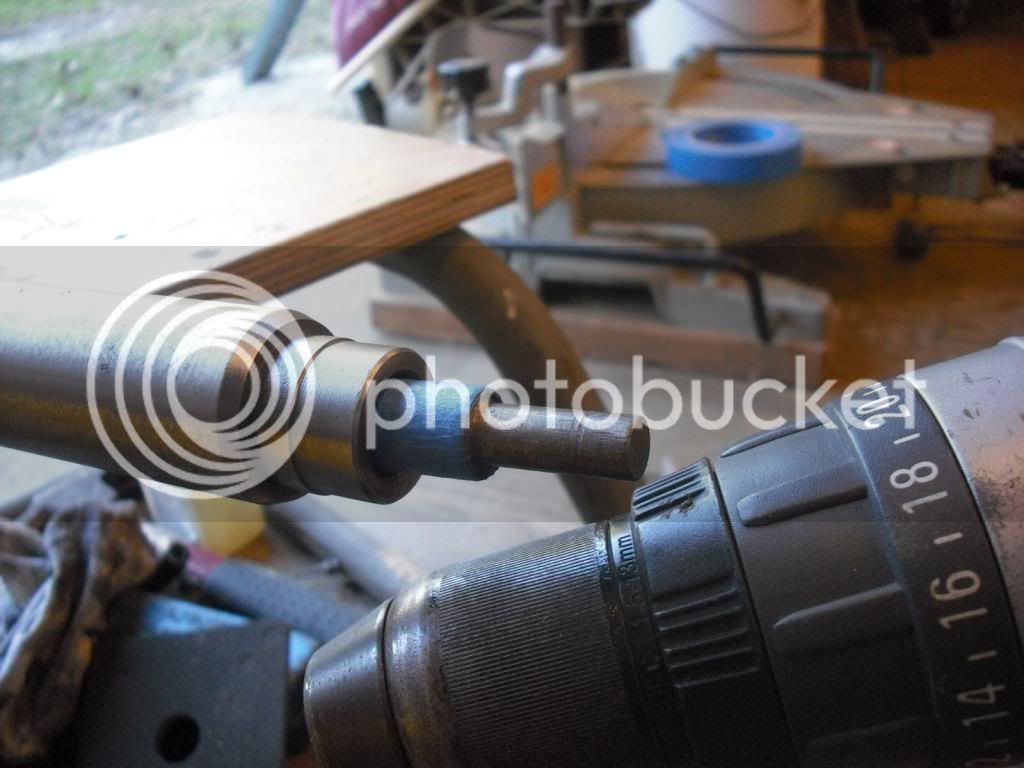
If you look closely to the left, you'll see my drill, chucked loosely in the vise, with several layers of tape wrapped around the drill bit.

CIMG1179.jpg


Then some serious rubbing with 320 grit by hand, you can see the remaining gouges that I'm working on (to the right of the sandpaper)

CIMG1178.jpg


While I was playing with the aluminum sliders, I had the steel fork tubes boiling away in the electrolysis tank. They came out rust free, but the rust itself had etched the beautiful shiny surface. Rust free? Yes, but not shiny... AT ALL. You're wondering what the drill wrapped with blue tape was for? Below, I stuffed the drill up into the threaded end of the fork tube so that the tape fits tightly into the threads. By the way, can you see the damage left over from the corrosion?

CIMG1175.jpg


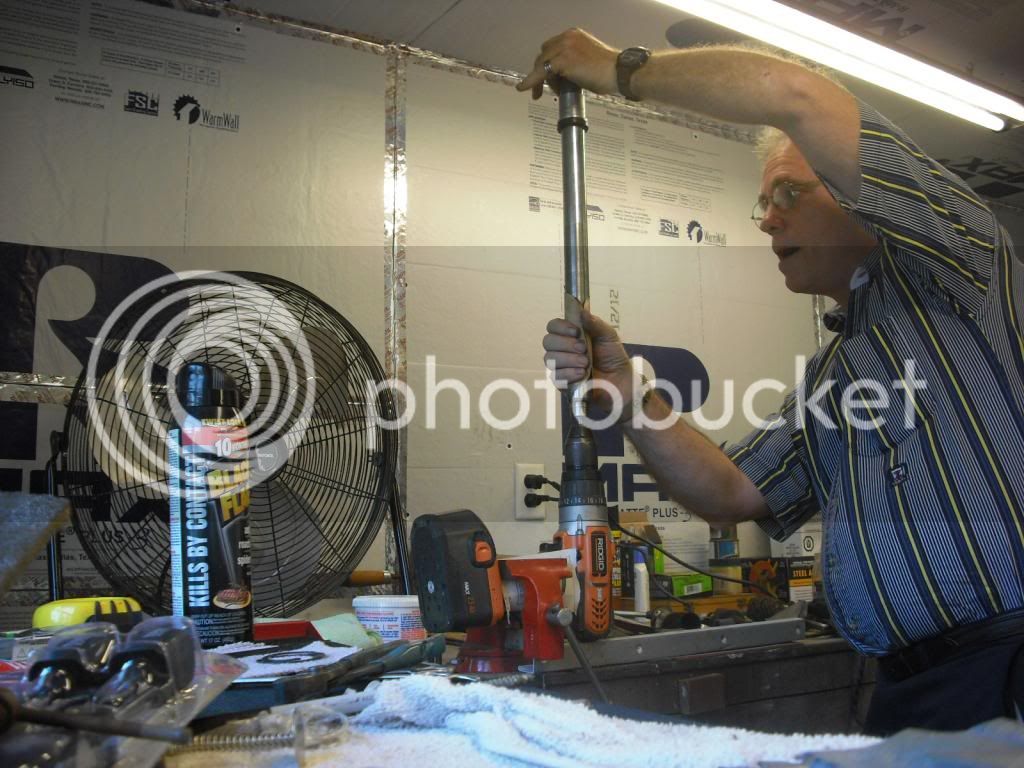
So I put the drill in the vise, chuck the bit into the drill, turn it on, and while holding the top of the tube with my hand clamped around a piece of sandpaper, I spun the fork tube up to about 1500 RPM's and sanded most of the left over corrosion off the bottom 10 inches or so. I had to be sure to stay away from the polished area where the the oil seal slides up and down. I'll polish it up later on.

CIMG1176.jpg


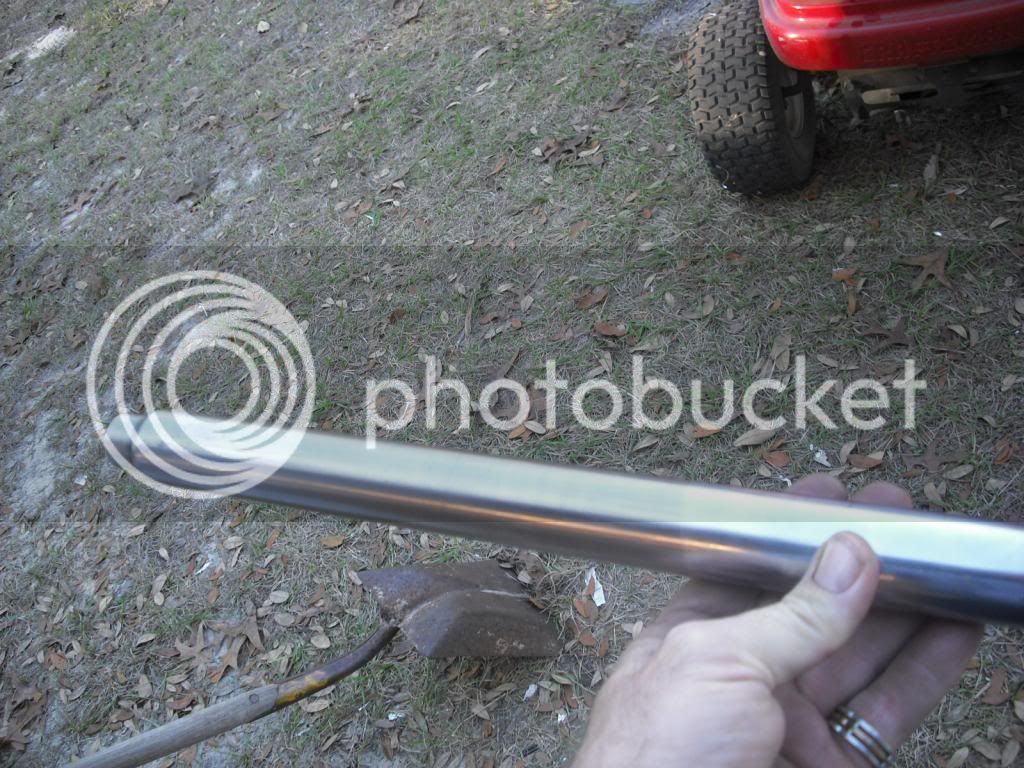
Below, you can see how well the fork turned out. It was a rusted mess. It still needs some polishing, but it's looking pretty good.

CIMG1177.jpg


Stay tuned

Gary

darksider #44

 
Last edited by a moderator:
Top