


Checkswrecks
Well-known member
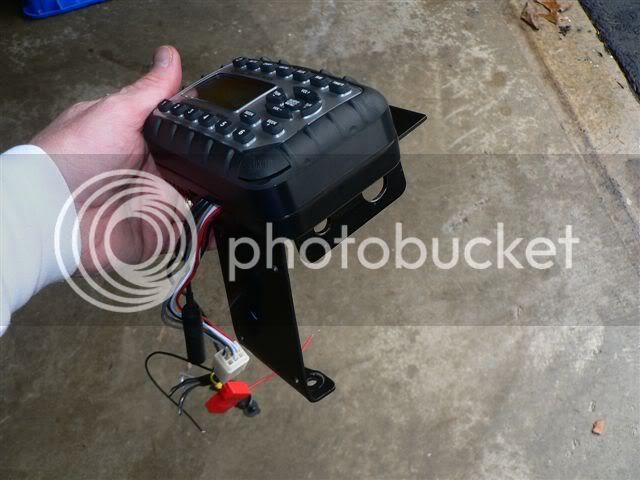
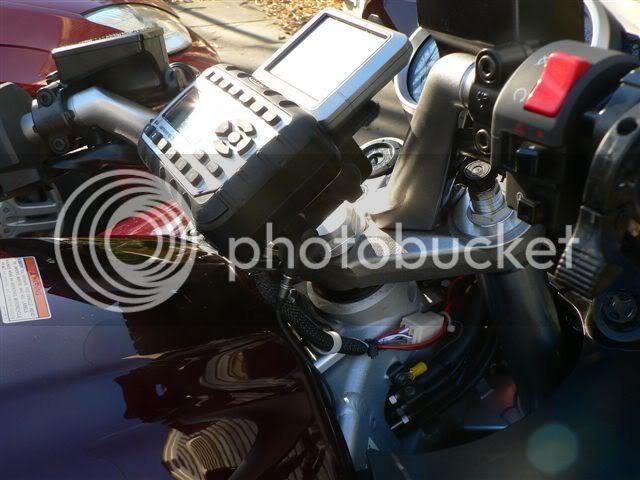
I got a question about monting to the forward tank bolts rather than buying a Techmount, RAM, or similar, so I thought I'd post what I did here for anybody to copy. I sized it originally for a Garmin Nuvi GPS and Pioneer Inno XM/MP3 on the top velcro surface, with a Gerbing heat control on the bottom. The Nuvi and XM would go into my pocket when I stopped. It culd have been lower but was made just tall enough to see with the tank bag I occasionally use. Since mounting the radio the Gerbing heat controller has been moved elsewhere and half of the Nuvi hangs off the front of this bracket, as discussed in the last photo.
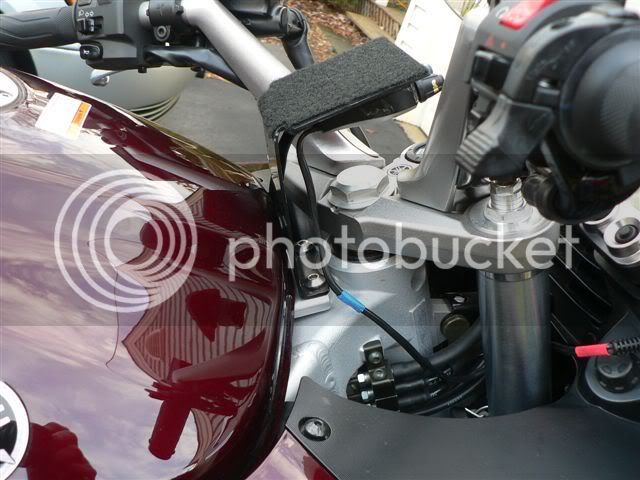
The aluminum is .080" that I had from working on airplanes, so you'll have to get your own source. The reason for this thickness is that it's stiff enough to minimize the radio bouncing around, but thin enough for the tight bend radius of the bend near the bolts. The vertical section is not quite straight. It is fairly perpendicular at the bottom bend near bolts, but maybe 3/4" up the vertical is a slight aftward bend to keep it from rubbing the tank, but still keep far from the upper triple clamp.
Just in case it would touch the tank (it is tight) I stuck a piece of fuzzy velcro on the tank to protect the tank paint. I can always take the velcro off later. Note the rounded cut to clear the steering head of the bike.
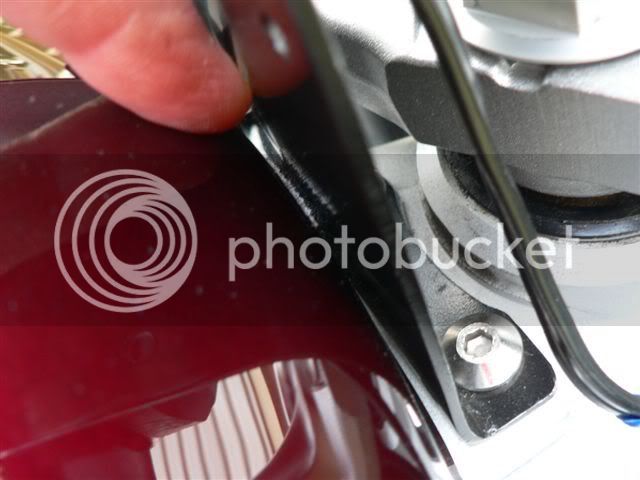
The two holes are for the headphone jack and Powerlet jack. The part with the two holes is a simple piece of 1.5" angle aluminum from Home Depot and it's attached with small screws & nuts.
Make it narrow enough to make sure that there is a solid gap between the radio/GPS and the hadlebars at full turn.
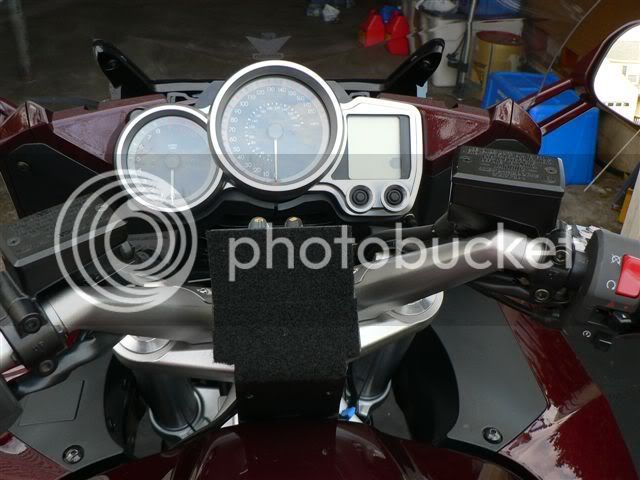
Again, I sized it originally for the Nuvi, Gerbing control, and XM/MP3. It's a bit short for the radio and GPS and you can see how much of the GPS is hanging off the velcro in this photo. While I will soon make an extension for the GPS, I've been surprised that the velcro has held it solidly for a couple of shorter trips. The radio is held by 4 screws but the Nuvi just doesn't have much mass so doesn't need much to hold it in place.
Bob
The aluminum is .080" that I had from working on airplanes, so you'll have to get your own source. The reason for this thickness is that it's stiff enough to minimize the radio bouncing around, but thin enough for the tight bend radius of the bend near the bolts. The vertical section is not quite straight. It is fairly perpendicular at the bottom bend near bolts, but maybe 3/4" up the vertical is a slight aftward bend to keep it from rubbing the tank, but still keep far from the upper triple clamp.
Just in case it would touch the tank (it is tight) I stuck a piece of fuzzy velcro on the tank to protect the tank paint. I can always take the velcro off later. Note the rounded cut to clear the steering head of the bike.
The two holes are for the headphone jack and Powerlet jack. The part with the two holes is a simple piece of 1.5" angle aluminum from Home Depot and it's attached with small screws & nuts.
Make it narrow enough to make sure that there is a solid gap between the radio/GPS and the hadlebars at full turn.
Again, I sized it originally for the Nuvi, Gerbing control, and XM/MP3. It's a bit short for the radio and GPS and you can see how much of the GPS is hanging off the velcro in this photo. While I will soon make an extension for the GPS, I've been surprised that the velcro has held it solidly for a couple of shorter trips. The radio is held by 4 screws but the Nuvi just doesn't have much mass so doesn't need much to hold it in place.
Bob