Reverse Trike

Yamaha FJR Motorcycle Forum

Help Support Yamaha FJR Motorcycle Forum:

This site may earn a commission from merchant affiliate links, including eBay, Amazon, and others.
Ok got all the controls mounted back in and wiring harness hooked up, battery installed etc. etc. Got it started again, headlights on and cables all run and mounted down.

The past week I got the subframe powder coated and hand built a little sheetmetal cover for the rear right over the top of the taillights. Turned out pretty nice for someone with zero sheetmetal forming work experience...!

IMAG0102.jpg


IMAG0103.jpg


I also cut all the bulky plastic under the tail out and cleaned it up with sheetmetal also and powder coated it.

IMAG0104.jpg


Here's the cool part, I didn't expect these to turn out as perfect as they did because I've never cut pipes down before but these were regular chrome yoshimura RS3 pipes and I cut them shorter so they wouldn't hang out past the rear and then cut the baffles out so they sound AMAZING now, nice and deep throaty sound. Then coated them all the way to the headers with high temp flat black. Wrapped them with the rivet trim pieces coated in white and then the end cap in candy red!

IMAG0107.jpg


Here they are mounted:

IMAG0108.jpg


IMAG0111.jpg


IMAG0112.jpg


IMAG0115.jpg


Here it is with the wing mounted back on. Everything is solid as a rock now, I can grab the wing or the pipes individually and shake the entire trike back and forth!

IMAG0116.jpg


IMAG0117.jpg


IMAG0118.jpg


IMAG0119.jpg


Last edited by a moderator:
Just a quick update. I've been making a lot of progress lately but it's mostly little stuff not worth taking pictures of. Still a little slower than I would like but that's mainly because of all this freezing weather and snow!!

Anyway, I did get the right side air scoop and radiator finished up and painted. Also just ordered the new tire for the back. Because of the slight tendency to oversteer I decided to set the front suspension up pretty stiff, the rear suspension super soft and then the rear tire I ordered is a higher performance and stickier tire than the front ones are. So with this setup I'm hoping it helps to grip the road real tight and have much less chance of oversteering.

Sorry the lighting was a little weird;

IMAG0135.jpg


IMAG0136.jpg


Nice weather this weekend so I got quite a bit done. I finally got some paneling done for the rear so it's not just wide open like it was before. I could have done a better job if I was a sheet metal guy and had all the right tools but I think it came out pretty nice after powder coating. I should have the new tire on the rim and reinstalled by this weekend!

IMAG0140.jpg


IMAG0139.jpg


IMAG0141.jpg


Here is where the air intake tube connects

IMAG0142.jpg


Woohoo FINALLY got the rear tire, got it mounted and balanced and back on the bike. So she's back on all 3 feet again.

Mounted one of the side blinkers and finished wiring up the tail lights and the extra brake light up on the wing.

I felt like doing a really short video update of the tire and rear lights so here it is:


IMAG0147.jpg


IMAG0146.jpg


IMAG0149.jpg


Thanks! I'm getting extremely anxious because I'm soooooo close to being done yet there's still a lot of tedious and detailed work to be done. :dribble:

 
Ok big update! Got a lot done the past week or so. I'm guessing I am only about 3 weeks to a month away from being registered and road legal!!!!!!!!!

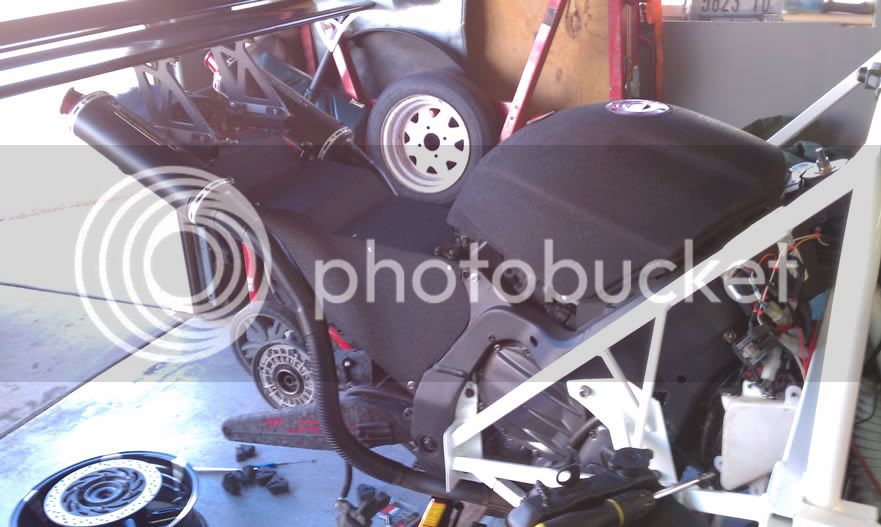
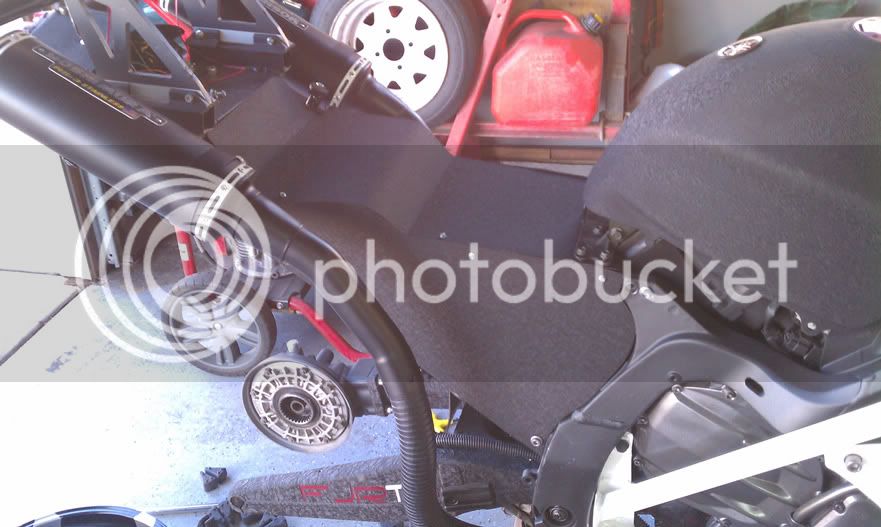
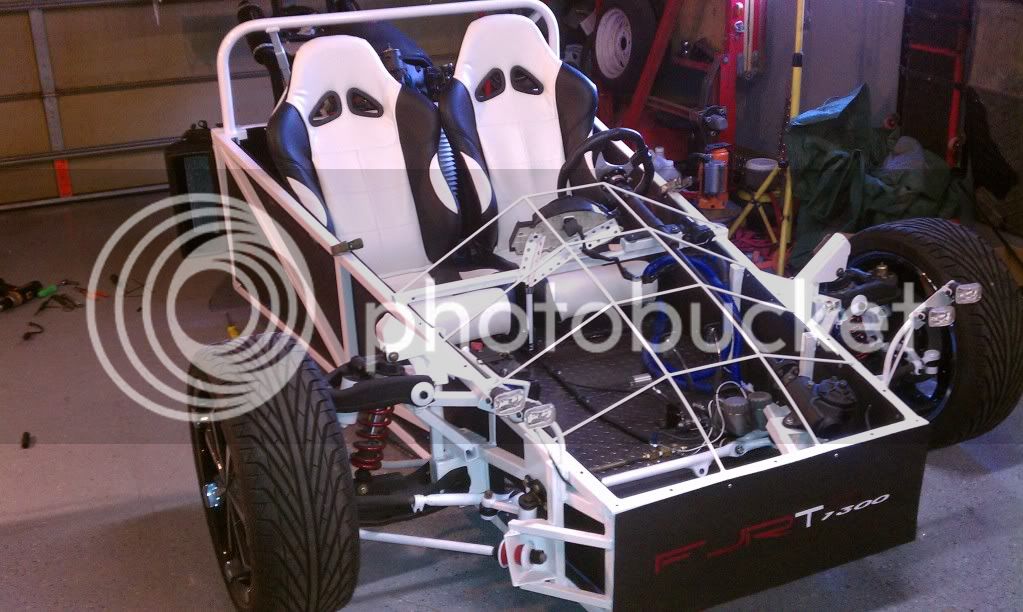
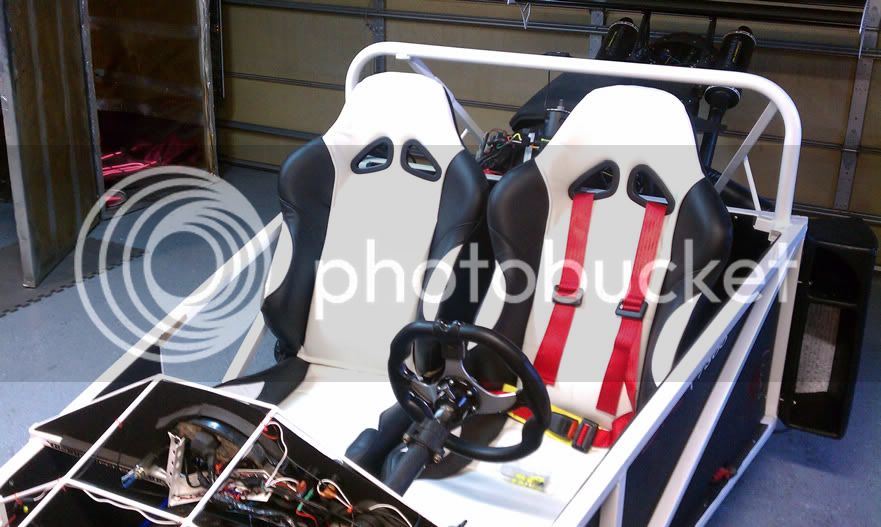
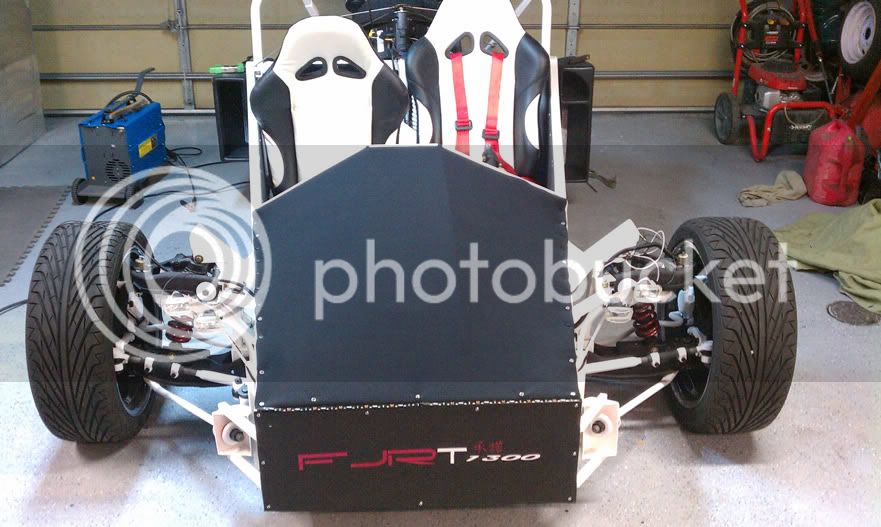
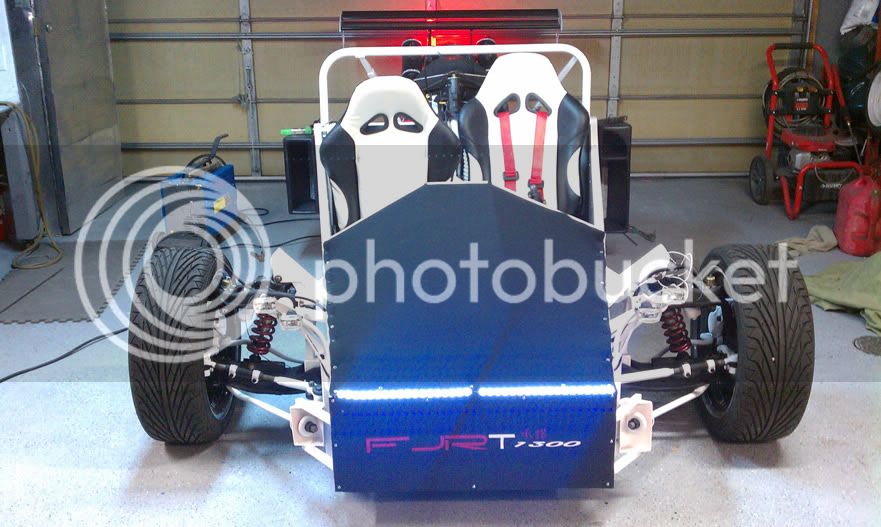
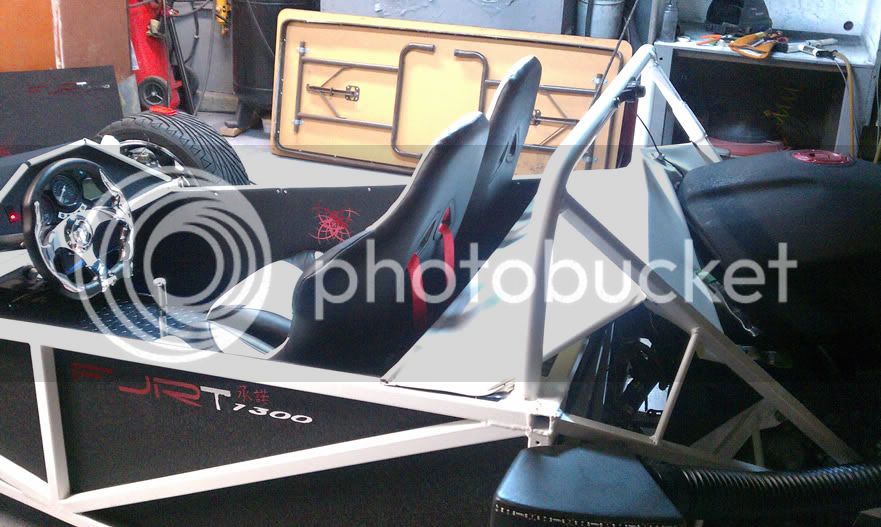
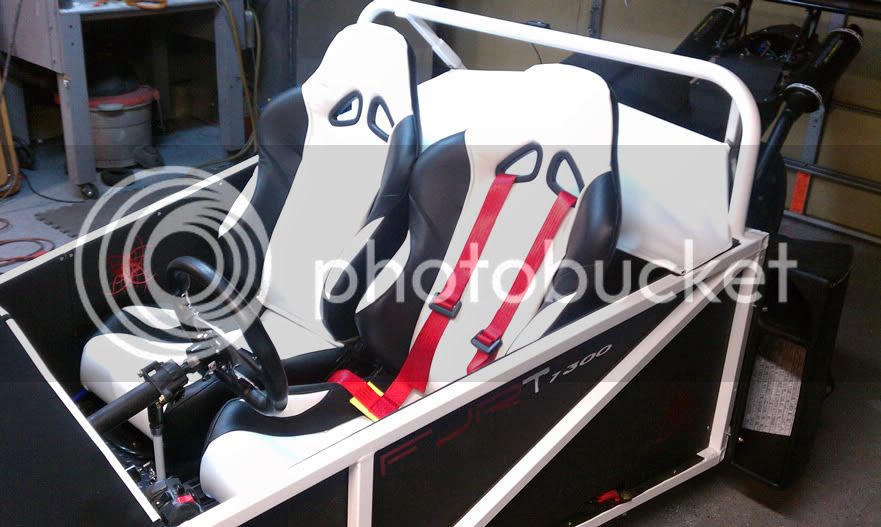
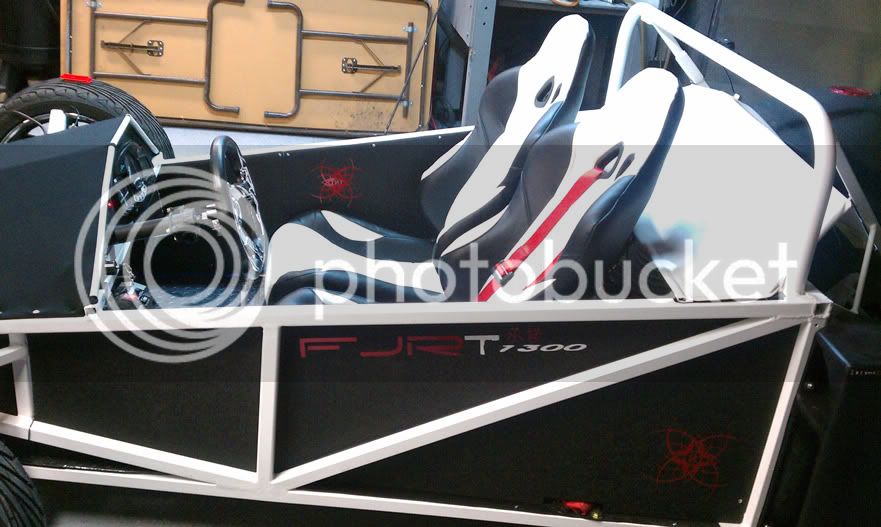
I used to work in auto upholstery so I pulled the covers off the seats and got some new covers made and reinstalled about a week or two ago. Looks WAY better than the old crappy purplish ones huh?!

IMAG0133.jpg


IMAG0132.jpg


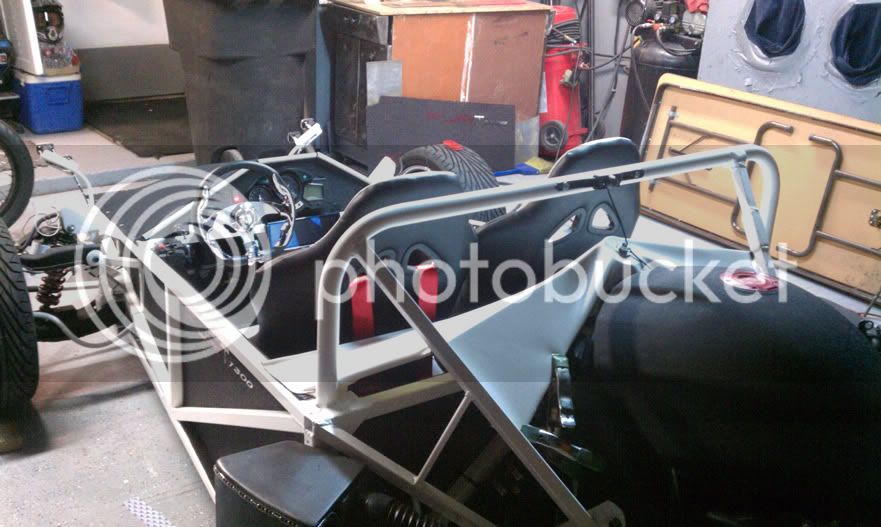
This weekend I got a TON of stuff done.

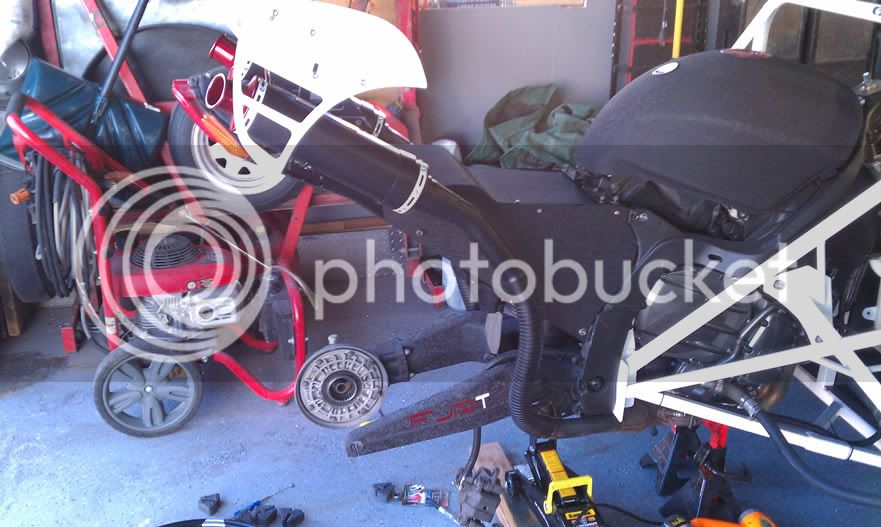
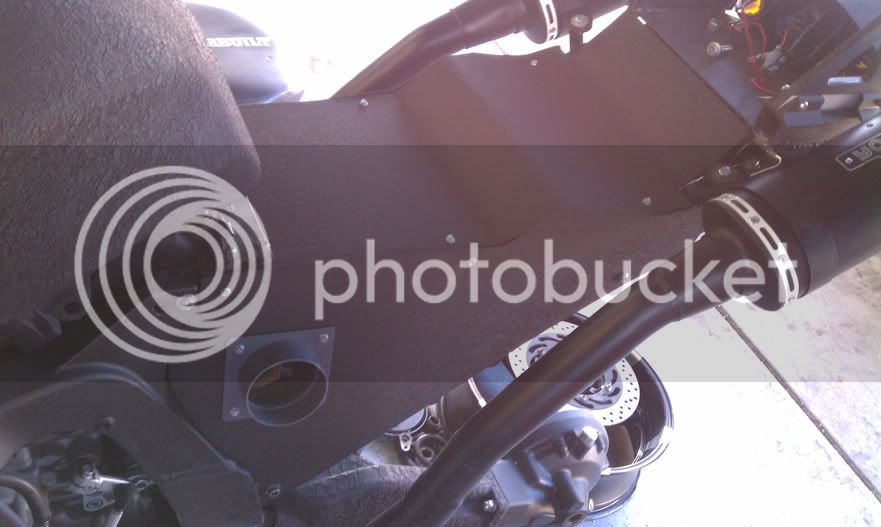
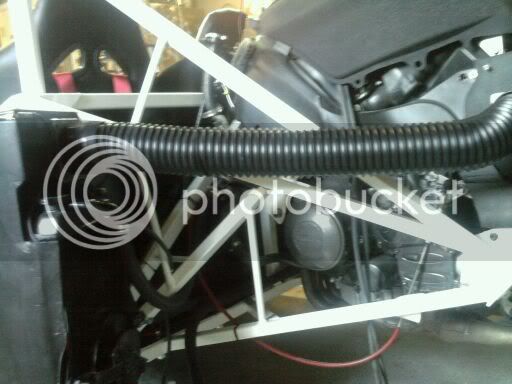
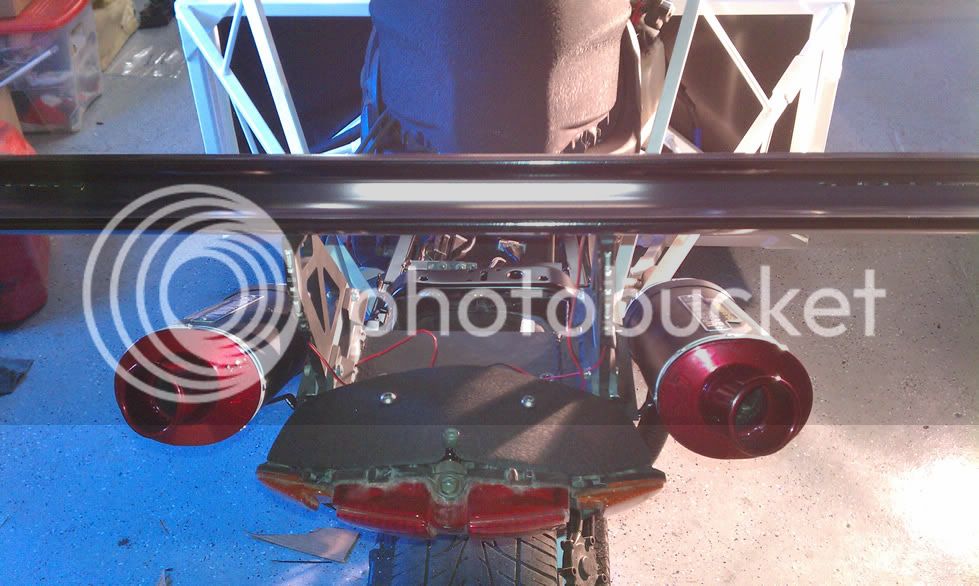
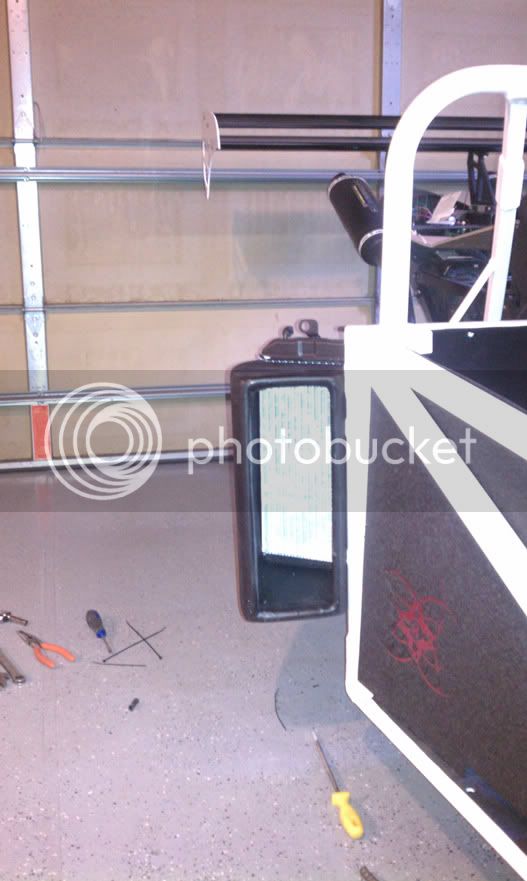
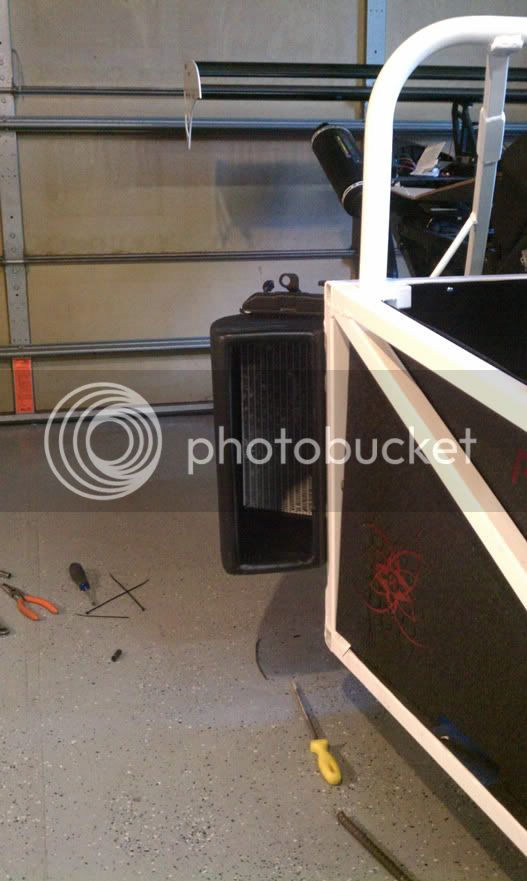
I got the driver's side panel, seat and harness mounted. I finished the bodywork, painted and mounted the driver's side intake scoop and the radiator with fan. Mounted it all up and filled the coolant system. The air intake tube is not necessary but I figured it would be nice to force a little extra air into the bike anyway.

imagejpeg_2_2.jpg


imagejpeg_2_4.jpg


imagejpeg_2_5.jpg


imagejpeg_2.jpg


IMAG0168.jpg


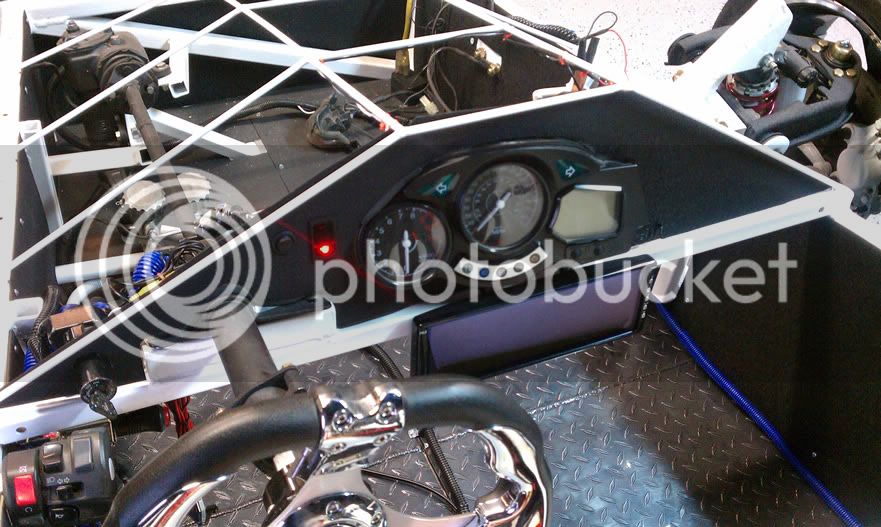
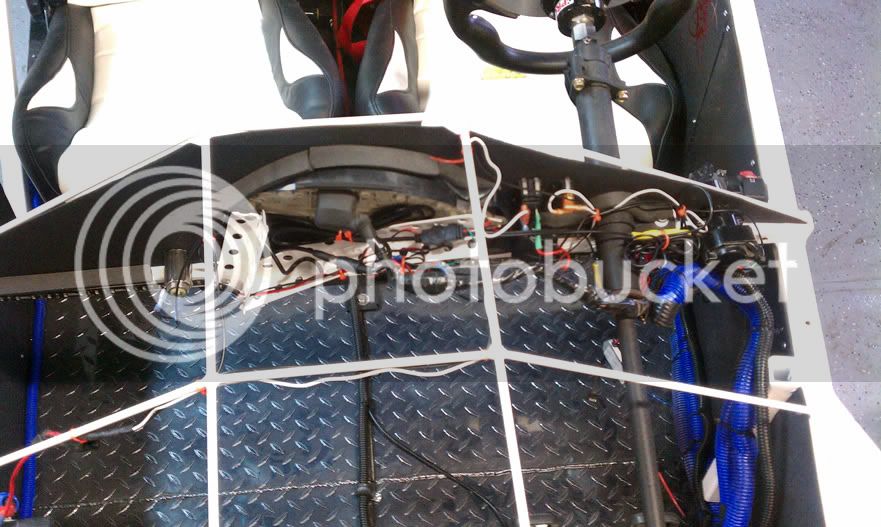
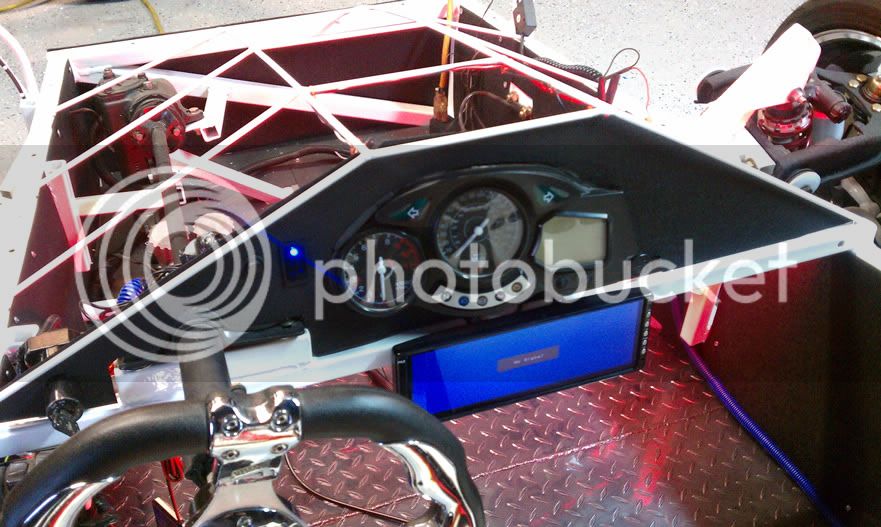
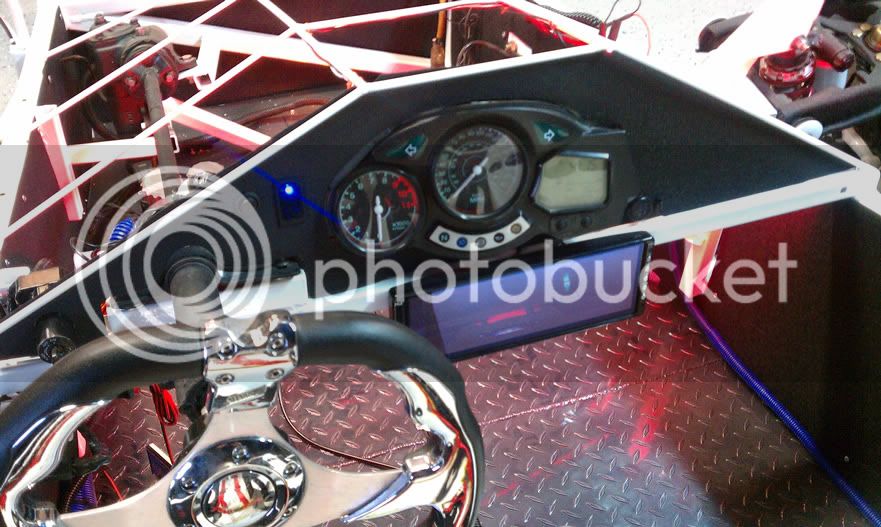
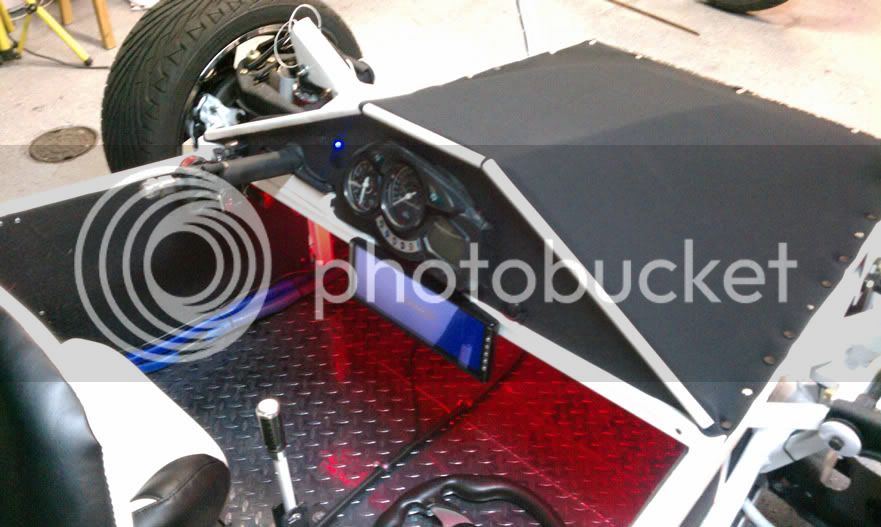
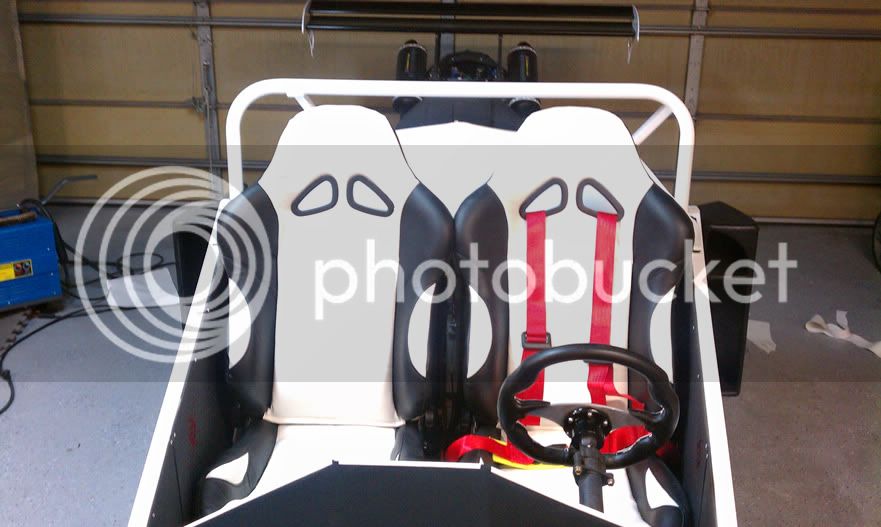
I built the dash panel from sheet metal and powder coated it. Mounted all the switches and gauges and wired everything up. I wired a switch for the two cooling fans along with another switch for the backup camera monitor and a 12v accessory outlet.

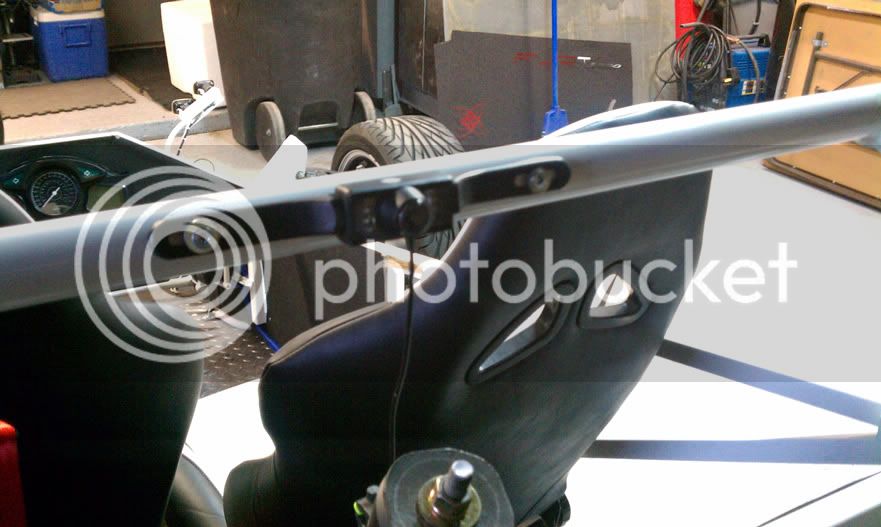
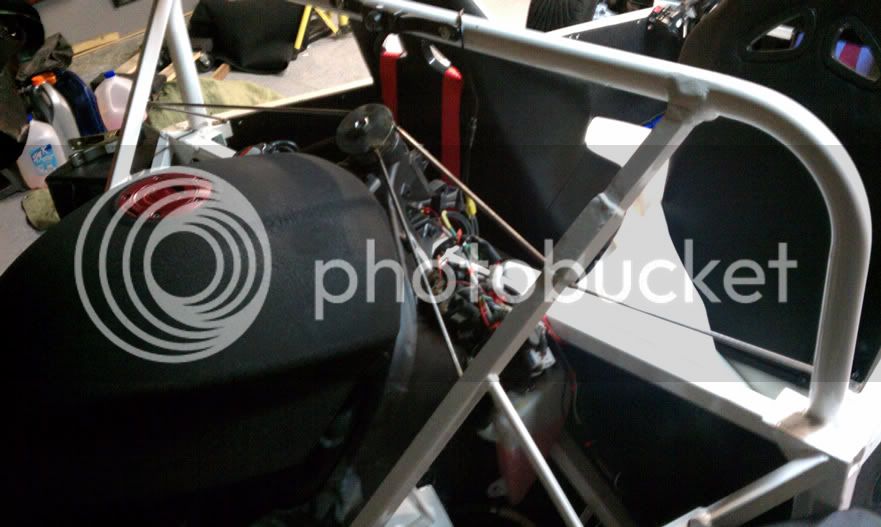
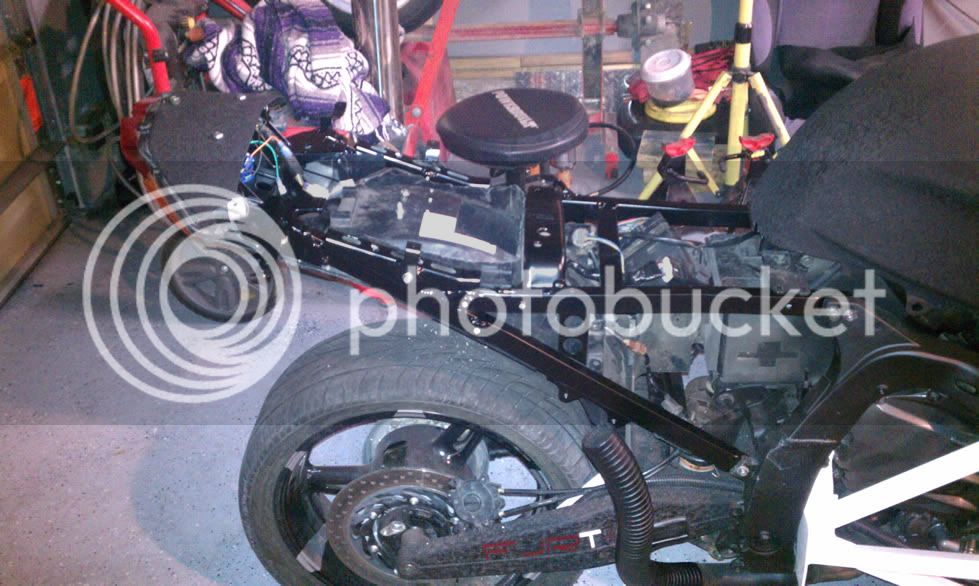
Backup Camera; I did this because even with the mirrors mounted and I can see behind me it's still a bit difficult to turn and look over my shoulder because of the harness seatbelts. I mounted the camera on the rollbar instead of the rear of the bike because it gave me a WAY wider view of my blind spots that way and I can still see straight behind me fairly well through the tail wing.

IMAG0161.jpg


IMAG0160.jpg


IMAG0165.jpg


I mounted some red accent lighting in front of the dash at your feet. You can sort of see it turned on in these pics along with the backup monitor.

IMAG0163.jpg


IMAG0164.jpg


So is the backup monitor reversed, so you behave as if it's a mirror, or do you have to remember to do everything backwards while looking in it?

 
Made a bunch more progress this weekend. Got the front cover put on, tightened up all the nuts and bolts, mounted passenger seat, mounted front running lights, ran the blinker wires, and built the skeleton for the rear tarp.

IMAG0189.jpg


IMAG0193.jpg


IMAG0192.jpg


If you look close you can see the skeleton I fabbed up yesterday. Tonight I'll be figuring out how I'm going to stretch some vinyl over it to hide all the wiring etc.

IMAG0191.jpg


More updates to come....

 
Thanks for the complements!

Quick and small update. Got the vinyl cover pretty much done for behind the seats. It looks pretty decent and will help hide ugly wires and keep any rain off also.

IMAG0197.jpg


IMAG0196.jpg


IMAG0195.jpg


IMAG0198.jpg


IMAG0199.jpg


Top