Suspension bushes

Yamaha FJR Motorcycle Forum

Help Support Yamaha FJR Motorcycle Forum:

This site may earn a commission from merchant affiliate links, including eBay, Amazon, and others.

drdevil44

Well-known member
Joined
May 27, 2012
Messages
55
Reaction score
1
Location
United Kingdom
Dear all

Today I had my annual MOT (UK statutory check) and the tester identified freeplay in the suspension bushes.

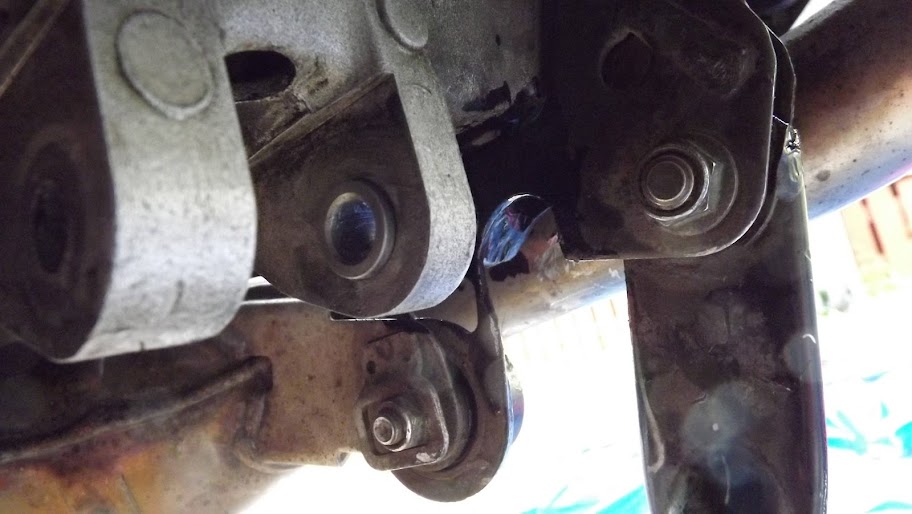
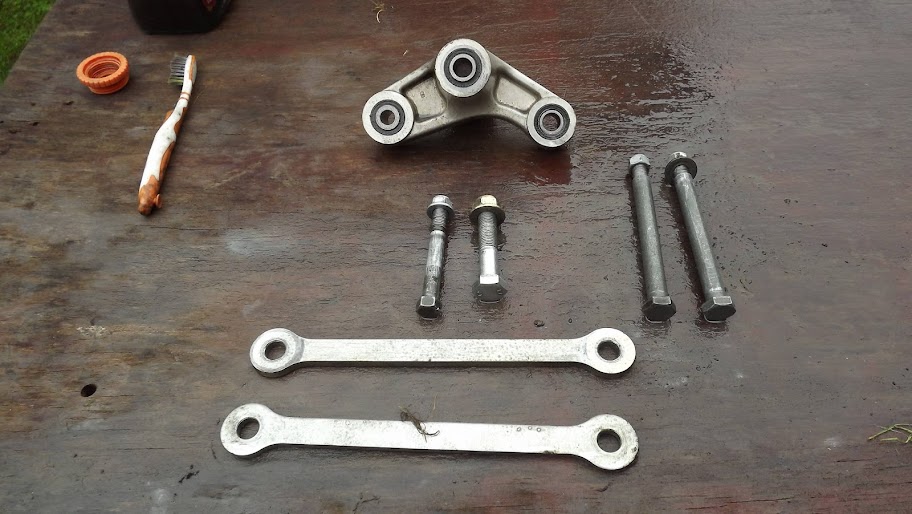
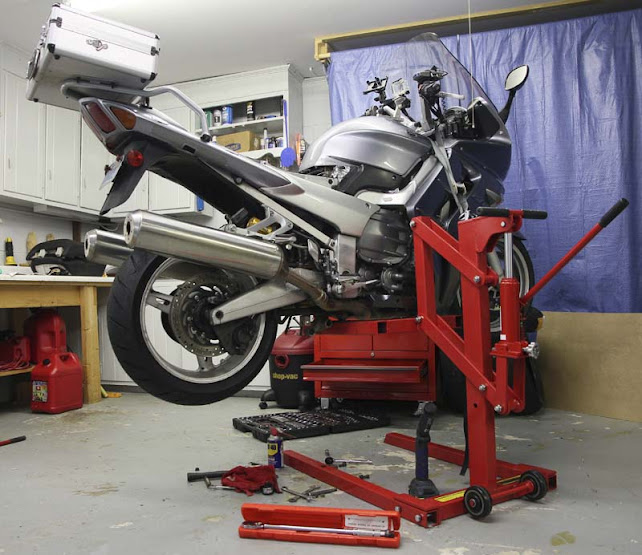
I've heard this is a PIT to remove. But I've had a look under the bike and the three bolts seem accessible. Can I remove the 'three bolted' metal lump without suspending the bike? It looks like the main stand is attached to engine block (altho it was dark when I looked)

Best wishes

Gareth

 
The relay are is hard to remove without lifting the bike or doing a mod to remove some metalwork.

I ended up removing some metal with a small dremel grinder that allows that dreaded bolt #23 to be removed.

My Story here on the Aussie Forum

from%2520LHS.jpg


Linkage%2520out.jpg


Thanks for the link. I understand now - the centre stand gets in the way. I had it on sidestand when I looked. Any tips for figuring out which one has the freeplay without removing it all?

 
If you live any where near North Norfolk send me a PM. I would be happy to help you sort out your suspension relay arm.

Alternatively, you could take it to Ernie at the FJR Centre in Gloucester clicky here. They do a really good job at very reasonable rates.

Don

 
You can remove, clean, inspect and lube most of the linkages while the bike on its centre stand.

The only challenge is that final bolt.

While the rear wheel is off you can check the swing arm bearings, they may well be the cause.

Both of my FJR's had movement in the swingarm.

Grab the rear of the swingarm and move it up/down and side to side.

Easy to feel any movement with the linkages disconnected.

All what was required was to torque up the bearing to specification on the LHS.

The bearing on the LHS is a sealed roller while the bearing on the RHS is a needle roller.

It seems to be normal to have free play on the bearing / sleeve where the relay arm attaches to the back of the motor.

While it's all apart, check the dog bones just in case.

 
Hi Ken

Thanks for the info that's very helpful. The mechanic seemed pretty certain it was one of the linkages, he put a lever arm under the wheel and lifted the rear wheel up - there was notchiness - but I'll check both.

You say you can tighten the suspension bearings. I've never come across those type of bearings before (only sealed roller and bushings), could you point me at the item in the diagram which you tighten to adjust the bearing please?

Capture.PNG


Many thanks

Gareth

PS - Thanks for the offer Donal. I'm a few hours from Norfolk and even further from Gloucs - I'm at Dartford. Reckon I can manage it myself - just like to have a clear idea first of the parts and how they fit together!

 
Last edited by a moderator:
Hi Gareth,

Nar, not the suspension, just the swingarm bearings.

Page 4-99 on my service manual, how to check.

Page 4-100 sequence to tighten.

Loosen off the nuts and follow the sequence.

1: #6 Pivot shaft 23 Nm (2.3 m·kg, 17 ft·lb)

2: #5 Pivot shaft locknut 115 Nm (11.5 m·kg, 85 ft·lb)

3: #4 Pivot shaft nut 125 Nm (12.5 m·kg, 90 ft·lb)

It seems that when you tighten the Pivot shaft, it reduces movement in the swingarm.

There seems to be a difference in my manual and what you posted ?? as in the Pivot Shaft torgue 17 Vs 23 Nm

Also my needle roller bearing is on the RHS (item 16) and the sealed roller is on the LHS (item 18) strange.

d. Check the swingarm vertical movement “B”by moving the swingarm up and down.

If swingarm vertical movement is not smooth

or if there is binding, check the spacers, bearings, washers, and dust covers.
I used a tube spanner that fitted into the "socket" hole of the pivot shaft.

Then a socket over the other end of the tube spanner, then a torque wrench to tighten.

 
Thanks Ken - immensely helpful! I have the 2001-2005 manual as couldn't find the 2008 manual online. That may explain the differences. I wasn't prepared to pay a $100 to Yamaha for the service manual - and an electronic copy at that.

 
You don't have to have a lift but it definitely helps. I just finished the same job and the prospect of wriggling on the floor again drove me to good ol' Harbor Freight. This is their High Position Motorcycle Lift and it sure made the task less onerous. Note the included strap looped around the lower bars back to the lift to keep the bike from accidentally getting tipped. Using HF's monthly 20% off coupon the lift was only $160 and it's a sturdy unit. Hard to beat that for the occasional mechanic.

Bike%2BLift.jpg


Last edited by a moderator:
You don't have to have a lift but it definitely helps. I just finished the same job and the prospect of wriggling on the floor again drove me to good ol' Harbor Freight. This is their High Position Motorcycle Lift and it sure made the task less onerous. Note the included strap looped around the lower bars back to the lift to keep the bike from accidentally getting tipped. Using HF's monthly 20% off coupon the lift was only $160 and it's a sturdy unit. Hard to beat that for the occasional mechanic.

Bike%2BLift.jpg
I'm interested to know what part(s) of the bike are 'resting' on the lift arms. Is it all on the exhausts system?

Thanks

Don

 
As pictured the bike is resting on the exhaust and part of the bracket attachment piece for the rear stand. The lift worked fine as is but a good mod might be a stout piece of plywood attached to the lift arms to distribute more of the weight. The first and only time I used the lift was last week so I haven't had chance to mess with it.

Oh, and my apologies to you UK guys for sort of hijacking your thread with American stuff. I think your Machine Mart is roughly the equivalent of our Harbor Freight.

 
Last edited by a moderator:
Jack up the swingarm to relieve pressure on the bolts, and the lower shock bolt can be removed. Then rotate the lower shock mount down and the dogbone lower bolt can easily be removed while on the centerstand.

Copied from one of my other posts:

No front stand required or jacking under the engine.

Put bike on center stand.

Place floor jack under back rear of the right swingarm.

Loosen all dogbone nuts and bolts.

Raise swingarm slightly until the upper dogbone bolt can be easily removed.

Remove lower shock mount nut and bolt.

Rotate lower shock mount until lower dogbone bolt can be removed.

Install new dogbones and lower mount nut/bolt.

Install lower shock mount bolt/nut.

Raise swingarm using floorjack until the upper dogbone mount bolt/nut can be installed.

Lower floorjack.

This job took me 15 minutes and is easy weasy, except I raised the rear but same job.

 
Last edited by a moderator:
Top