W....T....FYeah well... eat that pie now, 'cause it's not gonna do you any good when the Apocalypse comes. Zombies don't eat pie. That's part of what makes them so screwed up.
Zombies eat some kinds of pie!

You are using an out of date browser. It may not display this or other websites correctly.
You should upgrade or use an alternative browser.
You should upgrade or use an alternative browser.
Valve Check When Garage is Cold?
- Thread starter Ignacio
- Start date

Help Support Yamaha FJR Motorcycle Forum:
This site may earn a commission from merchant affiliate
links, including eBay, Amazon, and others.
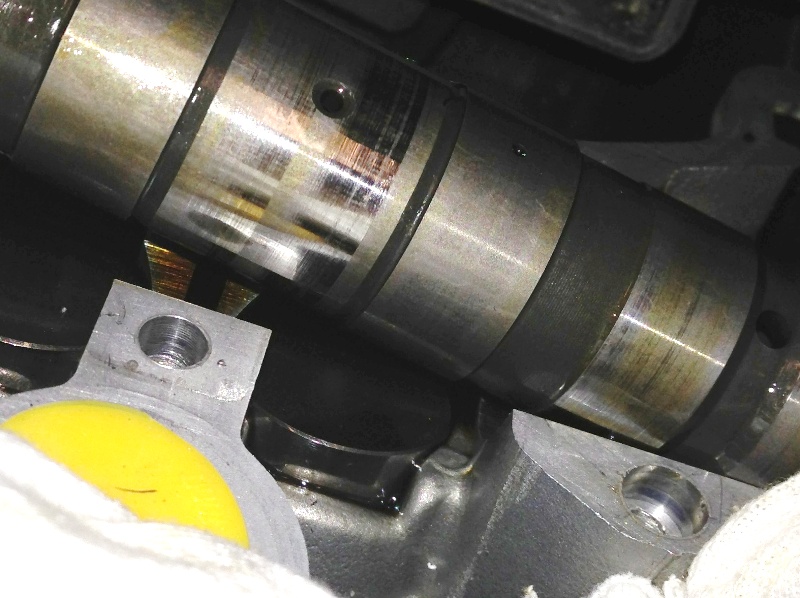
I got my shim kit and was able to swap E1A very easily with the move-cam-to-the-side trick and grabbing the bucket with a retaining ring pliers, but E4B doesn't seem as promising. It looks like I'm going to have to remove the cam chain completely...so that I can then remove the exhaust cam....so I can then remove the bucket.
Going inside for a while to have some pie (the kind without fingers or charts) and ponder a bit more. Unless there's a way to lift out the valve bucket without removing the cam completely? I just seems like there's not enough room for it to come all the way up.

Going inside for a while to have some pie (the kind without fingers or charts) and ponder a bit more. Unless there's a way to lift out the valve bucket without removing the cam completely? I just seems like there's not enough room for it to come all the way up.

Last edited by a moderator:
Matt,
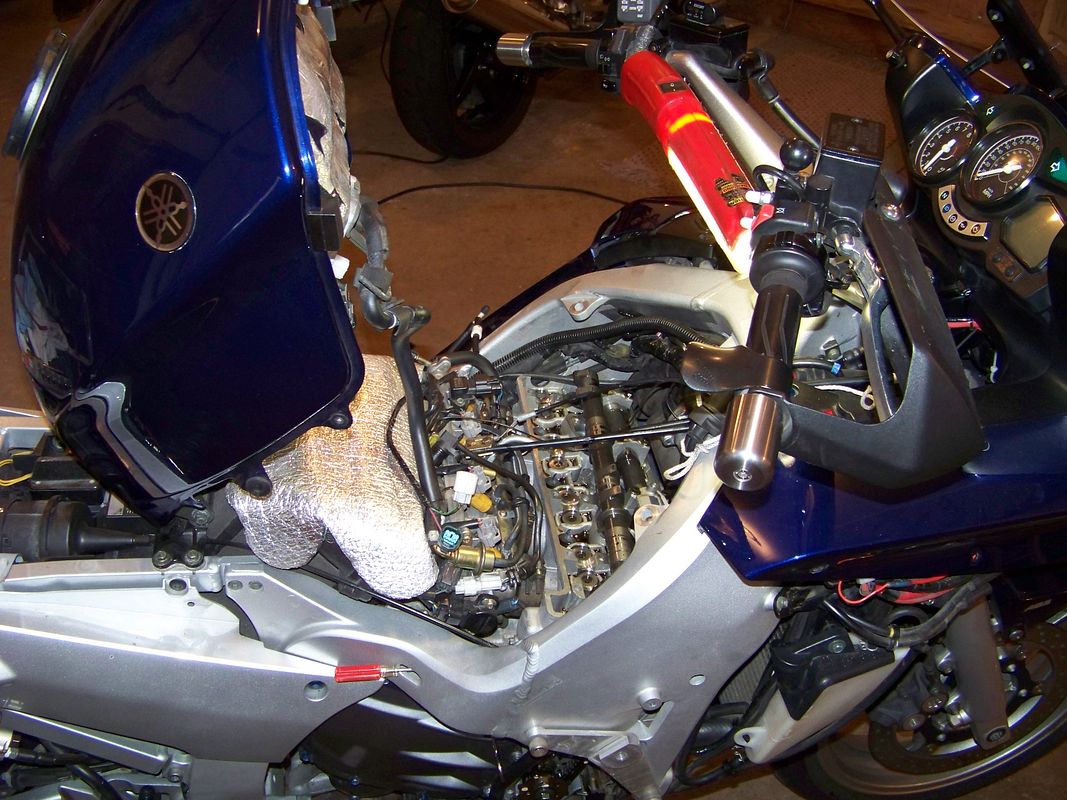
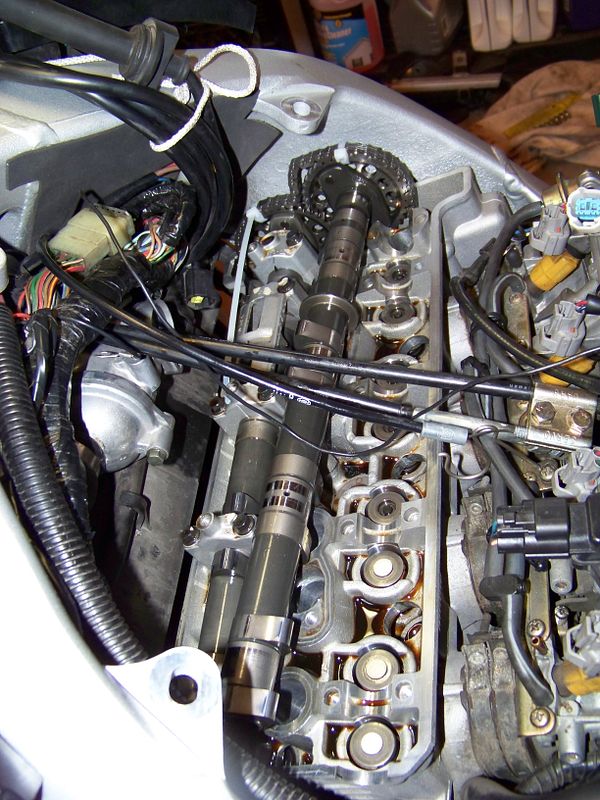
I was able to get the intake cam up and moved forward with the chain still ty-wrapped to both sprockets. I had the CCT fully retracted and being held with a screwdriver in the slot and a pair of hemostats holding it from turning back (from under the frame in the top picture below).
The trick was to allow the cam to rotate as the chain tugs on it as you lift it up. It is tight, but it will move out and then getting it back in is even trickier


Last edited by a moderator:
Good idea. I think I can get it and will try finessing it a bit. The picture helped as I get a sense of how much slack there can be with the CCT released.The trick was to allow the cam to rotate as the chain tugs on it as you lift it up. It is tight, but it will move out and then getting it back in is even trickier
Will report back.
SkooterG
Purveyor of Crooked Facts
Ditto to what Fred said. That's how Hal, Fairlaner, and I did it. It can be a bit tricky getting it out, and especially back in as Fred said. Take your time and patience.
That worked!Good idea. I think I can get it and will try finessing it a bit. The picture helped as I get a sense of how much slack there can be with the CCT released.The trick was to allow the cam to rotate as the chain tugs on it as you lift it up. It is tight, but it will move out and then getting it back in is even trickier
Will report back.
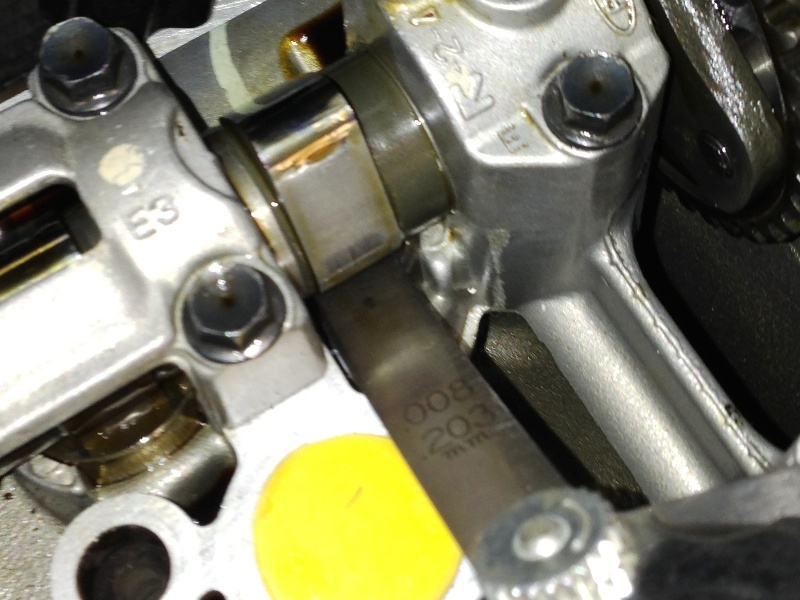
You really put some faith in the zip ties on the cam chains and hope that somehow the chain's not slipping a cog on the bottom end (it doesn't do that does it?) and was able to move the cam enough to get the buckets out with one finger and a gentle screwdriver. I dropped one shim size (.05) on E1A and two shim sizes (.10) on E4B from what many have reported as the standard of .185mm and measured after reinstall. Both measured.203mm with slight rub and .229 was too much. That puts me between 0.18 and .025 range. I think I'm done!


$22.09
$25.99
MOREOK Waterproof & Windproof -30°F Winter Gloves for Men/Women, 3M Thinsulate Thermal Gloves Touch Screen Warm Gloves for Skiing,Cycling,Motorcycle,Running-Black-XL
MOREOK-US (Ships from USA)

$44.99
Real Time Industries Reflective Decals for Yamaha FJR1300 Gen 2 Fairing (Black - Silver Print)
Real Time Industries

$64.99
Edwards Oil Change Kit fits 2003-2020 Yamaha FJR1300 Sport Touring
Edwards Motorsports & RV's

$127.99
$159.99
FLAVOR Men Brown Leather Motorcycle Jacket with Removable Hood (Large (US standard), Brown)
FLAVOR Leather

$24.37
Fuel Tank Sticker Motorcycle Stickers for Yam&aha FJR1300 FJR 1300 Tank Pad Protector Decal Emblem Side Fairing Symbol Adventure
nanyangshixianpushangmaohanggerenduzi

$22.09
$25.99
MOREOK Waterproof & Windproof -30°F Winter Gloves for Men/Women, 3M Thinsulate Thermal Gloves Touch Screen Warm Gloves for Skiing,Cycling,Motorcycle,Running-Black-L
MOREOK-US (Ships from USA)

$49.99
$54.99
HOOD CREW Men’s Casual Stand Collar PU Faux Leather Zip-Up Motorcycle Bomber Jacket With a Removable Hood
Jamickiki

$15.15
$21.95
Tough Headwear Balaclava Ski Mask - Winter Face Mask for Men & Women - Cold Weather Gear for Skiing, Snowboarding & Motorcycle Riding (Black)
Tough Outfitters
Good work. You are almost home.
Now, be careful. Take your time. The chain does want to jump a tooth on the bottom sprocket when you are re-assembling. If you still have everything lined up at TDC on #1, you will see it happening as the chain tries to skip a tooth on the crank (as you release the CCT). It is not OBVIOUS, but it is detectable. Make sure that you get that back in the right position before you think about cutting your ty-wraps. It is much easier to fix the timing before you cut them since you know that there is only one possible spot for the error.
After committing to cut those ty-wraps, spin the engine with a socket wrench by hand multiple times to get the warm fuzzy that no valve damage can happen. and then line it all up again at #1 TDC and make sure the alignment is right.
Last edited by a moderator:
SkooterG
Purveyor of Crooked Facts
That worked!
You really put some faith in the zip ties on the cam chains and hope that somehow the chain's not slipping a cog on the bottom end (it doesn't do that does it?)
YES, it DOES do that! You should have been reading up on more threads around here on the procedure! Your searching is lacking young grasshopper!
Just ask Fairlaner about it skipping one tooth on the crank sprocket doing the procedure EXACTLY the way you did it. (not securing the chain to the crank sprocket)
Last edited by a moderator:
Nikk
Well-known member
So, as it is about 20F-30F in my garage right now what is the recommendation?
1. Wait until warmer weather?
2. Run the engine, than do the tear down?
The problem with #2 is the race to get to the valve check before the engine cools.
1. Wait until warmer weather?
2. Run the engine, than do the tear down?
The problem with #2 is the race to get to the valve check before the engine cools.
rPGoatBoy
Well-known member
You're splitting hairs on a gnat's ***. It's doubtful you'd see any measurable increase or decrease in valve lash in the narrow temperature range of your garage. Temperature based valve checks are for things like old airplane engines, which were air cooled, ran considerably hotter, and had huge valvetrain parts which would expand more measurably when hot. Having a hot vs cold measurement difference was important at maintenance depot level when you could pop the rocker arm cover off of a cylinder that was running 30 seconds ago.So, as it is about 20F-30F in my garage right now what is the recommendation?
1. Wait until warmer weather?
2. Run the engine, than do the tear down?
The problem with #2 is the race to get to the valve check before the engine cools.
Tear it down while it's still winter.
Either do #1 or else just do it now. Can't you get a portable space heater for your garage? I personally would not cherish the idea of freezing my *** off while doing this check.So, as it is about 20F-30F in my garage right now what is the recommendation?
1. Wait until warmer weather?
2. Run the engine, than do the tear down?
The problem with #2 is the race to get to the valve check before the engine cools.
I would not do #2. A warmed up engine could give artificially tight measurements.
Similar threads
- Replies
- 10
- Views
- 1K


