Auxiliary Cell Design

Yamaha FJR Motorcycle Forum

Help Support Yamaha FJR Motorcycle Forum:

This site may earn a commission from merchant affiliate links, including eBay, Amazon, and others.
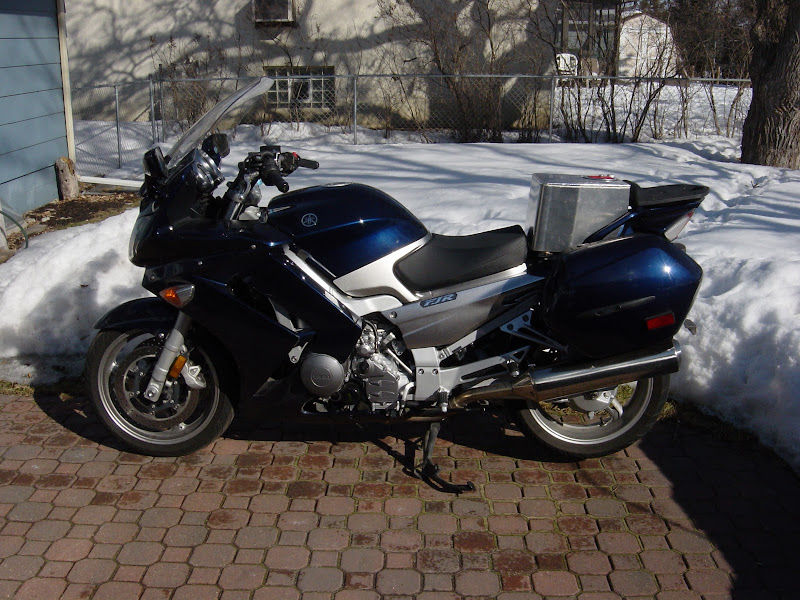
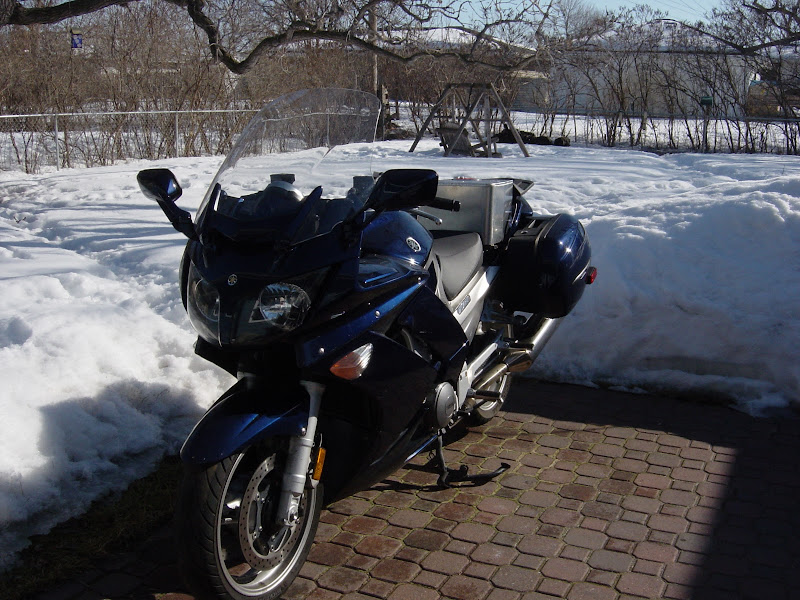
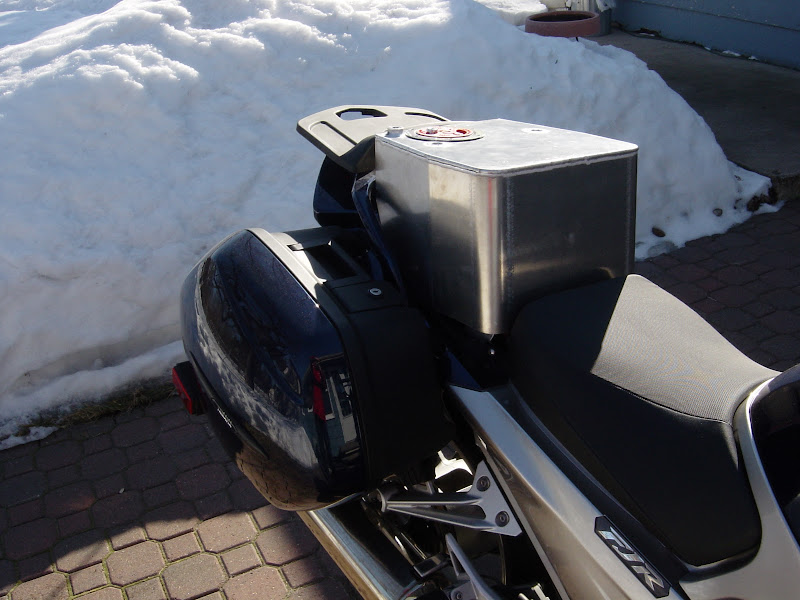
At this point you have a unit ready to test fit on your bike. Have you tried it yet? The pieces are not welded together yet, but I did try it with the pieces taped together, and I got so excited about the fit that I had to go in the house and get my wife to show her. Her comment was; "Wow, you're really excited. Should I be jealous?" I'd be interested in how well it fits. Does it take away any space that was under the passenger seat? Sort of. The rear seat sits on rubber bushings and the tank doesn't. Will it accommodate the stock seat in both the upper and lower position? Good question. I don't see why it would have any effect on the front seat position, but I always ride in the taller position. I'll need to verify that one for you. Will it fit as planned with the modifications you made for the Givi rack? That is the plan, but I need to verify that once everything is welded together. The tank should clear the Givi rack, but mounting the tank might be slightly different due to the fact that the Givi rack eliminates the grab rail bushings. A lot of us have trunks on our bikes. They need to be able to fully open with your tank in place. That's important to me too. In fact, that's the reason for this whole re-design. Some of us have custom seats that were modified from stock to give us more leg room. My Bill Mayer seat has me sitting 3/4 inch further back, the rear seat was trimmed to fit. There is a slight gap between the front seat and the tank. I haven't measured it, but it looks like about a half inch. Go for a ride with dcarver after he gets S/N 1 and check it out.
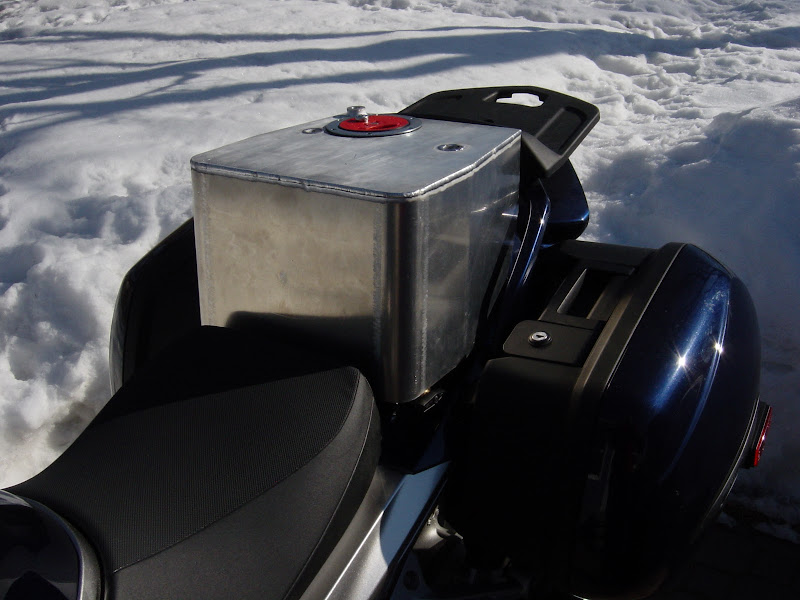
When mounted to the bike, you are using the OEM grab rail mount bolt locations. These use a sleeve under the bolt to keep from damaging the ABS plastic the grab rail is made from. Will your tank sit properly on this sleeve and not touch the cross bar? Excellent question! The answer is Yes and No. The tops of the OEM bushings are slightly below the plane of the two rear seat pads. I am replacing the OEM bushings with my own. These have a slightly taller head (approx. .030" added) The result is that the weight of the rear of the tank is supported over four points. A washer over the grabrail bushings would accomplish the same thing, but I can just imagine losing one of those washers and not having a spare. Since only 2 bolts are used, are you resting the tank bottom on any other frame locations? Yes. There are two additional legs/pads in the front. The weight of the tank is transfered to the bike over six locations. Have you considered reinforcing the metal at the bolt holes to keep from having metal fatigue? The holes are supported by the sleeves that are welded to the top and bottom plates. I have considered using some thin washers to minimize any damage the flange screws might cause, but I doubt the screws will cause that much damage. I've had the bottom plate on and off the bike several times and the screws have not caused any damage. When mounted how stable is the tank when grabbed and pushed around - the design lends itself to be a low back rest for the driver. How well does it feel when sitting in the saddle? I'll let you know. But I will tell you that this tank was designed to stay put. If it is subjected to enough force for it to move around, you have more serious problems to worry about.

When designing the filler opening, if flush mount will there be an internal neck to fill up to? The neck need not be a solid ring. This may be the way to keep from over filling and creating a mess. Have you given thought to where the puke bottle and pluming will go? At this point, the flush fill cap does not have an internal sleeve. The puke bottle is something we're still looking into. I'm not sure if vent lines count against volume or not. My preference is a welded on puke tank on the right side near the rear. I haven't added that until the volume question is answered. Right now, no puke tank is attached. The vent line is plumbed from the right rear corner.

My inclination would be to have a gravity feed, will there be room for a large enough line to the main tank. Placement of the ball valve within easy reach? Yes to both questions and it's my understanding that Don is going to run his as a gravity feed at first and let us all know how that works for grueling Candy Butt use.
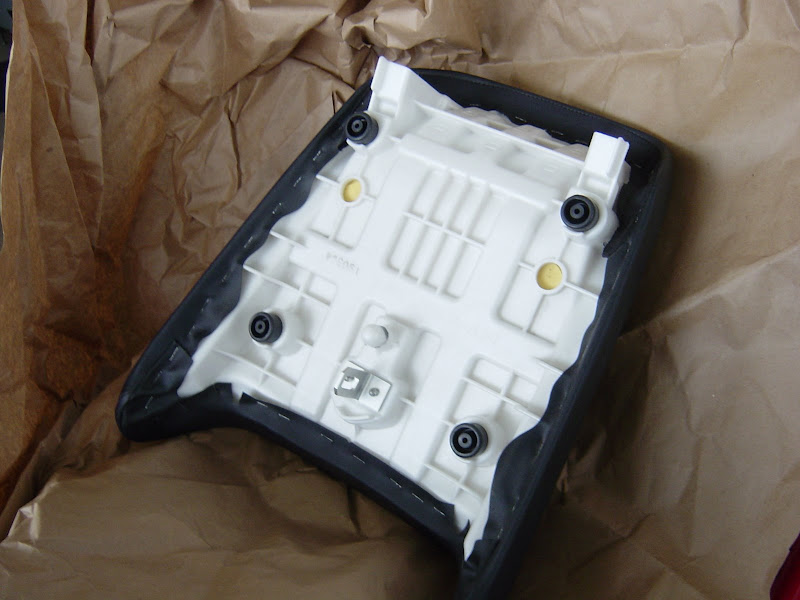
Note the height of the rubber bushings:

DSC03629.JPG


Last edited by a moderator:
Thanks Joe for the quick response.

Looks like I better get cracking on that Grounding Harness of mine so I have something for Don when I head south to see it. Perhaps I can mount my seat on his bike and take pictures.

Brodie

 
Thanks Joe for the quick response.
Looks like I better get cracking on that Grounding Harness of mine so I have something for Don when I head south to see it. Perhaps I can mount my seat on his bike and take pictures.

Brodie
Very cool.

When I drop off the pieces for welding, I'll request a quote. The count right now is four additional tanks and cost seems to be the shared concern.

edit: Don't anyone freak out now! I'm not holding anyone to anything. I'm not going to contact you and tell you your tank is ready. I'm just finding out what these are going to cost if four are made.

 
Last edited by a moderator:
Thanks Joe for the quick response.
Looks like I better get cracking on that Grounding Harness of mine so I have something for Don when I head south to see it. Perhaps I can mount my seat on his bike and take pictures.

Brodie
If all comes to fruition, I'll have 3 serial number 1 items! :yahoo: (Brodie ign relay, Joel2Maker tank, Brodie ground harness)

edit: Don't anyone freak out now! I'm not holding anyone to anything. I'm not going to contact you and tell you your tank is ready. I'm just finding out what these are going to cost if four are made.
I'm freaking! I've tried to pay you 3x now, you never want my money! :rofl:

 
Make sure you leave sufficient expansion volume in the tank...i.e...you do not want to totally fill the volume with liquid fuel as it will start to expand as it warms and overflow. Typically a fuel tank would have an unfillable vapor volume of 5 to 10% of total capacity. One way to do this is to make the fill bung extend into the tank so that a vapor volume will be created when the liguid reaches the bottom of the fill tube. Or, just make sure you never completely fill the tank but that approach is not ***** proof....LOL.
Thats a great looking fuel cell;)

 
Last edited by a moderator:
I remember the filler neck hurdle from last year. *heavy sigh*
Fig%201324.jpg
Damn it Bounce!

I'm not going to go off on a tangent. I am not going to go off on a tangent. I am not going to go off on a tangent.

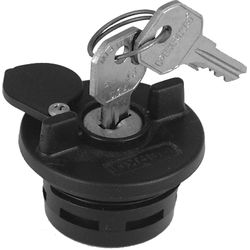
But, a locking cap sure would be nice. I believe I have fully recovered from the Coyote locking cap nightmare of last year.

This Perko idea could work. They have two different non-vented sizes; 1-15/32" dia. thread and 1-7/8" dia. thread. I could cut the threads in some aluminum tube and voilà! A locking filler neck. I'll design something after I finish the first two tanks. 08FJR4ME, Moosehead, or Scoobyvroom, Looking for something to do?

The first two tanks should be are scheduled to be welded Monday. I've been told that by next Friday, they will give me a quote for five tanks.

1324DP0BLK.jpg
I'm not going to go off on a tangent. ****! here I go!

 
Last edited by a moderator:
I'm not going to go off on a tangent. ****! here I go!
This seems fitting... here is the first sentence of the pep talk Phil Becker gave me after he saw where I was and couldn't decide which way to go...

Okay, please don't take this wrong but my advise is to keep it SIMPLE. I realize that you have the tools available to create CAD drawings and to do 3D modeling plus your an engineer which makes it worse.
he then continued with something to the effect of ... blah.... blah.... blah.... JUST GET IT DONE!

I didn't listen to him... and I'm guessing you won't either. :rolleyes:
Au Contrare! I'm outta the woods Dude! I have a box on my kitchen table from McMaster-Carr. It's full of valves and fittings and tubing. The rest of the parts were dropped off at the fab shop yesterday. SN1 and SN2 are as good as done :yahoo:

Plus, I pulled Rev4 outta the basement and started cutting the POS filler neck off and I've got the cool filler neck 90% finished. I am auxiliary tank rich! OOh! I almost forgot, I have the JAZ tank too! The bulkhead fittings for that one are in the McMaster-Carr box too. By the middle of next week, I'll have nearly 18-1/2 gallons of auxiliary tank capacity :dribble:

At least this isn't as bad as years past when my tangets were mirror spacing auxiliary light brackets. Now THAT was a tangent!

 
Last edited by a moderator:
... (filler neck designs) were always more positive imho.
Thanks Bounce. In the end, I figured it out without too much trouble.

Perko P/N 1324DP0BLK fits a Pro-Werks P/N C73-767 aluminum weld-in bung. (See post #119 <Link>) It's too bad I didn't know this last year. Today I'm cutting the Coyote filler neck off the tank I made last year. After the Tag-Along Tanks are finished, I'll have the custom filler neck welded to the Tanji style tank.

If anyone out there is considering building their own tank and they want to add a locking cap, take a look at the Pro-Werks, Perko combo :thumbsup:

I'm calling my current tank the Tag-Along-Tank. The tank I made last year I'm calling my Tanji Style tank. I don't have a name for the JAZ system yet, but I want a name like "right side up" or something. I want to call it something that emphasizes its orientation.

Also I have an idea that might interest the GenI owners, (and those who want the tank mounted higher).

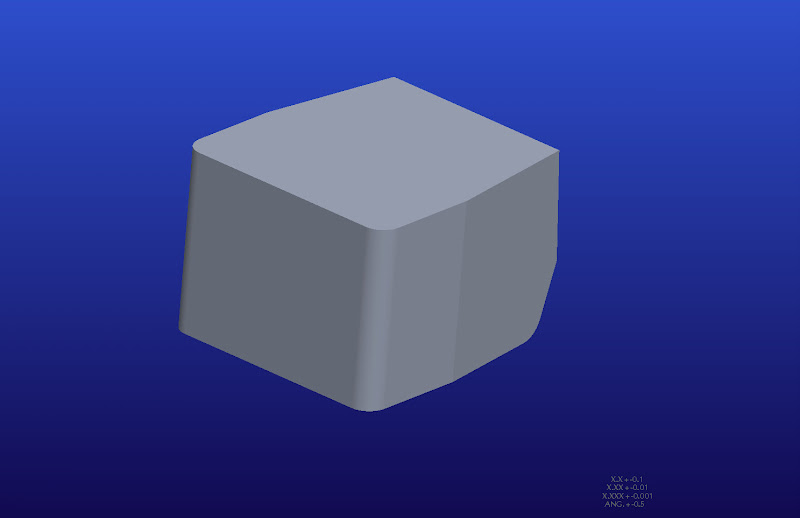
I played with the model a little bit and I came up with this:

Simplified%20TAT.jpg


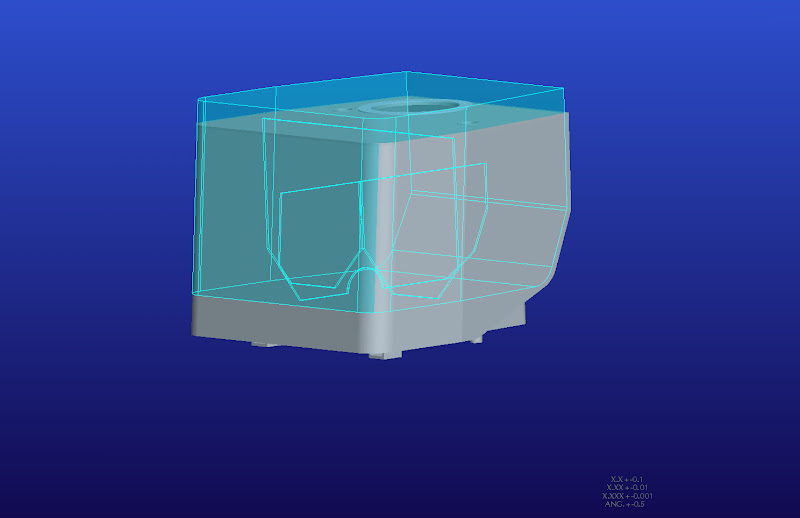
Here's another screen shot showing it compared to the Tag-Along Tank:

TAT%20and%20Simplified%20TAT.jpg


I'm not looking at this one as an improvement, but there are some who might prefer it. The bottom of the tank sits approximately 1-1/2" higher. It will mount on a rack so the sleeves going through tank have been eliminated. Because it's higher, there are two fewer pieces required and one fewer bends (There are three fewer bends if you count the bends on one of the pieces eliminated in this design). In order to maintain the 4.8 gallon volume, the top of the tank would be 1" higher on the bike. Because there are fewer pieces and fewer bends, the tank would be less expensive to produce, but the savings would be eliminated by the cost of the required rack.

Opinions? Interest?

 
Last edited by a moderator:
2.) Why would El Presidente de la Candy Extremo Asociación need a fuel cell, hmmmmm?
Because, well, because, it's like this you see, it's kind of like well, you know, and that's why!


At least this isn't as bad as years past when my tangets were mirror spacing auxiliary light brackets. Now THAT was a tangent!
Now THERE's an Idea! How about some brackets on tank rear to mount a set of Solteks? That way, when in reverse gear, I can tell where I'm not going again? Getting excited now! sn1 and 2 just about done! Woot Woot! (and I just got Krzy8 back from the shop, she's good to rock n' roll again!)

 
Getting excited now! sn1 and 2 just about done! Woot Woot! (and I just got Krzy8 back from the shop, she's good to rock n' roll again!)
I was waiting for the phone to ring all day! I should have taken a picture of it sitting on the welding table. It is really beautiful. And I'm not saying that like people talking about their babies; "OOH Isn't she a pretty baby!"

Maybe tomorrow!

Time to drill holes in Krzy8's tank! Go Don! You Caan DOO EET!

 
Last edited by a moderator:
[SIZE=14pt]Finally !![/SIZE]

DSC05216.JPG


DSC05225.JPG


DSC05226.JPG


DSC05229.JPG


DSC05223.JPG


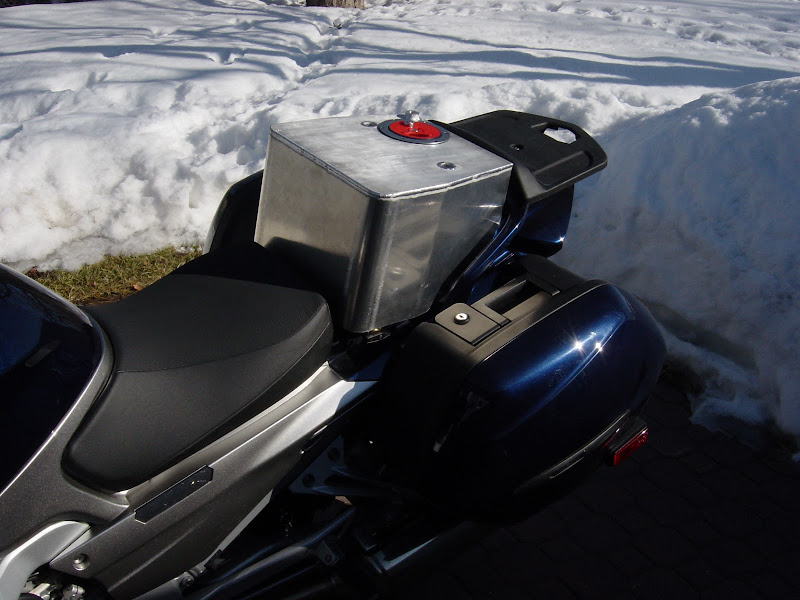
Install is Super Simple. Rear seat comes off, two flange screws through the grab rail are removed, set the tank on, insert flange screws in the tank and tighten.


It's a little tough to make out the flange screw in the photo, but if you click on the photo you'll see a larger image.

Group buy? Wait 'til after the Tanji auction? Wait 'til after it's CBA certified? HHhmmm

edit: One more note, being able to grab a fistful of grabrail is a huge advantage. These photos were taken on a tight little corner of my patio. I would have run out of patience long before getting the bike in there if I couldn't hold on to that grabrail.

I'll get some photos of the tank between some Givi grabrails this afternoon. ;)

 
Last edited by a moderator:
Top