Installing a bulkhead fitting through the fuel pump

Yamaha FJR Motorcycle Forum

Help Support Yamaha FJR Motorcycle Forum:

This site may earn a commission from merchant affiliate links, including eBay, Amazon, and others.

Joe2Lmaker

Well-known member
Joined
Jul 1, 2006
Messages
2,162
Reaction score
50
Location
Fridley, MN
I find myself shooting off on another tangent. I started out installing a bulkhead fitting, a necessary step closer to installing an auxiliary tank.

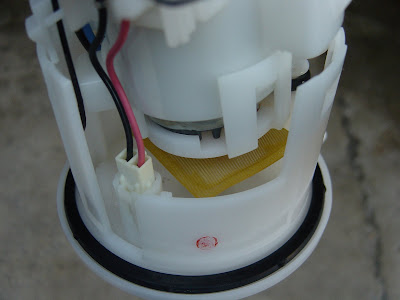
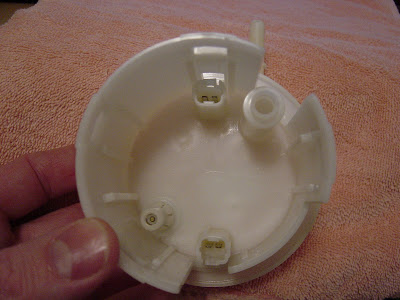
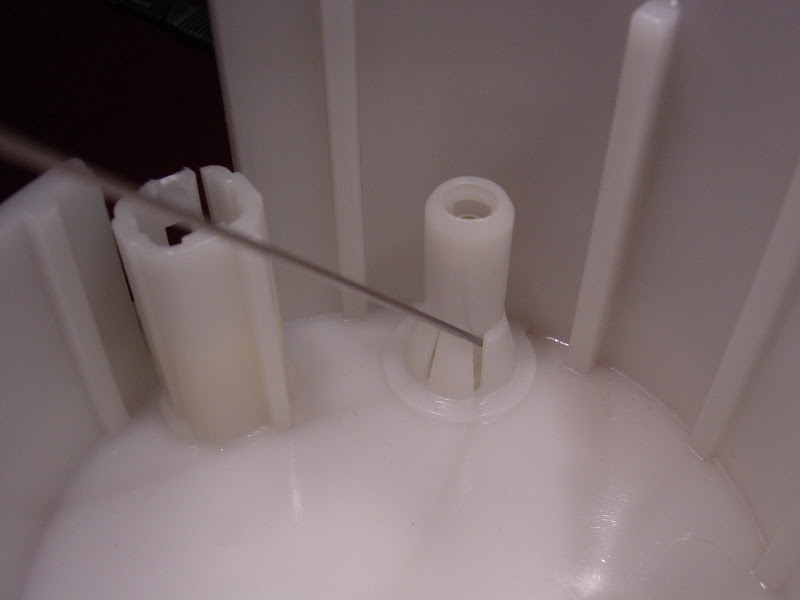
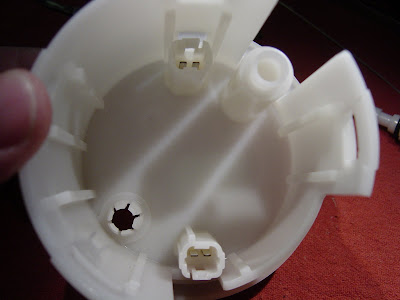
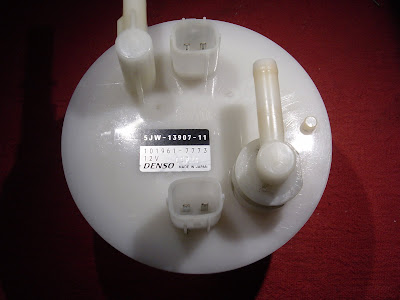
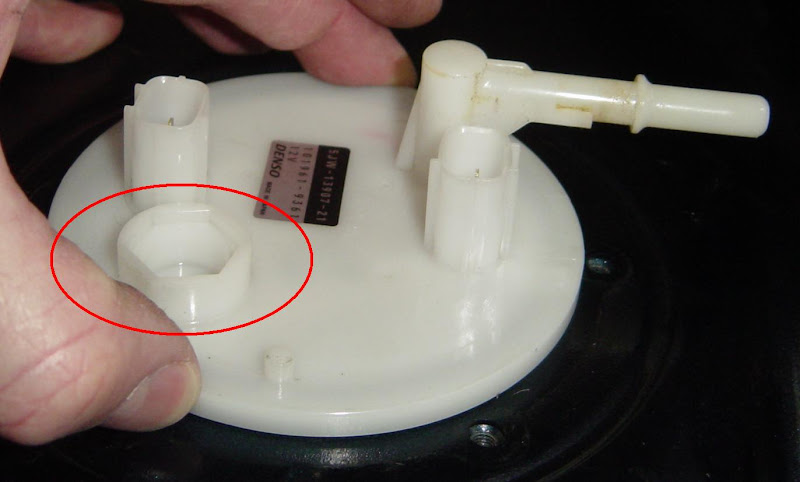
While studying for the project, I saw this feature in the photos:
DSC04178_cropped_marked-up.JPG


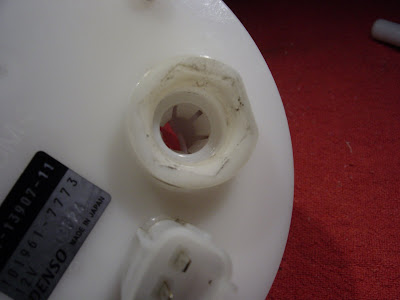
DENSO probably has another fuel pump that uses that feature, but the GenII FJR doesn't need it. Before this part was molded, inserts were removed from the tool (mold) so that the plastic could flow into details that would otherwise be shut-off.

I'm considering adding a fitting here (line from my auxiliary tank) instead of drilling through the FJR's tank. It's too bad this isn't a Walbro fuel pump. I could probably acquire the part instead of reverse engineering this one. ;)

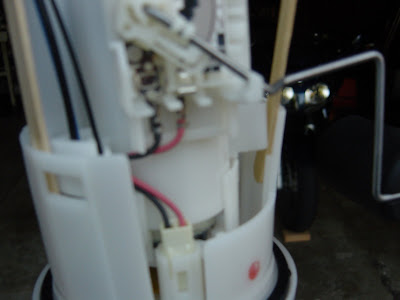
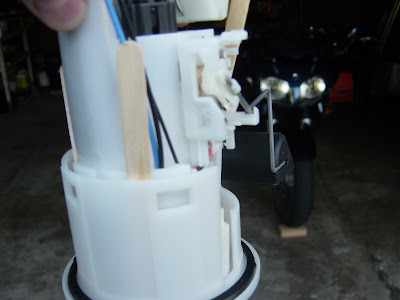
Before any modifications can be made, a little more disassembly is necessary:

Edited for clarity: Gently pry each of the window snap features on the base (flange) off its corresponding catch on pump holder.
DSC04197.JPG


DSC04198.JPG


DSC04199.JPG


DSC04200.JPG


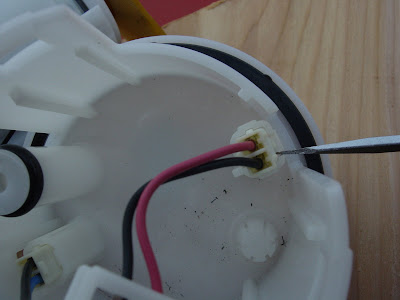
After the base (flange) is separated from the pump housing, remove the connections for the fuel level sending unit and the pump.
DSC04222.JPG
[SIZE=36pt] [/SIZE]
DSC04224.JPG


This is the base after it's separated from the pump housing:

DSC04226.JPG
[SIZE=36pt] [/SIZE]
DSC04232.JPG


Now the fun part...

 
Last edited by a moderator:
I would say that its an excellent idea myself. As a matter of fact, I was looking at doing the same thing on another bike I own. My thought was it would be cheaper to replace a fuel pump if I screwed something up.

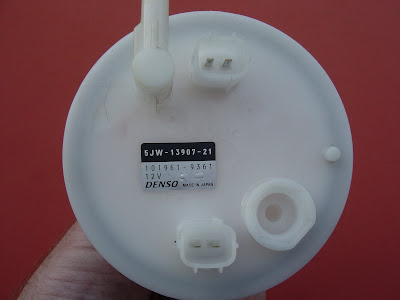
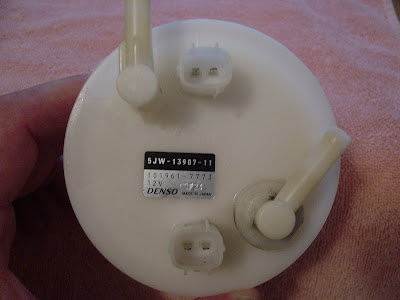
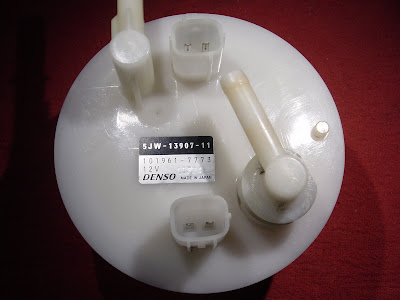
Instead of looking where that molding is, why not look at installing it where the Denso sticker is instead? You'll have a nice flat surface for the bulkhead fitting to fit.

 
Instead of looking where that molding is, why not look at installing it where the Denso sticker is instead? You'll have a nice flat surface for the bulkhead fitting to fit.
This is a photo of a partially disassembled pump:

DSC04219.JPG


When assembled, the filter is just off the bottom of the base(flange/reservoir). There's not much unused space in there.

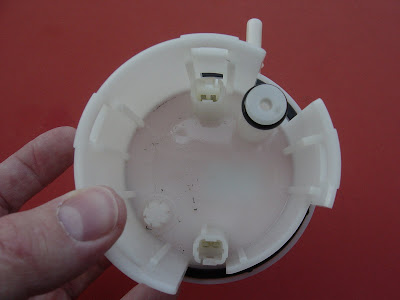
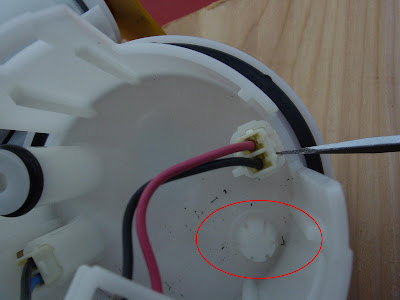
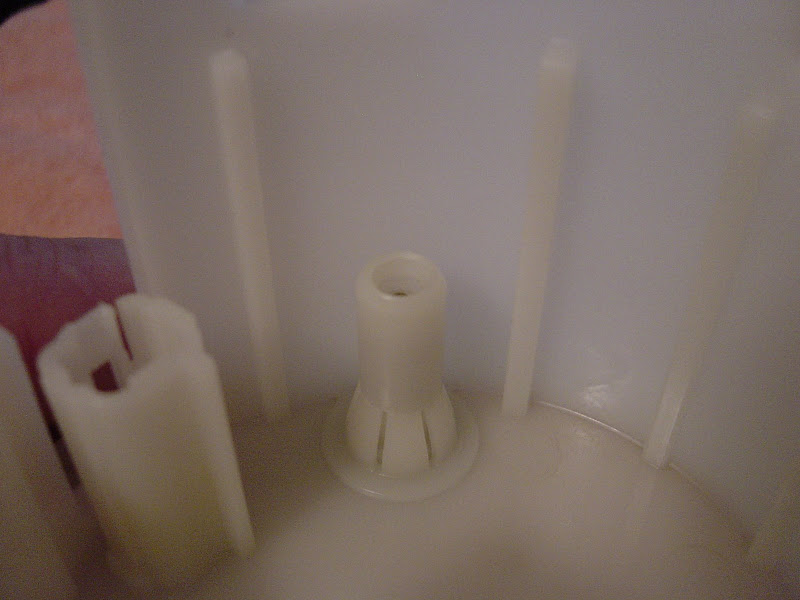
Here's the feature from the inside:

DSC04222_marked-up.JPG


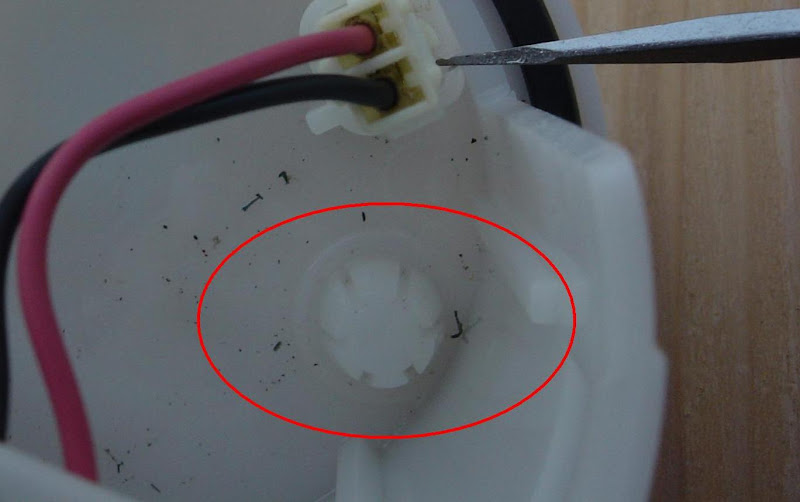
And a close-up:

DSC04222_cropped_marked-up.JPG


Right now I'm leaning toward a round Delrin® piece with an "O" ring. I'm still working on how to retain the thing. I could take advantage of the molded detail. Removing a little material from the center will free up those 6 fins to act as lock tabs. Another option is a "C" clip.

 
Last edited by a moderator:
Right now I'm leaning toward a round Delrin® piece with an "O" ring. I'm still working on how to retain the thing. I could take advantage of the molded detail. Removing a little material from the center will free up those 6 fins to act as lock tabs. Another option is a "C" clip.
Fun to follow your project.

Are you sure that you'll have enough material to hold both sides of the connection so they are solid and can't leak? Remember that the hose is going to be under a vibratory load and you sure don't want to break a hose or have a leak right over the tightly faired engine that is between your legs! This is one of those places where you want some beef.

Bob

 
Might do some research and see what other vehicles uses that pump that use that option. My first thought is, that's the return line for a Gen. I. Might be wrong though.

 
Might do some research and see what other vehicles uses that pump that use that option. My first thought is, that's the return line for a Gen. I. Might be wrong though.
Thanks! You are correct. There is a decent photo here: https://www.fjr1300.info/howto/bulkhead.html

Possibly a Cali thing?

O.K. Attention GenI owners (or Cali owners?) Why are there two lines into your fuel pump?

Edit: Why is there one line in and one line out on the bottom of your fuel pump?

 
Last edited by a moderator:
Might do some research and see what other vehicles uses that pump that use that option. My first thought is, that's the return line for a Gen. I. Might be wrong though.
Thanks! You are correct. There is a decent photo here: https://www.fjr1300.info/howto/bulkhead.html

Possibly a Cali thing?

O.K. Attention GenI owners (or Cali owners?) Why are there two lines into your fuel pump?
Joe, the GenI bikes have a different feed system to the FI - recirculating. This design contributed to the heat, as the fuel would be heated by the engine and then returned to the tank. GenII bikes - well, you know how those are set up.

 
Joe, the GenI bikes have a different feed system to the FI - recirculating. This design contributed to the heat, as the fuel would be heated by the engine and then returned to the tank. GenII bikes - well, you know how those are set up.
Thanks Hal.

Next question: Does anyone have one of those GenI pumps lying around? My guess is that the fitting is sonic welded to the flange. But I'd like to see one.

 
Let us know if it works.
Yeah, I dunno about this, Joe.... it seems problematic to me. The fuel pump's nylon housing is (obviously) no where near as strong as the steel tank, so you're certainly not going to be able to crank down on a bulkhead fitting.

And as Checkswrecks correctly observes, harmonic vibrations in this area are substantial. It's not a problem when you can apply mega-torque as you can installing a bulkhead fitting in a steel tank; the nylon housing of the fuel pump is another matter altogether.

Good luck... please keep us posted!

 
That unused fitting boss, drilled, threaded, with a like material nipple/fitting screwed in using the correct adhesive for the material as a threadlock and sealer, would be at least as strong as any of the nipples used for hoses on the pump base, if not more so. That boss appears to offer plenty of material on both sides of the base for such a purpose. IMHO of course.

 
Last edited by a moderator:
Yeah, I dunno about this, Joe.... it seems problematic to me.
Your concerns are legitimate. The potential for grave injury or even death exists even if this work is done properly.

Hopefully everyone following this thread will heed the warning.

A few more words of caution:

1.)This is not an application for fittings with pipe threads.

2.)The fuel pump flange is Polyoxymethylene (POM), Delrin®, or simply “acetal”. Its excellent solvent resistance means it’s also going to resist glues, thread sealers, etc.

I other words... [SIZE=14pt]DO NOT:[/SIZE]

Drill a hole, thread to NPT. Seal with a fuelproof epoxy.

 
Might do some research and see what other vehicles uses that pump that use that option. My first thought is, that's the return line for a Gen. I. Might be wrong though.
Thanks! You are correct. There is a decent photo here: https://www.fjr1300.info/howto/bulkhead.html

Possibly a Cali thing?

O.K. Attention GenI owners (or Cali owners?) Why are there two lines into your fuel pump?

Edit: Why is there one line in and one line out on the bottom of your fuel pump?
It's a return line for the Gen I. GenII has different FI

 
Thanks to madmike2 I have a GenI fuel pump flange. :drinks:

Here's what it looks like:

[SIZE=36pt] [/SIZE]

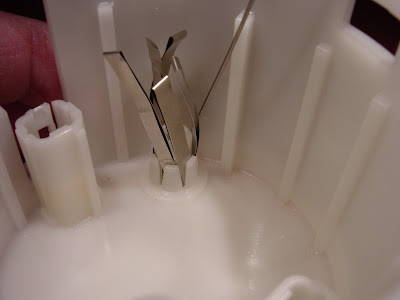
And here's the interesting part:


I can add some arrows to the photo if this description is unclear...

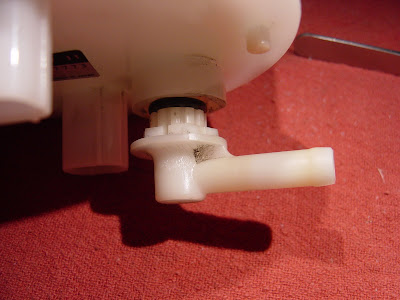
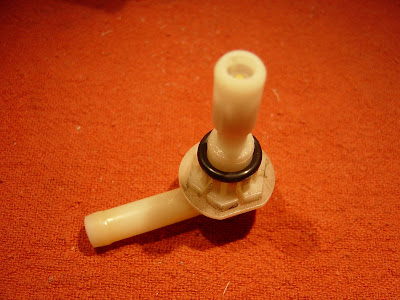
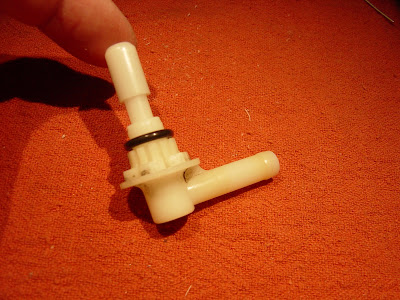
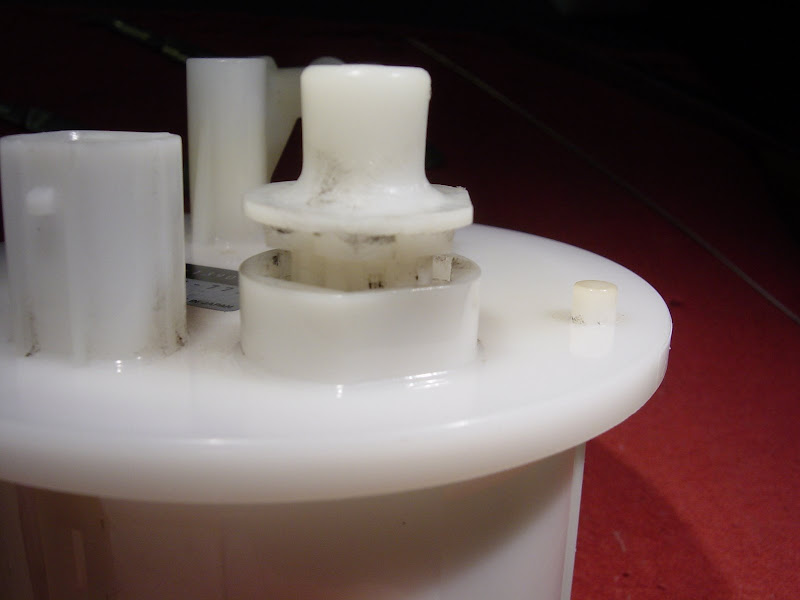
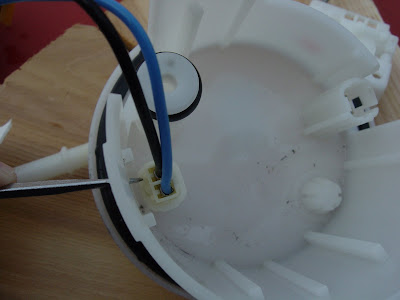
What you see in the photo is the return fitting as seen from inside the fuel pump flange. At the base three of the snap lock features are shown. When the fitting is inserted in the flange, the six snap locks (also known as lock tabs, see link) are deflected by the larger diameter of the fitting. The fitting has a ring with a smaller diameter which the locks snap into. I'm assuming there is an "O" ring in there, but I'm not going to take it apart (yet :unknw: ). On the outside of the flange is a hex shape. That seems to be there only to orient the fitting. It would otherwise spin freely on the snap locks.

There is also a check valve in the fitting. Gravity feed advocates won't like that. Those who have a pump in their auxiliary fuel line might like it, but shouldn't be bothered by it.

 
Thanks to madmike2 I have a GenI fuel pump flange. :drinks:
Here's what it looks like:

[SIZE=36pt] [/SIZE]

And here's the interesting part:


I can add some arrows to the photo if this description is unclear...

What you see in the photo is the return fitting as seen from inside the fuel pump flange. At the base three of the snap lock features are shown. When the fitting is inserted in the flange, the six snap locks (also known as lock tabs, see link) are deflected by the larger diameter of the fitting. The fitting has a ring with a smaller diameter which the locks snap into. I'm assuming there is an "O" ring in there, but I'm not going to take it apart (yet :unknw: ). On the outside of the flange is a hex shape. That seems to be there only to orient the fitting. It would otherwise spin freely on the snap locks.

There is also a check valve in the fitting. Gravity feed advocates won't like that. Those who have a pump in their auxiliary fuel line might like it, but shouldn't be bothered by it.
Im sure this is probably a stupid question but: could you use the whole piece from the gen I on the genII pump and be done with it?

Don't know **** from shine just curious as some day I too will be adding a little capacity.

 
... could you use the whole piece from the gen I on the genII pump and be done with it?
Short answer = I think so.

The added details were intended for those who might be tempted to make a fitting to fit into a modified GenII fuel pump flange. Someone with a little machining skill could do it easily and safely using the same method as Yamaha (or DENSO) used for the GenI.

If you look at the photos, the flange has a long sleeve with an "O" ring on it. That is the line to the fuel rail; the long sleeve slides into the pump holder. The area near the "O" ring is a little different between the GenI and GenII parts, but I don't think that's a big deal.

 
details .. details .. the devil is in the details. It seems that I was so confident about this solution that I skipped a few details.

Thank Warchild for holding my feet to the fire on this one. <Link>

Without further ado, here are the details:

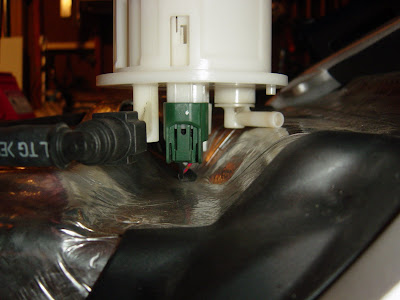
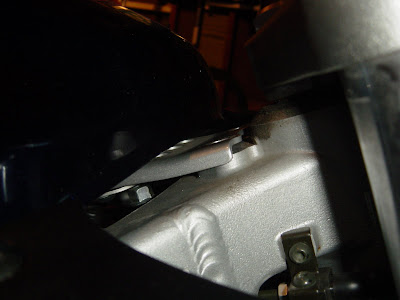
This is the GenI fuel pump flange resting (in its correct orientation on the GenII heat shield) note: the fuel line and electrical connections are not fully plugged in


These photos show that it's a bit of tight fit. It would work, but the fitting and fuel line would be pressing down on the heat shield a little more than I'd like.

[SIZE=36pt] [/SIZE] [SIZE=36pt] [/SIZE]
Click on the photos for larger images. It may be a little hard to see, but there is about 3/16" (4.75mm) gap. I could easily squash that down and tighten everything up, but I had another idea...

I could rotate the fitting, but first I have to take it apart. Remember the lock tabs I told you about??

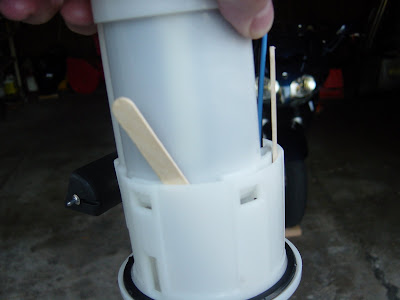
Here's one of them being pried back:


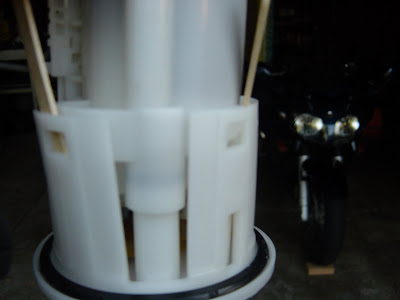
Here, all six of them are being held back (do not try this at home):


After the lock tabs are disengaged, this can be removed:

[SIZE=36pt] [/SIZE] [SIZE=36pt][/SIZE]

See the hex shape in this next photo? That keeps the fitting from rotating. Six keys means I can change the orientation of the fitting in 60 degree increments.


Here's pic showing the inside of the fuel pump flange:


If you look carefully at this photo, you can see I've rotated the fitting to the next index flat:


This next photo shows what 60 degrees looks like:


****! That's not much better.

This is what I was hoping for:


So, I'm confident that I can make a new fitting sans the check valve and it will work perfectly.

So, I suppose I need to post photos of that when it's done. :blush2:

details .. details ..

There won't be any pressure testing for me until the North thaws out again. But seriously, how could this not work?

 
Last edited by a moderator:
Top