2006 FJR Stator Pictures

Yamaha FJR Motorcycle Forum

Help Support Yamaha FJR Motorcycle Forum:

This site may earn a commission from merchant affiliate links, including eBay, Amazon, and others.
Just got back from Sunnyside, having a look at Sparky's '06 FJR.

(Update on his bike: the scrapes/scratches were definitely there, no question about it. Sunnyside already ordered a new windscreen and even paid for overnight express; it's installed on the bike right now. They were still polishing out some of the scratches when I left. Some seem to be polishing out a good bit, but Dan Denchel said he will order whatever panels won't polish up).

Anyway, I took a look at the placement of the 2006 FJR regulator/rectifier.

Check it out: it resides adjacent the shock absorber preload lever, and this R/R is HUGE in comparison with pre-06 R/R's:

2006RR.jpg


So.... let the retrofit game begins! B) B) B) B)

 
Last edited by a moderator:
Warchild,

Just to confirm The R/R is mounted under the crossplate behind the shock?

That's going to be fun with my Ohlins,

I guess they are very confident about the weatherproofing it's going to be liquid cooled in the rain at that location.

Are the connectors the same or are we looking at a splice and solder job?

Chris

 
What about replacing the flywheel?
Oh, without a doubt, that will have to be looked at as well.

Warchild, Just to confirm The R/R is mounted under the crossplate behind the shock?
Correct.

Are the connectors the same or are we looking at a splice and solder job?
I could not ascertain this by the cursory look I gave it, but something tells me that are not quite the same connectors.

Yet, all is not lost. Consider the retro-fit approach: since we obviously have to replace the stator, it will come with the proper 3-white-wire connector foir the new R/R. This is pointed to by the cyan arrow below:

2006RR_wires.jpg


It is the R/R's *output* connector (pointed to by red arrow) that is most likely going to be the problem child. I see a possible splicing job here most definitely. The retro-fit community must pray that this output connector is identical to previous model years. If it isn't, this makes the retrofit project much tougher.

However, if it *is* identical, than all one has to do at this point is cut off the R/R's old output connector (located on the front left frame area, where the early-generation R/R's live), and splice/solder in an appropriate length of equivalent gauge wire such that you can run this output connector back under the seat to the new R/R.

There are, of course, a number of other aspects one needs to think about regarding this retro-fit exercise. As SkooterG correctly observes, we will likely need to look at the '06 flywheel, in addtion to the new stator/gasket/cover and R/R. Then there is the necessary bracketry to retain the new R/R in this position here under the seat. And like BugR suggests, space availability might be an issue for those who already have farkles in this area. Also - and I can't seem to recall from when I had my ABS bike - but doesn't this area have some ABS components from the '04-05 FJR1300ABS models? If so, you '04-'05 ABS dudes might have to find an entirely different location for your retro-fitted R/R.

And by the way, here's a photo of this same area from the RIGHT side of the bike, looking in at the R/R. As you can see, Yamaha has formed a aluminum "box" around the R/R as an apparent protective measure:

2006RRProtectiveBox.jpg


Last edited by a moderator:
There's probably quite a bit more space on the '06 in this area in front of the rear wheel. The swingarm was lengthened approximately 30+ mm (1.3"). The fender/flap will be closer to the shock on the pre '06 bikes.

 
Stupid question...

If it's obvious the hardware for the '06 is different, are the specs reporting this? Just curious!

 
On the '04 & '05 ABS there are no ABS components (or anything else) under the cross bar.

For those who have fitted an Ohlin's this is the bar you have to swap out with the one with the Ohlin's kit so the remote reservoir will fit.

As pointed out the wheelbase is shorter so that might be a factor.

Any chance the new R&R will fit in the same location as pre '06

Another muse

So when they moved the R&R, did anything take it's place?

If it's vacant it might serve as a location for HID ballasts

Chris

 
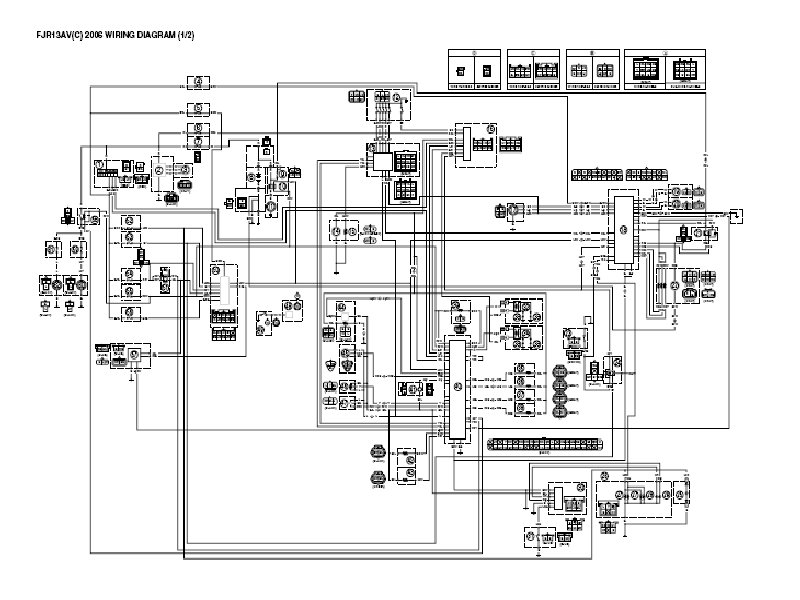
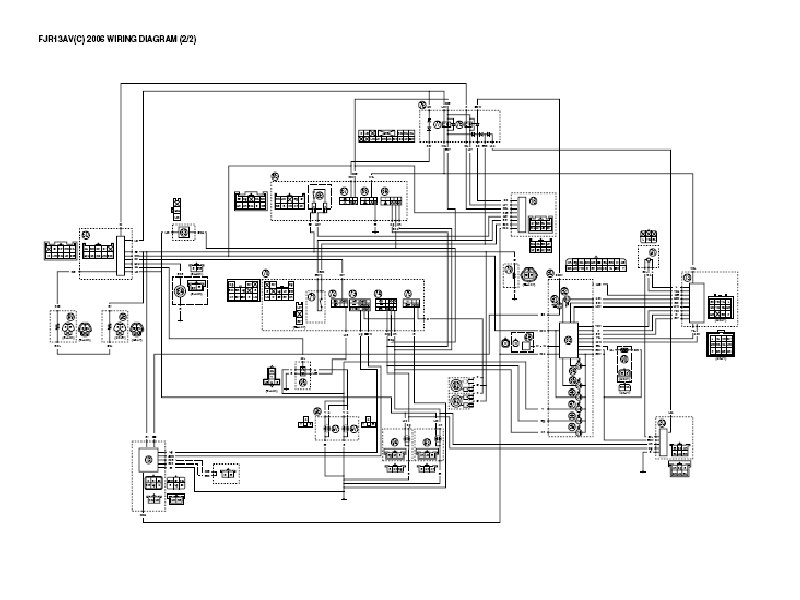
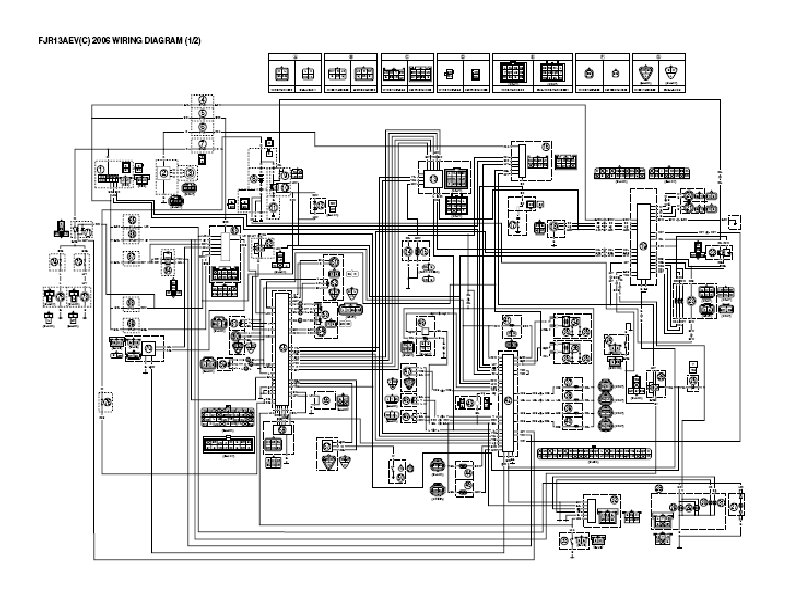
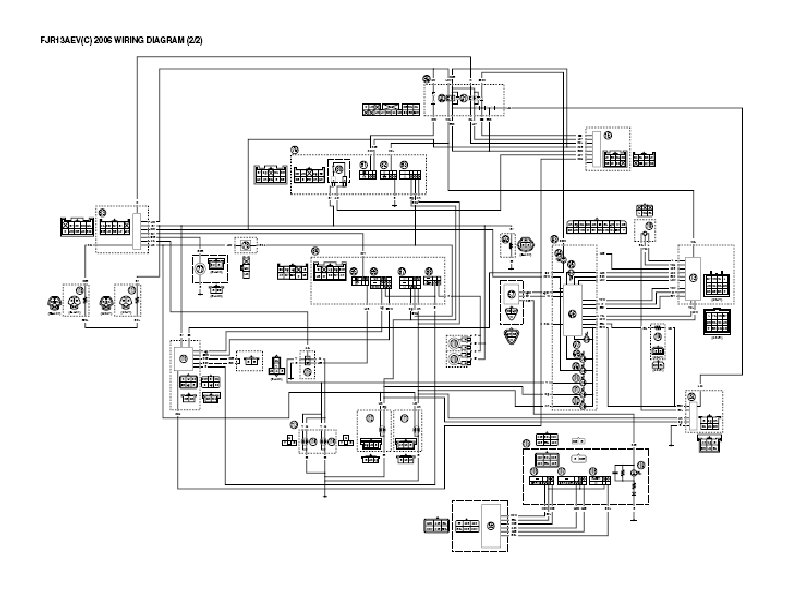
Could you possibly whet our appetite by providing the '06 wiring diagram from your service manual?
Dang Constant Mesh, you left out the work USEFUL :lol: Now would be a good time to use links to larger pixs.

 
Probably wouldn't matter, Ionbeam.

I just played around with copying the PDF pages and trying to save them into a higher resolution and unfortunately, at least with the image manipulation programs that I have, I can't get the pages truly legible once they are in any image format (JPG, GIF, TIFF, etc.)

You can see 'em plenty good in PDF format, but I can't get individual pages out that way since the entire manual is copied as one, single PDF document.

Sorry.

And BTW, Dale (Warchild)... Thanks for closing the other thread about the 2006 manual. At least in this one here we have been able to keep it on-topic. I will take my share of the responsibility for the other one spiralling out of control, and as such, apologize for that. I guess I just don't like it implied I am dishonest.

Dallara

 
Last edited by a moderator:
Edited:

Upon reconsideration, let me edit previous comments and leave it at:

[delete]........................................................[/delete]

Thanks for the good signal to noise ratio :)

 
Last edited by a moderator:
Dallara --

Thanks for the schematics.

One fairly easy way to split individual pages from a large pdf document is to print the individual page to a print file rather than the printer. The print file can be downloaded and then printed by the end user. You pull up the page in the Acrobat pdf viewer and print the page. When the printer driver pops up on the screen before it prints you can select "print to file". You then specify the filename and where to save the file. The file size is quite small -- 200 KB or so.

This file can be printed later on anyone's printer with a simple DOS Command Prompt input in XP.

COPY filename LPT1 /B

assuming your printer is connected to LPT1.

See the following printing tips:

https://www.chami.com/tips/windows/122196W.html

My laser printer can create a very legible drawing from such a file.

Thanks.

 
Last edited by a moderator:
That sounds great, Constant Mesh...

And I will try it when I get home. But that still saves it only as a PRN file, right?

Remember that I can print individual pages perfectly from Adobe Acrobat without a hitch for my own use at home. My problem is to somehow get those individual pages up here in high enough resolution to be useful.

So, if I save those pages to PRN files how do I get 'em up here in high enough resolution to be worthwhile?

Point is, I don't mind, or think I am doing anyone a disservice, etc. if I post specific pages from the manual that can assist everybody a bit. What I am not going to do is post individual pages for every little request of some detail repair. If somebody wants that then they should buy one of the manuals when they are available. Remember, one of the reasons I was able to get this from the dealer is that I paid for a print one in advance and my bike was crate damaged and I would be replacing the damaged parts myself.

I don't mind posting the wiring schematics because essentially those will be used primarily for research purposes.

So, if you can tell me how to get those wiring diagrams up here in sufficient resolution to be helpful, I'm game!

Thanks!

Dallara

 
Last edited by a moderator:
That sounds great, Constant Mesh...
And I will try it when I get home. But that still saves it only as a PRN file, right?

Remember that I can print individual pages perfectly from Adobe Acrobat without a hitch for my own use at home. My problem is to somehow get those individual pages up here in high enough resolution to be useful.

So, if I save those pages to PRN files how do I get 'em up here in high enough resolution to be worthwhile?

Point is, I don't mind, or think I am doing anyone a disservice, etc. if I post specific pages from the manual that can assist everybody a bit. What I am not going to do is post individual pages for every little request of some detail repair. If somebody wants that then they should buy one of the manuals when they are available. Remember, one of the reasons I was able to get this from the dealer is that I paid for a print one in advance and my bike was crate damaged and I would be replacing the damaged parts myself.

I don't mind posting the wiring schematics because essentially those will be used primarily for research purposes.

So, if you can tell me how to get those wiring diagrams up here in sufficient resolution to be helpful, I'm game!

Thanks!

Dallara
I don't know if this will work but:

Print the pages you want to post to a PDF creating program (I use PDF995's free one).

Then when you have the pages you want get someone with a web page to host the pages in PDF format.

 
Slightly off topic.

If you have an Ohlin's rear shock on a pre '06 you can't mount an '06 R&R at that location,

The gas reservoir is in the way.

And if you have an '06 looking for a shock upgrade, this will not fit.

l_mc_46prxlshor.jpg


Chris

 
Well, the change of placement for the R/R may have different causes that have nothing to do with the R/R itself. The 06 is a different bike.
I look upon the newly relocated R/R as a favorable thing.

I never liked the R/R's original placement.... I mean, c'mon, right next to the blazing hot engine bay, and bolted directly to a searing hot frame?! Ideally, you want to place that ******* about as far away from the engine bay as practical, especially *this* engine bay! :blink:

Back in the shock/swingarm area is definitely a lot cooler position for this component to reside....
Mind you, there's not a lot of excess power to heat up the regulator on the 03-05 <_<

 
Last edited by a moderator:
Thanks, BugR...

For the Ohlins info. I already have budgeted for suspension upgrades. I am kind of a hefty boy (as in I like food, too much sometimes... :) ), and though the suspension on the 2006 is pretty good, I would prefer a larger range of preload and damping adjustments, not to mention having the shock sprung for me in the first place.

I was wondering if Ohlins or Wilbers shocks for earlier FJR's would fit, and now I know. Hopefully suspension suppliers will address that issue quickly enough. I suppose they could address this hitch by simply using a remote resevoir rather than a piggyback one. I must say I will probably will go with Ohlins... For a number of reasons, but mostly because they are owned by Yamaha now and because I have a lot of experience with Ohlins shocks internals.

One of the reasons I bought a 2005 Service Manual (and it's here at the dealer's and I pick it up today) is so I could compare things like fork spring length, etc. to see what will fit and what won't on the suspension from previous years. Your observation helps a lot.

Thanks!

Dallara

 
Last edited by a moderator:
Already contacted Wilbers USA to see about what's in the works the '06 FJR for youse guys. Klaus said the chassis change for 2006 will require the factory in Germany to do some re-design effort, which they are doing now.

It doesn't appear as if the OEM shock has changed to any significant degree, so if history is any indication, most of youse guys will be looking hard for a replacement by next summer.


Latest posts

Top