mcatrophy
Privileged to ride a 2018 FJR1300AS
I wanted to give my bike its second clutch soak. The first was done by my dealer, but wasn't the miracle cure for all clutch issues like some have reported.
So, I purchased a cover gasket, and using billfjr's excellent post "08 FJR R&R clutch plates, clutch soaking and comments" as a guide, I did my own.
As is my wont, I photographed things as I went along. It might help someone who still has some doubts about doing it themselves, it hopefully shows every stage.
There are some 56 photographs, anyone who is interested can view them, click here. They are captioned to explain what they show.
As with all my web site's photos, you can click on any thumbnail to get a larger view, clicking on that larger view will get the original photo. Note the originals are quite large files, around 5 Mbytes, but show a lot of detail (where I've got the focus right
 ).
).
Couple (I never could count) of examples (click on image for larger view)
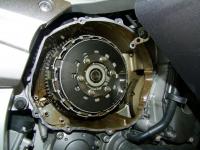
Clutch cover off. Note, no oil drains out (bike's on the side-stand, so even residual oil won't seep out). Note the two dowel pins, 4-o'clock and 9 o-clock on the casing face. They just pull out.

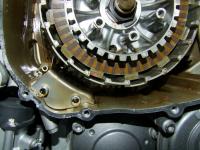
This shows one of the pink spots that is supposed to be between the two triangle marks.

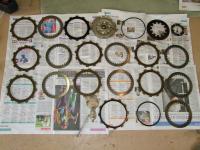
All removed parts laid out, in order, outside face down.

OK, confession time. When I put it back together, I made the mistake of putting all my tools away and tidying up before testing. When I then turned on the ignition, it gave me a "SH__26" error code, which means the clutch movement isn't what is expected. I took it all apart and re-assembled it, taking extra care that everything was seated correctly, and this time it was fine. I suspect either the innermost friction plate wasn't properly round the ring it sits round, or the pressure plate's dogs weren't seated properly in the splines. I've noted the care needed for these items in the captions.
Was it worth it? Well, yes. Firstly, the changes are now much, much smoother, especially the first-to-second change. Secondly, it gave me the excuse, "Got to go for a ride to make sure every-thing's hunky-dory, dear"
 .
.
Hope this helps somebody.
PS. Why the clutch operation wasn't this good after my dealer did the job, I don't know. I know he took it apart because the friction plates weren't correctly aligned (the pink dots weren't where they should be), but all except the innermost and outermost friction plates were dry, albeit with no sign of burnt grease that some have reported.
PPS. If anything is unclear (or even wrong), please let me know so I can clarify (or correct) it, I wrote the captions after it was all working, so from memory. Always suspect with me.
So, I purchased a cover gasket, and using billfjr's excellent post "08 FJR R&R clutch plates, clutch soaking and comments" as a guide, I did my own.
As is my wont, I photographed things as I went along. It might help someone who still has some doubts about doing it themselves, it hopefully shows every stage.
There are some 56 photographs, anyone who is interested can view them, click here. They are captioned to explain what they show.
As with all my web site's photos, you can click on any thumbnail to get a larger view, clicking on that larger view will get the original photo. Note the originals are quite large files, around 5 Mbytes, but show a lot of detail (where I've got the focus right
Couple (I never could count) of examples (click on image for larger view)
Clutch cover off. Note, no oil drains out (bike's on the side-stand, so even residual oil won't seep out). Note the two dowel pins, 4-o'clock and 9 o-clock on the casing face. They just pull out.

This shows one of the pink spots that is supposed to be between the two triangle marks.

All removed parts laid out, in order, outside face down.

OK, confession time. When I put it back together, I made the mistake of putting all my tools away and tidying up before testing. When I then turned on the ignition, it gave me a "SH__26" error code, which means the clutch movement isn't what is expected. I took it all apart and re-assembled it, taking extra care that everything was seated correctly, and this time it was fine. I suspect either the innermost friction plate wasn't properly round the ring it sits round, or the pressure plate's dogs weren't seated properly in the splines. I've noted the care needed for these items in the captions.
Was it worth it? Well, yes. Firstly, the changes are now much, much smoother, especially the first-to-second change. Secondly, it gave me the excuse, "Got to go for a ride to make sure every-thing's hunky-dory, dear"
Hope this helps somebody.
PS. Why the clutch operation wasn't this good after my dealer did the job, I don't know. I know he took it apart because the friction plates weren't correctly aligned (the pink dots weren't where they should be), but all except the innermost and outermost friction plates were dry, albeit with no sign of burnt grease that some have reported.
PPS. If anything is unclear (or even wrong), please let me know so I can clarify (or correct) it, I wrote the captions after it was all working, so from memory. Always suspect with me.
Last edited by a moderator:


