Brake rotor removal

Yamaha FJR Motorcycle Forum

Help Support Yamaha FJR Motorcycle Forum:

This site may earn a commission from merchant affiliate links, including eBay, Amazon, and others.

McRuss

Well-known member
Joined
Jun 21, 2005
Messages
167
Reaction score
4
Location
Lakehills, TX
In preparation for installing a yet-to-be-obtained front wheel, I started to remove the brake rotors. No go. The hex-socket head bolts do not want to come loose. I fear I wallowed out one with a very good allen wrench; they must be lock-tited.

Heat? PB Blaster? All suggestions welcome.

 
Be warned...those babies are really in there good. I had to drill out several of mine using a reverse drill bit. Not fun. Hours of work and patience to ensure that I didn't damage the wheel. I replaced all of mine (even the few that come loose with relative ease).

You're in for some fun.

 
The rotor carrier bolts are assembled at the factory using "Loctite Green", a very high strength threadlocker, and it's very, very tough stuff.

Apply a heat gun to the carrier bolt for a goodly amount of time before trying to break it free. Endevor to use the biggest breaker bar you can find to use on these bolts so you can apply some serious torque.

Good luck... if the assembly line guy got carried away with the loctite green, you're in for a rough time.... :(

 
Last edited by a moderator:
Stripped out 4 of them when I was replacing my rims a couple of years back. Luckily, I was replacing the rims so all I needed to do was drill off the heads and removed the rotor. Ordered some new bolts and was back in business.

 
I stripped the very last bolt. I tried drilling it and using a screw extractor but I was afraid I woiuld break the extractor before the bolt came loose.

One thing to remember is that these are shouldered bolts. I just drilled the top down to the level of the rotor and then snapped the head off the bolt by removing the rotor. At that point, there's plenty of room to carefully get a pair of vise grips onto the bolt's shoulder to remove it. It's not pretty but it worked and didn't mar the wheel or the old rotor.

I heated the damned thing up beforehand too. I wonder how much the benefit of heating the locktite is offset by the fact that heating the bolt causes it to expand and, therefore, be harder to remove.

After replacing the rotors, I had the wheel spun balanced before putting it back on. I'm not sure this is a requirement, but they did add some weight to the wheel.

Cheers,

Jim

 
Last edited by a moderator:
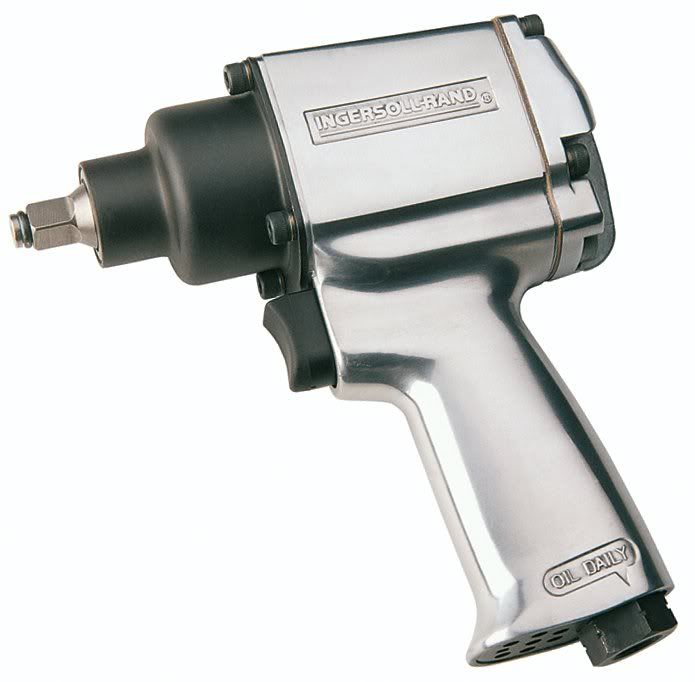
There is a very easy solution to removing the rotor bolts, use an impact wrench and each rotor will be removed in about 30 seconds flat. It worked for me and not one of my rotor bolts suffered in the process.

One like this will work just fine.

225_Impactool_p001_l.jpg


Without this, they are tight as all hell and you will probably be stripping out bolt heads and lots of skinned knuckles along the way. Add to that many long sentences involving well known 4 letter words. ;)

 
Last edited by a moderator:
Why would an air impact tool help with high-strength loctite?

With all high-strength threadlockers, the key is heat and don't be shy with the heat gun. Once you've got it hot enough to melt the threadlocker, then you can use the tool of your choice although with an allen fastener, a brand-spanking new bit is not a bad idea.

- Mark

 
Heat gun shmeat gun... I used a small butane torch to heat up the area around the nuts.... didn't strip a single one when I was putting on my ABM rotors.... Thanks to TeeRex for the advice...

 
Last edited by a moderator:
I stripped the very last bolt.  I tried drilling it and using a screw extractor but I was afraid I woiuld break the extractor before the bolt came loose.
One thing to remember is that these are shouldered bolts.  I just drilled the top down to the level of the rotor and then snapped the head off the bolt by removing the rotor.  At that point, there's plenty of room to carefully get a pair of vise grips onto the bolt's shoulder to remove it.  It's not pretty but it worked and didn't mar the wheel or the old rotor.

I heated the damned thing up beforehand too.  I wonder how much the benefit of heating the locktite is offset by the fact that heating the bolt causes it to expand and, therefore, be harder to remove.

After replacing the rotors, I had the wheel spun balanced before putting it back on.  I'm not sure this is a requirement, but they did add some weight to the wheel.

Cheers,

Jim
Heating will definintely help to break them loose. The area around the bolts will expand as well, not just the bolts. :D

 
Why would an air impact tool help with high-strength loctite?
With all high-strength threadlockers, the key is heat and don't be shy with the heat gun. Once you've got it hot enough to melt the threadlocker, then you can use the tool of your choice although with an allen fastener, a brand-spanking new bit is not a bad idea.

- Mark
An impact will beat steady torque in removing difficult bolts 9 out of 10 times. This tip was right on.

 
Yep, that's a 1/2 inch drive impact gun and puts out over 100 ft. lbs of torque at each impact stroke, it will always beat green locktite.

 
Yep, that's a 1/2 inch drive impact gun and puts out over 100 ft. lbs of torque at each impact stroke, it will always beat green locktite.
Not if the allen key strips.

I'll acknowledge that the impact action may tend to break loose the bond of the loctite a bit and help things out, but I don't think it is good advice to recommend an air impact tool w/o heat as the final solution for high-strength thread locked bolts. The data sheets on loctite talk about heat for removal, not air impact tools.

- Mark

 
Last edited by a moderator:
This procedure worked for me.

1. Use a gas welding tourch with a small tip size and apply heat to the top of the bolt. This will concentrate the heat into the threads of the bolt and break the locktight free. Do't get the bolt too hot (not glowing red).

2. While the bolt is hot take a good size hammer and wack the top of the bolt (be sure to support the wheel). This will slightly deform the allen head. Don't hit the bolt too hard or you will not get the allen wrench into the bolt. The idea is to tighten up the fit of the allen wrench.

3. Take a good quality allen socket and hammer it into the slightly deformed allen bolt.

4. Use a 1/2" air wrench and 120+ psi of air and remove the bolt. It should twist right out. DON'T reuse the bolts when installing the rotor, get new ones.

 
Yep, that's a 1/2 inch drive impact gun and puts out over 100 ft. lbs of torque at each impact stroke, it will always beat green locktite.
Not if the allen key strips.

I'll acknowledge that the impact action may tend to break loose the bond of the loctite a bit and help things out, but I don't think it is good advice to recommend an air impact tool w/o heat as the final solution for high-strength thread locked bolts. The data sheets on loctite talk about heat for removal, not air impact tools.

- Mark
True. Actually, the combo method is best. A wheel is just not something a guy wants to mess up, so patience and care is the best way to go, no doubt.

 
Good stuff, all. All I have to save is the rotors as the wheel is bent and thus not a concern. I'll try the "heat & beat" trick, sounds like a good combination of all these tips. As pointed out, keeping the allen wrench from stripping the socket head is the biggest problem.

Again, thanks for all the help, will give it a go this weekend.

Anyone have an extra front wheel for an '04 (or '05)?

 
Top