UselessPickles
Making Grand Canyon replicas from air boxes...
I was nearly rear-ended recently while slowing to make a turn at a fairly major intersection (with my turn signal on and using my brakes, of course). I started looking for some additional attention-grabbing lights on the back of my bike. I decided to go with some LED bars that are called "Knight Riderz" for reasons that will become obvious. This was my first lighting/wiring project. Hopefully my installation notes will give other first-timers some ideas and courage.
Videos of the lights in action:
A photo of the final result for the ADHD sufferers among us:
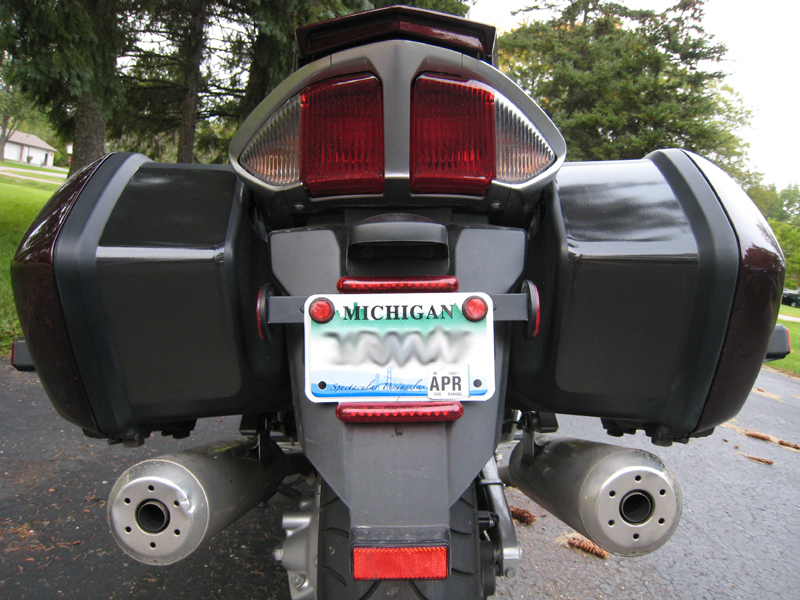
Unfortunately, the two LED bars are not operating at the same speed. When in the running-light mode, they start off completely opposite of each other (what I wanted) but gradually become synchronized, then opposite again... like watching your own turn signal in comparison to another vehicle's turn signal. Maybe some electronics experts out there might have some ideas on how I could solve this?
I discovered that light-duty brackets can easily be created with a sheet of plexiglass and a dremel, seen here being held in place with a screwdriver:
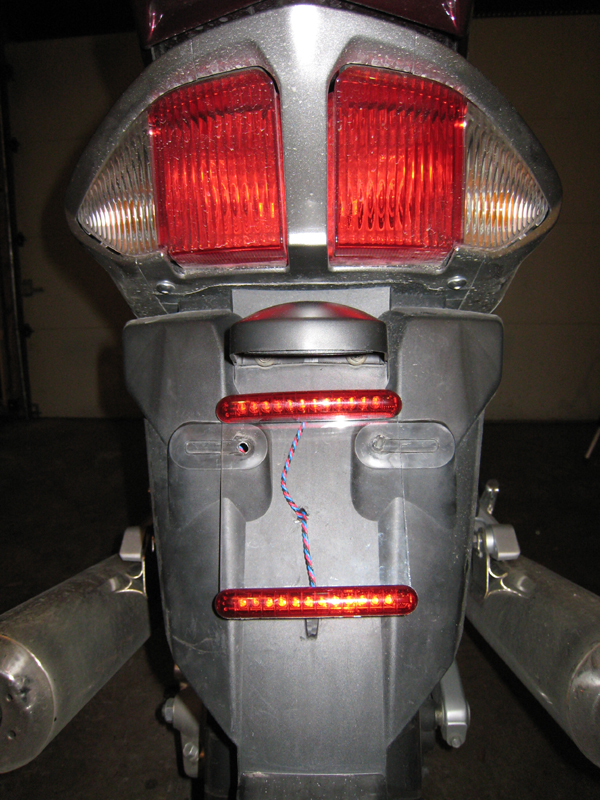
When the license plate bracket is installed through the plexiglass bracket, the bracket will stick out above and below the license plate, providing mounting surfaces for the LED bars. The above photo shows both braids of wires running back through the fender, but I ended up splicing the wiring together into a single braid of wires before it goes through the fender. You may also notice that I had to remove the little fin on the fender just below the license plate.
Here you can see the (new, single braid) wiring behind the fender, going a fresh hole into the tail of the bike:
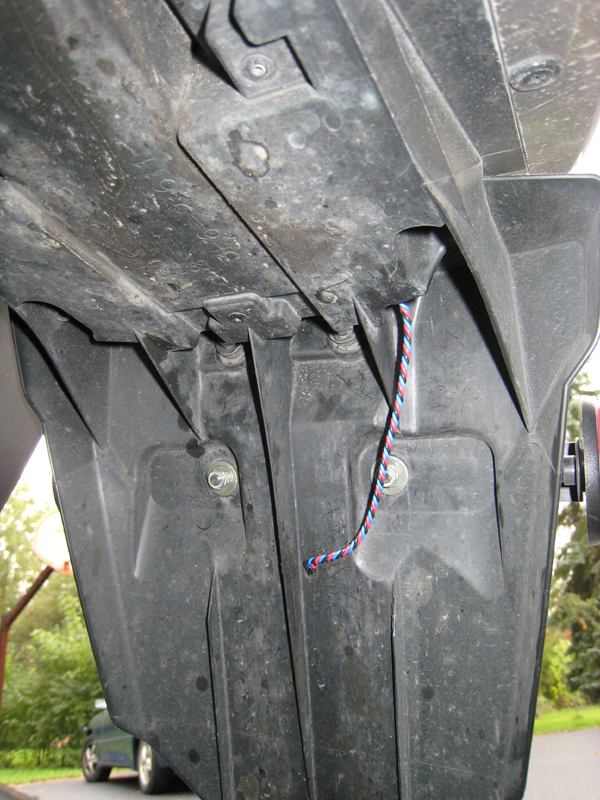
I should've put some type of protective covering on the wiring before I routed it and made the final connections. I guess I'll just wrap it with some electrical tape, then come up a clever way of securing it to the back-side of the fender so it doesn't just dangle (it'll probably involve that license plate bracket bolt near the wiring). I used a router bit for the dremel to cut the hole on the back-side of the tail tray, rather than drilling a straight up through the bottom.
Here, you can see my soldered and electrical-taped connections into the bike's tail-light wiring:
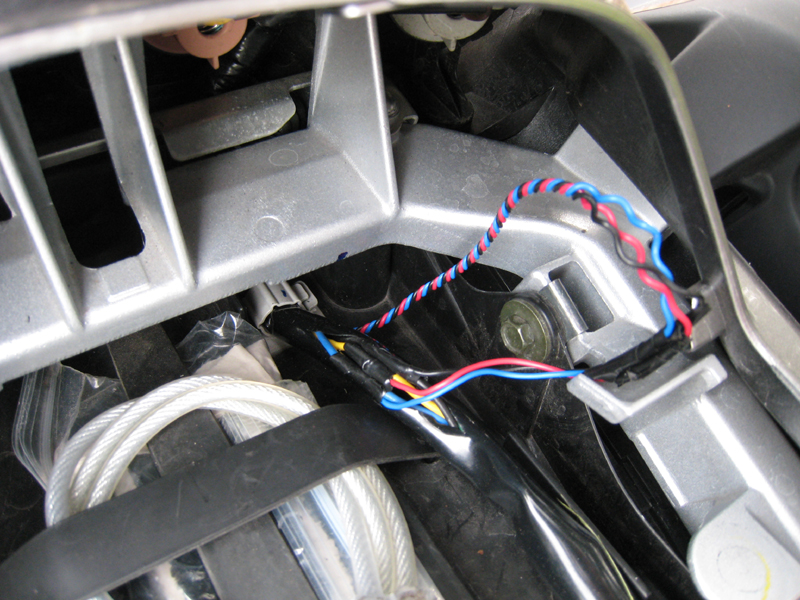
The wires can be tucked in and hidden nicely. I'm sure I'll need to cut the wires and add connectors someday if I take the tail of my bike apart. For now, they'll stay hard-wired. A multimeter and a needle (for poking through the insulation to the wire) makes it easy to identify the running light wire (constant 12v) and the brake light wire (12v only when brakes engaged). The black wire is ground.
And, finally, a close-up of one of the LED bars mounted to the plexiglass bracket:
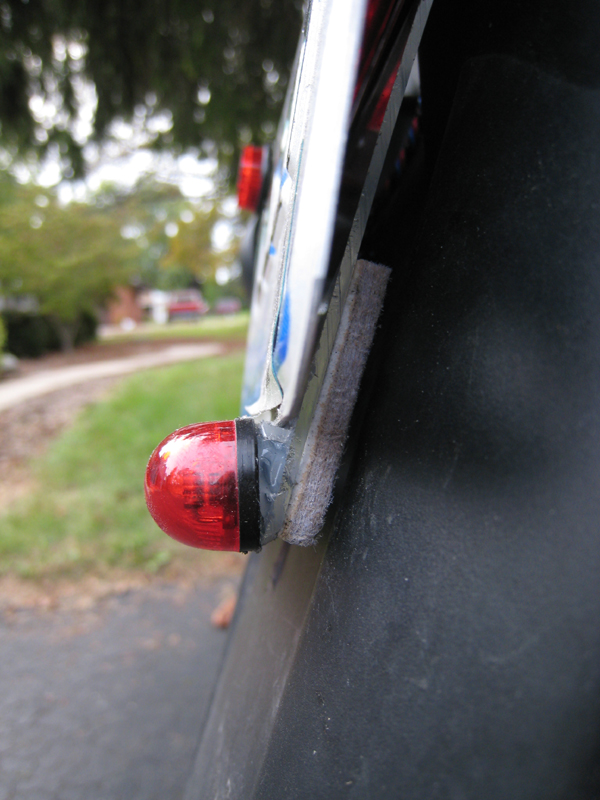
The LED bars come with 3M double-sided tape already mounted to them. I originally mounted them directly to the plexiglass sheet with this tape. I didn't realize the LED lights are so directional (only look very bright from a small range of viewing angles) until after they were mounted. I removed them with some goo-gone, a small screwdriver and some patience, then created small shims with plexiglass and re-mounted them with plenty of silicone adhesive. They are now very bright when viewing from behind, instead of shining up at the sky. Also visible in this photo is an adhesive felt pad to prevent possible vibration noise between the fender and the plexiglass.
The floor is open for discussion
Videos of the lights in action:
A photo of the final result for the ADHD sufferers among us:

Unfortunately, the two LED bars are not operating at the same speed. When in the running-light mode, they start off completely opposite of each other (what I wanted) but gradually become synchronized, then opposite again... like watching your own turn signal in comparison to another vehicle's turn signal. Maybe some electronics experts out there might have some ideas on how I could solve this?
I discovered that light-duty brackets can easily be created with a sheet of plexiglass and a dremel, seen here being held in place with a screwdriver:

When the license plate bracket is installed through the plexiglass bracket, the bracket will stick out above and below the license plate, providing mounting surfaces for the LED bars. The above photo shows both braids of wires running back through the fender, but I ended up splicing the wiring together into a single braid of wires before it goes through the fender. You may also notice that I had to remove the little fin on the fender just below the license plate.
Here you can see the (new, single braid) wiring behind the fender, going a fresh hole into the tail of the bike:

I should've put some type of protective covering on the wiring before I routed it and made the final connections. I guess I'll just wrap it with some electrical tape, then come up a clever way of securing it to the back-side of the fender so it doesn't just dangle (it'll probably involve that license plate bracket bolt near the wiring). I used a router bit for the dremel to cut the hole on the back-side of the tail tray, rather than drilling a straight up through the bottom.
Here, you can see my soldered and electrical-taped connections into the bike's tail-light wiring:

The wires can be tucked in and hidden nicely. I'm sure I'll need to cut the wires and add connectors someday if I take the tail of my bike apart. For now, they'll stay hard-wired. A multimeter and a needle (for poking through the insulation to the wire) makes it easy to identify the running light wire (constant 12v) and the brake light wire (12v only when brakes engaged). The black wire is ground.
And, finally, a close-up of one of the LED bars mounted to the plexiglass bracket:

The LED bars come with 3M double-sided tape already mounted to them. I originally mounted them directly to the plexiglass sheet with this tape. I didn't realize the LED lights are so directional (only look very bright from a small range of viewing angles) until after they were mounted. I removed them with some goo-gone, a small screwdriver and some patience, then created small shims with plexiglass and re-mounted them with plenty of silicone adhesive. They are now very bright when viewing from behind, instead of shining up at the sky. Also visible in this photo is an adhesive felt pad to prevent possible vibration noise between the fender and the plexiglass.
The floor is open for discussion


![fjackets Real Lambskin Leather Biker Jacket — Quilted Cafe Racer Zip Up Moto Leather Jackets For Men | [1100085] Johnson Brown, XL](https://m.media-amazon.com/images/I/41I7Pm1f+vL._SL500_.jpg)


