Datel installed.

Yamaha FJR Motorcycle Forum

Help Support Yamaha FJR Motorcycle Forum:

This site may earn a commission from merchant affiliate links, including eBay, Amazon, and others.
I will finally be installing my Datel soon. Gonna try a bezel-less 'clean' install, but I have no idea on how to do this without making a complete mess.
So somebody throw me a bone, here!

How did you guys make such a nice rectangle to get the Datel to fit in so snugly?

Procedure? Tools?

I started by removing powerlet and drilling a new hole for it. I took the old powerlet hole and traced in pencil the bezel I planned on installing. Using an xacto knife slowly removed plastic until it was a tight fight. The Powerlet hole was a perfect starting point. I only had to remove the four coners of the rectangle.

datel.jpg


I hope this helps,

Dave

 
Stuck mine on the right side of the steering head with mounting tape, just above the black clamp that holds the four lines, far enough foward that the meter clears the fork leg at full lock. Wires can be run thru the chase in the steering head to the battery terminals..No panels to cut..

 
I will finally be installing my Datel soon. Gonna try a bezel-less 'clean' install, but I have no idea on how to do this without making a complete mess.
So somebody throw me a bone, here!

How did you guys make such a nice rectangle to get the Datel to fit in so snugly?

Procedure? Tools?


Skoots,

I took the D panel off the bike to my work bench and covered the top surface of the panel with some masking tape. The real kind that sticks, not the blue painters tape. Holding the bottom edge of the Datel meter in the position you want it (be sure to check what stuff will be behind it when in place first), trace around the meter with an exacto knife, through the tape. Be very careful and don't slip here or you will gouge your panel.

Remove the rectangle of tape where you will be cutting away the plastic. Drill holes in the 4 corners of the rectangle. Use a coping saw to cut away the rectangle but leave a little extra plastic behind on the panel. In other words, this is the rough cut, don't cut too close to the edge.

Finally, file the edges of your rough cut hole, and get pretty close to the tape edges. Keep trial fitting the meter in place until you get a tight fit.

The most important tool to have is patience. If you mess it up you can always just go with the bezel. ;)

 
Last edited by a moderator:
Well, after nearly six years and 185,000 miles I finally got around to installing a Datel voltmeter. :eek:

:yahoo:

Thanks for the help and advice everybody! :clapping: Once I got past the two days of thinking about how I wanted to do this, it was a relatively easy procedure. I was going to install it in the 'D' panel in nearly an identical location as Fred's. But, I decided I didn't want to deal with the wires every time I removed the 'D' panel. So I put it in the painted faring piece right next to the 'D' panel. That piece almost never gets removed.

And as ionbeam recommended in another thread, I purchased several quality sealed switches for the Datel. But I didn't use them. :blink: They were too big. There would have been room in the 'D' panel, but there goes that PITA wires issue again. So I used one of the micro-toggle switches I have on hand that were purchased to use an aux light switch. Maybe I'll get to that at 300k. :p

I am wondering how the little micro-toggle wil do in the long-term and with weather, but it will be simple to remove from the circuit if necessary.

Ok, so withour furter adieu:

Datel1.jpg


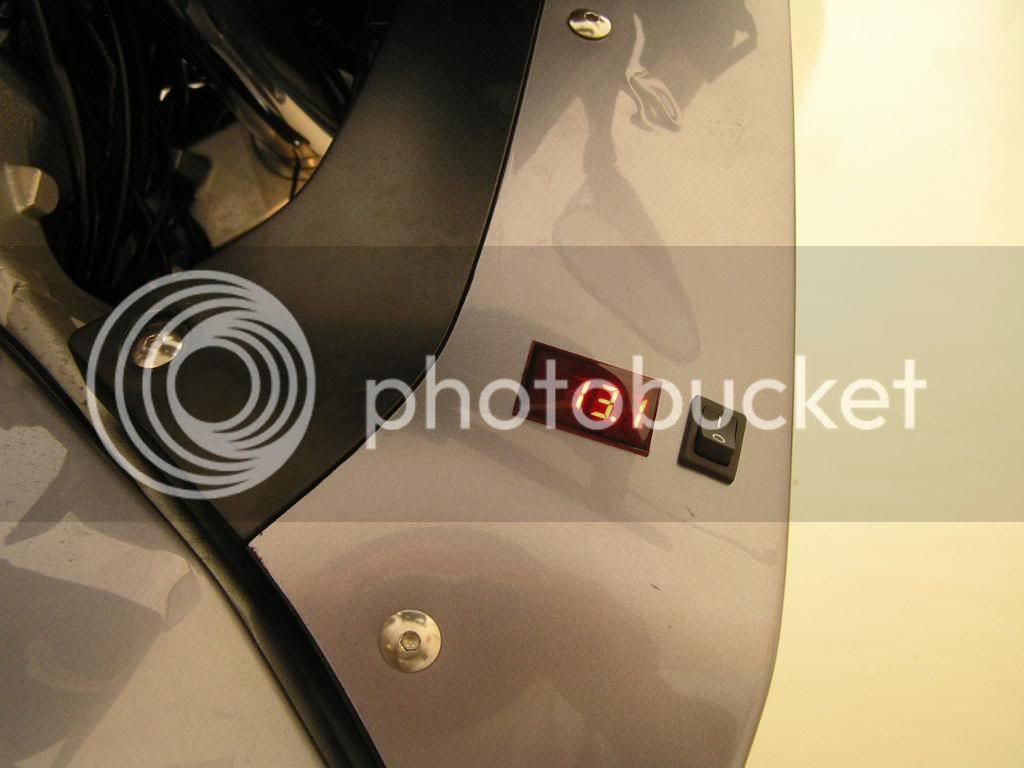
+2. The "bezel-free" look is the bomb-diggety.

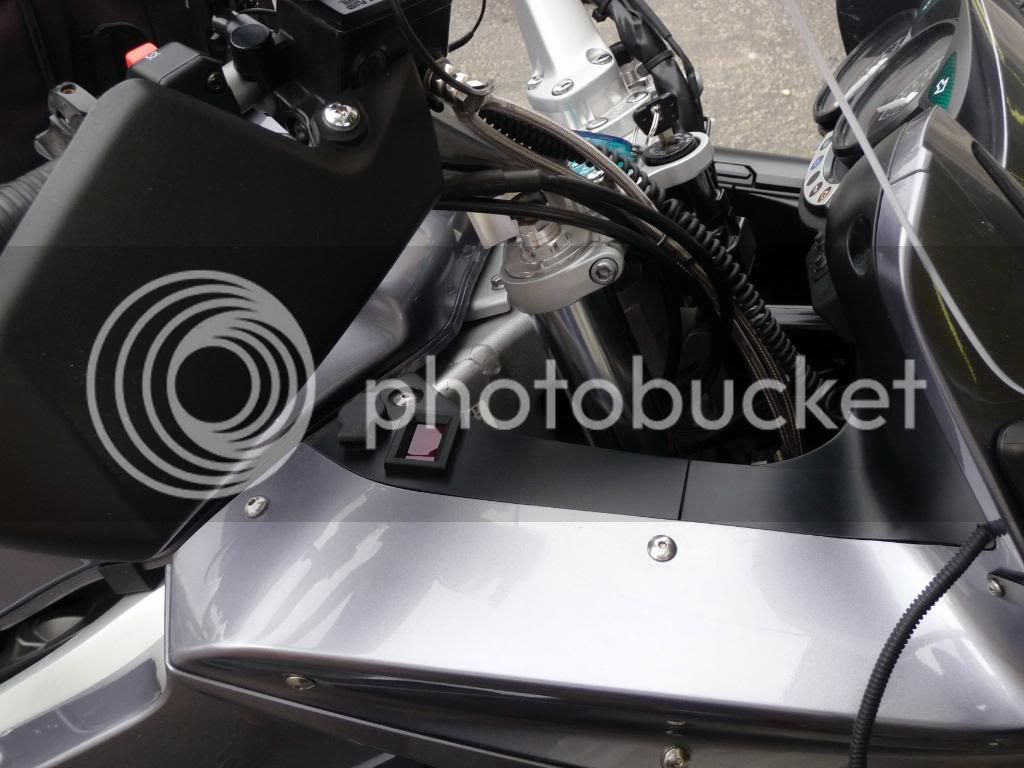
As I mentioned privately, dealing with the wiring in the "D" panel is not all that big of a handicap, but having the meter in the painted faring panel is a good idea. It's not like you are going to ever want to remove the thing. They are just too damn handy. The Datels are also about as reliable as a brick, so you should never have to replace it.

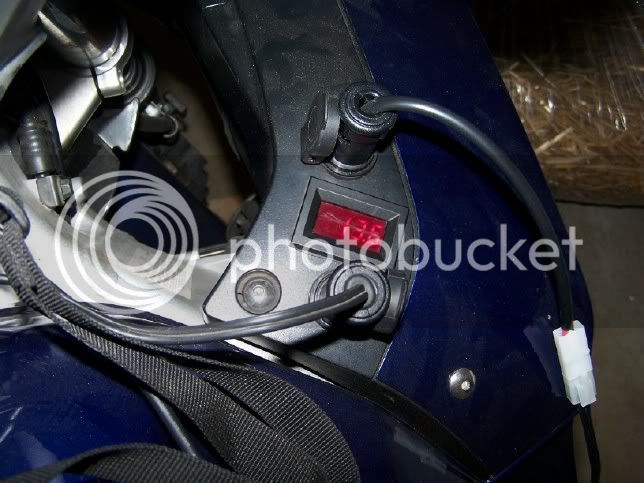
I have come to the conclusion that having the meter direct wired to the battery through a manually operated switch (like "G" did) is the better way to go. I presently have my Datel fed via my 12V (key-switched) accessory relay, which in addition to the Datel meter, also provides power to heated grips, the FF50 Aux light's relay (yes I have one relay controlling another relay ( :blink: ), and my AVCC. My intention was to automatically switch off the meter to prevent draining the battery down if some dumb ass (that would be me) forgets to turn it off.

But I am now convinced that, with the low current drain that these meters draw, this would be a moot point. If I left it on by mistake I believe it would take weeks before the battery would be substatially drained down. (No, I never got around to doing that experiment last winter...)

Having the meter wired directly through the switch on dedicated (non-shared) wiring back to the battery will provide superior diagnostic accuracy of the battery and charging system, which after all is the point of having the meter on-board. Being able to see the battery voltage before turning the key switch on and subsequently placing a load on it will be valuable information.

I'm thinking about rewiring mine like Skooter's real soon. Of course I'll be leaving mine in the D panel though... ;)

 
I debated on where to install my Datel. I wound up using the D panel, because I already had a Powerlet mounted there, so it was already a hassle to remove the panel. I put just enough slack in the Datel wiring that the panel can hang off to the side for most panel-off situations without scratching anything.

 
where'd ya get the body-colored anodized allen screws?

Nice clean install. Except for you're missing the C and D panels. Did you misplace them? :unsure:

Some of the cool kids leave off the big bezel thingee and put it right in the "D" panel. Of course then they wish they didn't every time I they have to take off the D panel... :blink:

2329832130098858932S500x500Q85.jpg
 
I want to try the Iggy install and add some blinker lights also to my FZ1 mirrors.

 
Last edited by a moderator:
I put mine in the top of the C panel, which keeps it in my line of sight better. It wouldn't fit flush, so I used some black RTV to form a bezel, and trimmed it up after it set. No pics of it, somehow, I'll see if I can remedy that.

As for dealing with wires for panel removal, what's so frickin hard about a single 2-wire connector??!??!?!

Wired it on the relay that's switched by the key, so it's on with the key. Folks have said that's not an accurate reading, but it is. Maybe it wouldn't be if I had 2 decimal places. . . . .

 
where'd ya get the body-colored anodized allen screws?

Nice clean install. Except for you're missing the C and D panels. Did you misplace them? :unsure:

Some of the cool kids leave off the big bezel thingee and put it right in the "D" panel. Of course then they wish they didn't every time I they have to take off the D panel... :blink:

2329832130098858932S500x500Q85.jpg

Ah, yes. They came with the bike. Previous owner was a bling-meister and bought a bunch of blue anodized stuff for it before he decided he was too short for an FJR. Along with the old-color Pure-One filters, it makes my FJR uniquely mine. Ive been busted on this apparent "blue fetish" before: linky ;)

 
I have 2 Powerlets (one switched, one unswitched) installed in D panel. I decided to try to squeeze the Datel in between the two...figuring that if I screwed up, I could always replace the D panel and reposition all 3. I took my time and...VOILA! I now have a Datel between 2 Powerlets. Works for me.

 
I promised pics, too, so here. There is a gear indicator above the bike's LCD panel, and the voltmeter is at the top of the C panel. I chose that position because I don't have to look down so far for it.

Voltmeter1.jpg


Voltmeter2.jpg


I put mine in the top of the C panel, which keeps it in my line of sight better. It wouldn't fit flush, so I used some black RTV to form a bezel, and trimmed it up after it set. No pics of it, somehow, I'll see if I can remedy that.
As for dealing with wires for panel removal, what's so frickin hard about a single 2-wire connector??!??!?!

Wired it on the relay that's switched by the key, so it's on with the key. Folks have said that's not an accurate reading, but it is. Maybe it wouldn't be if I had 2 decimal places. . . . .
yes, like Walter advised, every wire to the upper panels like that should have a connector inline somewhere for easy removal :blink:

just sayin' :rolleyes:

 
Here's the piccie...

DatelInstallation.jpg


The lower Powerlet is for switched power. The upper Powerlet is used for the battery tender.

 
Last edited by a moderator:
Cool. It really did happen!! ;)

Seriously, both are good installs. I especially like the "high mount" in the C panel for functionality, though it isn't as pretty. Function precedes form in that one? :unsure:

 
Top