Drain Oil before removing Oil Pump/Timing Cover?

Yamaha FJR Motorcycle Forum

Help Support Yamaha FJR Motorcycle Forum:

This site may earn a commission from merchant affiliate links, including eBay, Amazon, and others.

user 17635

Well-known member
Joined
Mar 9, 2009
Messages
92
Reaction score
8
Maybe this is a dumb question, but I cannot find any definitive answer. I am in the middle of a valve check on my 2006 FJR.

I have drained the coolant and removed the valve cover to expose the cams. The next step will be to check the valve clearances. I know I can rotate the engine with the rear wheel, and I may do that for the check, but if I need to remove that side cover, do I need to drain the engine oil first?

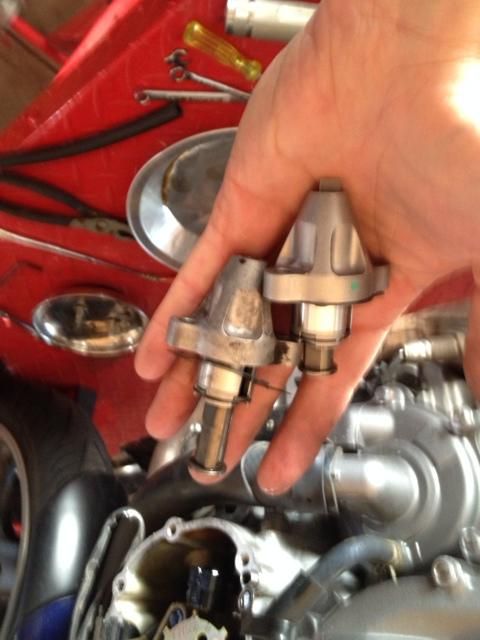
Even if none of the valves need to be adjusted, I might replace the CCT, which will necessitate removing the timing cover anyway. I haven't made up my mind on that one yet.

Thanks!

 
Also you can use a 17mm socket on the bolt at the end of the crank shaft under this cover, no need to turn that rear wheel. Either remove the cover, or just un-screw the plug to gain access. If you do replace the CCT (and you should if it has never been done), the cover will come off with the bike on center stand yet the oil level is still a ways below it. If you do this, it would be a good idea to have a new gasket available in case the old one tears upon removal.

Brodie

rolleyes.gif


Last edited by a moderator:
Hey Ken...

I LOVE that video you made..... a real eye-opener for me as I was very surprised how little oil is getting flung off the crank (also amazing how fast things are spinning even at a high idle!).

If I ever have my clutch cover off, I plan to do a similar video clip except I'll drop it into gear to illustrate how the center of the clutch bangs to a halt (the infamous "clunk").

And I agree with Brodie, while you have it apart, change the CCT!


Regards,

Mr. BR

 
Hey Ken...I LOVE that video you made..... a real eye-opener for me as I was very surprised how little oil is getting flung off the crank (also amazing how fast things are spinning even at a high idle!).

...

Regards,

Mr. BR
Me got one as well
smile.png


Shows they are all the same - at least two of them, anyway.

 
I look down the spark plug hole with a flashlight and bump the starter to get the piston near TDC on the compression stroke (doesn't have to be exact). I go in firing order (1-2-4-3).

Dan

 
Hey Ken...I LOVE that video you made..... a real eye-opener for me as I was very surprised how little oil is getting flung off the crank (also amazing how fast things are spinning even at a high idle!).

If I ever have my clutch cover off, I plan to do a similar video clip except I'll drop it into gear to illustrate how the center of the clutch bangs to a halt (the infamous "clunk").

And I agree with Brodie, while you have it apart, change the CCT!

Regards,

Mr. BR
If you listen carefully after the engine stops, you hear a quiet "gurgling". I think you also hear it in mcatrophy's video.

That's the oil punching through the clutch plate oil port.

The port is the hole that the push rod is located, the slave cylinder pushes the rod, in the oil port, that operates the clutch plates.

You see it in the diagram in Chapter 1 of the FSM.

Hence not much oil at all.

Very little oil, you also get some from the crank.

 
Update: I finally got the bike back together this weekend. I was not in a hurry - it could have been done much more quickly. Most of the delay was waiting for parts or tools to be delivered, or just waiting for some free time to work on it.

Results:

  • Although I didn't think there was a problem, I replaced the CCT. Not sure if it is just because I spent a month riding a much louder bike while the FJR was in pieces, but the FJR surely seems quieter and smoother now. I think maybe it had developed some cam chain rattling so gradually that I hadn't ever really noticed it until it went away.
  • Zip-ties to keep the cam chain on the upper and lower sprockets while replacing the CCT removed any doubt that the timing was kept intact.
  • While I did not need to drain the oil first, I should have thought to put a little drain pan or at least a rag under the bike when I removed the oil pump/timing cover. A few tablespoons-worth of oil ended up on my garage floor.
  • It was much easier to get at the CCT after removing the clutch cover. I highly recommend doing this.
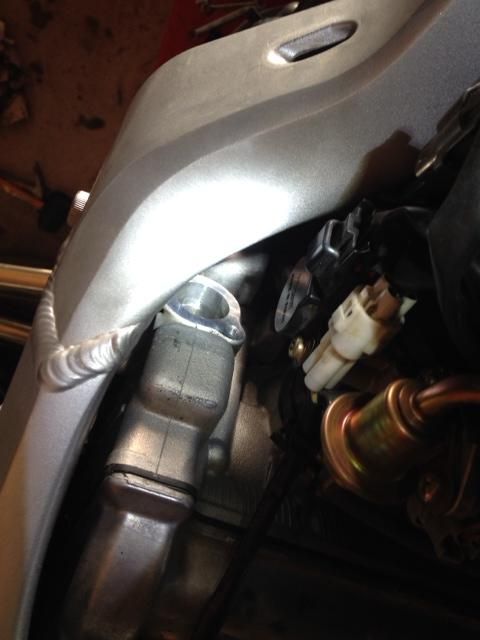
  • To thread the lower CCT bolt into the hole, it was easy enough to turn it with my fingers, but there was so little clearance that I could only turn it a few degrees at a time. I used a flexible metal claw grabber tool (like this) to grab the bolt head through the hole in the frame, and I was able to get it to snug quickly, then I used an open-end wrench to tighten it (no room for a torque wrench). I could not get a socket on the bolt, even with a long wobble extension. I have a ratcheting box-end wrench set, but it was too thick-edged to work here. I was too cheap to invest in another one, so I used what I could find.
  • My valves were all within Spec. Some were getting close to the limits, but I decided not to adjust any of them. I did record the clearance values as I measured them.
  • Pictures taken of the top of the motor prior to disconnecting cables and hoses were helpful to get everything back the way it was later.

Thanks to everyone who offered advice.

 
Top