I thought about it but its not stressed and is only acting as a plug and a mount for the grease nipple, I'm pretty sure that the ali will be the part that get hit most by corrosion, if anything it will get tighter over time and I doubt it would swell enough to cause issues. (I almost used a nylon plug).I am just curious about aluminum/steel dissimilar metal corrosion: Is this an issue? Or is it not an issue? Just curious.Thanks for posting this. I've just spent the afternoon doing this mod to all 3 of my FJRs. I used an ali insert rather than the steel one you used (just because its easier to work with)
(because the life span of these bikes are so short relatively to say: buildings that the amount of corrosion caused by this issue is insignificant during the typical FJR lifespan?)
You are using an out of date browser. It may not display this or other websites correctly.
You should upgrade or use an alternative browser.
You should upgrade or use an alternative browser.
Fixing that sticking rear brake pedal for good
- Thread starter ToyQuest
- Start date

Help Support Yamaha FJR Motorcycle Forum:
This site may earn a commission from merchant affiliate
links, including eBay, Amazon, and others.
FJRPittsburgh
Rally Addict
Makes sense. 0.393701 inches equals 10mm.Just a footnote the counter bore was 10mm on all three of my bikes (all gen 1)
escapefjrtist
Searching for Dry Roads
I'm thinking this weekend with 10mm OD brass or bronze spacer drilled and tapped for a zerk. I'm house-bound all weekend anyway...Winter time project maybe?Nice job and clean install!
Now, off to find a buddy with a lathe...
--G
--G
Last edited by a moderator:
LAF
Well-known member
I was wondering the same thing. Mine needed dressed with sand paper badly. However maybe the ease of greasing may keep that at bay. Even if I could skip one cleaning then do the next it still would be better then every time. As you know it is not hard just takes time but it needs done after I saw mine at 16,000.Damn... when the part's shaft is that rusty, I don't know if grease is gonna be able to make it operate smooth again. You might wanna take some emery cloth or wet 'n dry paper to that thang!
For the record... Mine's been sticky a few times, at the most inopportune times naturally, in the past. But it never looked quite that nasty!!
escapefjrtist
Searching for Dry Roads
Another slant on ToyQuests great idea!
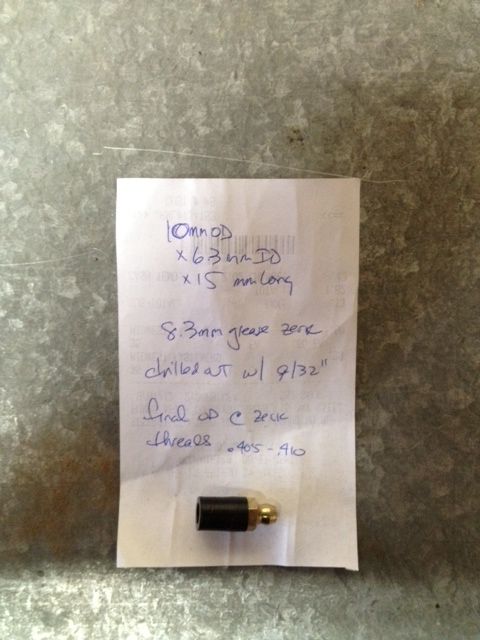
After visiting my local Do-It-Best Hardware, I found a couple pieces to try. Bought a nylon spacer 10mm OD X 6.3mm ID X 15mm long and a 8.3mm grease zerk. I drilled the nylon spacer for a little thread relief and screwed in the zerk. No machine work, 1/2 hour of time, $1.62 and finished the install...
Technical Specs...sorry for the scribbles!!
Slipped in the 10mm counter bore, before driving home.
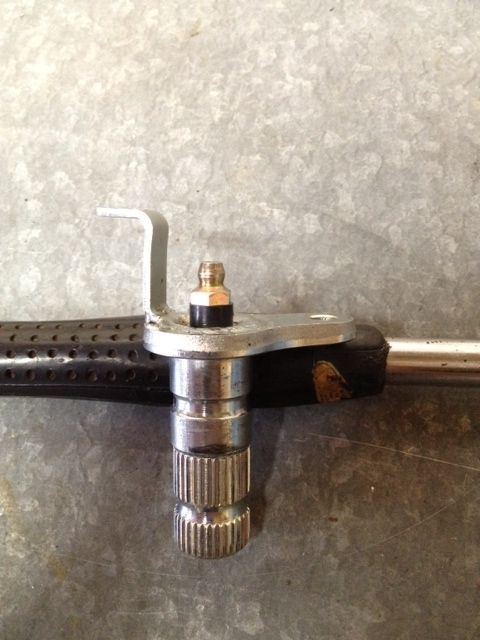
Driven home, the hex on the zerk stops at the counter bore. Got a little "roll" of material while driving in so I know it's tight. As long as I don't get stupid with the grease gun, little risk of pushing it out of the bore.
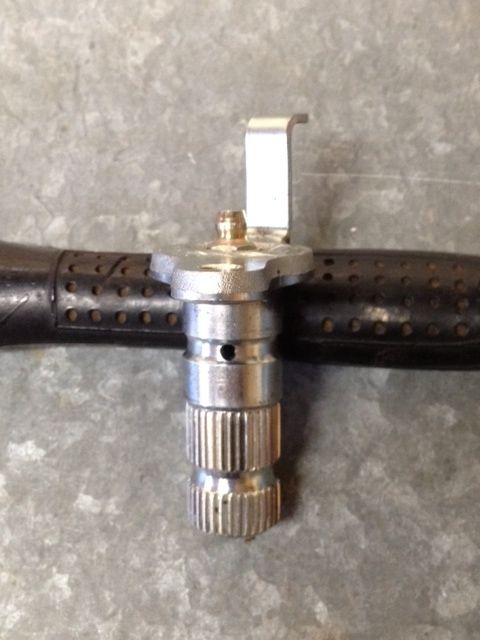
Grease!
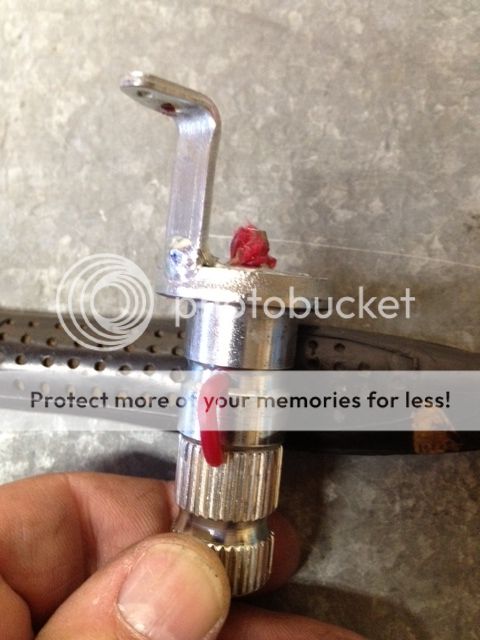
--G
After visiting my local Do-It-Best Hardware, I found a couple pieces to try. Bought a nylon spacer 10mm OD X 6.3mm ID X 15mm long and a 8.3mm grease zerk. I drilled the nylon spacer for a little thread relief and screwed in the zerk. No machine work, 1/2 hour of time, $1.62 and finished the install...
Technical Specs...sorry for the scribbles!!

Slipped in the 10mm counter bore, before driving home.

Driven home, the hex on the zerk stops at the counter bore. Got a little "roll" of material while driving in so I know it's tight. As long as I don't get stupid with the grease gun, little risk of pushing it out of the bore.

Grease!

--G
Last edited by a moderator:
C&C
Well-known member
I pulled my rear brake lever out (for inspection) and it was fairly clean with no rust ('04), so just cleaned it up and applied Honda Moly and re-installed. Just listing my experience to reduce any anticipation that this is a universal problem; your experience may vary. Great solutions, though, to those that need it.
Last edited by a moderator:

$197.39
$209.99
Milwaukee Leather SH1408 Men's Sporty Crossover Vented Black Motorcycle Leather Scooter Jacket - Large
Amazon.com

$79.95
Harley-Davidson Water-Resistant Travel Hybrid Duffel Bag/Backpack - Black
Wisconsin Harley-Davidson

$89.45
No Cutting Motorcycle Frame Slider Anti-collision Drop For Yamaha FJR1300 FJR 1300 2006-2011 motorcycle crash pad(Carbon Fiber Look)
dengzhoushijiushuncaishangmaoyouxiangongsi

$24.37
Fuel Tank Sticker Motorcycle Stickers for Yam&aha FJR1300 FJR 1300 Tank Pad Protector Decal Emblem Side Fairing Symbol Adventure
nanyangshixianpushangmaohanggerenduzi

$64.99
Edwards Oil Change Kit fits 2003-2020 Yamaha FJR1300 Sport Touring
Edwards Motorsports & RV's

$91.99
Edwards Maintenance Kit fits 2003-2020 Yamaha FJR1300 Sport Touring
Edwards Motorsports & RV's

$98.16
25-1775 Replacement for All Balls Wheel Bearing Kit (25-1775) for Yamaha FJR1300 03-16 FJR1300ES 14-18
Otisdelilah Auction

$159.99
FLAVOR Men Brown Leather Motorcycle Jacket with Removable Hood (Large (US standard), Brown)
FLAVOR Leather
Two things:I pulled my rear brake lever out (for inspection) and it was fairly clean with no rust ('04), so just cleaned it up and applied Honda Moly and re-installed. Just listing my experience to reduce any anticipation that this is a universal problem; your experience may vary. Great solutions, though, to those that need it.
First, it is most definitely a wide spread problem. You are certainly the anomaly for not having experienced it.
Maybe you don't ride much in the rain? That would explain it.
Second, Moly paste is good stuff, but not really what you would want to use in this particular application. A waterproof (actually water resistant) marine grade grease would be a better choice here. But if whatever you are doing works for you, keep it up!!
Fontanaman
Robin Trower
George do you have a press? Should read the whole post. Great job George!Nice job and clean install!
Now, off to find a buddy with a lathe...
--G
Hey how often should these be lubed?
Last edited by a moderator:
PhilJet09
Nondescript FJR Hierarchy Displayed
Two things:I pulled my rear brake lever out (for inspection) and it was fairly clean with no rust ('04), so just cleaned it up and applied Honda Moly and re-installed. Just listing my experience to reduce any anticipation that this is a universal problem; your experience may vary. Great solutions, though, to those that need it.
First, it is most definitely a wide spread problem. You are certainly the anomaly for not having experienced it.
Maybe you don't ride much in the rain? That would explain it.
Second, Moly paste is good stuff, but not really what you would want to use in this particular application. A waterproof (actually water resistant) marine grade grease would be a better choice here. But if whatever you are doing works for you, keep it up!!
This is what I use. Has some moly, but also "highly water resistant"...whatever that means. At least it's made locally. BTW, mine doesn't have any rust either and I ride in the rain fairly often.
escapefjrtist
Searching for Dry Roads
With the amount of rain and fine sand we see, I think an semi-annual cleaning would keep any sticking at bay. The zerk makes it really simple now!George do you have a press? Should read the whole post. Great job George!Nice job and clean install!
Now, off to find a buddy with a lathe...
--G
Hey how often should these be lubed?
Tech Day is coming up. If there's enough interest I can make up a half-dozen or so fittings for the day.
--G
Fontanaman
Robin Trower
Count me in.With the amount of rain and fine sand we see, I think an semi-annual cleaning would keep any sticking at bay. The zerk makes it really simple now!
Tech Day is coming up. If there's enough interest I can make up a half-dozen or so fittings for the day.
--G
SkooterG
Purveyor of Crooked Facts
Perhaps you could make up a few to send to your melting friend in Arizona?Tech Day is coming up. If there's enough interest I can make up a half-dozen or so fittings for the day.
--G
dcarver
Well-known member
..and I'll be in La Pine soon.Perhaps you could make up a few to send to your melting friend in Arizona?Tech Day is coming up. If there's enough interest I can make up a half-dozen or so fittings for the day.
--G
Happy to pay cash for product!
:lol:
escapefjrtist
Searching for Dry Roads
I'll make up a few then. Install it too?Count me in.With the amount of rain and fine sand we see, I think an semi-annual cleaning would keep any sticking at bay. The zerk makes it really simple now!
Tech Day is coming up. If there's enough interest I can make up a half-dozen or so fittings for the day.
--G
--G
escapefjrtist
Searching for Dry Roads
Exactly how many do WE need now?Perhaps you could make up a few to send to your melting friend in Arizona?Tech Day is coming up. If there's enough interest I can make up a half-dozen or so fittings for the day.
--G
First round on you DC!..and I'll be in La Pine soon.
Happy to pay cash for product!
:lol:
--G
dcarver
Well-known member
DEAL!Exactly how many do WE need now?Perhaps you could make up a few to send to your melting friend in Arizona?Tech Day is coming up. If there's enough interest I can make up a half-dozen or so fittings for the day.
--G
Pick up in person or I'll give them to your step-pappy in La Pine and he can deliver to the Valley-of-the Sun!
First round on you DC!..and I'll be in La Pine soon.
Happy to pay cash for product!
:lol:
--G
I finally got around to doing this mod. Thanks to ToyQuest for leading the way and coming up with a great idea.
I took a few pictures and had a few little things that I did that other folks may want to consider if they'll be wanting to do it too.
First off, is the disassembly. Before you go yanking the brake pedal off the splined shaft, you may want to be sure that there is a match-mark on the shaft and pedal so you will be easily able it back on at the same angle. I can't recall if this mark was already there, or if I made these marks when I disassembled them previously. Either way, just pay attention to their relationship beforehand
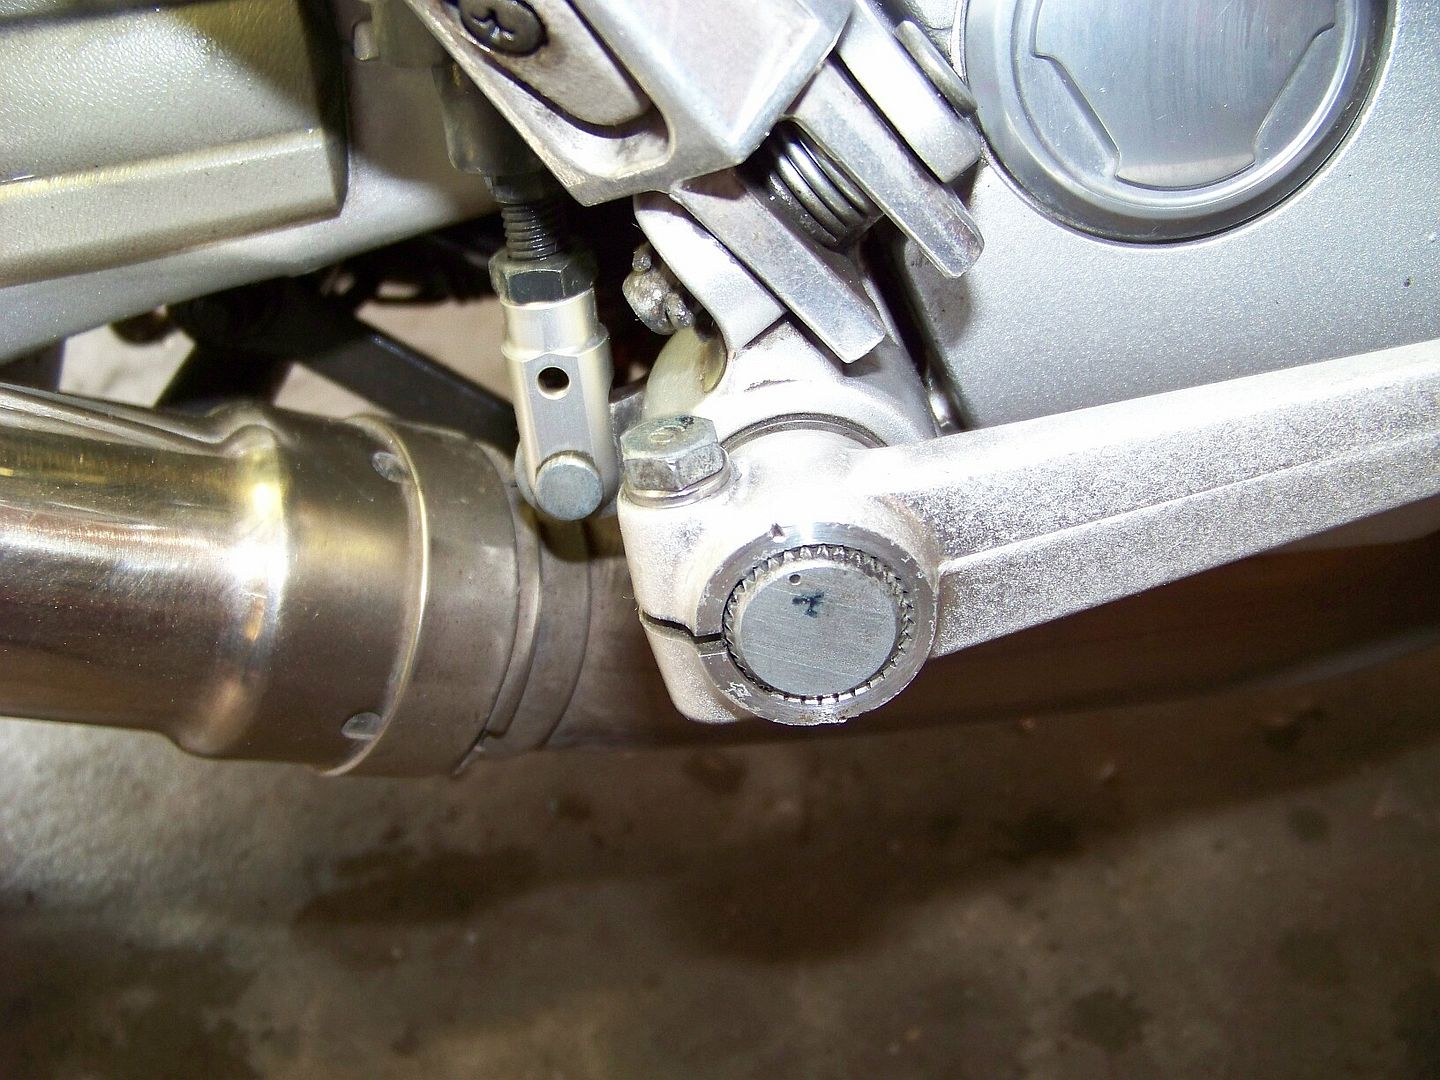
Also, be aware that when you do remove the brake pedal you'll need to fully remove the 10mm pinch bolt, as there is a groove in the middle of splined shaft that helps lock the pedal from slipping off the shaft, even if it gets loose. You can see that groove in subsequent pictures.
Some people have complained about how difficult is is to get the cotter pin out of the master cylinder pivot pin, because the cotter is in the back side. I think that is because they don't know how easy it is to just remove the entire footpeg assembly, master cylinder and all, from the frame. To do that you only need to remove the two bolts indicated here.
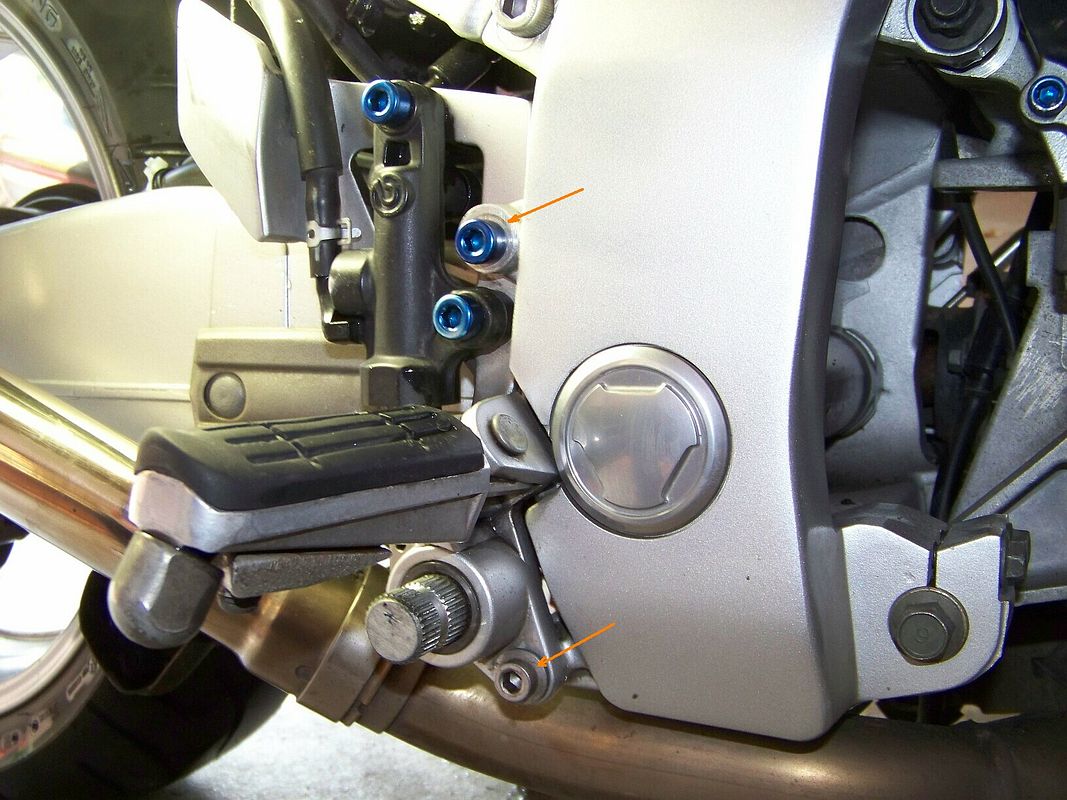
Note that your upper bolt will be regular silver colored, not blue alloy like mine. The prior owner replaced a lot of the hardware with some blue bling alloy stuff, and I'm too cheap to replace it all back.
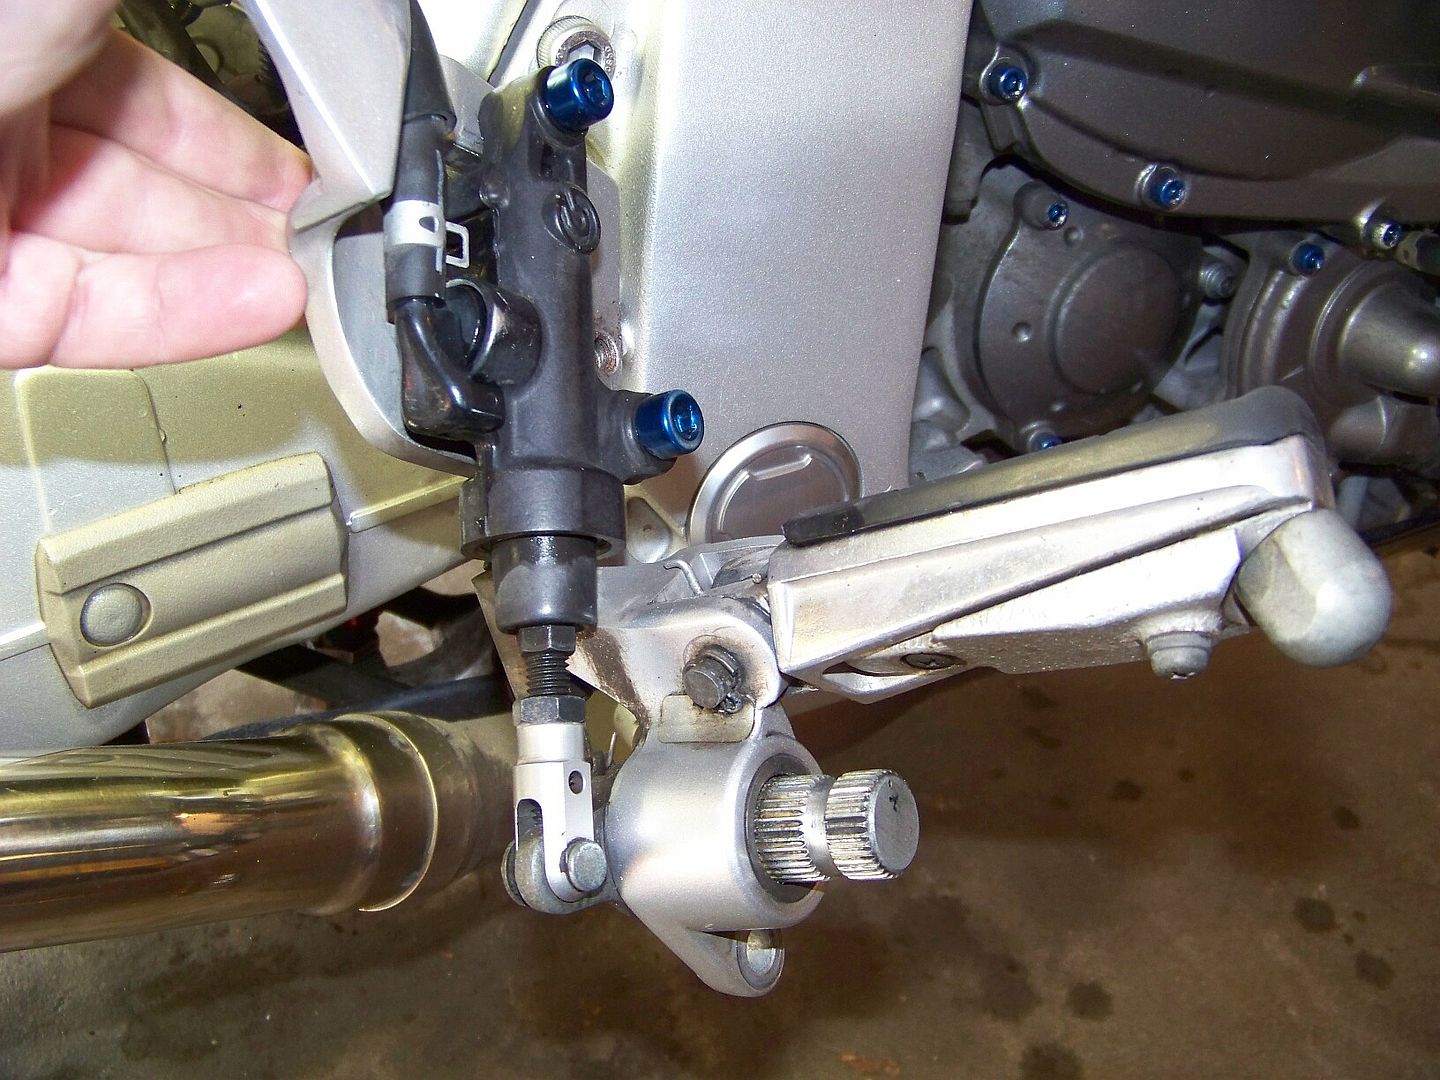
Anyway, after you remove those two bolts the whole footpeg assembly can be pulled out and you can easily get at all the stuff on the back side without laying on the floor.
This picture also shows the groove in the splined shaft that the 10mm bolt locks into well.
I went rummaging through my spare hardware and found that I had some 1/8" NPT Zerk grease fittings laying around from some prior project. This is what you want to install the zerk fitting directly into the pivot shaft with no pressed in spacers.
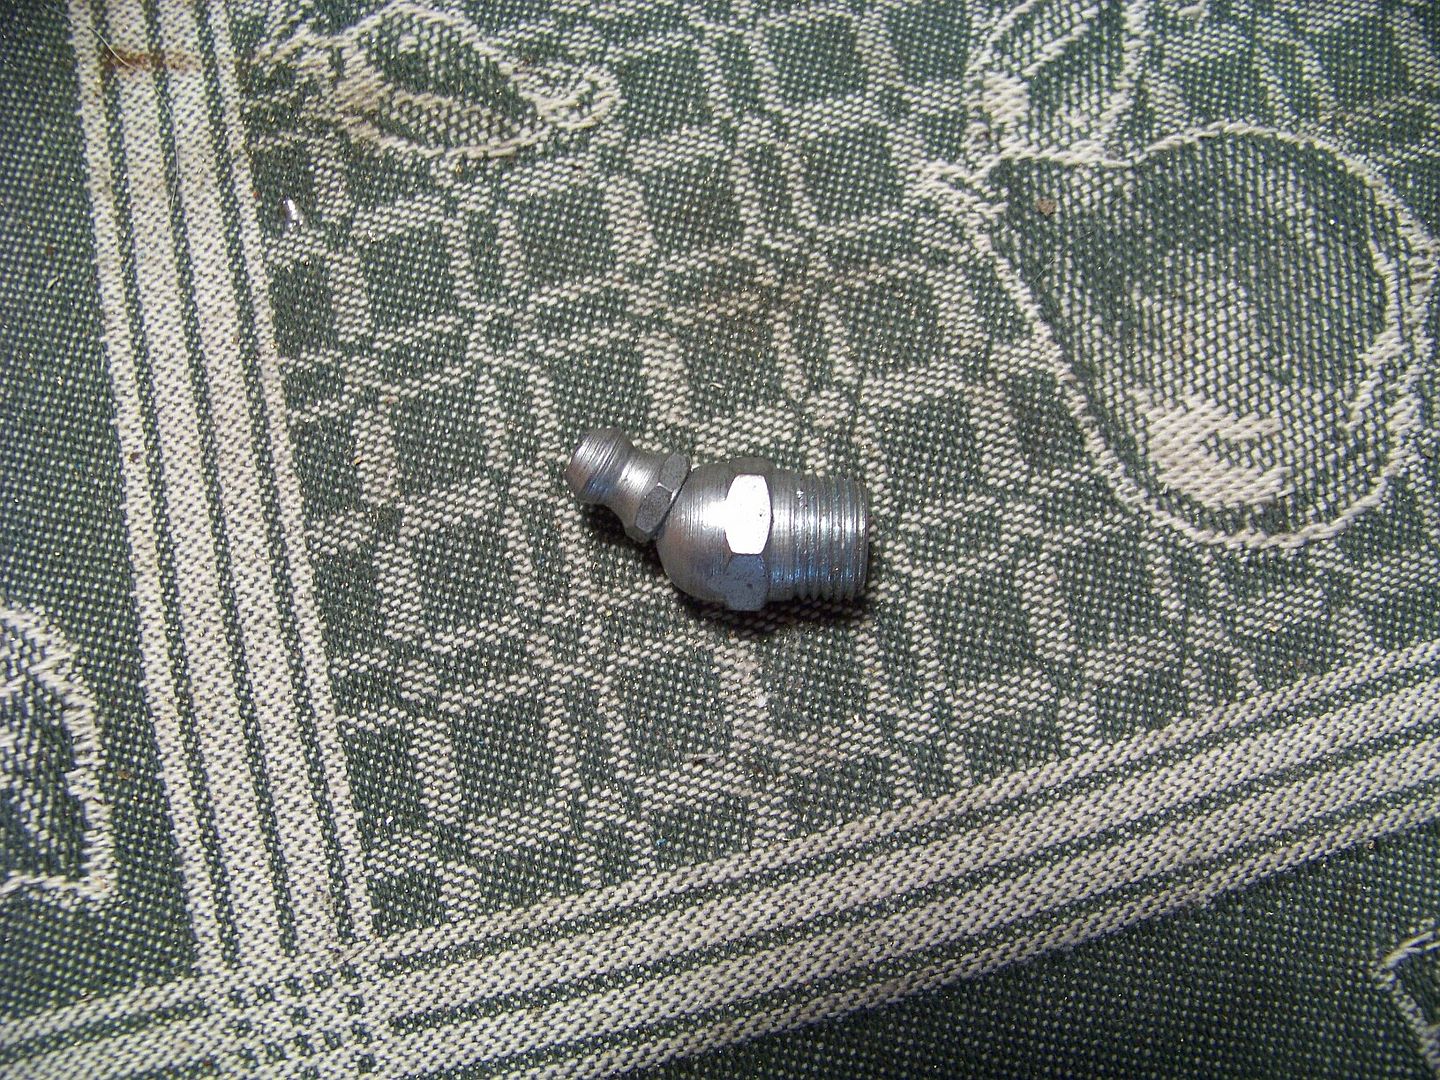
The outside diameter of a 1/8" male NPT fitting is .405". The inside diameter of the counter-bore in brake lever shaft has been said to be .394". You'll need a 1/8" NPT tap, which I also happened to already have on hand in a cheapo old Chinese tap set. As you may already be aware, NPT is a thread style used in plumbing, intentionally tapered so that as you tighten the fittings you get a leak-free joint. This means that you can adjust the depth of the thread taper to orient the angled zerk fitting in the direction you want.
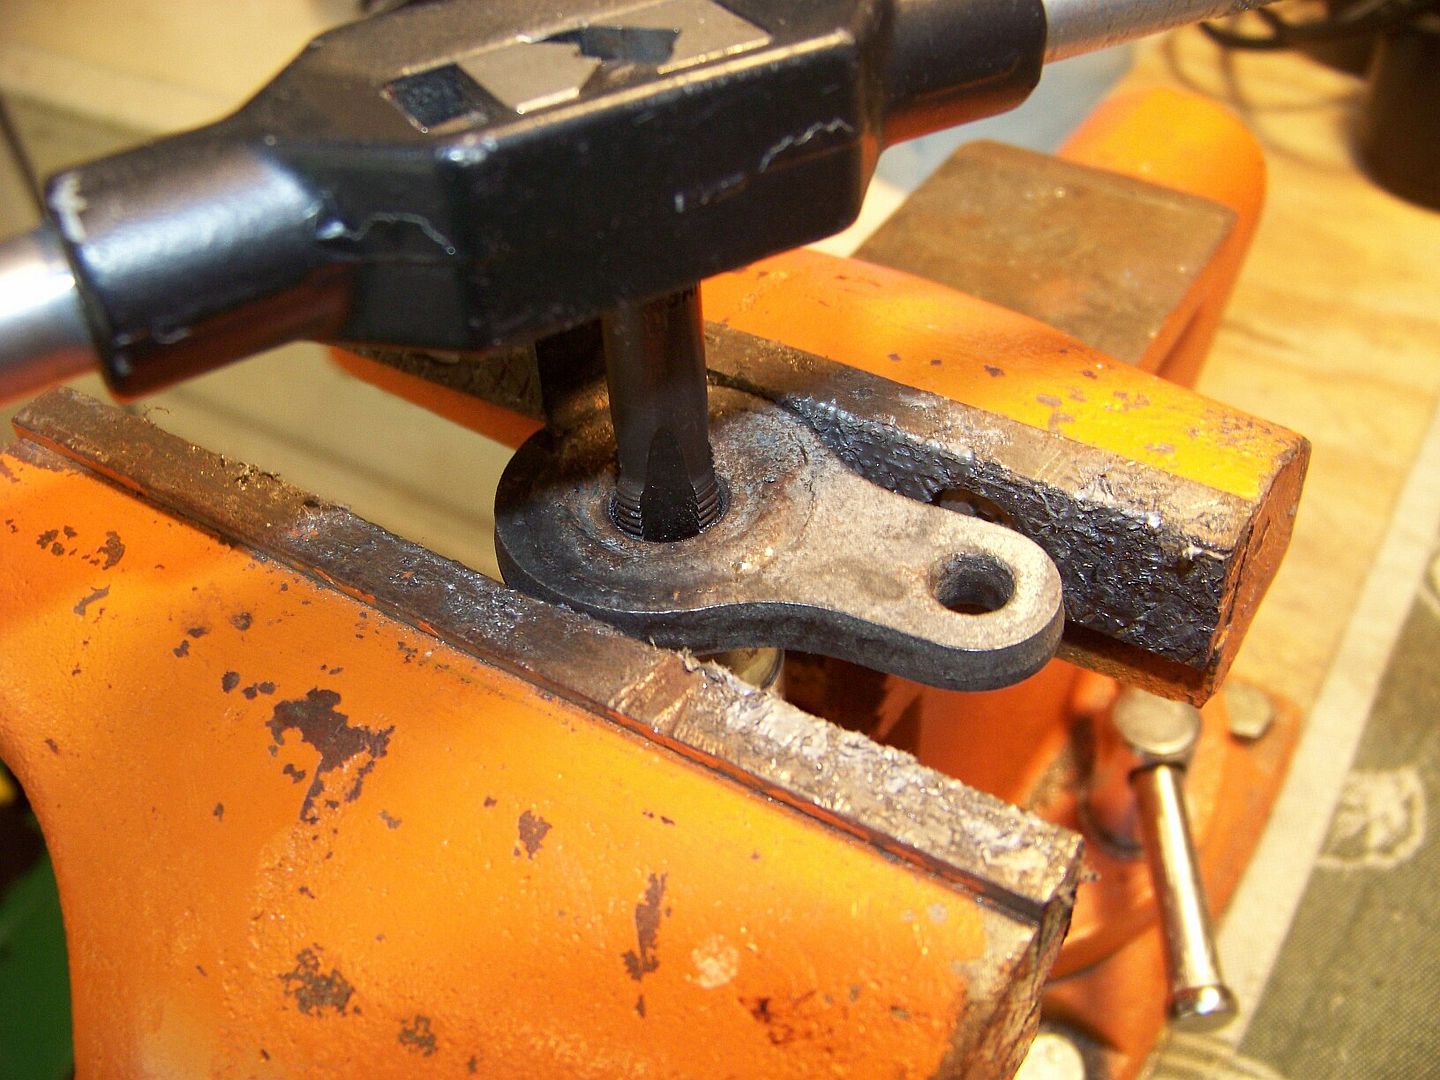
Here I am cutting the threads. With a little trial and error I was able to get the taper cut deep enough so the zerk sticks out at the desired angle, downward when in its installed orientation.
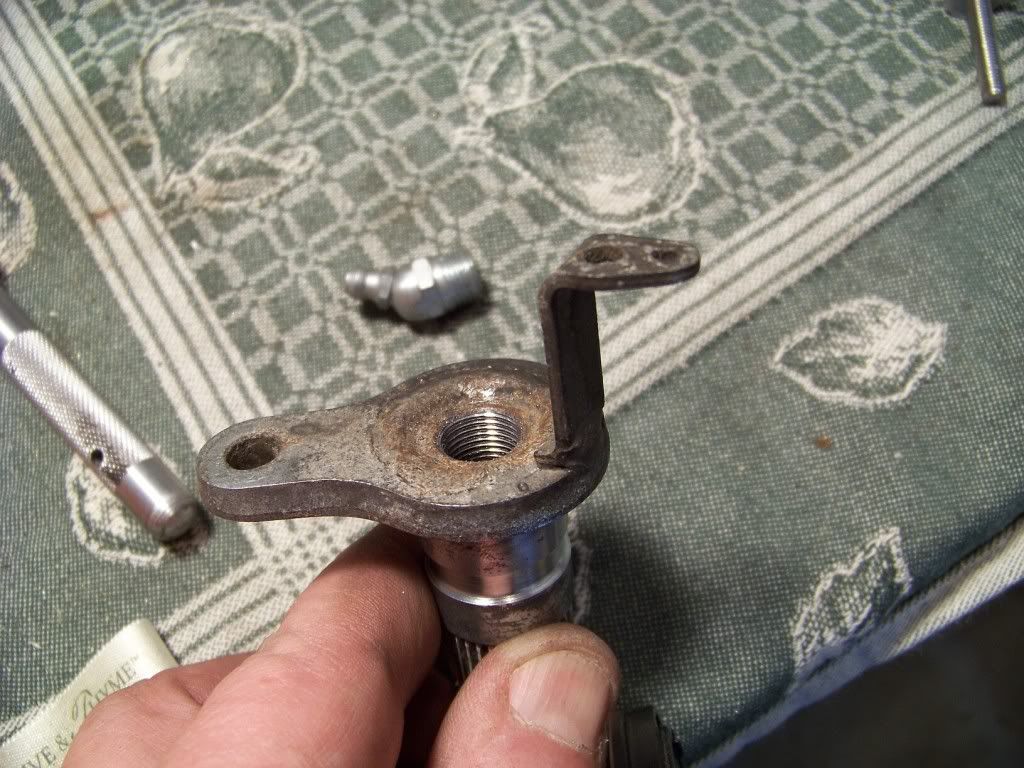
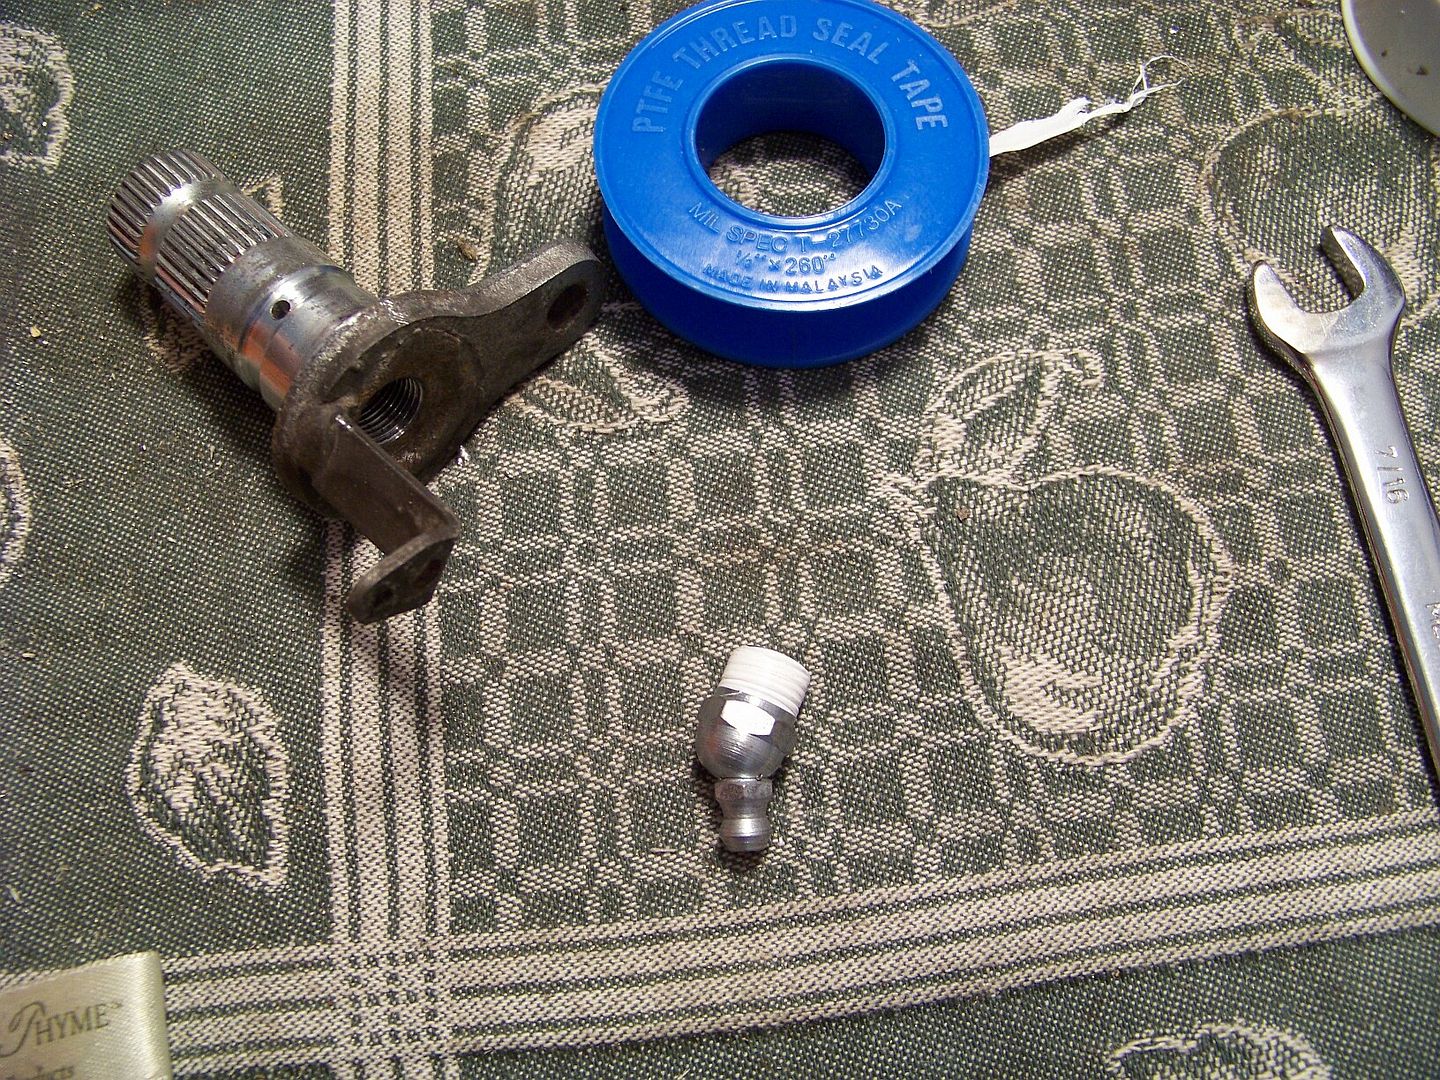
Next I drilled two 3/64" holes through the shaft, in the area of the groove in the center of the bearing surface. I used my drill press, but you could just do it with a hand drill, after center punching the marks, and a steady hand. Now just add a little Teflon pipe tape on the zerk's threads.
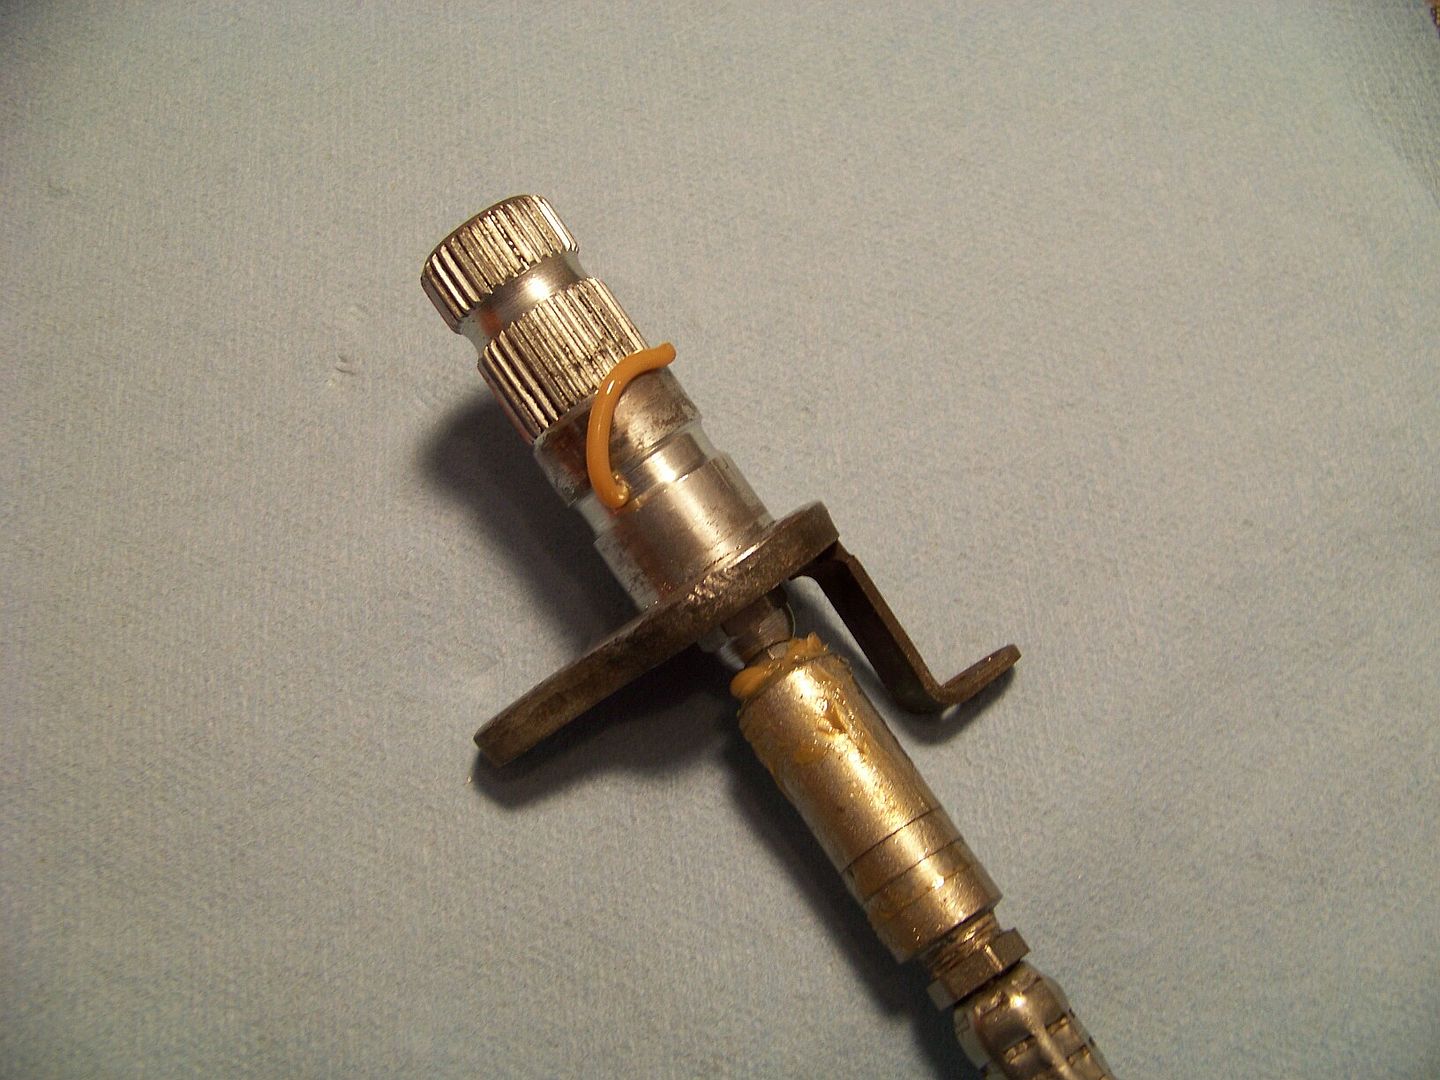
And after the final assembly, gotta make a bench test
When reassembling, I followed some other folks lead and put the master cylinder pivot pin in from the back side, so the cotter pin will be more readily accessible without having to remove the foot-peg bracket.
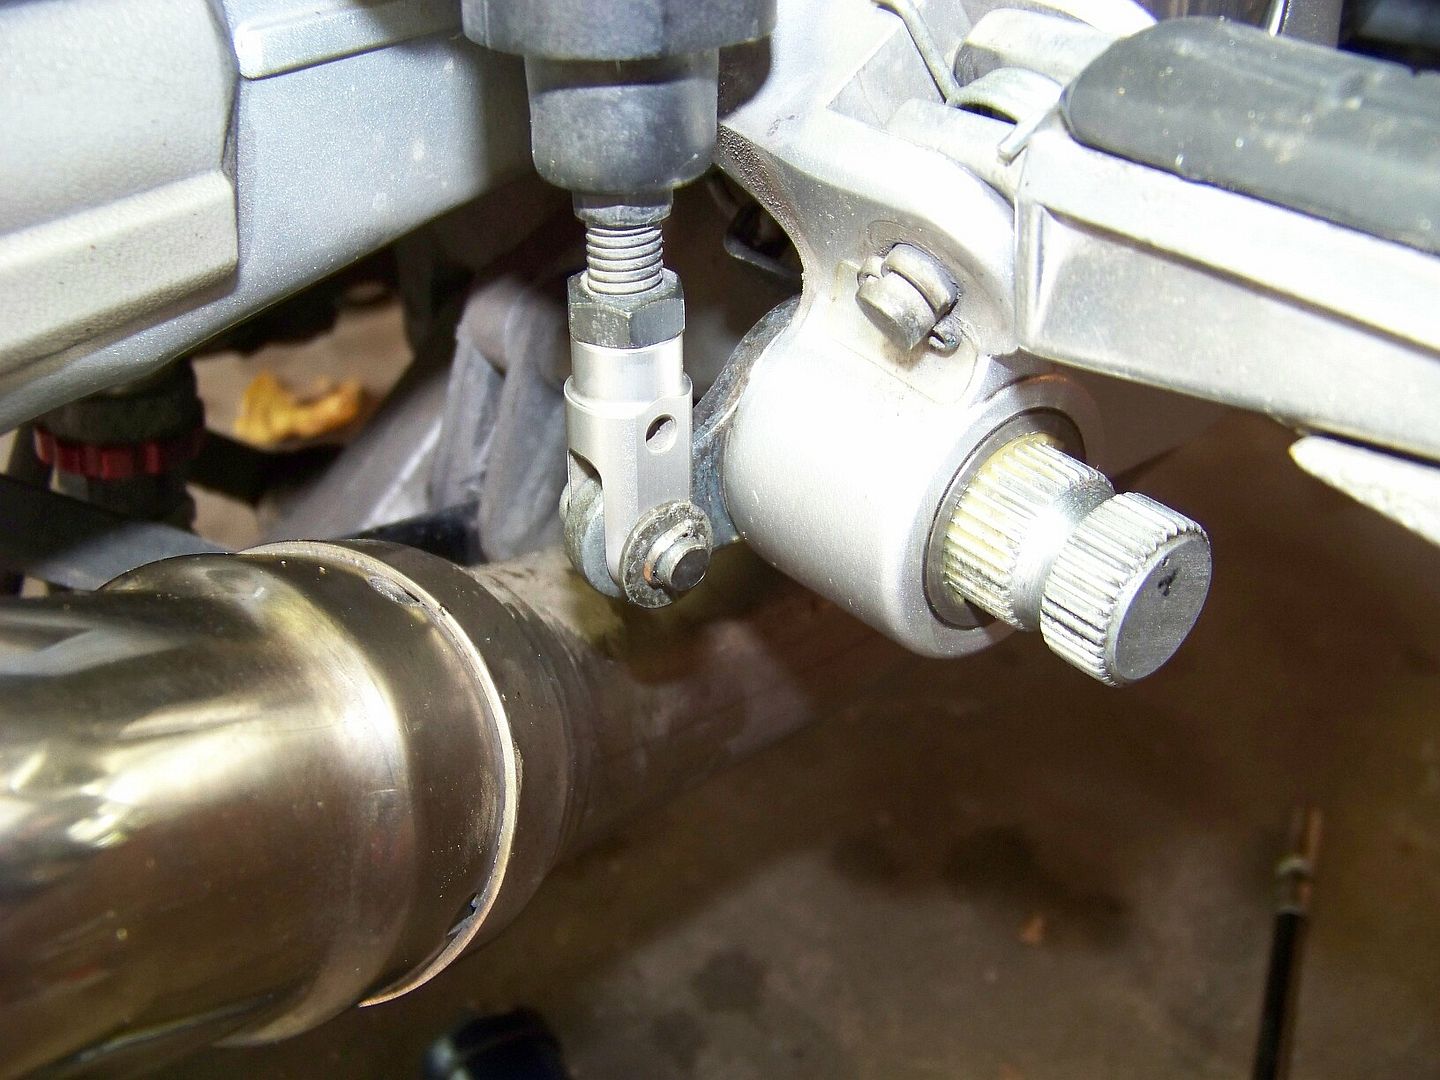
But I'm thinking with the new grease fitting, I may never need to disassemble this particular assembly ever again!!
I took a few pictures and had a few little things that I did that other folks may want to consider if they'll be wanting to do it too.
First off, is the disassembly. Before you go yanking the brake pedal off the splined shaft, you may want to be sure that there is a match-mark on the shaft and pedal so you will be easily able it back on at the same angle. I can't recall if this mark was already there, or if I made these marks when I disassembled them previously. Either way, just pay attention to their relationship beforehand

Also, be aware that when you do remove the brake pedal you'll need to fully remove the 10mm pinch bolt, as there is a groove in the middle of splined shaft that helps lock the pedal from slipping off the shaft, even if it gets loose. You can see that groove in subsequent pictures.
Some people have complained about how difficult is is to get the cotter pin out of the master cylinder pivot pin, because the cotter is in the back side. I think that is because they don't know how easy it is to just remove the entire footpeg assembly, master cylinder and all, from the frame. To do that you only need to remove the two bolts indicated here.

Note that your upper bolt will be regular silver colored, not blue alloy like mine. The prior owner replaced a lot of the hardware with some blue bling alloy stuff, and I'm too cheap to replace it all back.
Anyway, after you remove those two bolts the whole footpeg assembly can be pulled out and you can easily get at all the stuff on the back side without laying on the floor.
This picture also shows the groove in the splined shaft that the 10mm bolt locks into well.

I went rummaging through my spare hardware and found that I had some 1/8" NPT Zerk grease fittings laying around from some prior project. This is what you want to install the zerk fitting directly into the pivot shaft with no pressed in spacers.

The outside diameter of a 1/8" male NPT fitting is .405". The inside diameter of the counter-bore in brake lever shaft has been said to be .394". You'll need a 1/8" NPT tap, which I also happened to already have on hand in a cheapo old Chinese tap set. As you may already be aware, NPT is a thread style used in plumbing, intentionally tapered so that as you tighten the fittings you get a leak-free joint. This means that you can adjust the depth of the thread taper to orient the angled zerk fitting in the direction you want.

Here I am cutting the threads. With a little trial and error I was able to get the taper cut deep enough so the zerk sticks out at the desired angle, downward when in its installed orientation.

Next I drilled two 3/64" holes through the shaft, in the area of the groove in the center of the bearing surface. I used my drill press, but you could just do it with a hand drill, after center punching the marks, and a steady hand. Now just add a little Teflon pipe tape on the zerk's threads.

And after the final assembly, gotta make a bench test

When reassembling, I followed some other folks lead and put the master cylinder pivot pin in from the back side, so the cotter pin will be more readily accessible without having to remove the foot-peg bracket.

But I'm thinking with the new grease fitting, I may never need to disassemble this particular assembly ever again!!
Last edited by a moderator:
RadioHowie
I Miss Beemerdons!
But it's got cruise control! You NEVER have to touch the brakes!Nice job & write-up Fred W ! Yamaha should have done this mod for the 2013 FJR!
Plus, the 2013 has that bitchin' "Fly-By-Wire" throttle, which, based on the last Gen's electrical superiority, will probably NEVER let you get the frickin' bike home from the dealer!
BTW, Fred....good call on that NPT zerk!
Last edited by a moderator:
bramfrank
BramFrank
Both the NPT and nylon insert solutions look good to me - I prefer the nylon insert method because you don't end up with dissimilar metals in contact with each other and there's no modification of any sort required for Gen-II machines - just press it in, screw in the Zerk and apply grease.
Kudos to Toyquest for coming up the the fix and to Fred W and Escapefjrtist and the rest for expanding on the concept and their photos.
Kudos to Toyquest for coming up the the fix and to Fred W and Escapefjrtist and the rest for expanding on the concept and their photos.
Similar threads
- Replies
- 11
- Views
- 793
- Replies
- 2
- Views
- 1K
- Replies
- 2
- Views
- 1K
- Replies
- 9
- Views
- 534


