GEN II Plastic and Cowling Removal

Yamaha FJR Motorcycle Forum

Help Support Yamaha FJR Motorcycle Forum:

This site may earn a commission from merchant affiliate links, including eBay, Amazon, and others.
Can someone tell me how to disconnect the black solenoid wire for the glove compartment? I've pushed on every part of it but it won't disconnect.

 
very cool write-up, gotta love it to have sooo many skilled members on this forum

you come to Switzerland Kaitsdad you drink yourself silly on some fine Swiss beer ( Feldschlösschen) on my dime :yahoo: :yahoo:

 
Can someone tell me how to disconnect the black solenoid wire for the glove compartment? I've pushed on every part of it but it won't disconnect.

Thanks for the info. If I have the cojones to tear it apart, it will save me a couple hun by not taking it to the stealer, er dealer...

Botajet

ps: Since I'm new here, what's the cutoff between Gen I and Gen II machines?

 
Great writeup Does anyone know where to get replacement fairing fasteners in quanity& perhaps some part #'s Ive heard about other suppliers having them avail ( Mc Master Carr ) But without an actual discription It gets pretty confusing. Im already short two types. The phillips head 1/4 turn type fastener that holds the side cases on & the standard bayonet type or straight push in rivit that holds several of the covers in place around the instrument cluster etc. Yamaha want close to 3.50 apiece for these and I want to buy a bunch. I know im going to have these fairings off several times over the lifetime of the bike. Thanks Eric

 
Great writeup Does anyone know where to get replacement fairing fasteners in quanity& perhaps some part #'s Ive heard about other suppliers having them avail ( Mc Master Carr ) But without an actual discription It gets pretty confusing. Im already short two types. The phillips head 1/4 turn type fastener that holds the side cases on & the standard bayonet type or straight push in rivit that holds several of the covers in place around the instrument cluster etc. Yamaha want close to 3.50 apiece for these and I want to buy a bunch. I know im going to have these fairings off several times over the lifetime of the bike. Thanks Eric
Eric we have a nut and bolt store here in Lynchburg Va. It's called Valley Fastners, should be some store of this type near you. That would be a good place to match up what you need. Hope this helps.

 
Great writeup Does anyone know where to get replacement fairing fasteners in quanity& perhaps some part #'s Ive heard about other suppliers having them avail ( Mc Master Carr ) But without an actual discription It gets pretty confusing. Im already short two types. The phillips head 1/4 turn type fastener that holds the side cases on & the standard bayonet type or straight push in rivit that holds several of the covers in place around the instrument cluster etc. Yamaha want close to 3.50 apiece for these and I want to buy a bunch. I know im going to have these fairings off several times over the lifetime of the bike. Thanks Eric

Eric, Ive used the below link to replace OEM fasteners and screws on my FJR. They're called Babbitt's online, and the site has a great way of showing each part and location (in an exploded view). The only shortcoming is that they're rather slow sending out parts and don't offer fast shipping - all via ground shipping. I hope this helps...

https://www.yamahapartshouse.net/pages/part...d/1/Yamaha.aspx

 
Last edited by a moderator:
Just to say thanks...Could not find this during the forum search,

however did get a link through a 08' owner's personal web page.

Thanks again, needed this to replace my new mirror's.

RR

 
Thanks for the write up. Finally got around to installing the pair of Hella Supertone Hornes I bought last November. I thought they were to big (5.25" diameter) to fit but they went in pretty smoothly. Used the Eastern Beaver Horn Harness kit . Relay mounted on the left under panel B to a handy 8mm bolt, relay trigger wires connected to the terminals that served the horn on the right side and wire harnesses routed in front of the steering stem. Can't see any interference issues. Horns are a big improvement over the stock items. Checked the two spiders I could get to and found both free of corrosion. Put back together with a helping of dielectric grease, same for the turn signal connectors.

 
This thread was incredibly helpful to me this weekend, when I installed Road Runner fan harnesses. I had procrastinated for several months but finally decided to take the plunge. I had been tramatized when I broke a tab on my Ninja 250 fairing, causing no end of trouble. But since the Ninja was old and beat up anyway, that wasn't a disaster. A damaged fairing on a fairly new FJR would be a disaster of a different color!

I started at step 5, since I only needed to remove the side cowlings.

As others have said, the secret is to take it slow and steady, don't force anything. When you're stumped, stop and relentlessly apply logic.

BTW, before I do this again I'll have a few extra plastic bayonets, just for peace of mind.

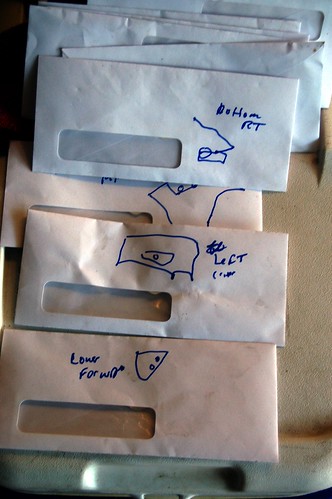
I used a sophisticated system to keep track of the multitude of fasteners.


envelopes by JimNtexas, on Flickr

I did notice some minor differences from the original post and what I found on my 2008 Advanced Edition:

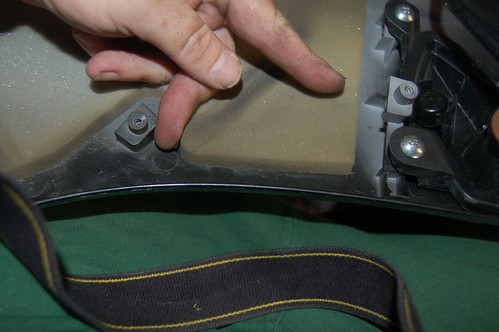
5b - only one screw on the bottom cowl


FJR Bottom Cowl by JimNtexas, on Flickr

5c - only two plastic bayonets per side (sorry, no picture)

after 5f: On my bike there were two Phillips head screws on the inside of the left cowling that connected it to the thin plastic inner cowl.

After you do all the steps in the original post the cowling is still attached until these two are removed.

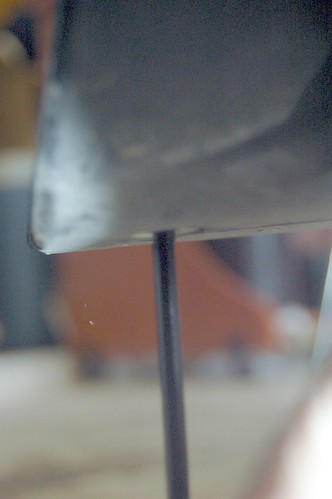
Their heads are on the side of the cowl facing towards the wheel. You can barely get them off with a 3" phillips. This picture shows the sockets on the inside of the left cowling that the screws go in to.


FJR left cowl inside view by JimNtexas, on Flickr

Again, thanks for this super useful thread!!

 
Last edited by a moderator:
Excellent write up for front cowling removal :)

I did this yesterday as my screen motor was jammed, due to the rubber gasket falling off into the mechanism. It is held in place by double sided tape. I removed all this old tape, cleaned and degreased everything and applied new tape. How come the smallest jobs take the most dismantling.

I checked the spiders on the front at the same time. Everything was OK. Here is betting now I have checked/moved these connectors I'll get spiders failure in the near future!

Well at least I know how straight forward removing the front cowling is now, if a little time consuming, putting it all back together.

Andy

 
Try it today, and belive it or not, I still stuck at step 1! The 2 screws retaining the "W" are supposed to be 3mm hex screws, but my 3mm hex screwdriver is too big to fit the screws, and my 2,5mm is too small! Damn!

 
Try it today, and belive it or not, I still stuck at step 1! The 2 screws retaining the "W" are supposed to be 3mm hex screws, but my 3mm hex screwdriver is too big to fit the screws, and my 2,5mm is too small! Damn!
Those 2 hex screws are 3mm. I just confirmed this by using two different hex wrenches, and a vernier caliper.

Perhaps your 3mm hex screwdriver isn't 3mm?

 
Hey what a great post , i will be doing this this weekend as i have already go so fare & said OMG how do i get that ect !!!!!!

I am sure just by reading your post i may get a little further.

Once again thaks for the intro to fairing dismantelment.

Adrian

FJR1300AP - 2008

 
Thanks for this post. I used it to remove the lower fairing and plastic as needed to change my engine coolant.

I removed more stuff than needed. No big deal it is not that hard to put on the extra stuff I removed, plus a little cleaning and inspecting parts for wear is not a bad thing.

As noted on this thread I put all the screws for the various panels in to envelopes; great idea.

I used the FJRTech.net cooling system flush method. That worked great.

Did all this and barely cracked open the service manual. The forum is better than the service manual.
 
Last edited by a moderator:
Any ideas or thoughts or am I just missed something here.

2010 FJR, there seems to be one more screw not mentioned here. It's in the front center about 7 inches up from the bottom of the fairing, just about behind the Yamaha symbol, is a screw that I can't get to that needs to come out.

 
Top