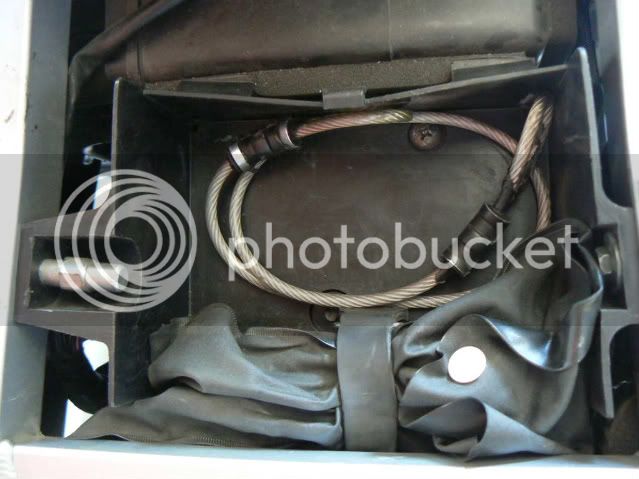
Warchild has it all summed up pretty thoroughly right here, so I won't add any photo's except this one.
FJRTech Gen1 Stock Shock removal, Wilbers #640 Shock Installation
2005 non-ABS, Tool tray to be removed.

I read a few other posts regarding shock removal and it really is as easy as they say. I used Warchild's FJRtech method the most, and his pictures were handy for reference. One thing both the manual and Warchild did not mention is that at least on the 2005, you need to remove the tool tray under the seat. I guess you could do it but what a pain it would be. Five screws, and disconnect the huge connector, and it was off, you had a huge area and clear shot to access the upper shock bolt, lots easier that way. I also used a 2X4 to raise the rear wheel a bit to help with removing and installing the bolts (from another post on here), instead of the jack warchild used, all real easy.
In order to route the remote hydraulic preload adjustment, I had to remove the two cap screws on the right side, from the plate that holds the stock hard/soft lever. With the bracket from the remote hydraulic preload adjustment removed, it made it easy to feed through the small area. I elected to keep the stock hard/soft lever plate on to help keep rigidity (if it does anything at all) in between the sub frame members there, and keep anything from kicking up back in there and possibly doing any damage.
Since I kept the stock hard/soft lever plate, I didn't like how close the line from the shock was so I took a small piece of fuel line and slit it length wise and glued it to the plate to help any abrasion that might happen in the event it does touch. I also tried to keep the line going into the remote hydraulic preload adjustment knob as straight as possible. It has a rather nasty bend there and I even tried routing it above the plastic; however, the line was not long enough for that idea to work.
One other note: All my bolts for the dog bones, upper and lower shock mounts were well lubed and had NO corrosion. It looked like the previous owner did a great job of keeping it lubed. I just cleaned it up and re-lubed the bolts and bearings.
On the test ride, just a few miles not on any twisties, what a difference!!! I felt very few bumps compared to the stock shock, it has a real solid feel to it, I can't wait to try it out on the twisties!
Good luck on your shock removal and installation.
FJRTech Gen1 Stock Shock removal, Wilbers #640 Shock Installation
2005 non-ABS, Tool tray to be removed.

I read a few other posts regarding shock removal and it really is as easy as they say. I used Warchild's FJRtech method the most, and his pictures were handy for reference. One thing both the manual and Warchild did not mention is that at least on the 2005, you need to remove the tool tray under the seat. I guess you could do it but what a pain it would be. Five screws, and disconnect the huge connector, and it was off, you had a huge area and clear shot to access the upper shock bolt, lots easier that way. I also used a 2X4 to raise the rear wheel a bit to help with removing and installing the bolts (from another post on here), instead of the jack warchild used, all real easy.
In order to route the remote hydraulic preload adjustment, I had to remove the two cap screws on the right side, from the plate that holds the stock hard/soft lever. With the bracket from the remote hydraulic preload adjustment removed, it made it easy to feed through the small area. I elected to keep the stock hard/soft lever plate on to help keep rigidity (if it does anything at all) in between the sub frame members there, and keep anything from kicking up back in there and possibly doing any damage.
Since I kept the stock hard/soft lever plate, I didn't like how close the line from the shock was so I took a small piece of fuel line and slit it length wise and glued it to the plate to help any abrasion that might happen in the event it does touch. I also tried to keep the line going into the remote hydraulic preload adjustment knob as straight as possible. It has a rather nasty bend there and I even tried routing it above the plastic; however, the line was not long enough for that idea to work.
One other note: All my bolts for the dog bones, upper and lower shock mounts were well lubed and had NO corrosion. It looked like the previous owner did a great job of keeping it lubed. I just cleaned it up and re-lubed the bolts and bearings.
On the test ride, just a few miles not on any twisties, what a difference!!! I felt very few bumps compared to the stock shock, it has a real solid feel to it, I can't wait to try it out on the twisties!
Good luck on your shock removal and installation.
Last edited by a moderator:


