Homemade Steering Bearing Socket

Yamaha FJR Motorcycle Forum

Help Support Yamaha FJR Motorcycle Forum:

This site may earn a commission from merchant affiliate links, including eBay, Amazon, and others.
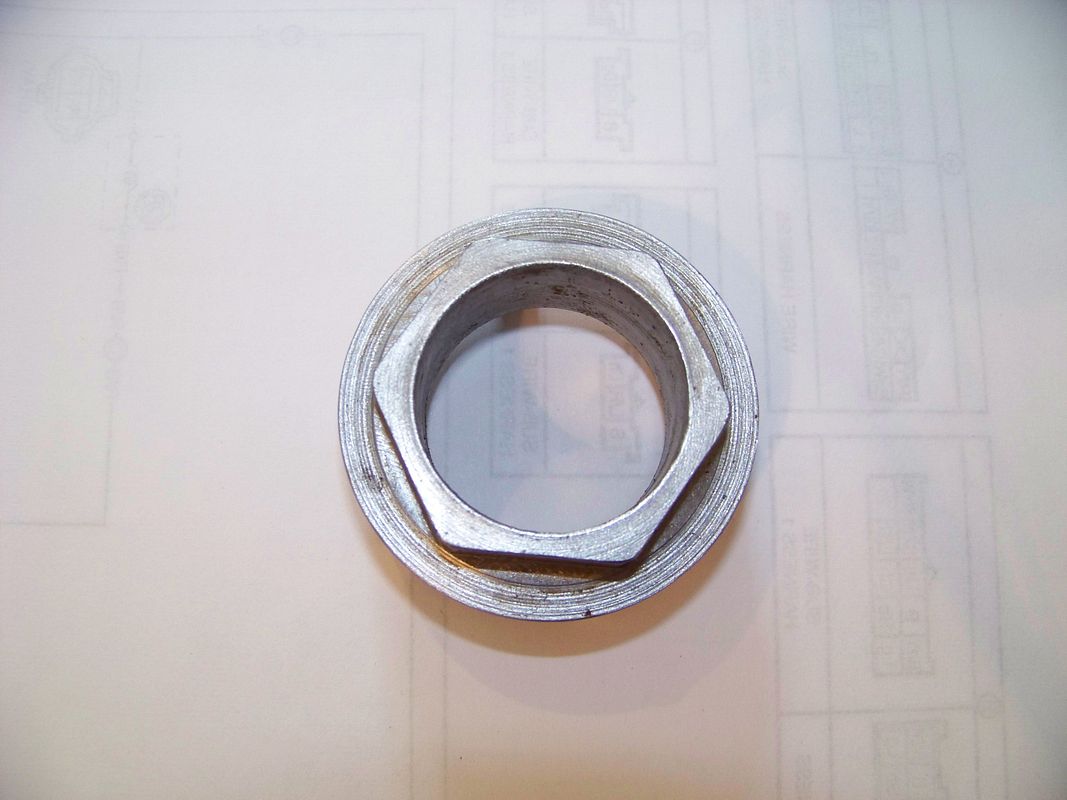
I have a spare castle nut that I used to mark the socket for cutting/fitting that I'm just going to pass around to those that are interested in trying this. Dale gets it first, but I'm sure after he's done he could be convinced to mail it to the next one in line.
You know....it wouldn't be too hard to fab up a pdf template that could be printed....

That's a great idea! Unfortunately, I just sent the nut out in the mail.
You still have the socket, right? :D

 
I have a spare castle nut that I used to mark the socket for cutting/fitting that I'm just going to pass around to those that are interested in trying this. Dale gets it first, but I'm sure after he's done he could be convinced to mail it to the next one in line.
You know....it wouldn't be too hard to fab up a pdf template that could be printed....

That's a great idea! Unfortunately, I just sent the nut out in the mail.
Not to worry. If the idea has any merit, I'll try to do a scale diagram of the nut and will willingly forward the diagram on to anyone who wants to try their luck at building the tool from a drawing.

Thanks to Phil for getting the ball (nut) rolling.

Dale

 
Last edited by a moderator:
I forgot about this thread. The original socket I modified in the pictures turned out to not be quite deep enough so I had to go out and get a deeper ($$) one. I'll post pictures one of these days...if I ever get back home. The concept is still the same though.
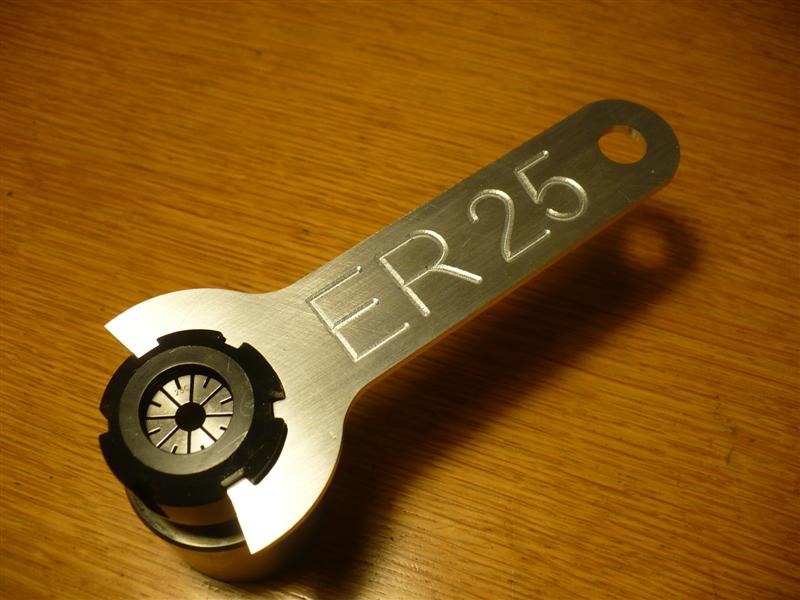
I made a collet wrench for my lathe a few weeks ago not realizing that the design was the same. Time to do a bit of measuring...

collet-wrench.JPG
Looks nice. Still need a way of using a torque wrench though.

 
Make the round hole in the end into a 3/8" square and Bob's your uncle.

(It doesn't matter how long the wrench is, just so long as you keep the torque wrench at a right angle to it)

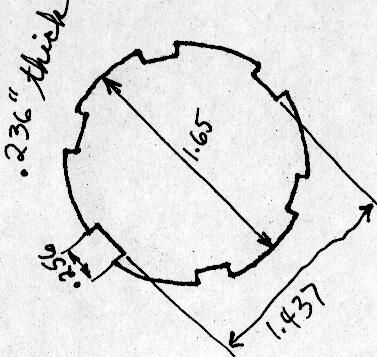
Here's a (not to scale) diagram of the nut:

SteeringHeadNut.jpg


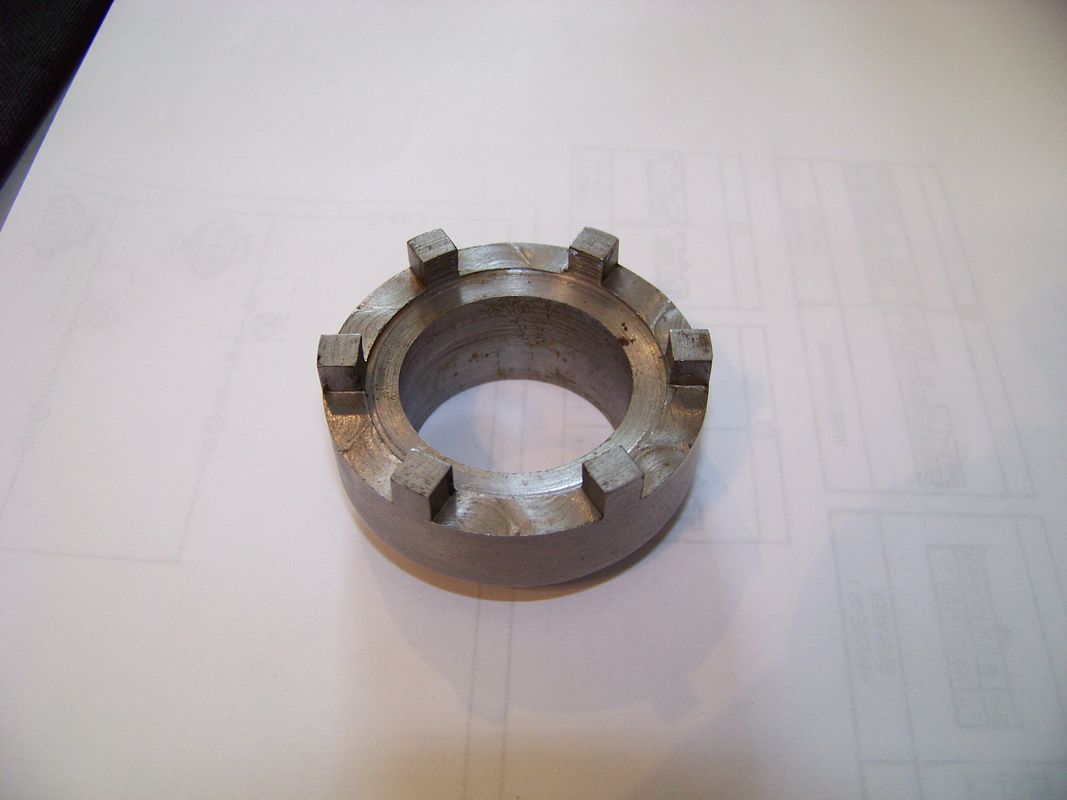
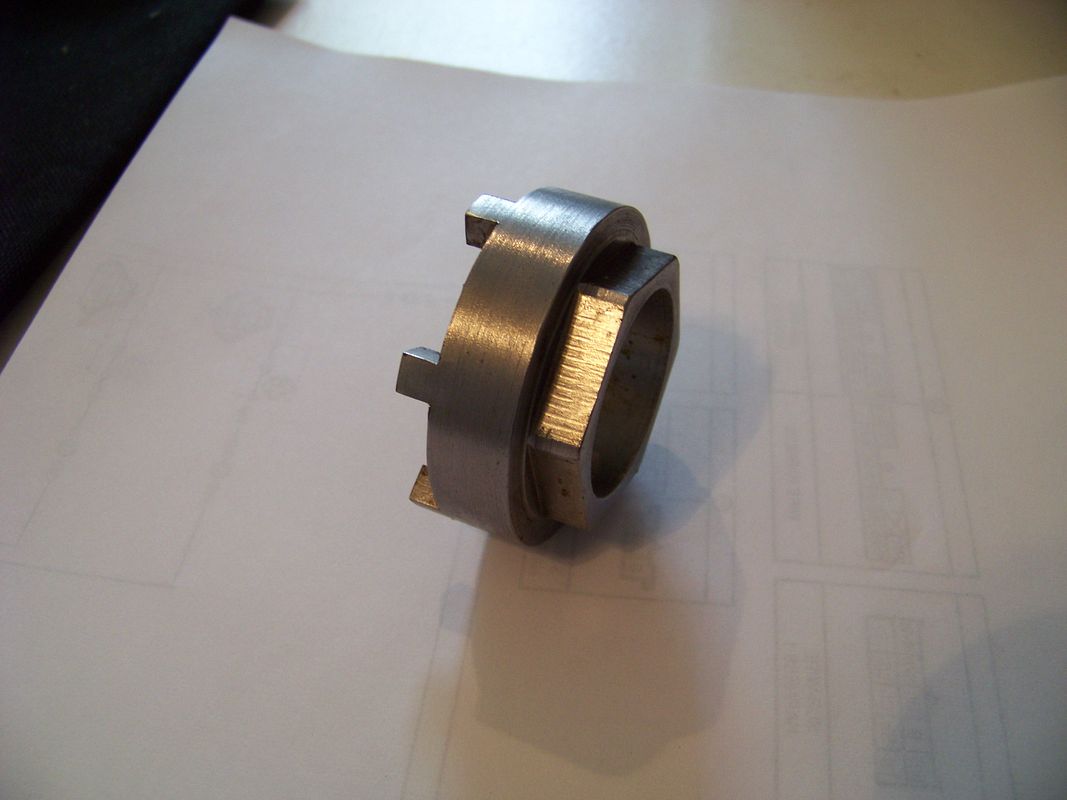
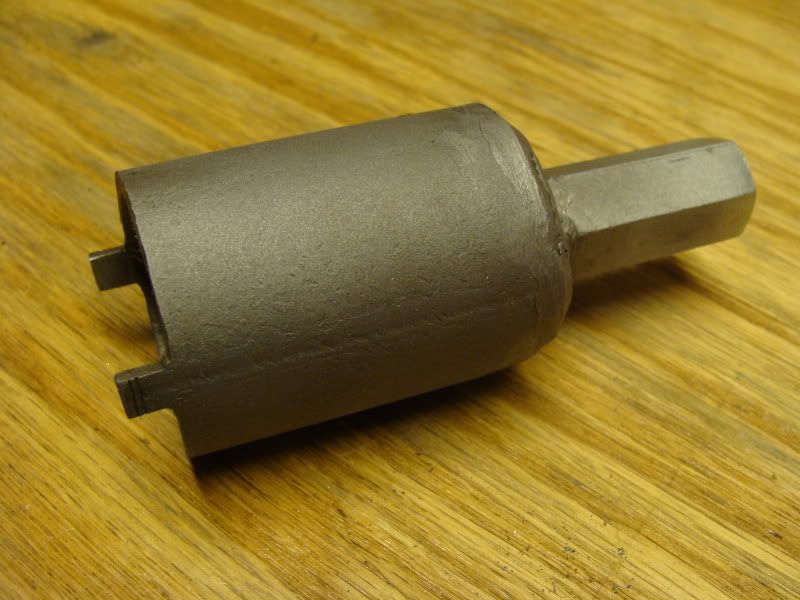
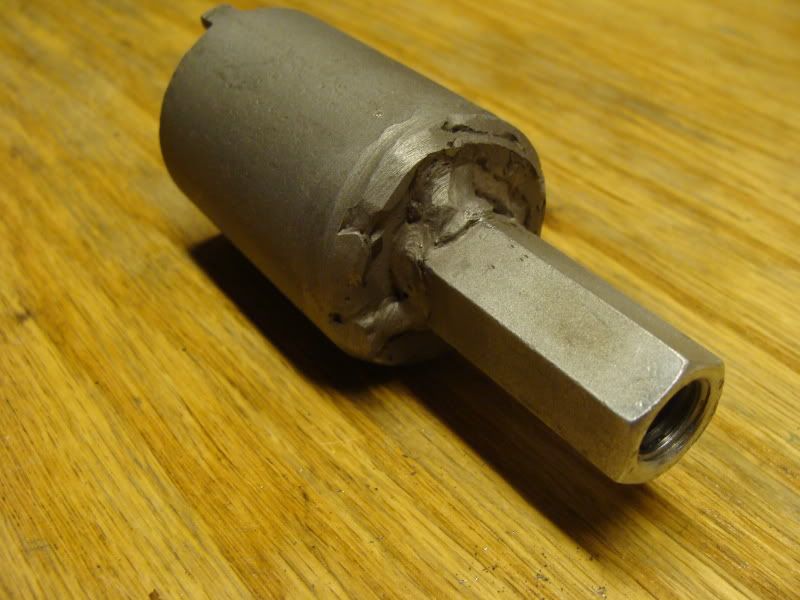
And here's how the JustRoy sockets are constructed:

100_3253.jpg


100_3254.jpg


100_3255.jpg


The hex drive on the top of this tool is the same size as the top nut on the steering stem (36mm), so you just use the same socket.

 
Last edited by a moderator:
Make the round hole in the end into a 3/8" square and Bob's your uncle.(It doesn't matter how long the wrench is, just so long as you keep the torque wrench at a right angle to it)
Yes, it does matter. If you are using some kind of homemade socket, the book specifications do not apply enough force. If you are using a wrench like 900gc made and it is too long, you are applying too much force.

https://www.freeinfostuff.com/torqueextension/torqueextension.htm

The service manual says to connect the torque wrench at 90 degrees from the factory tool. I have no idea what that does to the calculations.
It only matters IF the torque wrench and tool are 'in line'. If the torque wrench is at right angles to the tool the 'effective' torque will be the same, just as described in the manual.

 
Make the round hole in the end into a 3/8" square and Bob's your uncle.(It doesn't matter how long the wrench is, just so long as you keep the torque wrench at a right angle to it)
Yes, it does matter. If you are using some kind of homemade socket, the book specifications do not apply enough force. If you are using a wrench like 900gc made and it is too long, you are applying too much force.

https://www.freeinfostuff.com/torqueextension/torqueextension.htm

The service manual says to connect the torque wrench at 90 degrees from the factory tool. I have no idea what that does to the calculations.
If you look at the link that you posted, under "sources of errors" in section C, enter any values in and select a 90 degree angle. You'll see that the torque wrench reads the same as the applied torque. This is because the effective length of the torque wrench is not changed when the extension (or in this case the spanner) is at exactly 90 degrees to the wrench.

Not sure why anyone would bother calculating a bunch of stuff when they can just keep the extension at 90 degrees and use the wrench normally. I guess if you couldn't do that for some accessibility reason.

 
Last edited by a moderator:
You'll see that the torque wrench reads the same as the applied torque. This is because the effective length of the torque wrench is not changed when the extension (or in this case the spanner) is at exactly 90 degrees to the wrench.
I didn't run the numbers, but, yes, I was sort of thinking that because he effective length of the torque wrench didn't change, . . .

 
I doubt that 38 ft-lbs is the final torque preload setting. That would result in very stiff steering. Same as on the FJR's first step, to seat the bearings, and then back off and retorque to something like 10-15 ft-lbs. for final preload value.

 
I posted the #'s just to show a much simplier tool CAN be used for assembly, initial pre-load, etc.

Initial torque is 38' lbs, final is 13' lbs..

 
Last edited by a moderator:
No need to get all fancy shmancy with this tool. I am at work now so I can't give you dimensions, but this can be made for little or nothing. A piece of pipe, a coupling nut, a flat washer a hack saw, a file, a welder or someone to weld if for you are all you need. I can get the dimensions and size of pipe to use later, or you fan get them from post #44. Don't worry, the two ears are more than stout enough to handle the minimum amount of torque that will be applied to them for this job. Made this back in '08 and posted it here, but can't find the original post. BTW this was not my best day of welding, but it works!!

DSC00969.jpg


DSC00970.jpg


No need to get all fancy shmancy with this tool. I am at work now so I can't give you dimensions, but this can be made for little or nothing. A piece of pipe, a coupling nut, a flat washer a hack saw, a file, a welder or someone to weld if for you are all you need. I can get the dimensions and size of pipe to use later, or you fan get them from post #44. Don't worry, the two ears are more than stout enough to handle the minimum amount of torque that will be applied to them for this job. Made this back in '08 and posted it here, but can't find the original post. BTW this was not my best day of welding, but it works!!
[img=[URL="https://i401.photobucket.com/albums/pp95/bogus5454/Bike%20Pics/DSC00969.jpg%5D"]https://i401.photobucket.com/albums/pp95/bogus5454/Bike%20Pics/DSC00969.jpg][/URL]

[img=[URL="https://i401.photobucket.com/albums/pp95/bogus5454/Bike%20Pics/DSC00970.jpg%5D"]https://i401.photobucket.com/albums/pp95/bogus5454/Bike%20Pics/DSC00970.jpg][/URL]
Nice.

Very similar to my tool, except mine requires NO welding at all.

 
Make the round hole in the end into a 3/8" square and Bob's your uncle.(It doesn't matter how long the wrench is, just so long as you keep the torque wrench at a right angle to it)

Here's a (not to scale) diagram of the nut:

SteeringHeadNut.jpg


And here's how the JustRoy sockets are constructed:

100_3253.jpg


100_3254.jpg


100_3255.jpg


The hex drive on the top of this tool is the same size as the top nut on the steering stem (36mm), so you just use the same socket.
I have not delved into a head torque yet. I bought a spanner for future use. Reading the instructions on how to do it using a spanner requires removing the top fork tree. If using the JustRoy socket, does it require that disassembly? If the socket is a more simple way to go, can that tool be purchased? Thanks folks for your usual good input.

 
Last edited by a moderator:
Using the socket would require MORE access to the adjusting nut/lock nut. Removal of the upper triple would be

mandatory.

I don't remember if you can access both the nut and lock nut to slip a spanner in there(the upper triple may

cover one or both nuts).

 
Top