How to replace FJR gen 2 battery

Yamaha FJR Motorcycle Forum

Help Support Yamaha FJR Motorcycle Forum:

This site may earn a commission from merchant affiliate links, including eBay, Amazon, and others.

Alexander

Member
Joined
Dec 5, 2009
Messages
14
Reaction score
-1
Location
Pleasant Hill, Ca 94523
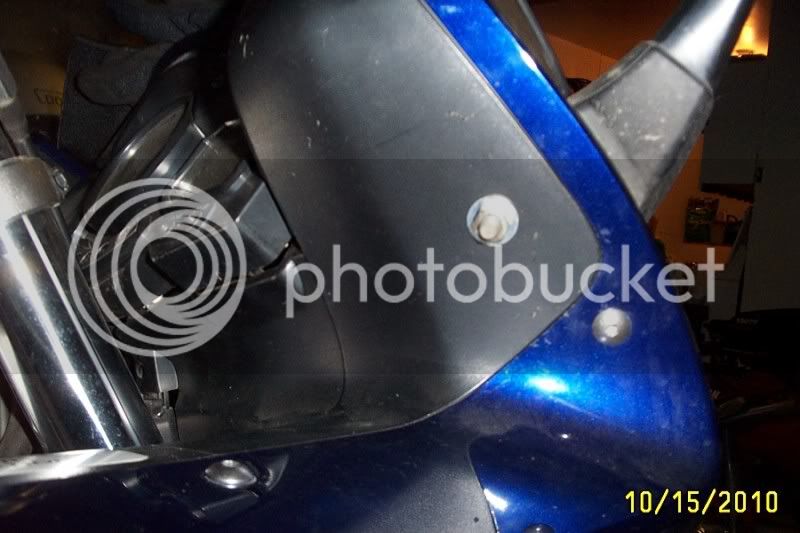
How to replace Gen2 battery? Thought I'd be proactive and replace my almost 5 year old battery. Owners manual said to take it to the dealer. Noooo! I've replaced batterys in lots of bikes. Removed panels A and C, Did not remove headlight adjustment cable from panel C per big CAUTION note in manual. Not enough room to get the battery out. Crap! Do I have to remove some coweling too?

 
Once that black panel is removed that's right on top of the battery, it'll come right out. Undo the locking device that holds the battery down first. Happy Trails!

 
Last edited by a moderator:
What majic says ^^^^ it's a tight fit and you'll need to "spring" the fairing plastic a touch. Easy as 1-2-3 once you've done it!

--G

 
Yeah, disconnect the cables first.
fool.gif


(Odot hasn't been here yet, I thought I'd help him out.)

But s3r10usly, cables off (ground side first off, last on) remove the bolts attaching upper fairing to lower, remove the bolt holding the arm that holds the battery, shove the upper fairing sideway until it breaks then back off a half inch or so (OK, maybe not so seriously,) and lift the offending instrument from its cradle. Or turn the bike over and let gravity pull it out.

Removing those bolts attaching upper to lower will give you a lot more play in that upper piece.

 
Last edited by a moderator:
Yeah, disconnect the cables first. :fool:
(Odot hasn't been here yet, I thought I'd help him out.)........ (OK, maybe not so seriously,) and lift the offending instrument from its cradle. Or turn the bike over and let gravity pull it out..........
Wfooshee, you're HILARIOUS!

V

RPK

 
Thanks guys!

I tried all that, but probably didn't flex the fairing far enough (had the same mental image that wfooshee suggested). The front, inner edge of the battery was hanging up. Sounds like this should work.

With all the fussing around, trying to get the battery out, I shorted the battery terminals. Thought the master fuse would have blown and protected everything. Didn't blow. Hope all is well when the new batt goes in.

 
Not that big a deal although some of the plastic needs to be coaxed a bit. You mentioned you are being proactive about changing the battery but I wouldn't bother until it was at least showing symptoms of impending failure. Yes, it might die tomorrow but it also might be good for another three years! Probably jinxing myself but I still have the OEM battery in my '07 after 85,000 miles. In the last couple of months of riding, I was beginning to notice (perhaps) a little less power starting after a few days of inactivity but plan to try to get at least one more season out of it. I never use a battery tender but top off the battery a couple of times during the (long) winter layoff.

 
Followed your advice and all went well. I like the idea about placing something through the battery terminal holes for use in pulling the battery out .

Here's a suggestion if you find the two battery hold down arms will not line up for the bolt because the new battery is slightly taller: Start the bolt through the arms first, and then connect the outboard arm to it's connector. Then finish tightening the bolt.

 
if you dont like the procedure for the Gen II, dont buy the Gen III....talk about a step backwards. Yamaha engineers should be slapped. Now you have to remove the side panel and all the plastic around the gauges. Total hassle.

 
if you dont like the procedure for the Gen II, dont buy the Gen III....talk about a step backwards. Yamaha engineers should be slapped. Now you have to remove the side panel and all the plastic around the gauges. Total hassle.
Not to mention fiddling with that tiny little Phillips screw to get the headlight adjuster off. Try accessing the battery on the side of the road in the dark. You're right, the design was done by a bunch of jackasses!
That's correct..and if you are going blind like i am, you will try a 2, 3, 3.5, and 4 mm hex trying to get the tiny screw out, till you actually realize its a damn phillips. Black head screw in a black plastic knob..
weirdsmiley.gif


The procedure sounds slightly less labor intensive that changing the air filter on a Wingabago.

OP: sounds like you got enough helpful tips (and I noted them for future use) to get the job done.

If the old battery isn't really dead, they make good emergency backups for ham radios, if put on the battery tender once in a while.

 
if you dont like the procedure for the Gen II, dont buy the Gen III....talk about a step backwards. Yamaha engineers should be slapped. Now you have to remove the side panel and all the plastic around the gauges. Total hassle.
Not to mention fiddling with that tiny little Phillips screw to get the headlight adjuster off. Try accessing the battery on the side of the road in the dark. You're right, the design was done by a bunch of jackasses!
That's correct..and if you are going blind like i am, you will try a 2, 3, 3.5, and 4 mm hex trying to get the tiny screw out, till you actually realize its a damn phillips. Black head screw in a black plastic knob..
weirdsmiley.gif
I changed mine out with itty bitty socket head cap screws in stainless. The stock phillips screws are pretty soft too, so these are much easier to work with.

--G

 
Not that big a deal although some of the plastic needs to be coaxed a bit. You mentioned you are being proactive about changing the battery but I wouldn't bother until it was at least showing symptoms of impending failure. Yes, it might die tomorrow but it also might be good for another three years! Probably jinxing myself but I still have the OEM battery in my '07 after 85,000 miles. In the last couple of months of riding, I was beginning to notice (perhaps) a little less power starting after a few days of inactivity but plan to try to get at least one more season out of it. I never use a battery tender but top off the battery a couple of times during the (long) winter layoff.
Mine is about the same age , same symptoms I'm going to change it out very soon...I don't think that the FJR will bump start as easy as my old Brit stuff...

The procedure sounds slightly less labor intensive that changing the air filter on a Wingabago.
OP: sounds like you got enough helpful tips (and I noted them for future use) to get the job done.

If the old battery isn't really dead, they make good emergency backups for ham radios, if put on the battery tender once in a while.
Just don't run it very low , they are NOT Deep Cycle batteries....N5BBC

 
Remember.....you can always keep a battery going(or someone elses) if you add a positive terminal to connect to before you go to work and when yer done with work.....you just need a jump. Kinda like this.

dcp_1037.jpg


Top