Please help identify this part

Yamaha FJR Motorcycle Forum

Help Support Yamaha FJR Motorcycle Forum:

This site may earn a commission from merchant affiliate links, including eBay, Amazon, and others.

GunMD

Well-known member
Joined
Jun 13, 2005
Messages
2,394
Reaction score
3
Location
Twentynine Palms, CA
While installing my Hellas today I reached up into the left nose area (near the glove box) from below (left side fairing removed). When I pulled my hand back out this little piece followed...please help me figure out where it is supposed to be.

2.jpg


3.jpg


If you can still adjust your headlights, I'd say that's probably road debris.... :blink:

 
As I get older my "Extra parts box" gets bigger & bigger... :)

If the mystery is not solved by the time I get home I will poke around and see if I have anything that looks close since my bike is already apart.

 
After removing the right side fairing I figured out where it goes. I still don't know what it is, but I know where it goes. Will post pics later.

 
It goes on the backside of the headlight... Me thinks it's for venting or something

(yup that's right, I'm a smart one...)

-bvw.

 
It goes on the backside of the headlight... Me thinks it's for venting or something(yup that's right, I'm a smart one...)

-bvw.
Correct.

Those are small vents to allow air to escape as the two 55-watt lamps heat up the the interior of the headlight assembly.

 
Last edited by a moderator:
Sounds right, but I couldnt' seem to find them on Yam's exploded diagrams for parts online. Oh well.

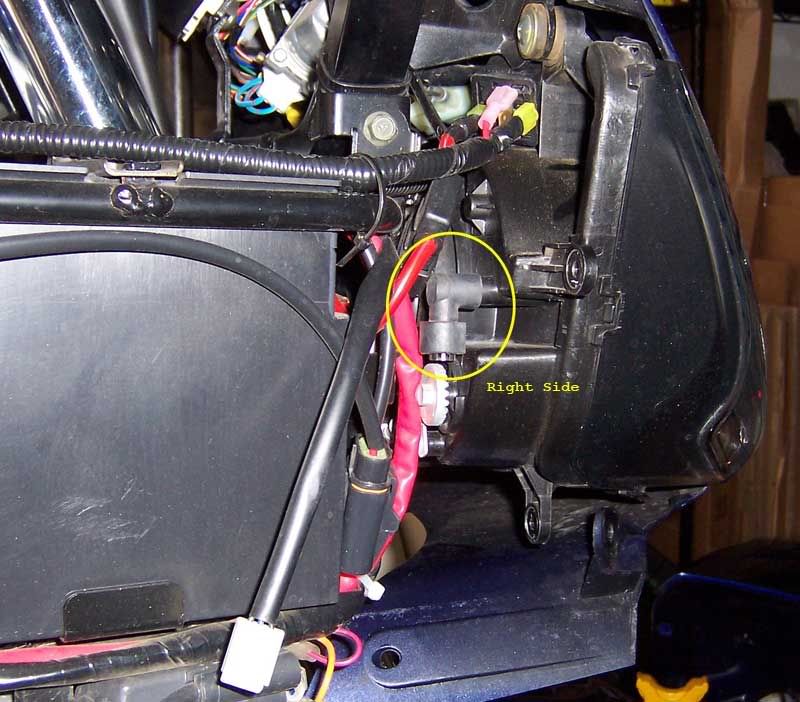
Here are some pics:

Left side, taken from below the bike w/ fairing removed.

Vent1.JPG


Vent2.JPG


Right side, same view.

Vent3.JPG


Went through the trouble of taking the pics, might as well post them too.

Glad the mystery is solved :)

100_2808.jpg


100_2809.jpg


Hmmm headlight vents, who would have thought?

Not us dumb guys...

 
Last edited by a moderator:
Thanks for the help folks (and the pics, Pawtracks).

All done...Hellas are installed. Now to dial them in tonight after dark.

 
It is the vent to help dry out the headlight should moisture get in. It is designed to prevent moisture from entering. I had the same question 3 years ago.

John

 
Wow, this gives me a great idea.

I was wanting to do the LED Signal Lamp Farkle but couldn't figure out how to keep plastic shavings out of the headlight assembly. Warchild recommends removing the whole assembly, which is a giant PITA. I think it would be possible to remove this vent, and attach a shop vac so that while drilling the hole for the lamp on top, the shavings get sucked out of the bottom.

Does this sound feasible?

 
Wow, this gives me a great idea.
I was wanting to do the LED Signal Lamp Farkle but couldn't figure out how to keep plastic shavings out of the headlight assembly. Warchild recommends removing the whole assembly, which is a giant PITA. I think it would be possible to remove this vent, and attach a shop vac so that while drilling the hole for the lamp on top, the shavings get sucked out of the bottom.

Does this sound feasible?
Theoretically, I don't see why not... might depend on how much suction your Shop-vac generates., and if you can get a decent seal on the interface.

 
Wow, this gives me a great idea.
I was wanting to do the LED Signal Lamp Farkle but couldn't figure out how to keep plastic shavings out of the headlight assembly. Warchild recommends removing the whole assembly, which is a giant PITA. I think it would be possible to remove this vent, and attach a shop vac so that while drilling the hole for the lamp on top, the shavings get sucked out of the bottom.

Does this sound feasible?
Removing the headlight housing is not as bad as it looks. I could have it out in less than 15 minutes. By doing so you can drill the hole and then shake as much out as possible. Then use a vac adapted with a smaller hose and suck the crap out. You could try it in the bike. Use a smaller vac and adapt a smaller hose to it. Pull the headlight bulb and suck the crap out. I think you should be able to get most of it.

John

 
And when you're finished, you can remove headlight assembly to shake out the remaining filings that will still find their way into the housing! :p :lol:

In all seriousness, in *addition* to helping keep plastic shavings from entering the headlight assemble, the other reason to do the drilling with the assembly out of the bike is that if you leave it installed, you will find it hard to get a straight-shot access precisely where you need to place your UniBit drill to the cut the LED hole properly.

 
Last edited by a moderator:
pawtracks, did you get the wiring harness reference pics I sent with the MB harness?

You've got the harness running across the top of the battery. It's supposed to fit alongside the battery, next to the clamp.

pawtracksharness.jpg


Sorry for the hijack, I just HAD to comment. ;)

 
:) It the window shield washing hose spout, you just have to buy the motor res etc. it all fits nicely in the glove box! :lol:

On a more serious note, you provided a bad measurement and the wires were not long enough to do it that way, so he improvised! :lol:

 
Top