Reinstalling camshaft question

Yamaha FJR Motorcycle Forum

Help Support Yamaha FJR Motorcycle Forum:

This site may earn a commission from merchant affiliate links, including eBay, Amazon, and others.

dcarver

Well-known member
Joined
Sep 5, 2005
Messages
13,825
Reaction score
3,484
Location
Creston, CA
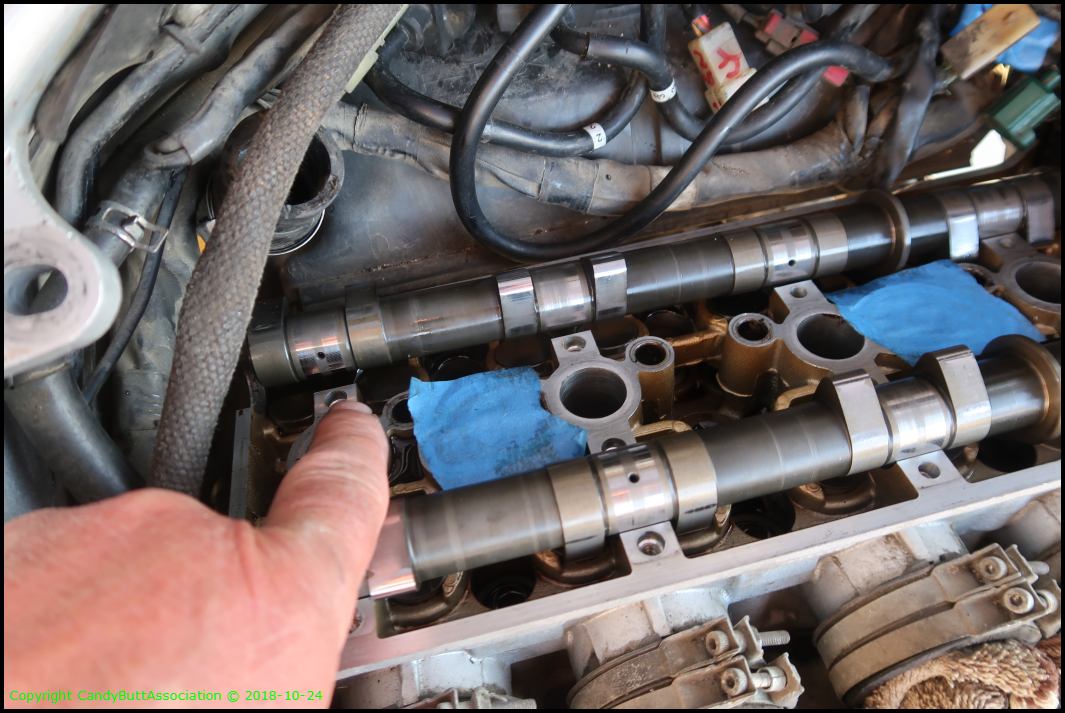
When I lifted cams, they both 'popped' up due to downward facing lobes compressing valve springs. See pic below.

10.jpg


When re-torquing cam caps, start at the sprocket end with a few turns then work inboard to cylinder 1 to prevent cam warpage? Or?

Looking for sage advice, TIA, dcarver

 
Judging from your picture it looks like you can put the one on cyl #4. Then you can get the others started and bring it down evenly. You can push the cam down enough by hand to get the cover on cyl #1 then put the other covers on and tighten them all down evenly. I seriously doubt you could put enough force on it to warp the cam.

 
My Haynes manual says the following:

"Clean the holder bolts, then lubricate with clean engine oil and fit them into the holders. Got the holders in their correct position and [correct] way round. Tighten the bolts evenly and a little at a time in a criss cross pattern, working from the center of the head outwards (i.e starting with the bolts that are above valves that will be opened when camshafts are tightened down), to the torque setting specified at the beginning of this chapter." which is 10 Nm or 7.3 pound ft.

Incidentally i did have to change out one shim on the intake side since it was a little tight. I could not help myself since it was new to me to check the exhaust side torque since the intake side seemed really really torqued down and when i was re-torquing it seemed i was not tightening as hard as it was to loosen them, so i had to darn near use a breaker bar to loosen the exhaust side, then re-torque it to spec. Had a really hard time getting to the bolt on the far side if the cam that your finger is pointing to.

I followed this sequence when i did mine this spring and it's still running, however i might wait for wiser more experience folks to lend their expertise on the matter.I followed this sequence when i did mine this spring and it's still running, however i might wait for wiser more experience folks to lend their expertise on the matter.

Cheers..
 
For the exhaust camshaft caps start with E2, then E3, E1, finally E. Same order for Intake caps. While the FJR service manual is silent on the order, my C14 service manual is very specific and I would think the order would be the same.

Be sure to tighten all 4 caps in stages.

 
Last edited by a moderator:
Don't forget to lube the shaft before insertion.
smile.png


Push cam down by hand and start caps bolts. Tighten a few turns on each bolt cam is seated. Torque.

 
I have used wet carbide paper on a hard flat surface to sand shims to required thickness. 240 grit followed by 320 IIRC. These are not case hardened and the "adjusted" shims are just fine. Takes maybe 10 minutes per shim depending on how much needs to come off. I use a digital caliper to check regularly as I go.

 
Top