TPMS Mounting

Yamaha FJR Motorcycle Forum

Help Support Yamaha FJR Motorcycle Forum:

This site may earn a commission from merchant affiliate links, including eBay, Amazon, and others.

RossKean

Well-known member
Joined
Feb 15, 2010
Messages
7,235
Reaction score
3,735
Location
Fredericton, NB
I bought a TPMS off Amazon. Inexpensive, waterproof and the handlebar mounted display provides pressures, temperatures and bike voltage. Also has a fast USB charge port for phones, power banks etc. on the side. Head unit hooks to the bike so no batteries. Sensors have replaceable batteries.
It arrived yesterday and I just realized that the mount won't work with the FJR handlebars. There is a screw in the end of the mount that screws into the back of the head unit - a bit like a tripod mount (same size thread). With the large diameter and irregular shape, I can't make their mount work on my bars - even with the rubber insert removed.
I considered "Dual Lock" to the panel that covers the battery or perhaps cutting the mount provided and securing to the bars with zip-ties. Possibly even heavy duty two-sided tape such as emblem-mounting tape.
Any other suggestions?

1720283655241.png
 
Last edited:
If tripod mount is 3/8-16, what about this ? Or this if 1/4- 20.
If the head unit is light weight, which I suspect it is, what about titanium velcro ?
-Steve
The RAM ball would fit the back of the head unit but I still have to secure it to the bike.
The "Dual Lock" stuff I mentioned is like the "Velcro" product you linked.

I just had another look and I think I can use double-sided trim tape (or Dual Lock) and attach it to a flat spot beside the LCD display.
Semi-permanent but can be removed if necessary. Would have preferred it on the left side beside the tachometer, but there isn't enough room to mount - interferes with the windshield arm at full extension. Have to extend the connecting wire to reach the Fuzeblock under my seat...
The other possibility is to mount it to a (plastic) wedge (to get the correct angle) that I could stick to the top of the brake reservoir.

1720292201650.jpeg
 
Lots of RAM options once you have the ball on the back of the head unit.
The simplest would be a short arm and reservoir mount. Getting the right viewing angle should be easy. You might end up spending more on mounting than on the device itself.
If you go with the Velcro product, then you can tell people your bike uses titanium fasteners :)
-Steve
 
I would probably use the heavy duty scotch lock velcro. Can you pm me a link that that unit? I can't find it on Amazon.
 
I would probably use the heavy duty scotch lock velcro. Can you pm me a link that that unit? I can't find it on Amazon.
I have the trim tape. Might have a bit of the Dual Lock (or Scotch Lock), but would have to find it...

Same unit is on eBay
https://www.ebay.com/itm/2044299890...Q7XNd999aKdwcK+fg8oR7SsQ==|tkp:Bk9SR7Sbk5iRZA

I got mine on Amazon.ca, but also saw it on Amazon.com
https://www.amazon.ca/gp/product/B0CNWH5Q4S/ref=ox_sc_act_title_2?smid=AHSL5HR4HP3O4&psc=1
https://www.amazon.com/Explopur-Pre...rcycle&qid=1720294320&sprefix=,aps,62&sr=8-31

AliExpress too
https://www.aliexpress.com/item/100...Tmwl7lD3&utparam-url=scene:search|query_from:

The only ratings I saw were on Amazon.com and they weren't terrific, but not many in total. Who knows, but I liked the features for the price. Nice to have the voltmeter and USB outlet.
 
I'll post a pic later from my other laptop. Basically I took a 1 inch wide by maybe 3 inch strip of 1/8 inch thick aluminum. Drilled a hole on 1 end for the TPMS readout to mount to and 2 holes lower that line up with the right switchgear mounting screws and installed it on those.

BTW this is the one I have. It has a rechargeable battery. Granted I'm not logging a ton of miles, only 3-4K per year, but I went 2 years without having to charge it.
 
Last edited:
Thanks for the links, I ordered one. We'll see how it works out. I like that it's hard wired and has volts instead of a clock. I already have a clock on the dash! :)
 
Thanks for the links, I ordered one. We'll see how it works out. I like that it's hard wired and has volts instead of a clock. I already have a clock on the dash! :)
Are you wiring it to a switched circuit or only plugging it in when you ride? Parasitic draw isn't likely to be huge, but would deplete the battery over time. (I will check current draw when I install it, but I am connecting to a switched circuit on my Fuzeblock.)

When I got mine, I thought the screen was scratched but there was a peelable plastic film on top...
 
I don't remember actually. Probably not because the aluminum was so thin. Looking at it again it's maybe 1/16 of an inch thick.
Aluminum is thin, but those screws are normally recessed. Easy enough to check if I decide I want it closer for better visibility. I have the Aluminum sheet - probably 3/32".
 
I bought a TPMS off Amazon. Inexpensive, waterproof and the handlebar mounted display provides pressures, temperatures and bike voltage. Also has a fast USB charge port for phones, power banks etc. on the side. Head unit hooks to the bike so no batteries. Sensors have replaceable batteries.
It arrived yesterday and I just realized that the mount won't work with the FJR handlebars. There is a screw in the end of the mount that screws into the back of the head unit - a bit like a tripod mount (same size thread). With the large diameter and irregular shape, I can't make their mount work on my bars - even with the rubber insert removed.
I considered "Dual Lock" to the panel that covers the battery or perhaps cutting the mount provided and securing to the bars with zip-ties. Possibly even heavy duty two-sided tape such as emblem-mounting tape.
Any other suggestions?

View attachment 7521
Could you please provide the link for that tpms from Amazon? Appreciate it. Thank you.
 
I bought the same unit (from AliExpress) for my 2024 FJR. I mounted it to the upper right of the instrument cluster using a 3D printed bracket I designed. I printed the bracket from black ABS so it would be hidden, weatherproof, and temperature resistant. I put a layer of black duct tape on the surface against the dash and the surface the TMPS mounts to increase friction and provide a small amount of padding. It mounts to the screw that holds the dash together up there (see pic). That single screw is plenty strong.

I tested the sensors with an air regulator and two good quality gauges that I trust and found that they each consistently read 2PSI low. I doubt that is consistent between sensors, but you never know.

The 38 and 44 PSI indicated in the picture below are therefore actually 40 and 46PSI. Why so high? I just turned the bike on briefly to take this picture, so they are still reading the HOT pressures from the end of my last ride. Pressure always goes up a few PSI as the tires warm up.

It is also reading 24C and 32C as the tire temperatures. 24C is just about what the ambient temperature was at the end of the ride. This is showing the temperature of the TPMS sensor itself, which is not really thermally connected to the tire, and literally blowing in the ambient wind, so it is reading ambient temperature. The rear one tends to read 5-10C higher, which is probably the engine heat being vented over the rear tire. So the tire temperature reading is pretty useless.

It can be configured to read pressures in either BAR or PSI, and temperatures in either C of F. I like to use PSI and C.

I tested the voltage readings against a good quality multimeter that I trust, and found it was very accurate. Better than 0.1V accuracy. More like 0.05V, so pretty good. The voltage readings was high on my list for choosing this sensor since I like to have that displayed.

I've seen reports that these are not really waterproof. The first time i washed the bike, sure enough, the display fogged up because water got inside. I don't have any pictures, but it is pretty easy to take apart. Just small hex screws on the back. The plastic front cover can be pushed off from the back. It is only held on with some double sided tape. I cleaned the tape off, put on new tape, and a bead of silicone around the outside edge of the clear plastic so now it is sealed. I would highly recommend doing that if you have one of these units. Be careful not to scratch the back of the window as it is back painted.

The display works extremely well in direct sun or via the built-in LED backlighting (that is a little uneven, but very usable). The display is a bit faded when it is sunny out, but the display is in the shade, but still very readable.

Here is what it looks like from the driver's seat:
FJR_TPMS3.jpg

This is screw it is mounted to:
FJR_TPMS1.jpg

And the same view with the bracket mounted. There is about 1/2" clearance from the brake lever at full steering lock.
FJR_TPMS2.jpg

And some views of the bracket itself.
TPMS4.jpg

It was designed in FreeCAD, and printed on a Bambu 3d printer. If anybody would be interested in the design files and/or the STL (it should print fine on any 3D printer), please PM me.
 
Last edited:
I bought the same unit (from AliExpress) for my 2024 FJR. I mounted it to the upper right of the instrument cluster using a 3D printed bracket I designed. I printed the bracket from black ABS so it would be hidden, weatherproof, and temperature resistant. I put a layer of black duct tape on the surface against the dash and the surface the TMPS mounts to increase friction and provide a small amount of padding. It mounts to the screw that holds the dash together up there (see pic). That single screw is plenty strong.

I tested the sensors with an air regulator and two good quality gauges that I trust and found that they each consistently read 2PSI low. I doubt that is consistent between sensors, but you never know.

The 38 and 44 PSI indicated in the picture below are therefore actually 40 and 46PSI. Why so high? I just turned the bike on briefly to take this picture, so they are still reading the HOT pressures from the end of my last ride. Pressure always goes up a few PSI as the tires warm up.

It is also reading 24C and 32C as the tire temperatures. 24C is just about what the ambient temperature was at the end of the ride. This is showing the temperature of the TPMS sensor itself, which is not really thermally connected to the tire, and literally blowing in the ambient wind, so it is reading ambient temperature. The rear one tends to read 5-10C higher, which is probably the engine heat being vented over the rear tire. So the tire temperature reading is pretty useless.

It can be configured to read pressures in either BAR or PSI, and temperatures in either C of F. I like to use PSI and C.

I tested the voltage readings against a good quality multimeter that I trust, and found it was very accurate. Better than 0.1V accuracy. More like 0.05V, so pretty good. The voltage readings was high on my list for choosing this sensor since I like to have that displayed.

I've seen reports that these are not really waterproof. The first time i washed the bike, sure enough, the display fogged up because water got inside. I don't have any pictures, but it is pretty easy to take apart. Just small hex screws on the back. The plastic front cover can be pushed off from the back. It is only held on with some double sided tape. I cleaned the tape off, put on new tape, and a bead of silicone around the outside edge of the clear plastic so now it is sealed. I would highly recommend doing that if you have one of these units. Be careful not to scratch the back of the window as it is back painted.

The display works extremely well in direct sun or via the built-in LED backlighting (that is a little uneven, but very usable). The display is a bit faded when it is sunny out, but the display is in the shade, but still very readable.

Here is what it looks like from the driver's seat:
View attachment 7534

This is screw it is mounted to:
View attachment 7533

And the same view with the bracket mounted. There is about 1/2" clearance from the brake lever at full steering lock.
View attachment 7535

And some views of the bracket itself.
View attachment 7536

It was designed in FreeCAD, and printed on a Bambu 3d printer. If anybody would be interested in the design files and/or the STL (it should print fine on any 3D printer), please PM me.
Very helpful, thanks. Unfortunately, your elegant mounting solution doesn't work for my Gen II.

Great comments on the voltmeter accuracy (I already checked it) and the pressure accuracy - I haven't completed the installation yet so was not able to evaluate accuracy for the pressure on mine. Might not get to it for a couple of weeks as I am planning a trip away (with my other bike).

I wasn't overwhelmed with the display brightness when I plugged it in, but wasn't terrible. Would not want to have to cover it riding at night so it is always a compromise. Your comments suggest that it is sufficient...

Thanks for the heads-up on water intrusion. Could you tell whether it was from around the cover "glass", the shell seam, the screws on the back, or the USB outlet? I think my proposed location will keep the rain off it but I will have to be careful when washing the bike.

Do you still have the factory plastic protective film on your bike's LCD screen - sort of looks like it in one of the photos? Or did you apply a protective layer yourself?
 
Last edited:
The water comes in between the clear plastic cover on the front of the display and the case. The double sided tape that holds it on does not provide a complete seal. That is why I added silicone around the outside of the tape.. i also put some silicone on the rubber gasket that goes between the case halves, but I'm pretty sure it seals fine on its own. If you do extra sealing on it, leaving a small hole on the bottom somewhere is a good idea to allow it to equalize pressure when you drive over mountains (I live close to mountains so I do that regularly). The cover on the USB power jack on the side would probably leak a tiny bit of air, but it can't hurt to make sure.

On the voltmeter, I would just not trust the 0.01 V digit. All you really need is 0.1V anyway. Truth is you barely need better than 1.0V resolution to be able to see if the charging system is working properly and the battery is up to snuff. My FJRs both run at right around 14.1V - 14.3V, which is right about where you want 'em.

I checked the sensors and voltage before I installed it using a DC power supply and an air compressor with a regulator and a couple of gauges hobbled together with some fittings. It appears (like most TPMS sensors) that the sensors have motion sensors in them, so they transmit more often when they are in motion and when they see a change in pressure. They go several minutes between transmissions when they have been stationary for a while (to improve battery life). That also means that the display does not have a valid reading for as long as 3-4 minutes after starting the bike in the morning.

Speaking of which, there is an alarm function in the display. It has a beeper, but it is so quiet that i don't think you'd hear it in even a quiet car with the windows closed. So useless. The display does flash though, so hopefully you would notice it.

For me this TMPS was a replacement for my Garmin Zumo 595 GPS with had TPMS support. The new bike has a new Zumo XT2 (no TPMS support). On the 595, it displayed a warning on the screen, and if I had my ear plugs connected via my Sena headset (that is most times since I'm usually listening to music via the Zumo) it had an audible warning.

I have mine connected to ignition power. With the backlight, the idle power would pretty quickly be be too much for the FJR's little battery.

The LED backlight is dimmable with the button on the front for night riding. The display is what is called transflective. That means it has a reflective surface at the back so it it is lit by the ambient light in addition to the LED backlighting (which does little to no good in the sun). Because of that it is very contrasty in direct sunlight.

The existing dash probably just has some dust on it. There are no protective convers in either picture. Those are actually different bikes. With the TPMS is my new 2024. Without is my old 2014 (for sale - there is an ad elsewhere on this site).
 
I have mine connected to ignition power. With the backlight, the idle power would pretty quickly be be too much for the FJR's little battery.
I am connecting it to switched power in my Fuzeblock under the seat - power leads will have to be extended in order to reach.
I agree on the voltage display. One decimal is more than sufficient. Really just want to watch for changes indicating you are overtaxing with accessories, evidence of failing stator (or R/R), or weak battery (key on, but not started). For the sake of my curiosity, I will probably measure the current drain for the device - probably a few milliamps for the receiver, display and USB charger (even without anything plugged in).

This is what looked like a surface film coming loose...
1720449748986.png

I suspected that the device alarm would not be audible - especially while riding. Since I don't use a BT communicator (and wear earplugs), I have to rely upon a visual. I have a Zumo XT (and a Zumo 665 before that).

For the water intrusion, I might try a layer of peel-and-stick 3M paint protective film over the front and stretched down the sides to the seam (if I can get that much stretch without wrinkles). Takes some technique... Would prefer not to take it apart unless necessary.

I appreciate your input.
 
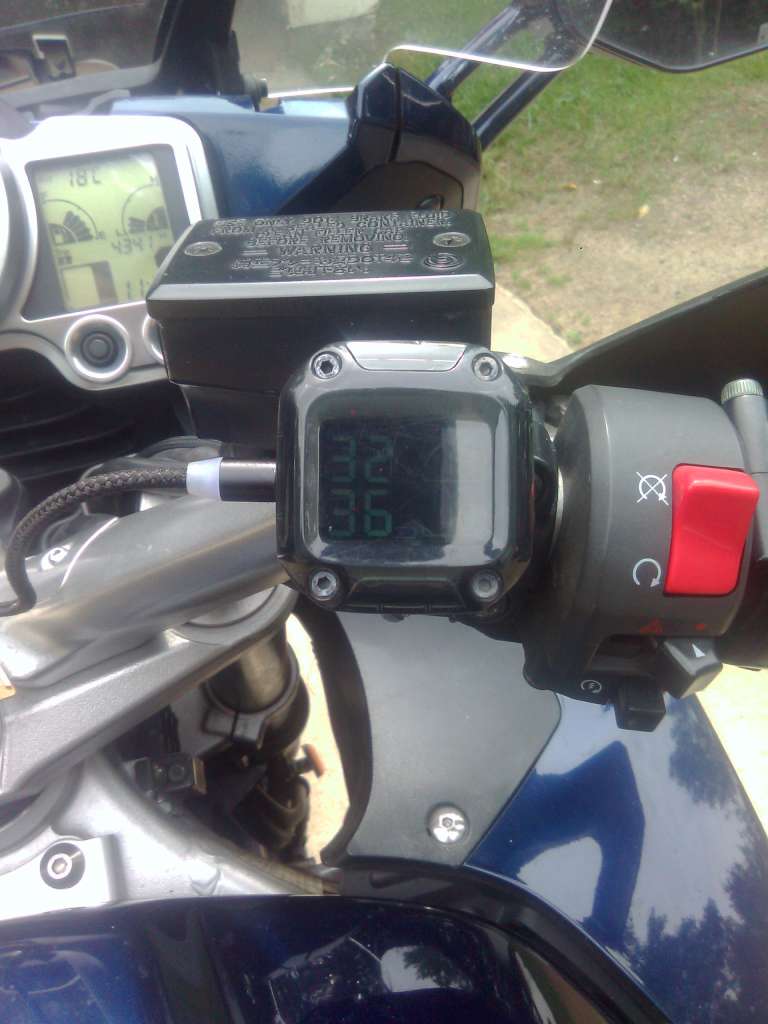
I'll throw this one into the mix, as it IS waterproof and fits the FJR with supplied hardware:

https://www.amazon.ca/gp/product/B08MPLQVDN

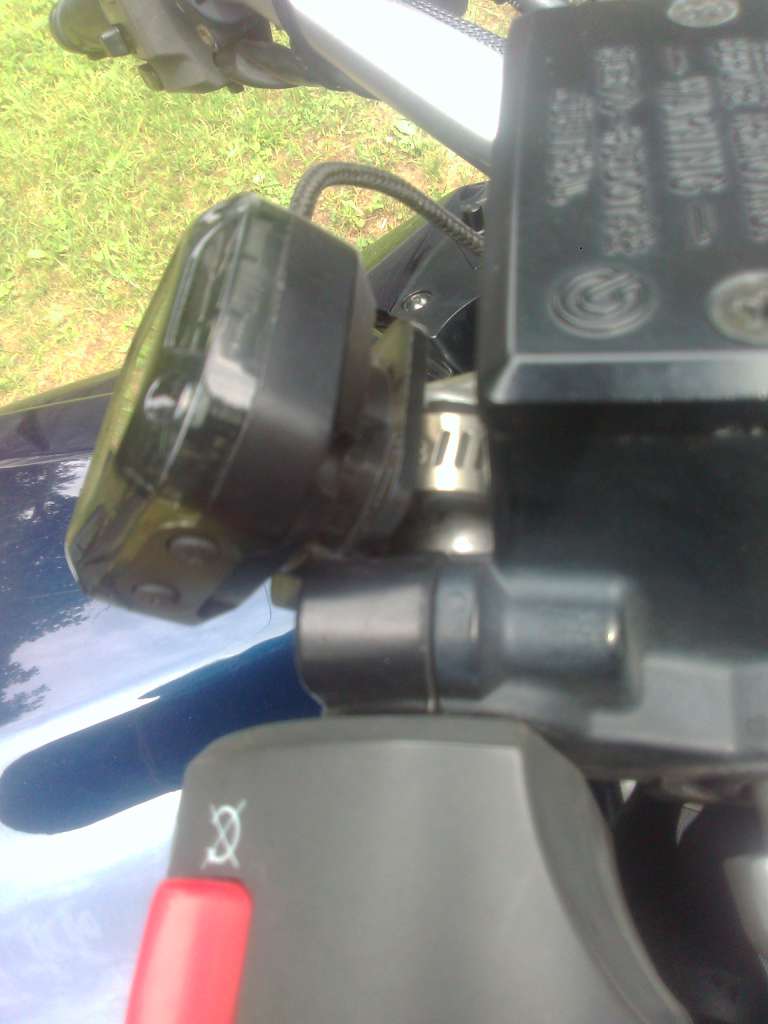
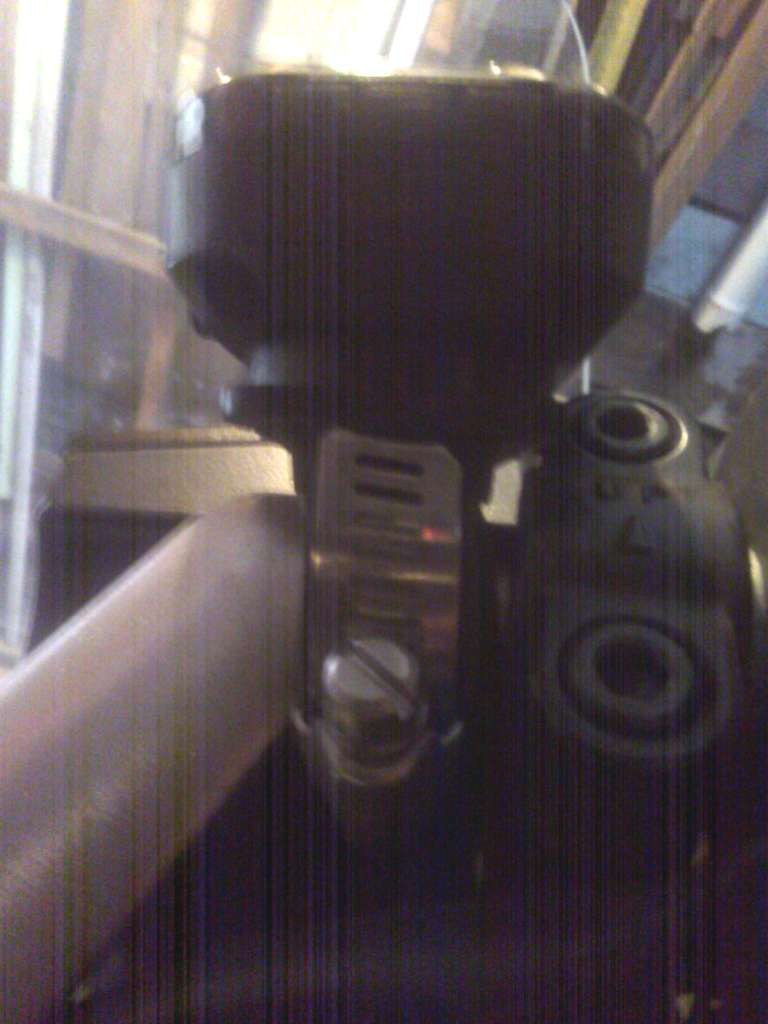
It comes with several mounting options, I used the basic band clamp to secure it to the right handlebar on both a Gen 1 and a Gen 2.

01_mount_side.jpg


02_mount_underside.jpg


It is powered by a rechargeable battery which lasts >1 month. The charge cable plugs into a USB port at one end while the other is flat faced and magnetically coupled so there's no penetration for water to get in. The sensors use replaceable watch batteries which last >1 year.

The display is minimal -- temp, pressure for each tire and charge level. The respective pressure will flash if a wheel sensor detects changes above or below the configurable presets. Also if a sensor notices a rapid drop even when still within the acceptable range. It also beeps, but good luck hearing that wearing a helmet and riding down the road!

As noted by others above, valve cap temp sensors hanging out in free air are pretty meaningless. Yes, they go up somewhat as the tires warm up but the only time they are actually accurate is when the bike has been sitting several hours so everything is at ambient temperature. At that time, they do agree with the the dash display.

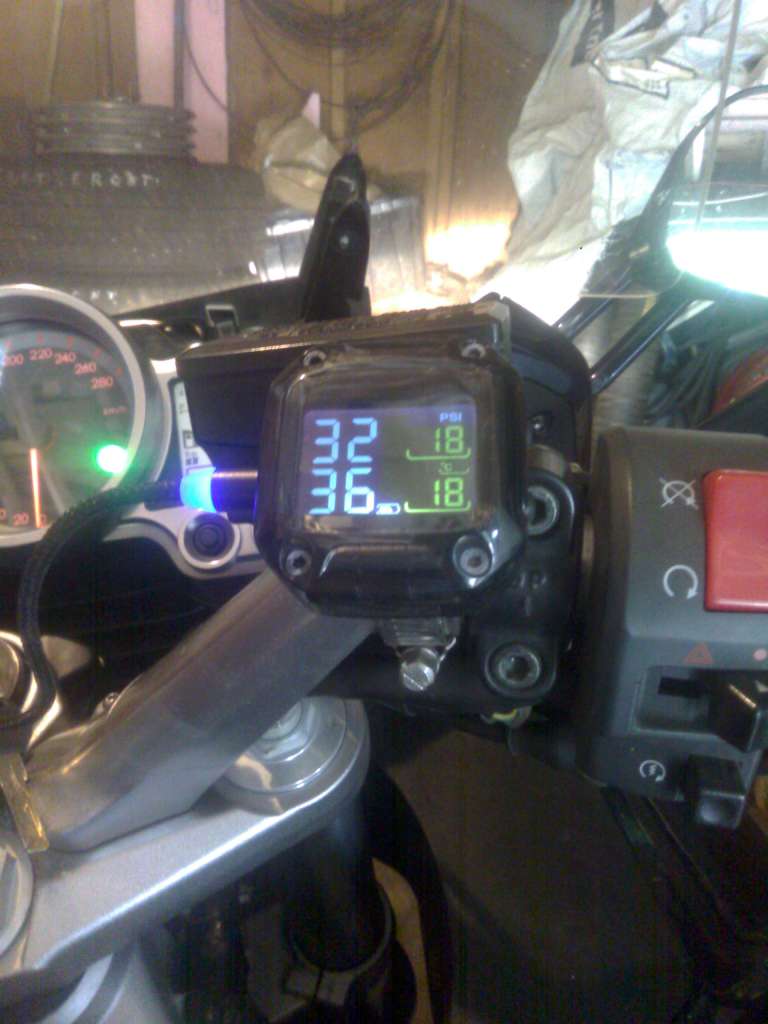
The pressures seem to be pretty accurate though. Between the two bikes the sensors are all +/-1psi from a couple of trusted gauges. (Pressures shown below are cold, will rise to about 35 F and 42 R in use):

03_displaly.jpg


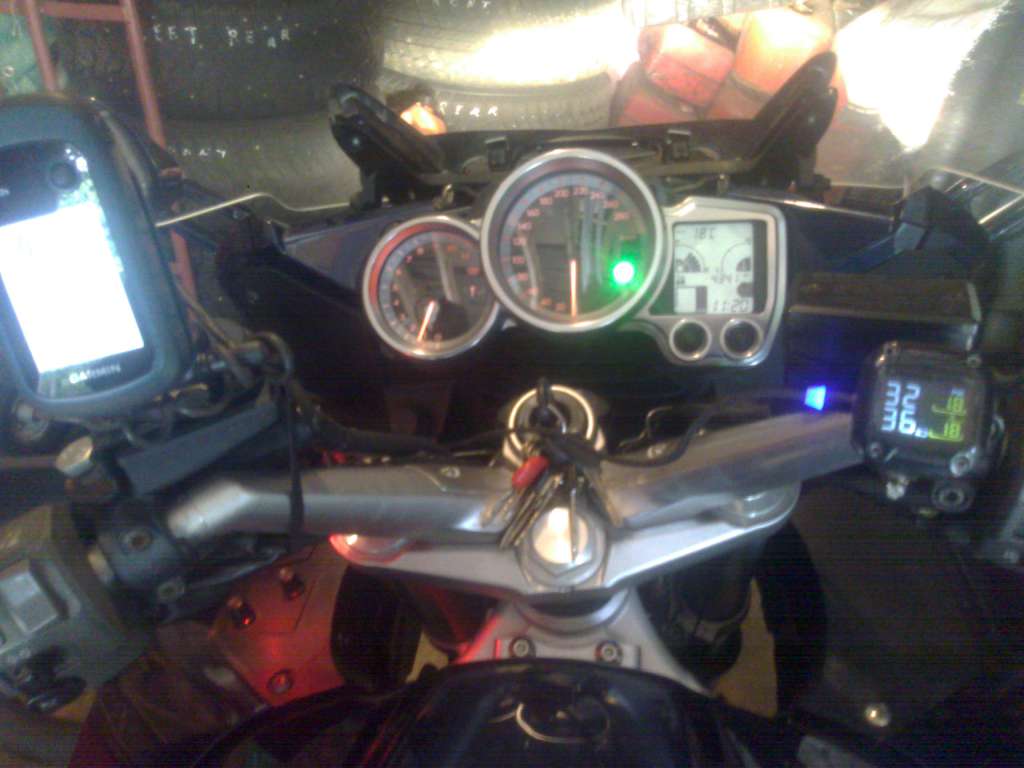
It's fairly small, but mounted on the handlebars the relative size compared to the dash display is reasonable (note that this image was with the bike parked in the garage):

04_drivers_view.jpg


In full sun the (useless) temperature readings are almost impossible to make out and while the pressure reading is visible while riding, it's considerably washed out too. As someone else noted above, it's a compromise between night and day. An ambient light sensor and automatic adjustment would be nice, but it is what it is.

05_full_sun.jpg
 
Top