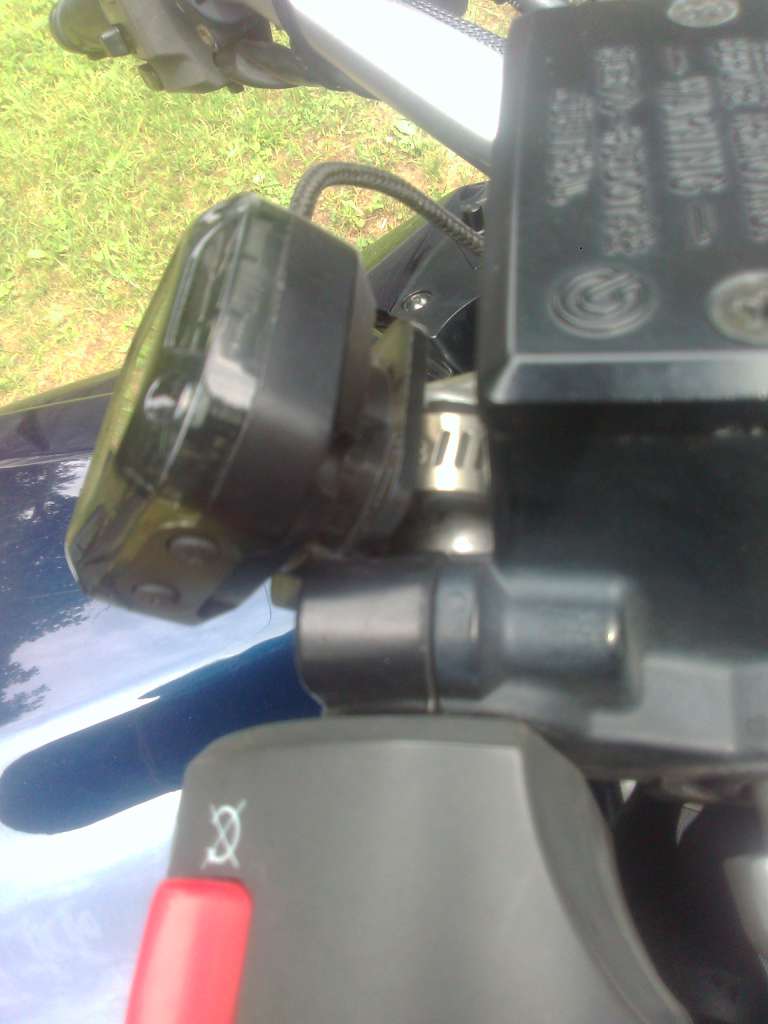
I bought the same unit (from AliExpress) for my 2024 FJR. I mounted it to the upper right of the instrument cluster using a 3D printed bracket I designed. I printed the bracket from black ABS so it would be hidden, weatherproof, and temperature resistant. I put a layer of black duct tape on the surface against the dash and the surface the TMPS mounts to increase friction and provide a small amount of padding. It mounts to the screw that holds the dash together up there (see pic). That single screw is plenty strong.
I tested the sensors with an air regulator and two good quality gauges that I trust and found that they each consistently read 2PSI low. I doubt that is consistent between sensors, but you never know.
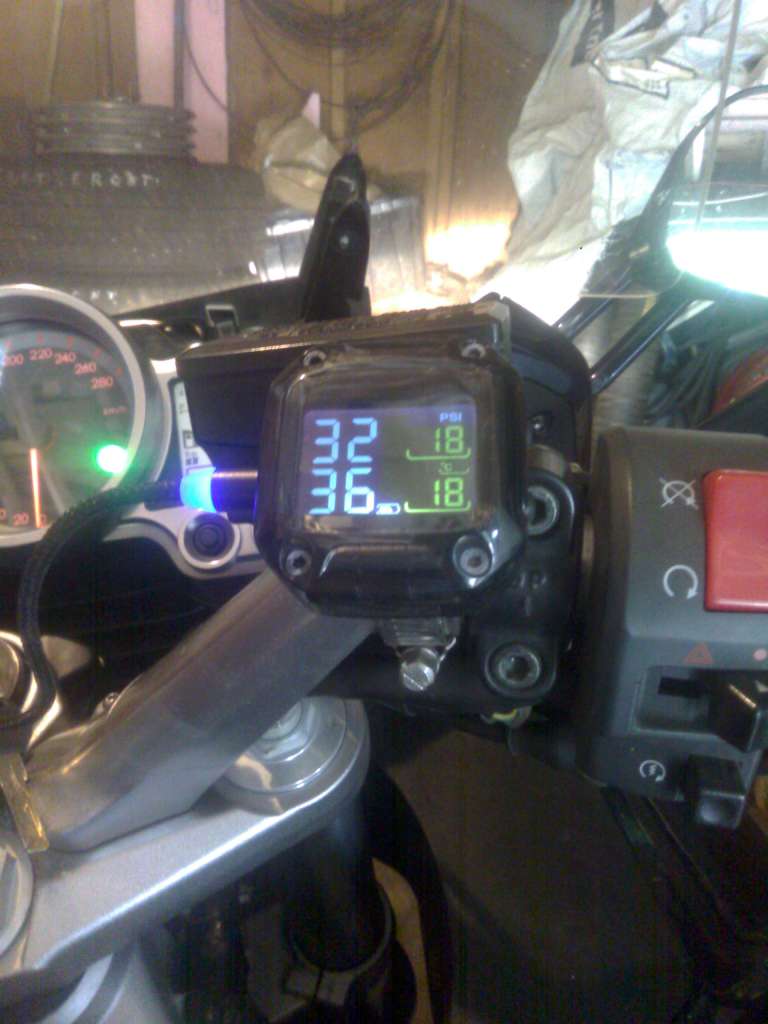
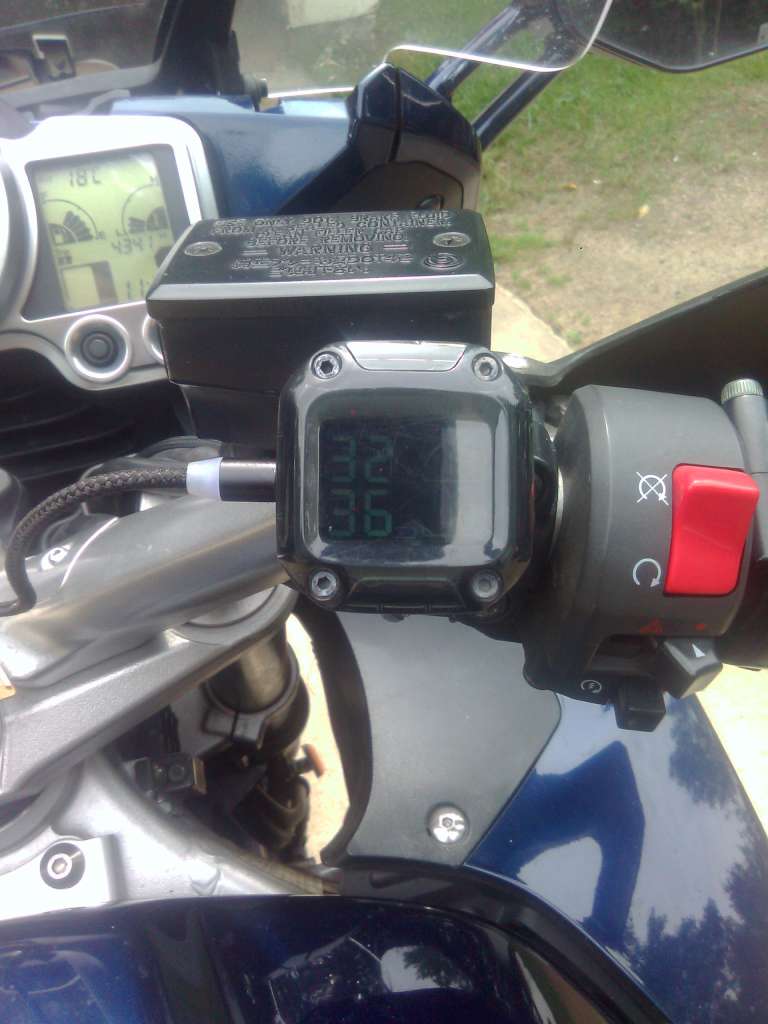
The 38 and 44 PSI indicated in the picture below are therefore actually 40 and 46PSI. Why so high? I just turned the bike on briefly to take this picture, so they are still reading the HOT pressures from the end of my last ride. Pressure always goes up a few PSI as the tires warm up.
It is also reading 24C and 32C as the tire temperatures. 24C is just about what the ambient temperature was at the end of the ride. This is showing the temperature of the TPMS sensor itself, which is not really thermally connected to the tire, and literally blowing in the ambient wind, so it is reading ambient temperature. The rear one tends to read 5-10C higher, which is probably the engine heat being vented over the rear tire. So the tire temperature reading is pretty useless.
It can be configured to read pressures in either BAR or PSI, and temperatures in either C of F. I like to use PSI and C.
I tested the voltage readings against a good quality multimeter that I trust, and found it was very accurate. Better than 0.1V accuracy. More like 0.05V, so pretty good. The voltage readings was high on my list for choosing this sensor since I like to have that displayed.
I've seen reports that these are not really waterproof. The first time i washed the bike, sure enough, the display fogged up because water got inside. I don't have any pictures, but it is pretty easy to take apart. Just small hex screws on the back. The plastic front cover can be pushed off from the back. It is only held on with some double sided tape. I cleaned the tape off, put on new tape, and a bead of silicone around the outside edge of the clear plastic so now it is sealed. I would highly recommend doing that if you have one of these units. Be careful not to scratch the back of the window as it is back painted.
The display works extremely well in direct sun or via the built-in LED backlighting (that is a little uneven, but very usable). The display is a bit faded when it is sunny out, but the display is in the shade, but still very readable.
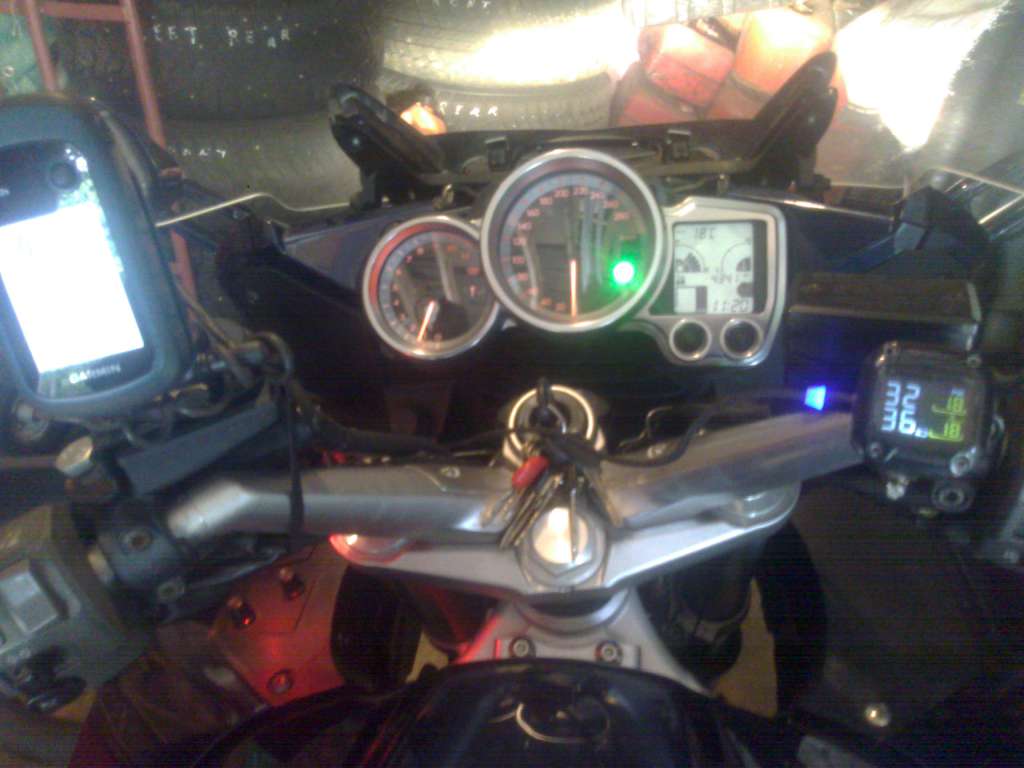
Here is what it looks like from the driver's seat:
View attachment 7534
This is screw it is mounted to:
View attachment 7533
And the same view with the bracket mounted. There is about 1/2" clearance from the brake lever at full steering lock.
View attachment 7535
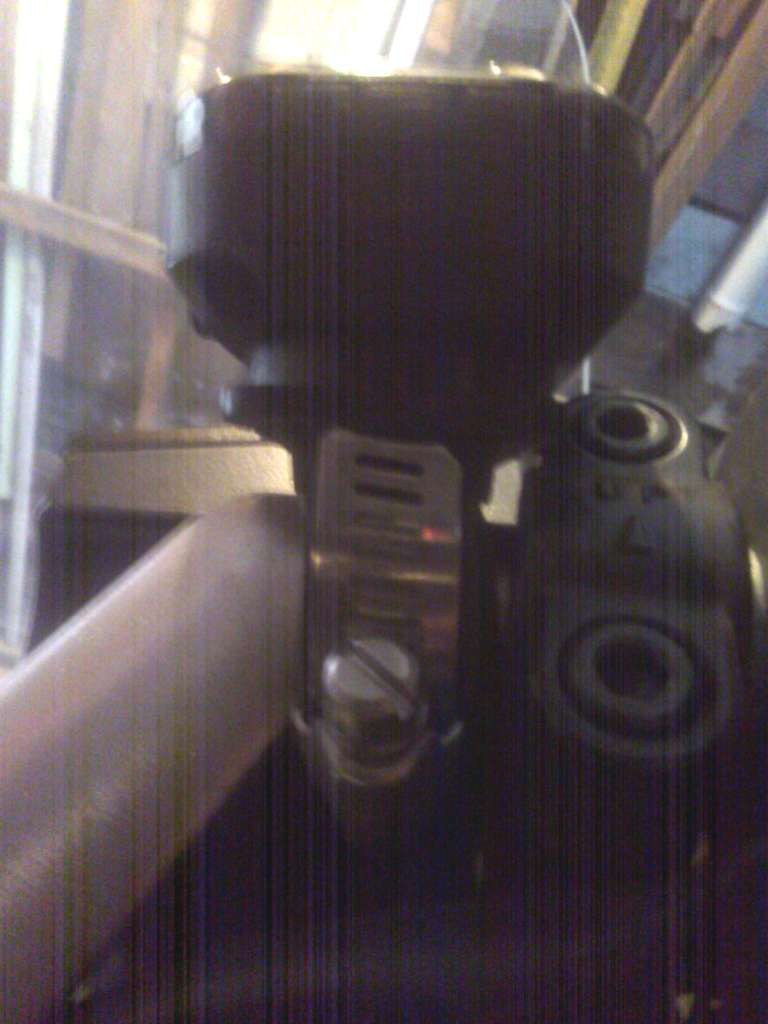
And some views of the bracket itself.
View attachment 7536
It was designed in FreeCAD, and printed on a Bambu 3d printer. If anybody would be interested in the design files and/or the STL (it should print fine on any 3D printer), please PM me.


")