You are using an out of date browser. It may not display this or other websites correctly.
You should upgrade or use an alternative browser.
You should upgrade or use an alternative browser.
Tranny (shifter) bokerforked (Found: star cam broke off the shift drum!)
- Thread starter wfooshee
- Start date

Help Support Yamaha FJR Motorcycle Forum:
This site may earn a commission from merchant affiliate
links, including eBay, Amazon, and others.
TownsendsFJR1300
Well-known member
Thanks for the video.
Just a side note after watching the video. As I re-call, the round "wheel" on the shifter that rides on the indents on the shifter drum, it should (again, as I re-call) turn freely.
Yes, oil does get splashed about there, but I would make sure (squirt and hand rotate) that "wheel" with oil just to make sure it spins nice and free.
Uncle Hud
Just another blob of protoplasm using up your oxyg
Damn fine job, sir! Thanks a million!
I have a thing for cams, gears, and other spinning Rube Goldberg devices. Your video shows an amazing set of pinions and gears, sliding cogs, and spreader bars (or whatever their real name) with driving pins in detented races ... which translate the the small movement of your left big toe into thrust that pushes you down the street with alarming acceleration. And that's the blankety-blank star cam, eh?
Made my day. Thanks again.
wfooshee
O, Woe is me!!
Reassembly has begun. Not much progress, but the case is back together and the middle gear shaft is installed.
That torque-angle gauge was a pain in the ass because without an extension I couldn't make anything reach the bolts, and with the shortest extension I had it was high enough that the arm that holds the gauge indicator stationary didn't reach anything I could set it against. I had to rig up a tube to fit the arm tightly as an extension to it. But we're there, 31 bolts tightened in sequence.
I temporarily put the clutch basket and clutch in and shifted it to first just to hold the transmission so I could torque the 36mm nut on the end of the middle gear shaft to its 80 lb-ft spec. That was kind of a pain because I'm not ready for the clutch stuff to be there, but it was an easy way to lock the transmission so I could torque that big nut. Clutch stuff is out again and I'm ready to continue tomorrow.
I only stopped because I'm out of Loc-tite! I don't want any of those internal bolts going in unsecured, so I'll pick up some Loc-tite and continue tomorrow. I was really hoping to get farther, and even distantly hoping to be riding this week, but college football got in the way.
Last edited by a moderator:
Uncle Hud
Just another blob of protoplasm using up your oxyg
College football will do that.
wfooshee
O, Woe is me!!
Yeah, me, neither. No ******* clue where it is.......
This, button up the clutch and the cover, the crankshaft cover, the stator cover, the oil cooler and water pump, and the engine is done. That's how close I am!!!
Oops. Found it!!!! It's waiting for me on the end of the shaft that came out of the bike, sitting over there on that oily junk-parts shelf. I stuck it on there so I'd know where it was and for sure wouldn't lose it.......
Last edited by a moderator:

$19.99
MOREOK Winter Gloves -10°F 3M Thinsulate Warm Gloves Bike Gloves Cycling Gloves for Driving/Cycling/Running/Hiking-Black-L
MOREOK-US (Ships from USA)

$72.99
$89.99
Electric Heated Underwear Set Fleece Lined Thermal Body Suit Men Winter APP Control Temperature Motorcycle Top Pants (Black, XL)
linzhoushiyangzhengmaoyiyouxiangongsi

$64.60
$68.00
WILD HEART Waterproof Motorcycle Duffel Bag PVC500D Double-bottom With Rope Straps and Inner Pocket 40L 66L 100L for Kayaking, Camping, Boating,Motorcycle
ZHONGSHAN WILD FRUIT OUTDOOR

$159.99
FLAVOR Men Brown Leather Motorcycle Jacket with Removable Hood (Large (US standard), Brown)
FLAVOR Leather

$86.99
Edwards Oil Change Kit fits 2003-2020 Yamaha FJR1300 Sport Touring (Full Synthetic)
Edwards Motorsports & RV's

$14.99
$17.99
MELASA Fleece Lined Winter Cycling Beanie with Holes for Glasses - For Men, Women
HNXCHUANG

$197.39
$209.99
Milwaukee Leather SH1408 Men's Sporty Crossover Vented Black Motorcycle Leather Scooter Jacket - Large
Amazon.com

$64.99
Edwards Oil Change Kit fits 2003-2020 Yamaha FJR1300 Sport Touring
Edwards Motorsports & RV's
RadioHowie
I Miss Beemerdons!
College football will do that.
TownsendsFJR1300
Well-known member
Hope you have part #21;
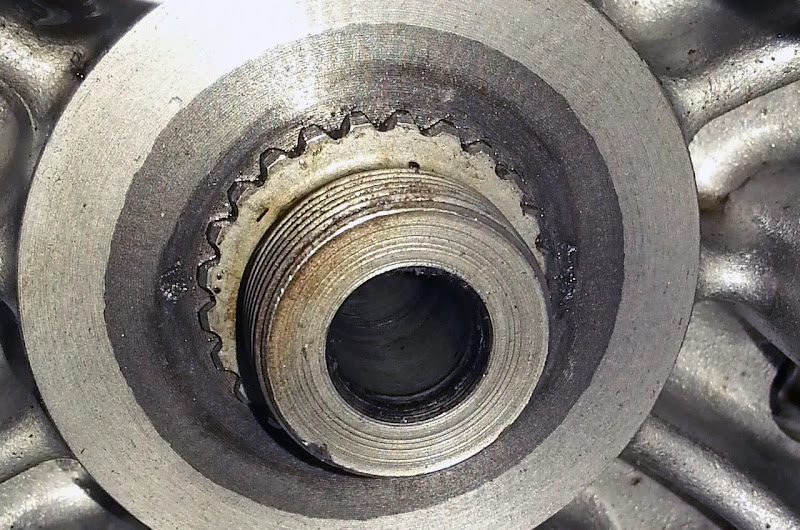
See the nut on the shaft here that holds the clutch basket onto the transmission shaft?
Yeah, me, neither. No ******* clue where it is.......
I have two parts trays holding the various pieces that simply can't be left where they belong (like I've been doing with bolts) and it's not to be found anywhere. Neither is the lockwasher that goes underneath it, but that's a single-use item and I've got a new one.
This, button up the clutch and the cover, the crankshaft cover, the stator cover, the oil cooler and water pump, and the engine is done. That's how close I am!!!
**** **** **** **** **** **** **** **** **** **** **** **** **** **** ****!!!!!!
Every piece I have still loose I can identify. I know where every part of this bike is. Except that one ******* nut. Of course the absolute guaranteed way to find it is to order a replacement!
Oops. Found it!!!! It's waiting for me on the end of the shaft that came out of the bike, sitting over there on that oily junk-parts shelf. I stuck it on there so I'd know where it was and for sure wouldn't lose it.......
https://www.partzilla.com/parts/search/Yamaha/Motorcycle/2003/FJR1300+-+FJR1300R/CLUTCH/parts.html
Last edited by a moderator:
wfooshee
O, Woe is me!!
Yes, that's called a lockwasher in the fiche. Splined to the shaft, and a tab bends down to keep the nut from backing off.
Motor is buttoned up, ready to go back into the frame! YAAAAAAAYYYYYYYY!!!!!


Getting the clutch basket in is not fun!!!! You have to make sure the rear balancer is timed, and the oil pump drive is driven by dogs that engage the back of the clutch basket, which is a blind mating when you're installing. You have to reach in through where the water pump is supposed to be and turn the oil pump shaft to get the dogs lined up on the back of the clutch basket.
Fortunately the rear balancer hangs in the right place, with its timing mark lined up. #1 in TDC and the basket eventually goes in, with some shoving and cursing.
Of course, you could take the extreme measure of removing the rear balancer and putting it in afterwards, but that sounded like too much work!

Motor is buttoned up, ready to go back into the frame! YAAAAAAAYYYYYYYY!!!!!
Getting the clutch basket in is not fun!!!! You have to make sure the rear balancer is timed, and the oil pump drive is driven by dogs that engage the back of the clutch basket, which is a blind mating when you're installing. You have to reach in through where the water pump is supposed to be and turn the oil pump shaft to get the dogs lined up on the back of the clutch basket.
Fortunately the rear balancer hangs in the right place, with its timing mark lined up. #1 in TDC and the basket eventually goes in, with some shoving and cursing.
Of course, you could take the extreme measure of removing the rear balancer and putting it in afterwards, but that sounded like too much work!
Last edited by a moderator:
rPGoatBoy
Well-known member
Did you twist a large flat bladed screwdriver through the hole in the clutch basket to line up the spring loaded primary gears on the basket? I think the service manual says to do that, and I was cursing and swearing before I took a break and read the manual. Once I did that, the clutch dropped right into place.Getting the clutch basket in is not fun!!!! You have to make sure the rear balancer is timed, and the oil pump drive is driven by dogs that engage the back of the clutch basket, which is a blind mating when you're installing. You have to reach in through where the water pump is supposed to be and turn the oil pump shaft to get the dogs lined up on the back of the clutch basket.
Fortunately the rear balancer hangs in the right place, with its timing mark lined up. #1 in TDC and the basket eventually goes in, with some shoving and cursing.
Of course, you could take the extreme measure of removing the rear balancer and putting it in afterwards, but that sounded like too much work!
"sonofabitch"
wfooshee
O, Woe is me!!
Yep. Did that. My issue was getting the oil pump engaged. I would feel it click it, then I'd reach for the collar that goes in the center of the basket for its bearing and drop the basket. Two hands only goes so far sometimes.....
RadioHowie
I Miss Beemerdons!
^^^^^^^^
Lay the motor on its side and if the clutch basket drops, it'll be in the right place!
Lay the motor on its side and if the clutch basket drops, it'll be in the right place!
Bustanut joker
Well-known member
wfooshee
O, Woe is me!!
Uh....... no.must be a Michigan fan...College football will do that.
Yankee football is not FOOTBALL!!!!!
wfooshee
O, Woe is me!!
OK, tonight's work:
As reported yesterday, engine is buttoned up. I've got it sitting on a board on a shop crawler so I can roll it around.
Brought the motorless Feej back into the garage from the backyard shed, put it on the centerstand with the stand elevated on a couple of bricks. Then I removed the rear wheel and removed the final drive.
(You have to have the drive shaft out of the way to remove or install the engine. I'd done that to remove the engine, then reinstalled the final drive and rear wheel so the motorless bike was a roller.)
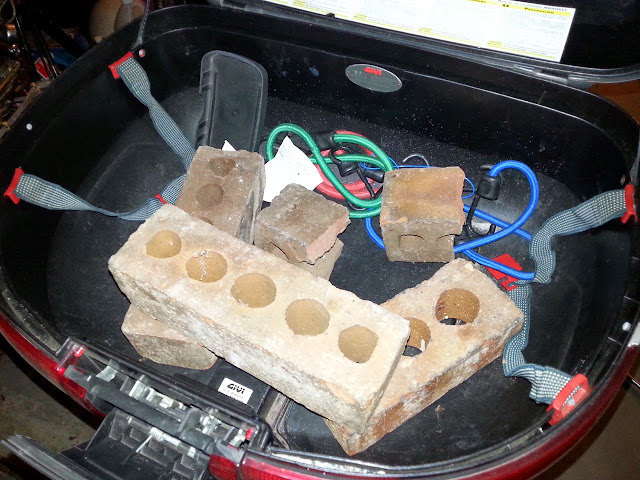
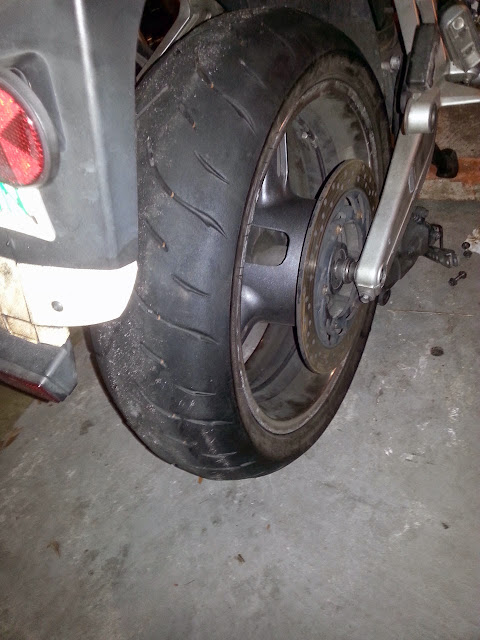
Then I put the axle back into the side of the swingarm that was still there and slid the wheel onto the axle, making a sort of single-sided swing arm out of it. Some bricks in the top case and the bike rocks back onto the rear wheel with the front in the air.
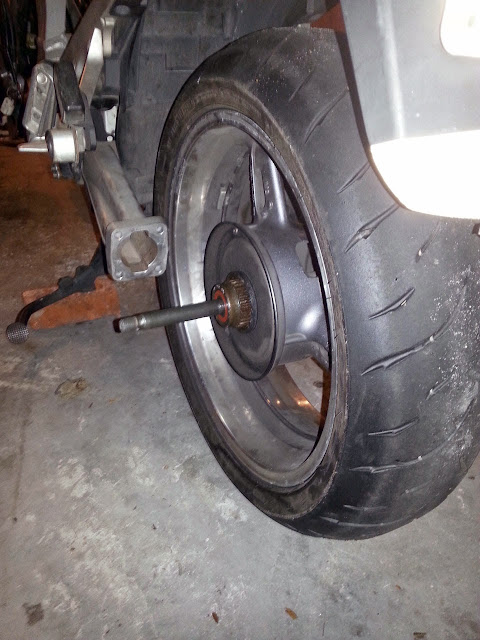
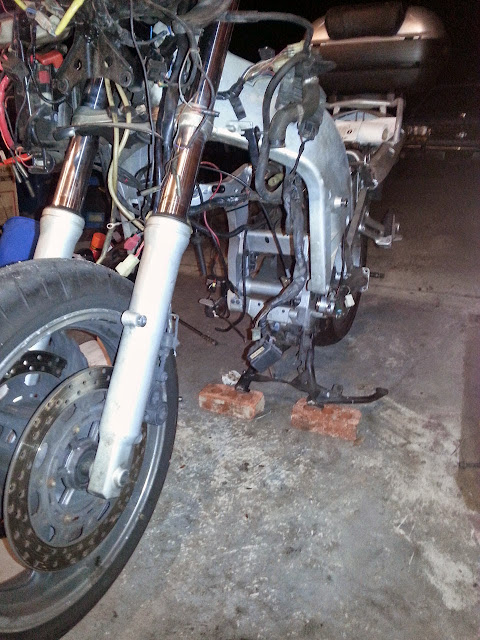
Next remove the front wheel and the forks, and you have this yawning cavity in the front of the bike ready to receive that other thing I finished screwing back together.
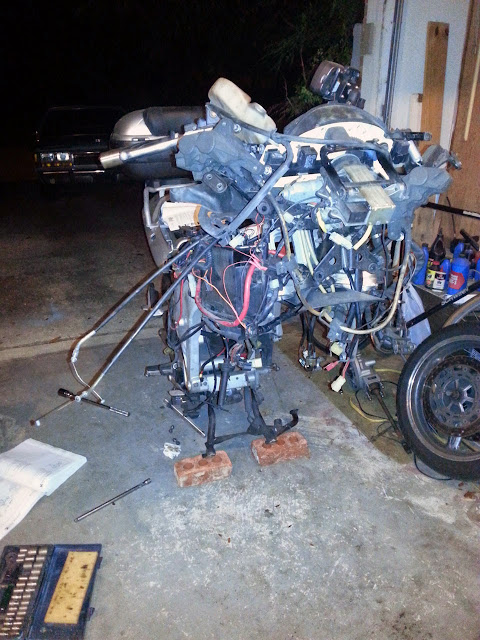
It took some trial and error and some test tip-downs to find the right angle to preposition the engine into, but here we go, rolling it into place.
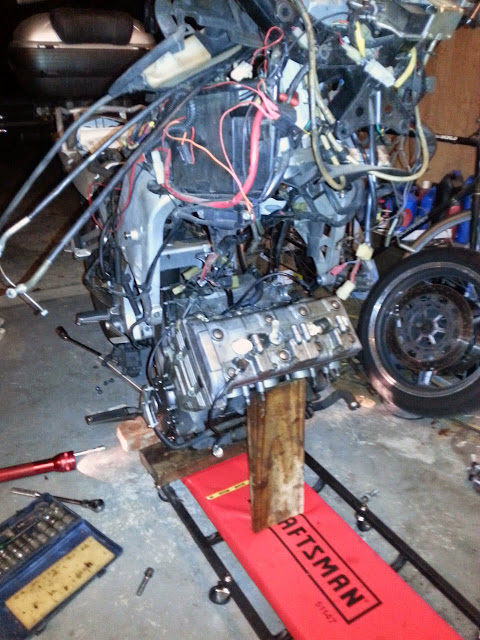
Lined up the lower rear mount first, and got that bolt through
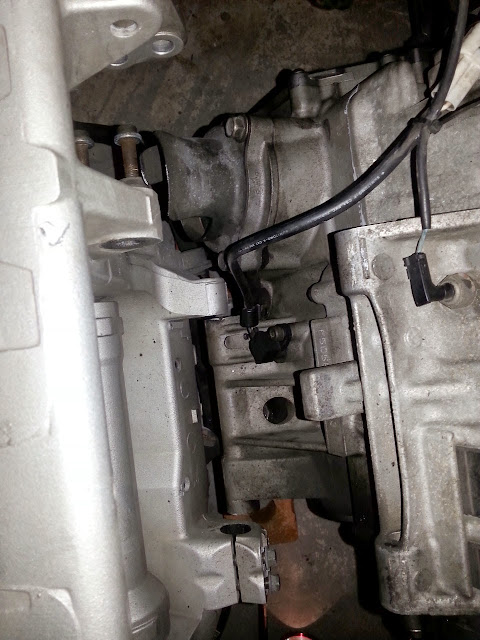
Pushing the frame down some more lines up the upper front mount holes
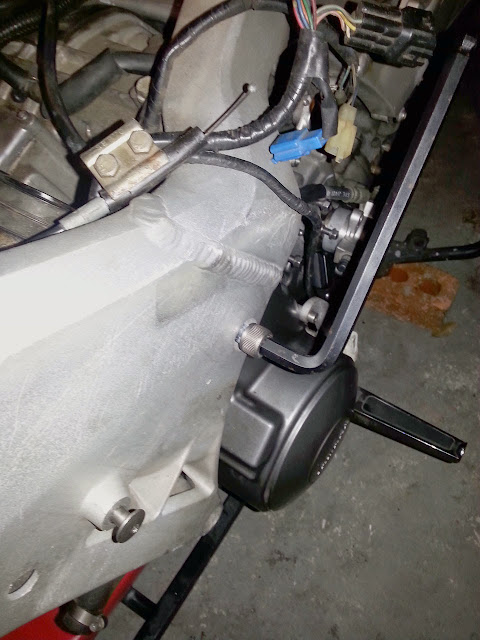
Once there, the rest of it lines up well, get the upper rear in, the brackets on top, and the lower fronts (temporarily, because those have my sliders on them.)
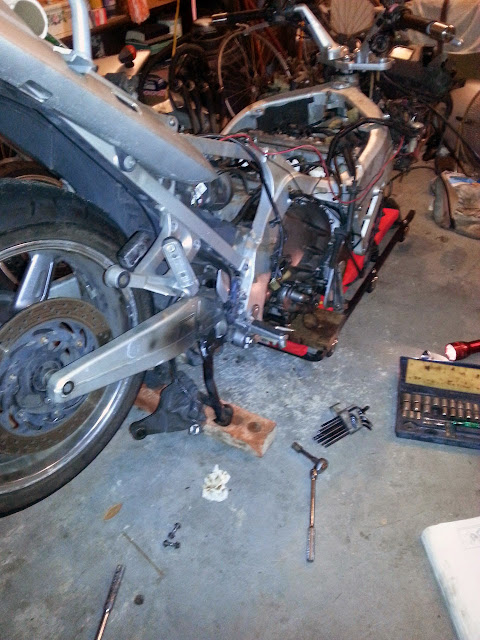
I removed the hanging-in-the-air rear wheel, installed the final drive and properly installed the rear wheel. Now we weight the rear seat area a little bit to rock the bike back onto the rear wheel, reinstall the forks and front wheel, and voila! Working alone, I have installed the engine, with no lift or hoists! I had a jack handy but never needed it.
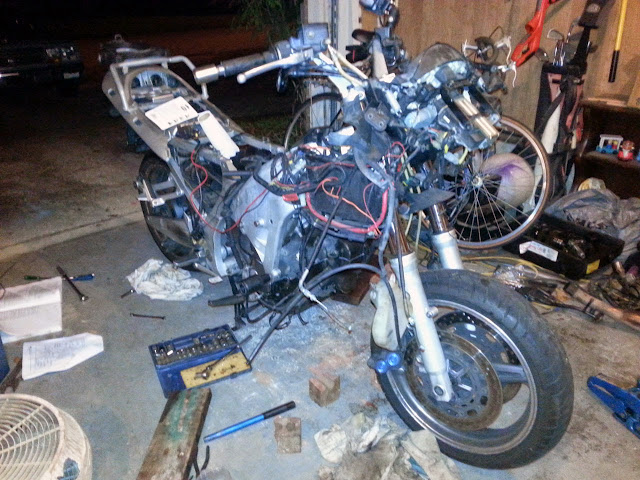
Just a couple electrical connections, the exhaust, the cooling system, the fuel injection and intake, the battery, the gas tank, the bodywork.
****! I'm nearly done!!!!

As reported yesterday, engine is buttoned up. I've got it sitting on a board on a shop crawler so I can roll it around.
Brought the motorless Feej back into the garage from the backyard shed, put it on the centerstand with the stand elevated on a couple of bricks. Then I removed the rear wheel and removed the final drive.
(You have to have the drive shaft out of the way to remove or install the engine. I'd done that to remove the engine, then reinstalled the final drive and rear wheel so the motorless bike was a roller.)
Then I put the axle back into the side of the swingarm that was still there and slid the wheel onto the axle, making a sort of single-sided swing arm out of it. Some bricks in the top case and the bike rocks back onto the rear wheel with the front in the air.


Next remove the front wheel and the forks, and you have this yawning cavity in the front of the bike ready to receive that other thing I finished screwing back together.

It took some trial and error and some test tip-downs to find the right angle to preposition the engine into, but here we go, rolling it into place.

Lined up the lower rear mount first, and got that bolt through

Pushing the frame down some more lines up the upper front mount holes

Once there, the rest of it lines up well, get the upper rear in, the brackets on top, and the lower fronts (temporarily, because those have my sliders on them.)

I removed the hanging-in-the-air rear wheel, installed the final drive and properly installed the rear wheel. Now we weight the rear seat area a little bit to rock the bike back onto the rear wheel, reinstall the forks and front wheel, and voila! Working alone, I have installed the engine, with no lift or hoists! I had a jack handy but never needed it.

Just a couple electrical connections, the exhaust, the cooling system, the fuel injection and intake, the battery, the gas tank, the bodywork.
****! I'm nearly done!!!!
Last edited by a moderator:
HotRodZilla
GOD BLESS AMERICA
Holy ****!!
rushes
Well-known member
Nice job!
wfooshee
O, Woe is me!!
'Zilla made me laugh!!!!
Break time right now, getting radiator stuff done. Engine electrical hookups and exhaust went on Tuesday night.
Break time right now, getting radiator stuff done. Engine electrical hookups and exhaust went on Tuesday night.
RadioHowie
I Miss Beemerdons!
Bustanut joker
Well-known member
Eyup.. Freddie Krugger is waiting at the end.


Similar threads
- Replies
- 3
- Views
- 592
- Replies
- 3
- Views
- 2K


